Wot i lerned dooing my bord

I learnt quite a few things actually and most, in hindsight, are pretty bleedin’ obvious. I’m not out of the woods yet, by a long way but I thought I might share these nuggets of wisdom with you.
* Do you have a clear idea of what you want to achieve?
* Make a plan
* Do you have an idea of the budget? Does the project realistically fit this budget?
* Screw the plan up, throw it in the bin and start again
* Tell your Wife/SO you love them
* Does your Wife/SO have any idea about what time, money, mess and swearing the project involves?
* Do you?
* Tell your Wife/SO you love them
* Do you have enough materials at hand to complete the project?
* Go and buy what you need
* NOW!
* Revisit plan
* Check plan
* Set yourself a reasonable timescale breaking down jobs into manageable chunks/milestones
* Start building
* Check plans
* Start swearing
* The razor saw/scalpel/hammer is your friend
* Tell your Wife/SO you love them
* Tidy as you go
* It is better to paint any fiddly or hard to reach parts BEFORE assembly
* Photograph as you go. Somebody may learn from your stupid mistakes.
* As you build you’ll get flashes of inspiration for your next project. Write them down. Do not, repeat, do not start this next amazing project until this one is done and dusted.
* Don’t be afraid to ask for people’s advice on dedicated forums.
It’s what the interweb is for.
Actually it’s for porn (Avenue Q)
Or pictures of kittens
* Speaking of which, if the kitten wants to play either put it out or play with it. You cannot work with kitten.
* When doing closeup touching-up don’t keep the paintbrush in your mouth
* Tell your Wife/SO you love them
* Take your time don’t rush. If that extra detail takes five minutes, take those five minutes. The end result is worth it
* Finished! Now collapse in a heap for five minutes
* Where the photon are you going to store it now?

Rogue Stars Gameboard

My regular readers will know that I set myself the goal of making a gameboard to run a demo game of Rogue Stars at the Austrian Salute this year. I’ve yet to play it. Here is a progress report.
plan First off a plan. I wanted to have raised walkways and a twisty-turney town part. My initial plan was a little too ambitious and too large. It was based on a metre by metre board, it was only when I got the rule book that I learnt that the play area was three foot by three foot play area. The idea is that the board can be used for a variety of games so it needs the maximum amount of empty space and the minimum of fixed scenery. I still wanted my twisty-turney streets. So a back wall is used and the scenery only projects about seven centimetres into the play area.
tokenSomething else the game uses is tokens. So I knocked out a couple of examples. The wound marker was something I already had and thought I would use.
gateHere was the first building, the Gatehouse. I would have liked it higher and more imposing, but using steps at one centimetre intervals didn’t allow it. Next time I will make the steps at two centimetres. Maybe.
houseIn all there are three different types of Desert House that I have made for the board. This is one type, the others have either a glass dome on top or stairs up the side. One problem is that they make the wall buildings rather insignificant.
startwallThe beginnings of the wall, trying bits out for size.
backwallA view of the wall buildings in situ. There is an edging to the gameboard which I have added extra shapes to suggest some depth.
progressYou can see everything painted up and glued down and work started on the cliffs.
viewThis is an overview where I am working on the positioning of the landing pad and the goods yard.
cliff1Work started on the cliffs using my new EBay purchase, a hot wire foam cutter.
cliff2Filling in any gaps with “No More Nails” a most excellent product which I haven’t yet sourced over here. If anyone knows what it is called in Austria/Germany I would be most grateful.
cop2
cop1
I plan to have three different groups of adventurers for the game. This is the first group, the “Star Cops” lead by the redoubtable Captain Robert Smythe. Figures by Pig Iron Productions

Pig Iron Productions


Nice figures and I will certainly be revisiting their ranges.
bridgeCutting the foam to insert a small bridge.
road1Glueing the roadway together.
road2One unfortunate effect of painting the roadway was that the card warped. It did straighten a bit when it dried. I shall say that it warped in the hot desert suns.
overHere we are at today’s state of play. There are four more stepped houses to make, but as they are loose they are a lower priority. The next job is to glue the roadway down and then apply sand.
More pictures will follow when this project draws closer to completion.

Save

2016 Been there, done it

This was started on New Year’s Day and then it got put down and buried under stuff.

I am sat here feeling slightly obfuscated, mostly due to schnapps, brandy and presecco seeing out the old year.
2016 was a year that a lot of interesting and clever people shuffled of this mortal coil. The way East/West politics are moving 2017 could be the year that everyone dies.
I didn’t paint much, far less than I wanted to. The Dragon was prevaricated on. It seemed that every time I picked it up I was asked for help with something else so there was no “Zone” achieved.
But there shouldn’t be too much beating myself up. My workshop is set up and I can airbrush to my hearts content. One project for this year is to make a spray booth with PC cooling fans (from the recycling center) to extract spray. The hobby room is done, bar one small speaker shelf. So I have my space for painting and gaming. And I have been working on the garden making a path and building a wall. This involves going to the farm with a wheelbarrow and taking a rock and wheeling it back, so quite time consuming.

Financially the laser cutting has not been a success this year. Etsy resulted in zero sales. Handing out my business card at Salute resulted in a huge spike in blog views the following day, but zero sales.
What I find frustrating in my target audience is that they will happily fork out thirty or forty quid for one figure they owned as a teenager but will balk at paying twenty for scenery to grace their collection. There was a thread I was following where collectors were boasting about the prices they had paid for a metal Thunderhawk Gunship. It was jaw dropping.

I am going to continue with making laser cut scenery, if only for myself. But getting some money for it would be nice. The last year has seen a readjustment in family finances. I have gone from having a huge disposable income a couple of years ago to having none. My Wife stopped working at the beginning of last year and despite having no income we’ve lived comfortably. Having no rent or mortgage helps tremendously and visiting fleamarkets for clothes and entertainment makes what we do have go along way.
I have backed a few Kickstarters this year, not as many as I would have liked. Ten Minute Heist and Dwarves in Trouble are two board games that look like fun to play with the Boys. Then came the addiction, miniatures. Space Raiders, scifi orcs sculpted by Kevin Adams. Greenskin Wars, goblins sculpted by Kevin Adams. Goblins and Sea Demons, sea goblins sculpted by Kevin Adams. Return to Colony 87, scifi civilians. Kev White does Matt Dixon, female fantasy miniatures. And finally Ramshackle Games’s Jetbikes.

The product of the year for me has been Foundrys Sable Mix General Detail Brush. I was going to replace it at the beginning of the year but it kept on going for “one more paint job”. In fact it is still going strong, so I might not replace it just yet.

Although I’m not very good with my predictions I’m going to say that 2017 will be the year of NMMs. Non Metallic Metallics, where you paint something to look shiny and metallic without using any metallic paint. For those of you who don’t quite get what I’m on about, think about a photograph of a shiny teapot. You don’t have metallic inks when you print a photograph. What you see are whites, greys and whatever background colours are being reflected. So the object is to try and replicate this without metallic paint. G’Dub is already putting painting guides out with this technique with some of their new products.

Talking about G’Dub, I have liked watching their Warhammer TV on Youtube. It has been very instructive and has kept my Boys entertained. Just remember kids, always thin your paints.

Something I got as a Christmas present was a copy of Osprey’s Rogue Stars ruleset. It is a bit dry, mostly tables of equipment, physical traits and very little fluff. From reading of reviews apparently one gets the hang of it very easily. The advantage, as I see it, of having very little fluff is that you can create your own universe in the flavour you want. Magrathea anyone?
I’d like to make a go of this and try and run a demo game at the Austrian Salute this year.
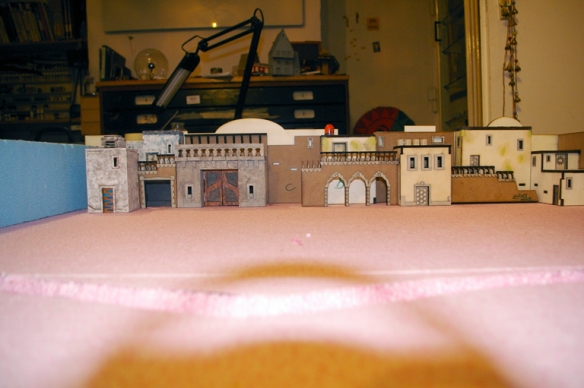
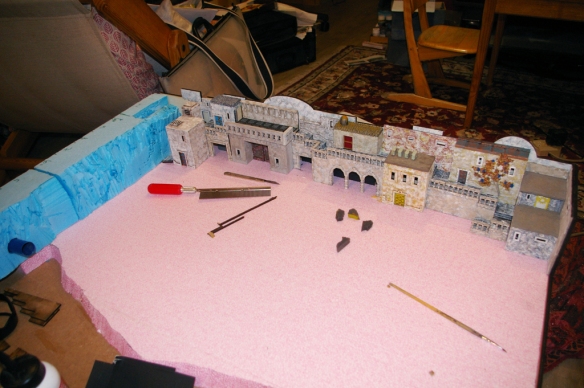
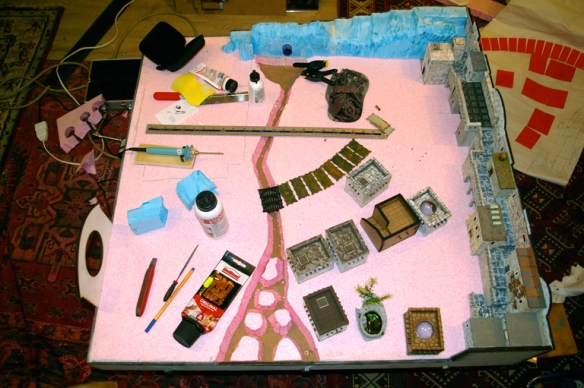
The game is figure light, four to six figures a side and the playspace is three foot by three foot.
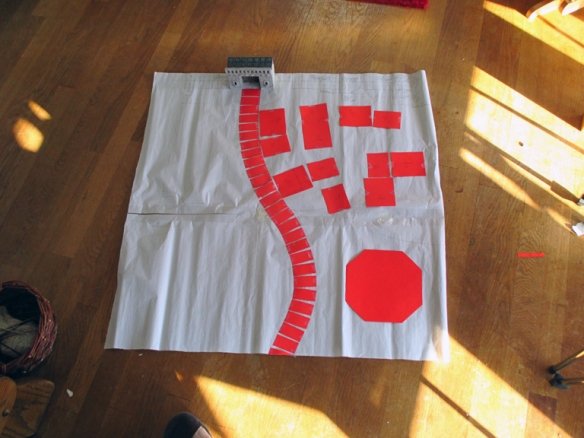
So I have approximately ten weeks to learn the rules. I’ve taken the step of joining the Austrian gaming forum, diefestung, to find opponents. Then painting the figures and making a terrain board which will showcase my laser cut work.
Oh, and make sure I have enough stock to sell.
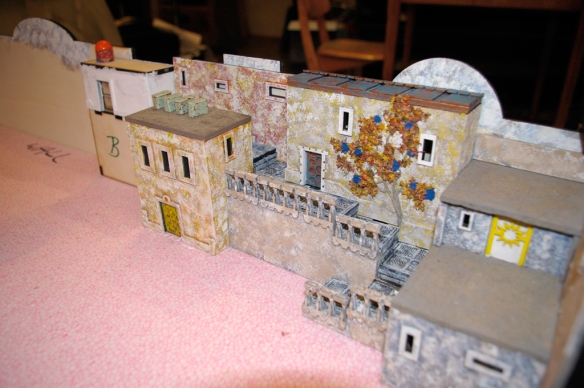
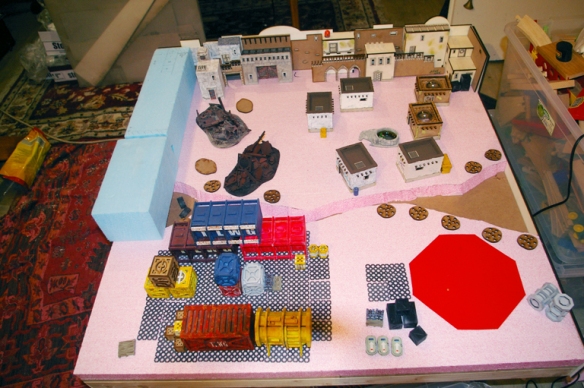
Speaking of stock I must really extract my digit and design more big objects. The ideal solution would be one big thing a month.

This year I must be more focused on my painting. First jobs are to finish off any jobs that haven’t been completed. Then I need to decide which army to concentrate on and finish it. A prime candidate would be my Roman army, just a fortified camp and two commanders.

A quick break from the prevarication

The last couple of weeks have seen me quite busy producing stuff for our local school’s  Christmas market.
image
So I have been making snowflakes, and getting glitter everywhere. Tealight holders, tree decorations, advent countdowns etc.
Just to have a quick break from all this seasonal work I knocked up the artwork for these and cut them this morning.
image
May I present the Corpse Containment Units. Useful for when dearly departed grandma has a little more life in her than expected.

And yes I’m still prevaricating.

There’s something in the air

Mostly paint particles.

I decided to strike while the iron was hot and try airbrushing the wings. The set up for airbrushing isn’t quite right yet, but a few small tweaks should get it there. More practice is required. Firstly getting the paint to the right consistancy and secondly getting the airflow/needle balance right.

And patience. Take time and build up the paint slowly otherwise it runs.

imageMost importantly wear a mask.

Winter is coming

The leaves on the trees are changing from green to orange. The mountains have had their first snow. Our winter wood has been delivered and safely stored.
image
And now I have primed the Dragon.
image 
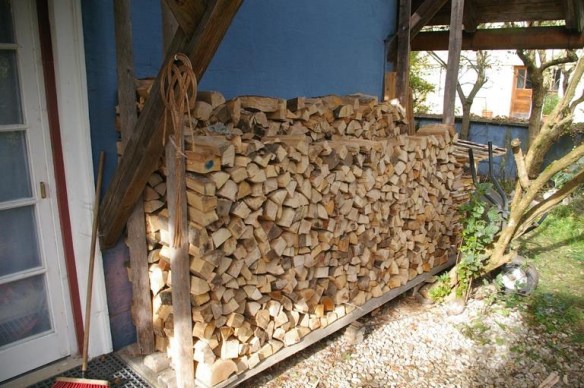
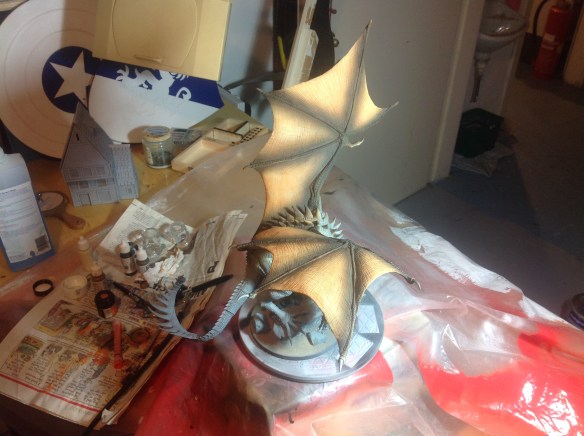
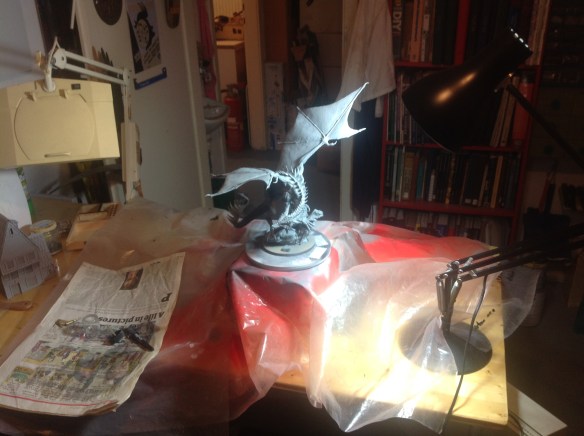
So far I have only used a single action airbrush. Now it’s time to up my game and break out the double-action airbrush for the wings.

I really need to stop prevaricating around the bush

So the Dragon is glued and ready to paint. Am I doing anything about it? Am I heck as like!

The first distraction was in the form of a freebie figure from the revamped White Dwarf. I thought he would make a nice leader for my growing band of Chaos cultists.

image
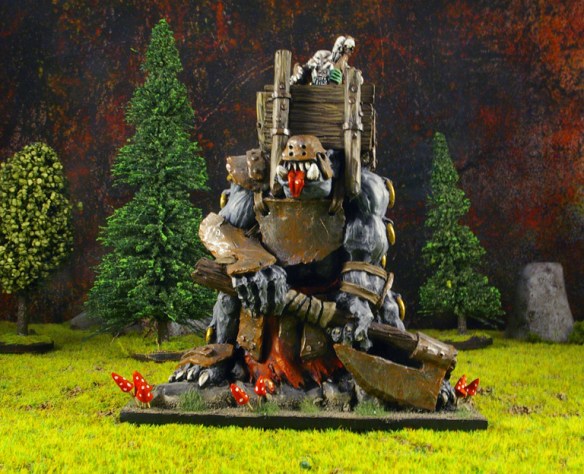
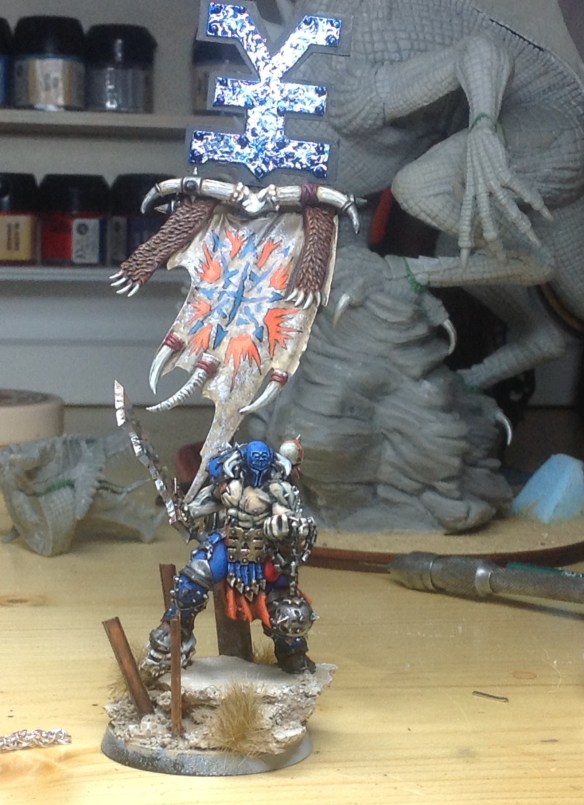
Then I got distracted by an old Bob Olley sculpt that I have had for about thirty years. I was inspired by seeing pictures on the Oldhammer Facebook group.

imageAnd finally my local GeeDub store is running a spooky painting contest. So I had a rummage through my bitz box and found this figure.

image
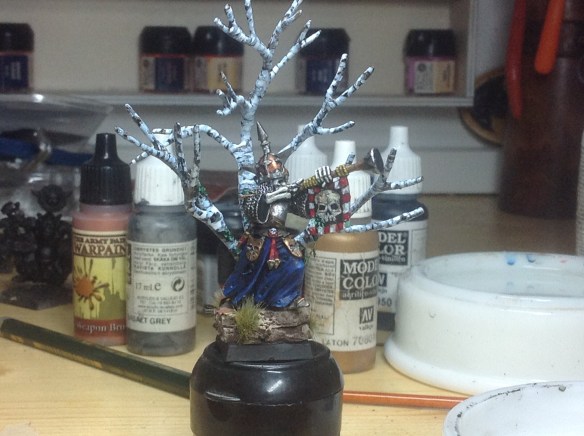
Perhaps it’s time to get my finger out and get on with the real job?

Well I found some plates

A few years back, when I was at CSM, the canteen was having a clear-out and I came across these plastic plates.
rtow1
We used them in our greenhouse, back in London, to put plant pots on. But always in the back of my mind I thought they might be useful for something hobby related.
Over here now and getting settled. Time to start unpacking boxes and I came across them. Tick tick tick, hmmmm?
rtow2
I laser-cut a base and some gubbins to make it a bit more interesting but I seem to have missed out photographing the base painting and the chipping.
rtow3
Here we are masking the structure to add a white stripe.
rtow4
Masking the whole structure to avoid overspray.
rtow5
As you can see my airbrushing was not very successful. Instead of gently building up the layers I blasted away with the end result being this where the paint went under the masking.
rtow6
This was remedied by adding a line of marker pen.
rtow7
Adding rust streaks with oil paint.
rtow8
The finished product. I wanted to provide a quick photo as I’m certain it is going to feature in more photos in the future.
If I can point you in the direction of this blog
http://port-imperiale.blogspot.co.at/
It’s Blogs like this that keep me on my toes.
Now that reminds me…. I’ve got some small flowerpots I picked up at Ikea because they had some plastic grass in them.

Another brick (or stone) in the wall

Today has been hotter than yesterday, if that is possible. The cicadas are in full voice and the mountains are a pearly grey in the heat.
This mornings task was to glue some walls together that I had laser cut over the last few weeks using up old scraps of MDF.

image

These were inspired by one of GDubs scenery books where they made walls from thick card. I really did not fancy spending hours and hours with a knife cutting out card shapes. This is where a laser cutter comes in handy. Each wall section only takes a couple of minutes to cut and I have loads of scrap that I want to use up. The only pain is glueing it together.

By ten this morning I had to stop as the glue was setting almost immediately in the rising heat.

“Do you really think that’s wise, sir?”

First of all a warm welcome to my new followers. Although I have to say I am not quite sure what some of you stand to gain from following a rather niche blog. But it is gratifying all the same.
So without further ado here is some more waffle.
Next up in the sketch modelling is the first in some sci-fi buildings. This is a small habitation.wise1
Here is a side view with Sergeant Wilson (https://en.wikipedia.org/wiki/Sergeant_Wilson) for scale. The exterior is going to have lots of gubbins like solar panels and heat exchangers. I think I might make the top of the roof flat so it can be used as another surface in skirmish games.
wise2
This is a front view looking into the car/buggy port. There will be a step/s leading up to the entrance.
wise3
A rear view shot. I’m not sure whether to recess this a little and have a little porch area.

Save

Summertime

image.jpeg
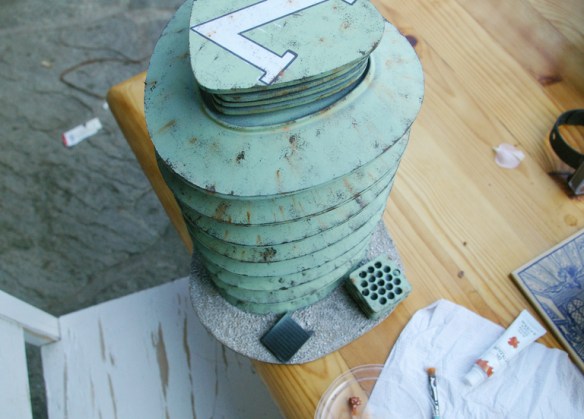
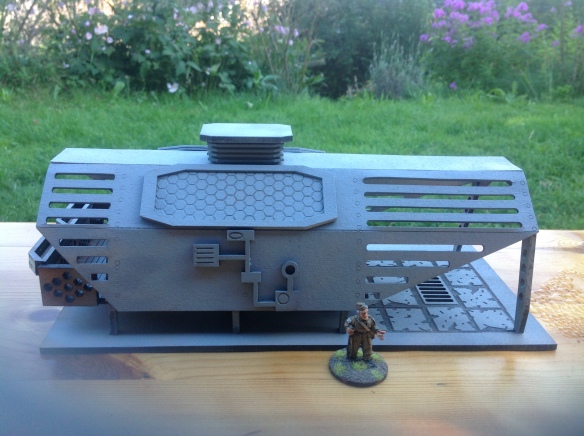
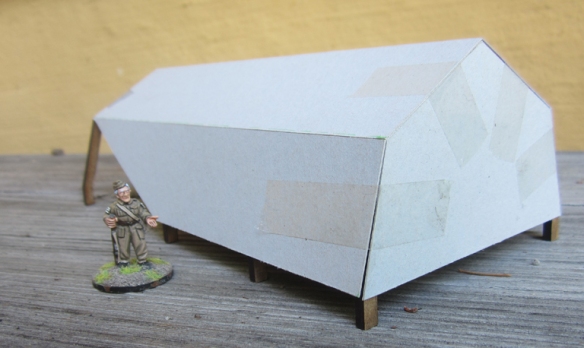
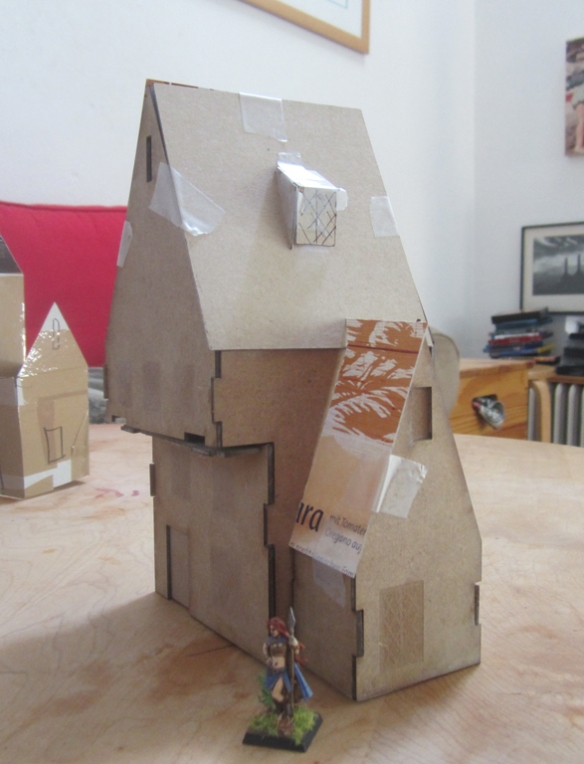
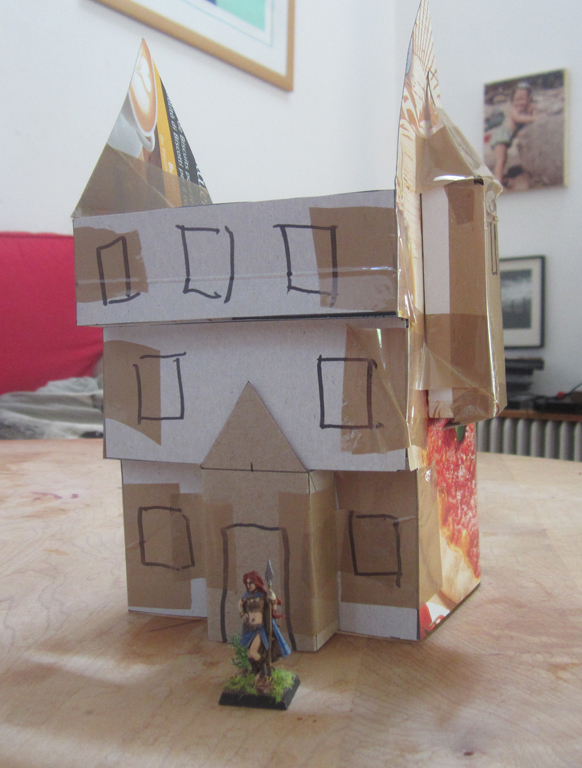
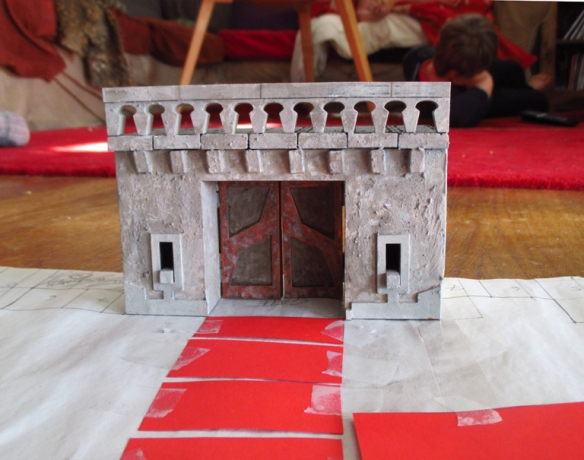
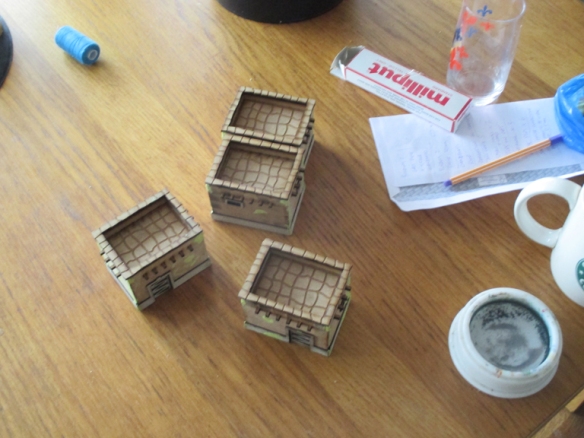
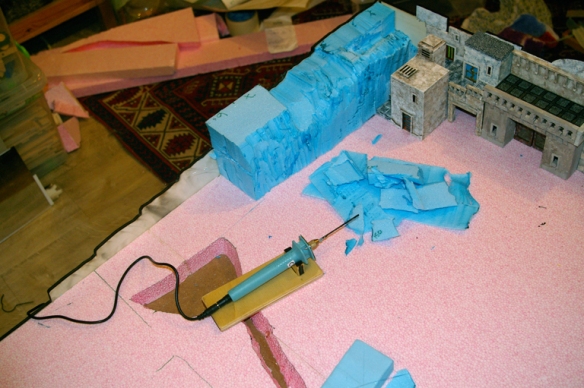
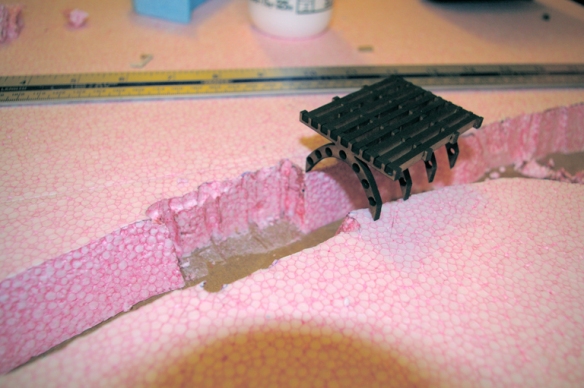
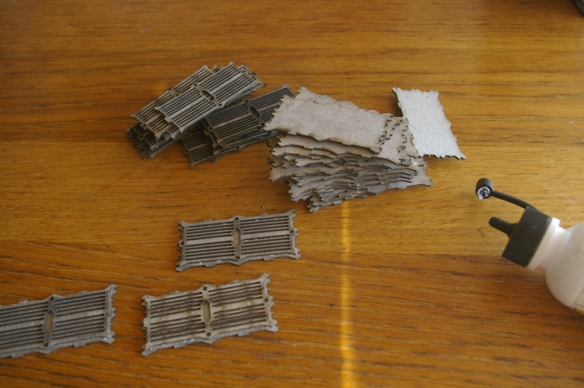
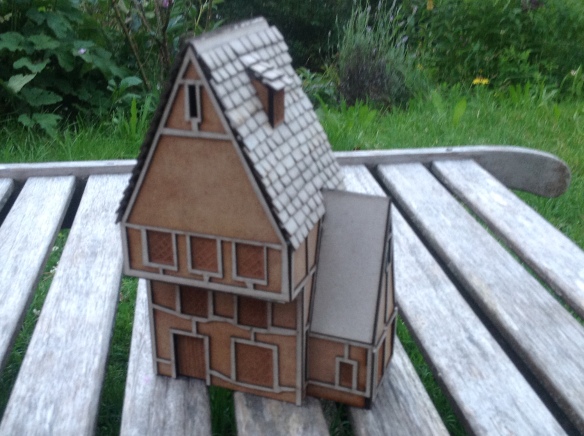
This is a follow on from the prototype in the last post. There are some minor adjustments to be made, but I’m just about there. I did misunderestimate the amount of roof tiles needed. The cut time is approaching an hour which is going to bump the price up, even at minimum wage.

Summertime blues, there ain’t no cure

For the last four months I’ve seemed to have hit a bit of a painting block.
This is not to say that I’ve not been busy, but I just can’t seem to be able to pick up a brush.
pro2
This is a prototype of a generic fantasy building I’m working on. The next step is to make the artwork for the wooden timbers.
pro1
This is a sketch model of a building I want to make. Thank heavens for pizza boxes, they’re great for chopping up and playing around with. After this I need to start playing around with some sci-fi buildings.

Getting the picture

This is a topic I’ve been having some problems with. Now things are starting to settle down a little with the house I thought it was time to get a little consistency with my model pictures.
There are a couple of blogs that I occasionally look at where their models are photographed with a scenic base and background and I quite liked it.
So here is my take on it.
photo4
The base was a square of polystyrene with some blue foam details. This was then coated in PVA glue and coarse sand added for texture. This was painted with some dark brown household emulsion paint.
photo3
Then it was drybrushed with two more colours of emulsion.
photo1
Then flocked.
photo5
I went a little low-tech with the sky backdrop. I used a diffuser tube, a kind of crude airbrush, figuring that the coarse splatter wouldn’t be seen.
photo2
On the reverse side of the sky backdrop I made a chaotic mix of colours. My main problem was that the card was not dimensionally stable and warped like mad. So I had to dry it like this.
photo9
Here is my set up. My camera is a Pentax istD. I went down the Pentax route as I have a large number of Pentax lenses from my time as a photographer in the Eighties. The soft-box and lights are from an eBenk WSB-342 studio kit that I bought for this purpose. The one thing I have done is to change the bulbs to LEDs as they don’t run as hot and don’t use as much electricity.
photo8
Here is the first attempt. The lights give a yellow cast, I haven’t as yet managed to source daylight bulbs, the white balance in camera is set to “Tungsten” and but a bit of tinkering in Photoshop (minimal, one slide of the colour balance) solves this.
photo7
Some trees in the background.
photo6
Now the chaotic sky.
So far the problem with this is the depth of field. There is far too much of it.
photo10
So I dropped the aperture right down and this is the result. There are some very minor adjustments to be made, but I think I’m pretty close.
Now to write down what I have done so I can continue to be consistent.
The model used for photography is from Ramshackle Games.
http://shop.ramshacklegames.co.uk/index.php?main_page=product_info&cPath=20&products_id=255

Tools

Really I should be writing about the last battle I had with Number 1 Son or showing you progress on the latest project. But I’ll do that another day, I am suffering at the moment from a surfeit of schnapps consumed last night at the village Solstice fire.

fire1
tools2
I’ve now got a computer set up in the workshop. So now I can play music and I have installed Illustrator so I can make artwork for laser-cutting. It is very slow but I mustn’t grumble as it was donated to me. Why a PC? Well the laser cutter I am planning on getting only runs on PC and I didn’t want to take the family computer, Apple, downstairs.
Whilst unpacking boxes getting the workshop set up I cam across a few rusty tools that had belonged to my Father and Grandfather. Nothing wildly exciting, some center-punches and a rather nice pin-vice.
tools4So they got an overnight soak in vinegar and then this morning a scrub with a wire brush and some wire-wool. I remembered that I had my Dremel set up in the hobby room, where I do my painting, so used that with a wire brush attachment to get into all the little cracks and crevices.
tools1Here they are all cleaned and with a light coating of turtle-wax.
tools3This is the pin-vice. I’ve added a wooden ball on top and I think I’ll make this my number 1 tool and shuffle the other pin-vice to back-up status.
I am starting to enjoy the fact that there is less and less Tetris involved when I am trying to get jobs done and the tools I require are right to hand.
The final job for the workshop is to get a L-shaped bench made which will be my station for airbrushing, glass-work and scratch-building.