I made something new. Don’t worry this time it is hobby related.
Years ago when I was taking the Boys to the playground I spotted something buried in the mud by the swings. I couldn’t tell what it was and being bored I dug it out with the help of stick. It was a mini tripod. I cleaned it up, stuck it in a corner and forgot about it.
I have started to use my “Handy” for taking photographs but I have a little trouble with camera shake. During my recent tidying I came across it. And now that I can laser cut again I had an idea.
I am trying to reverse engineer my way to happiness despite the best efforts of my lovely Wife. This is the philosophy I am attempting to use.
“Retrophrenology: It works like this. Phrenology, as everyone knows, is a way of reading someone’s character, aptitude and abilities by examining the bumps and hollows on their head. Therefore – according to the kind of logical thinking that characterizes the Ankh-Morpork mind – it should be possible to mould someone’s character by giving them carefully graded bumps in all the right places. You can go into a shop and order an artistic temperament with a tendency to introspection and a side order of hysteria. What you actually get is hit on the head with a selection of different size mallets, but it creates employment and keeps the money in circulation, and that’s the main thing.”
I can gauge my mental state by my surroundings. The tidier and more ordered it is then the better mental state I am in. So I am attempting to reverse engineer a better mental state by organising my environment. Having a now fully functioning laser cutter has been a huge mind saver.
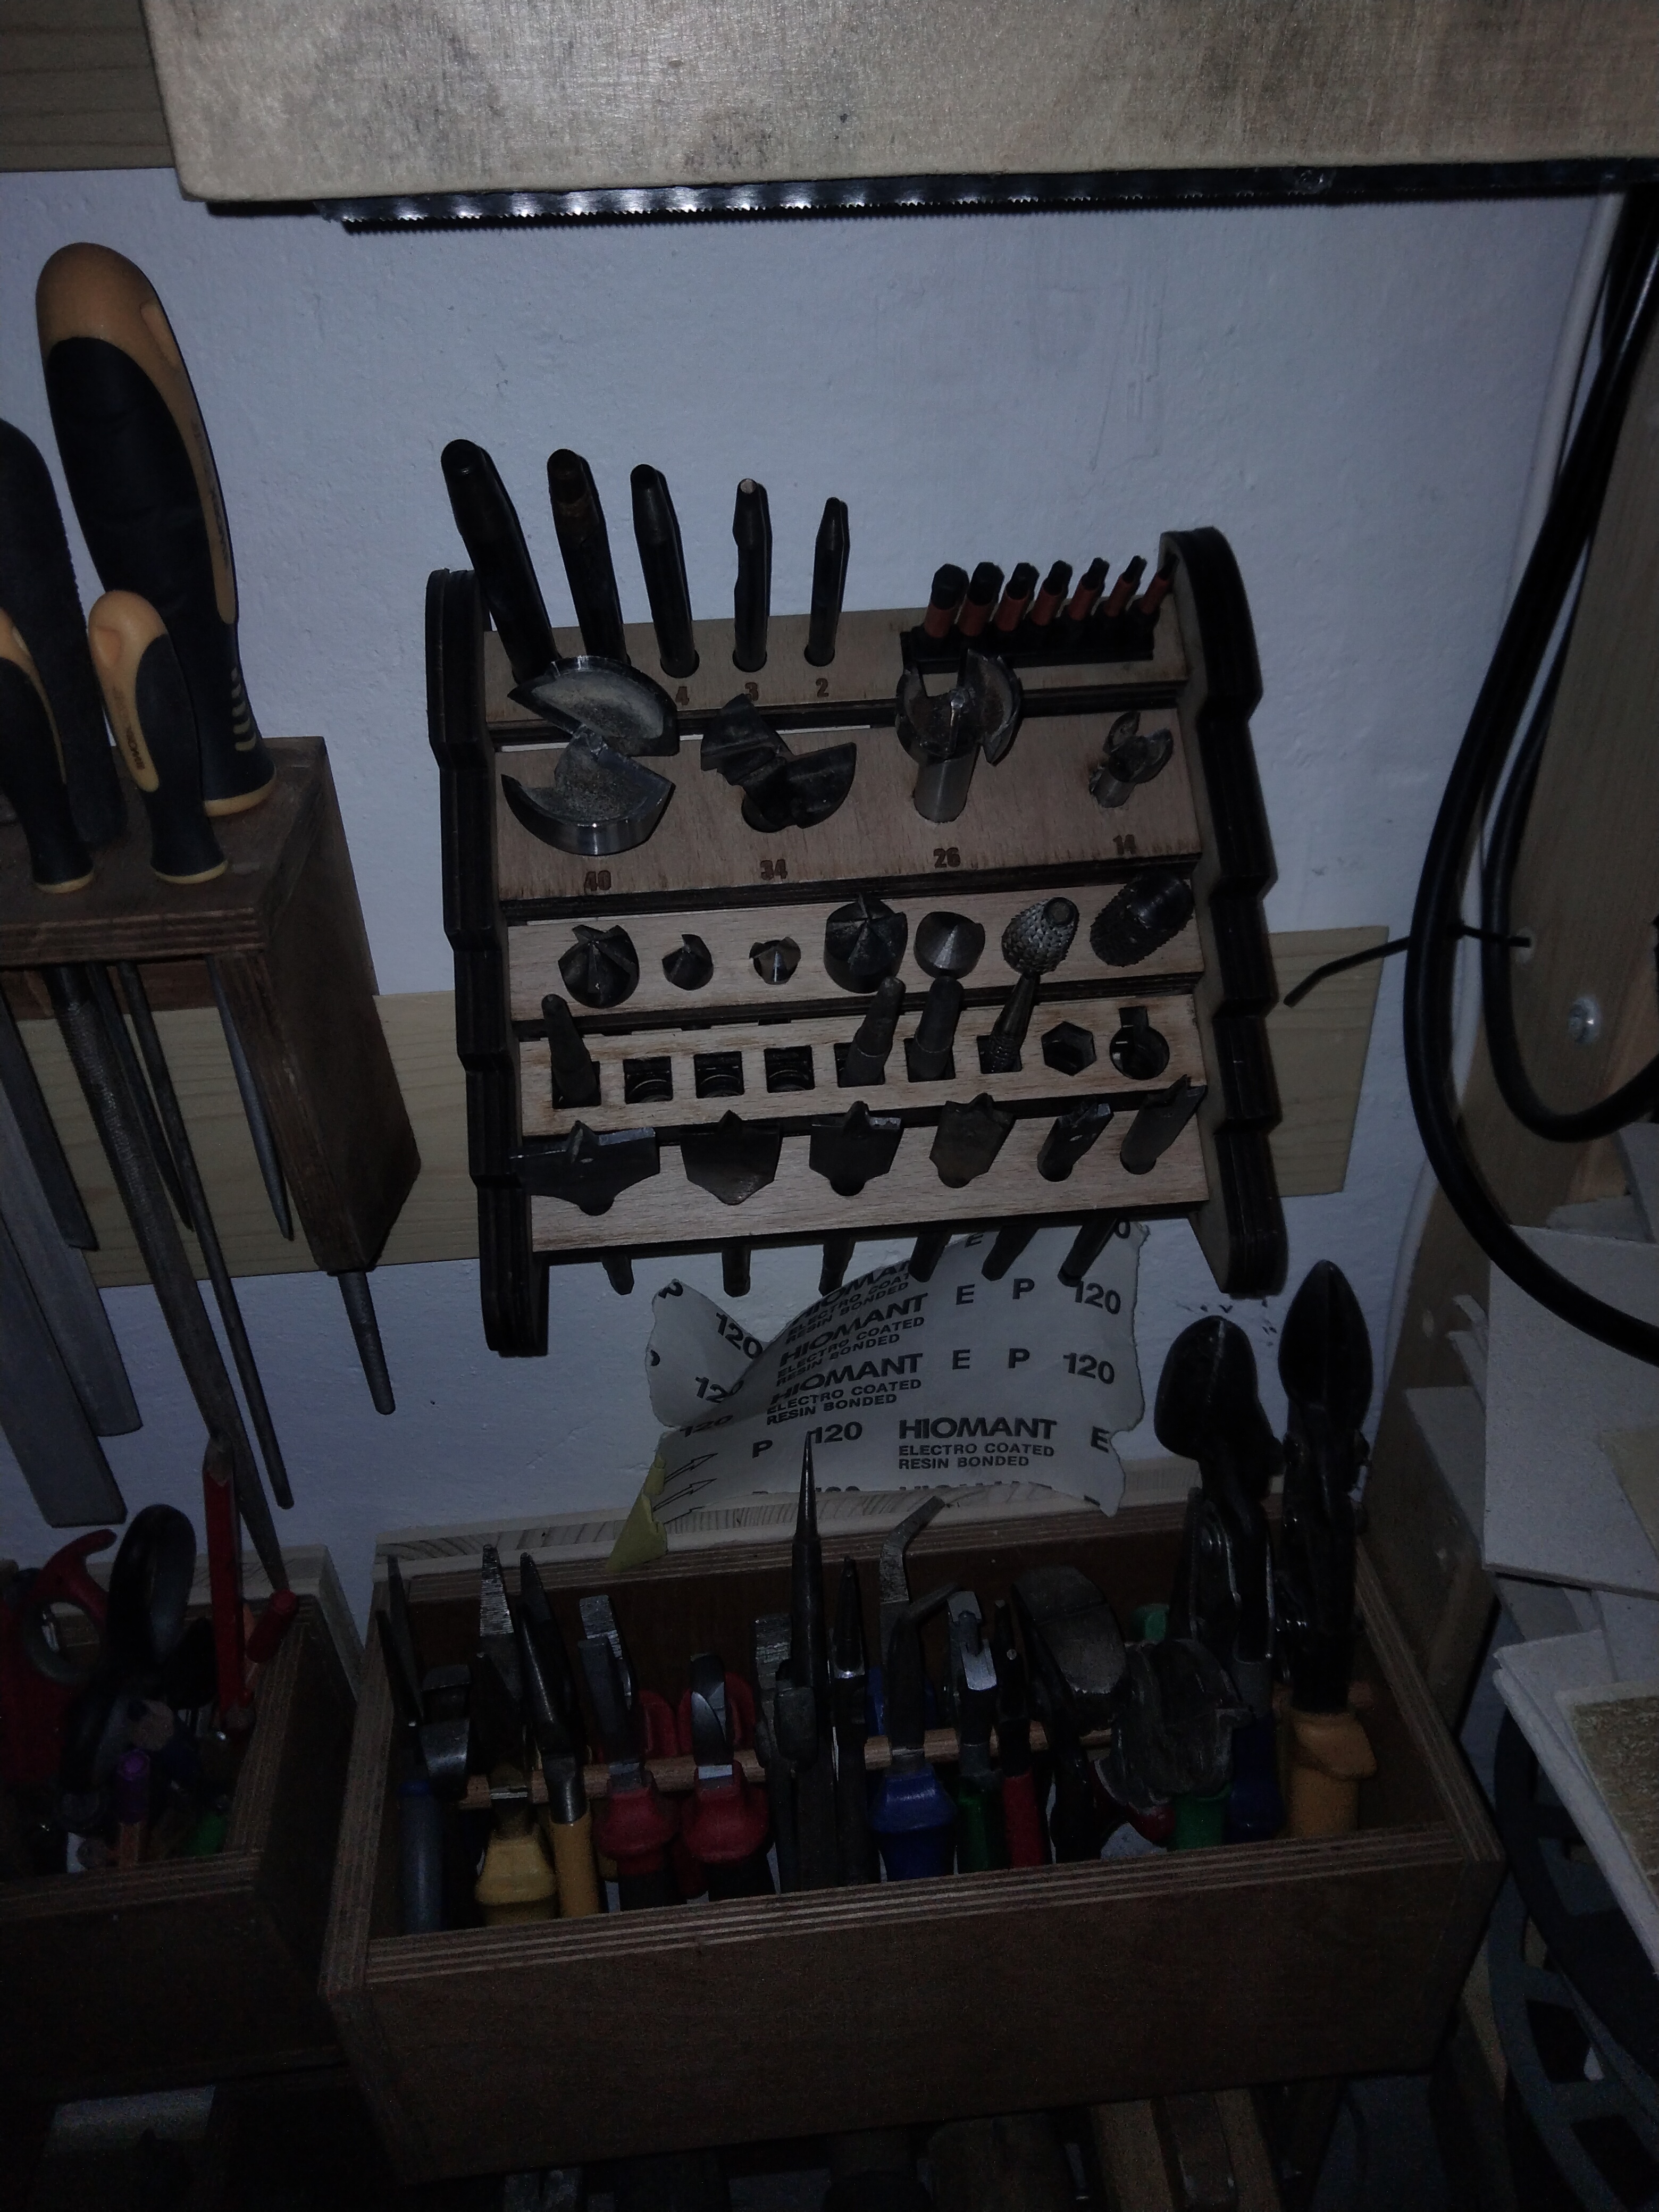
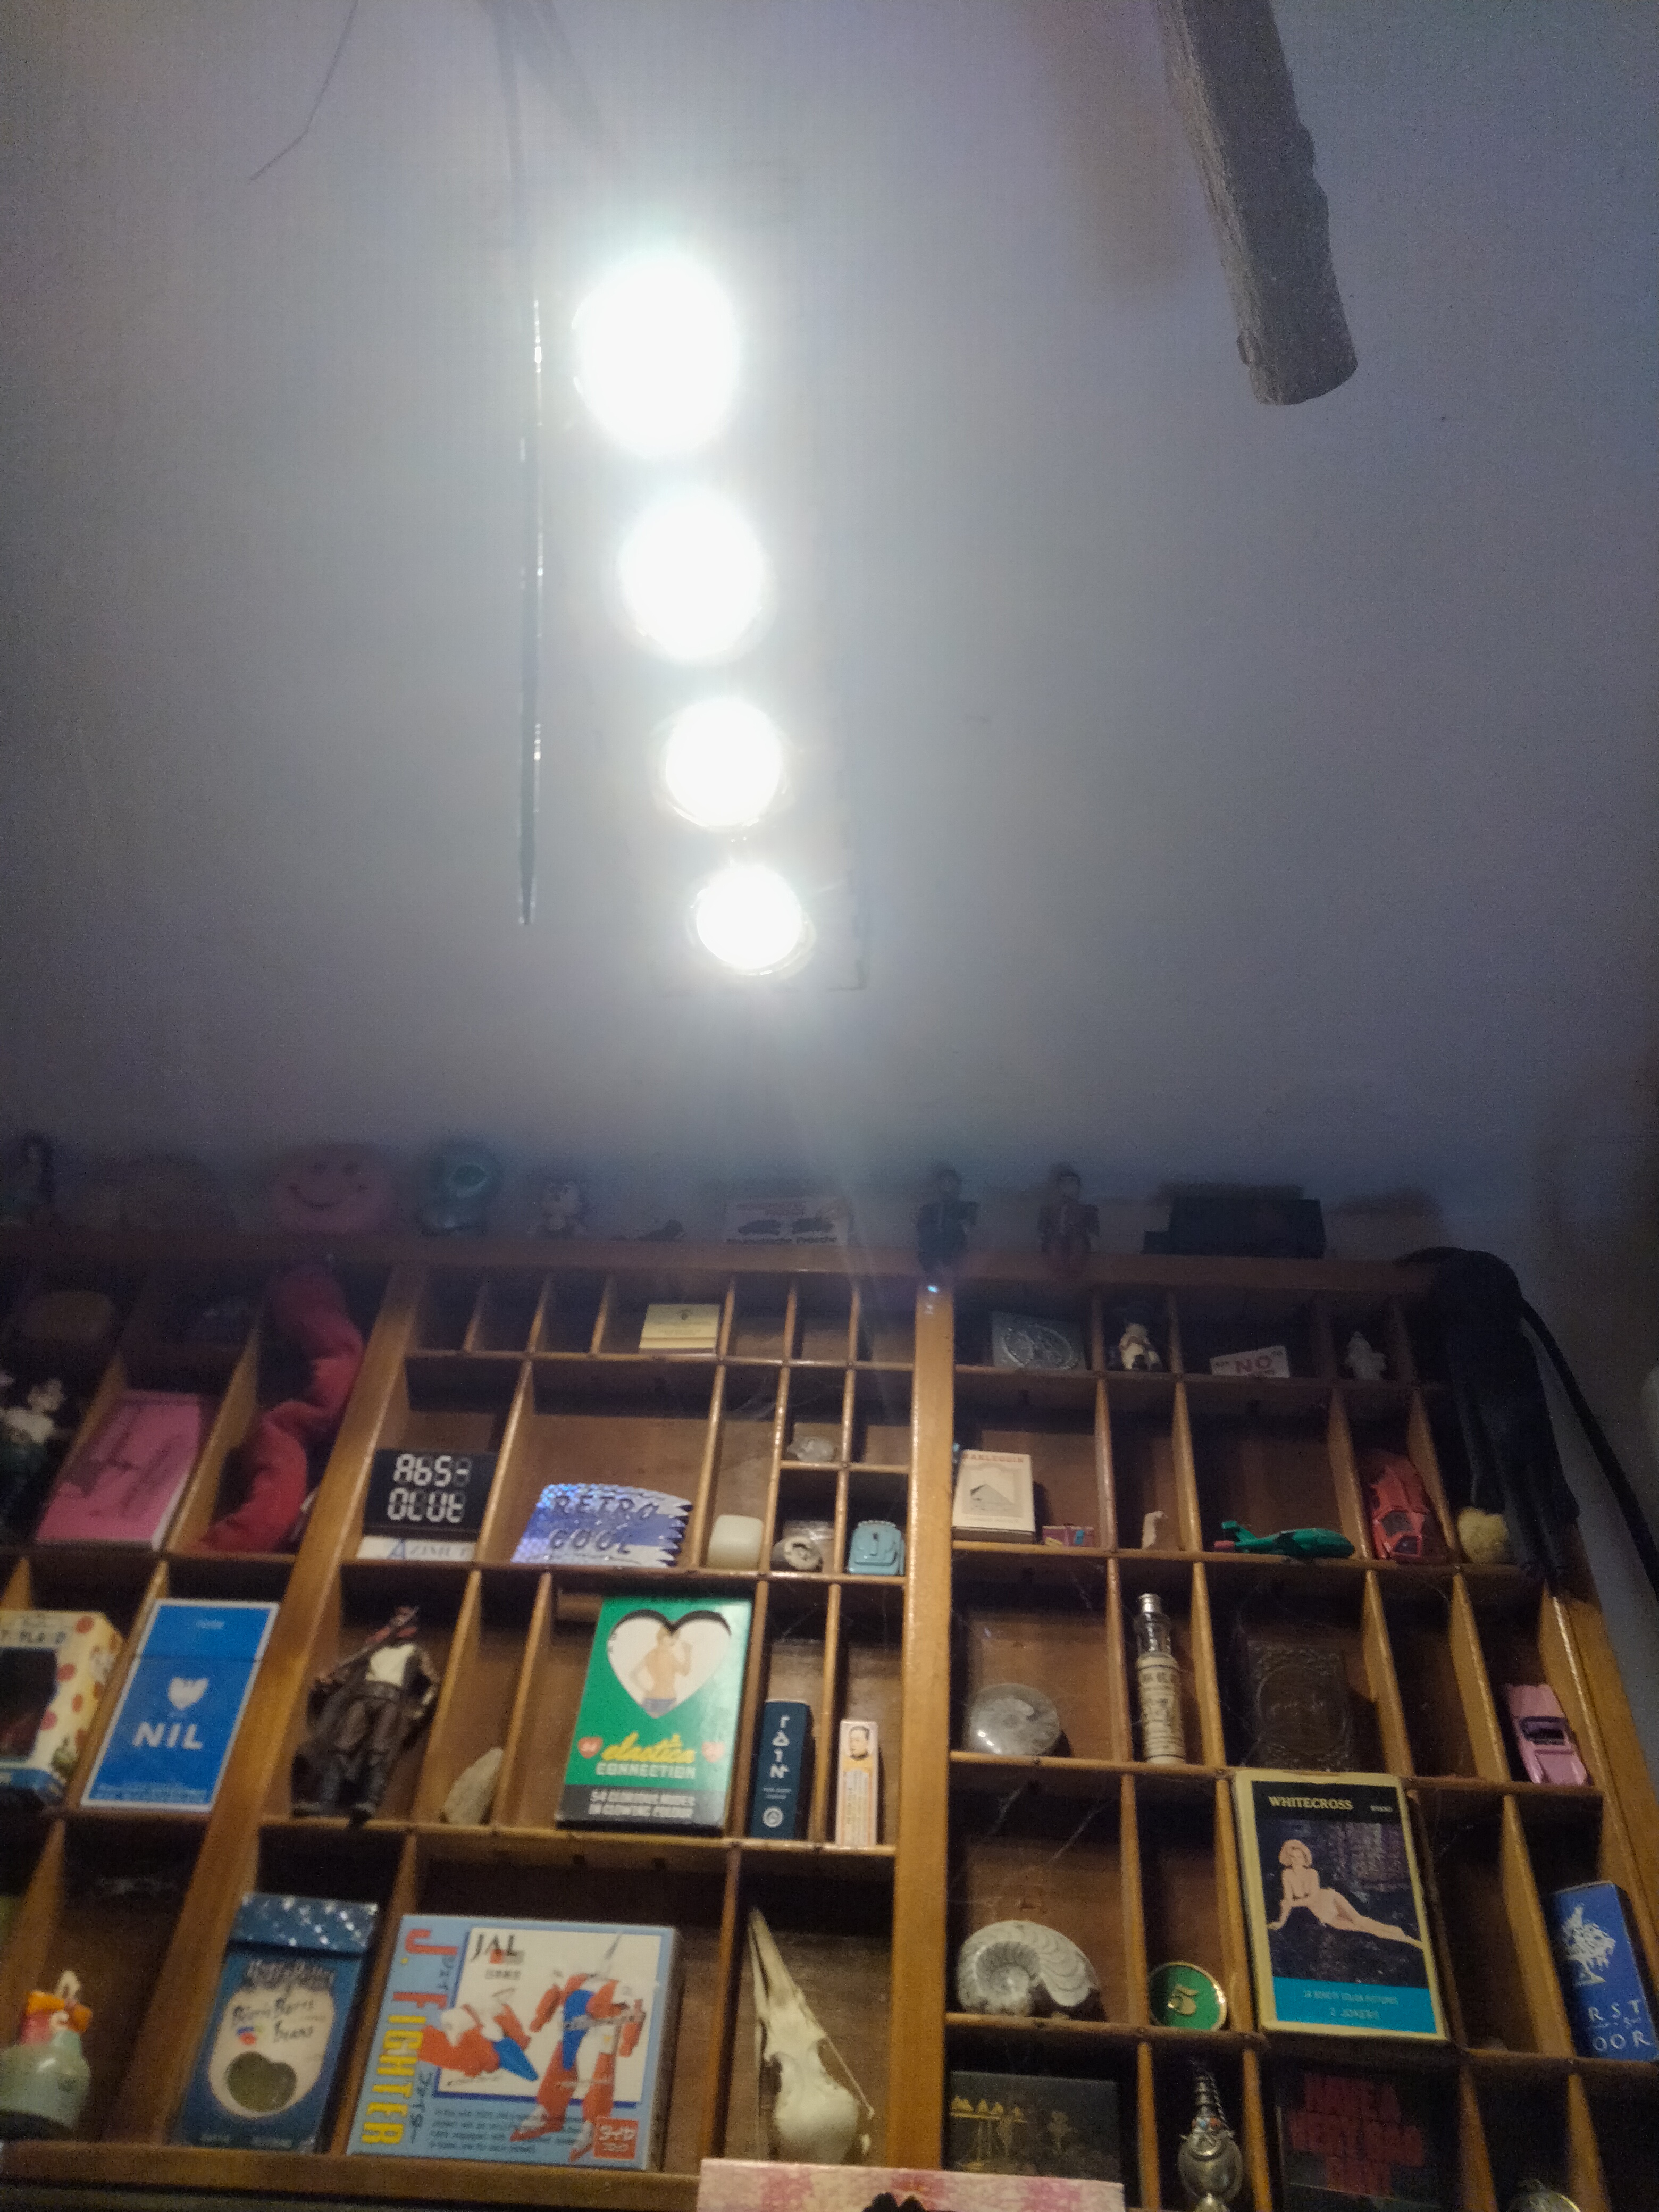
The third time is the charm. There are boxes of tools that I have inherited from my Father and Grandfather, and from my Wife’s Father and Grandfather. I have been sorting through everything, getting rid of any broken bits and setting up tool boxes for my Boys with any duplicates. What I have left has been slowly organised.
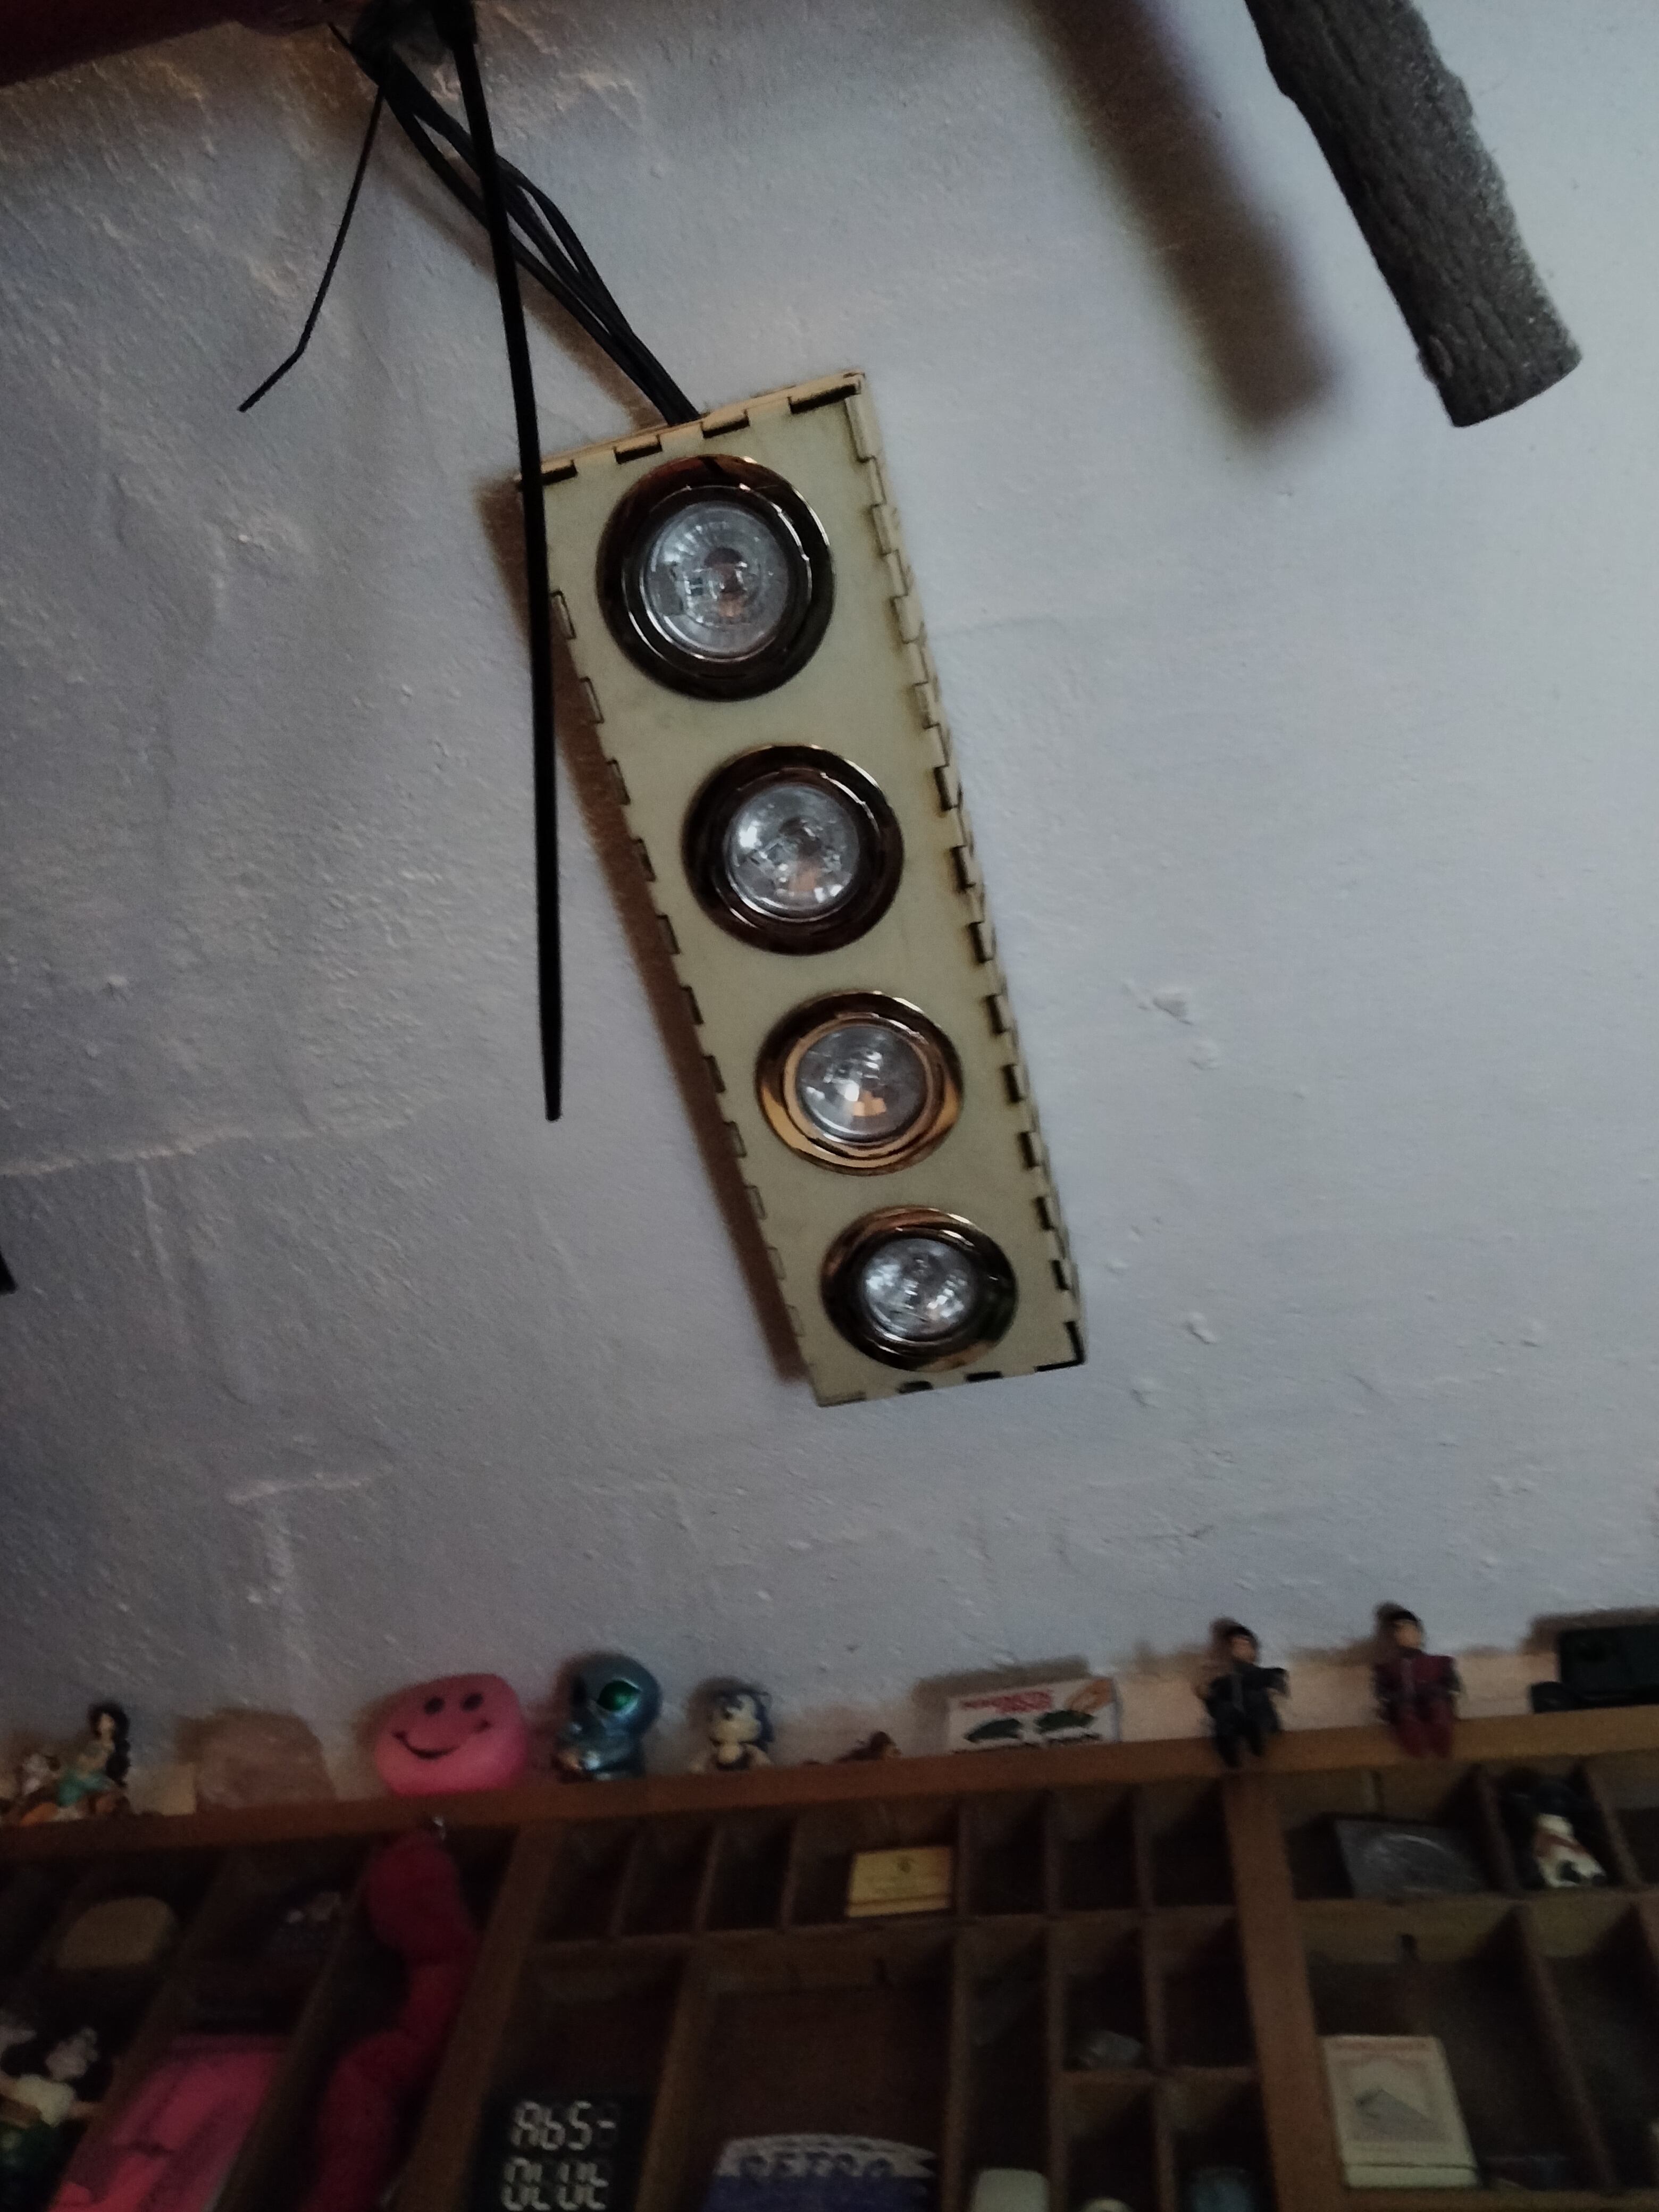
As you can see it is rather poorly madeSome gouged out sections to allow for bitsMeasure twice cut once anyone?Second attemptIn situ in a rather gloomy corner
Had I enough wood I would have attempted a third go to correct those mistakes.
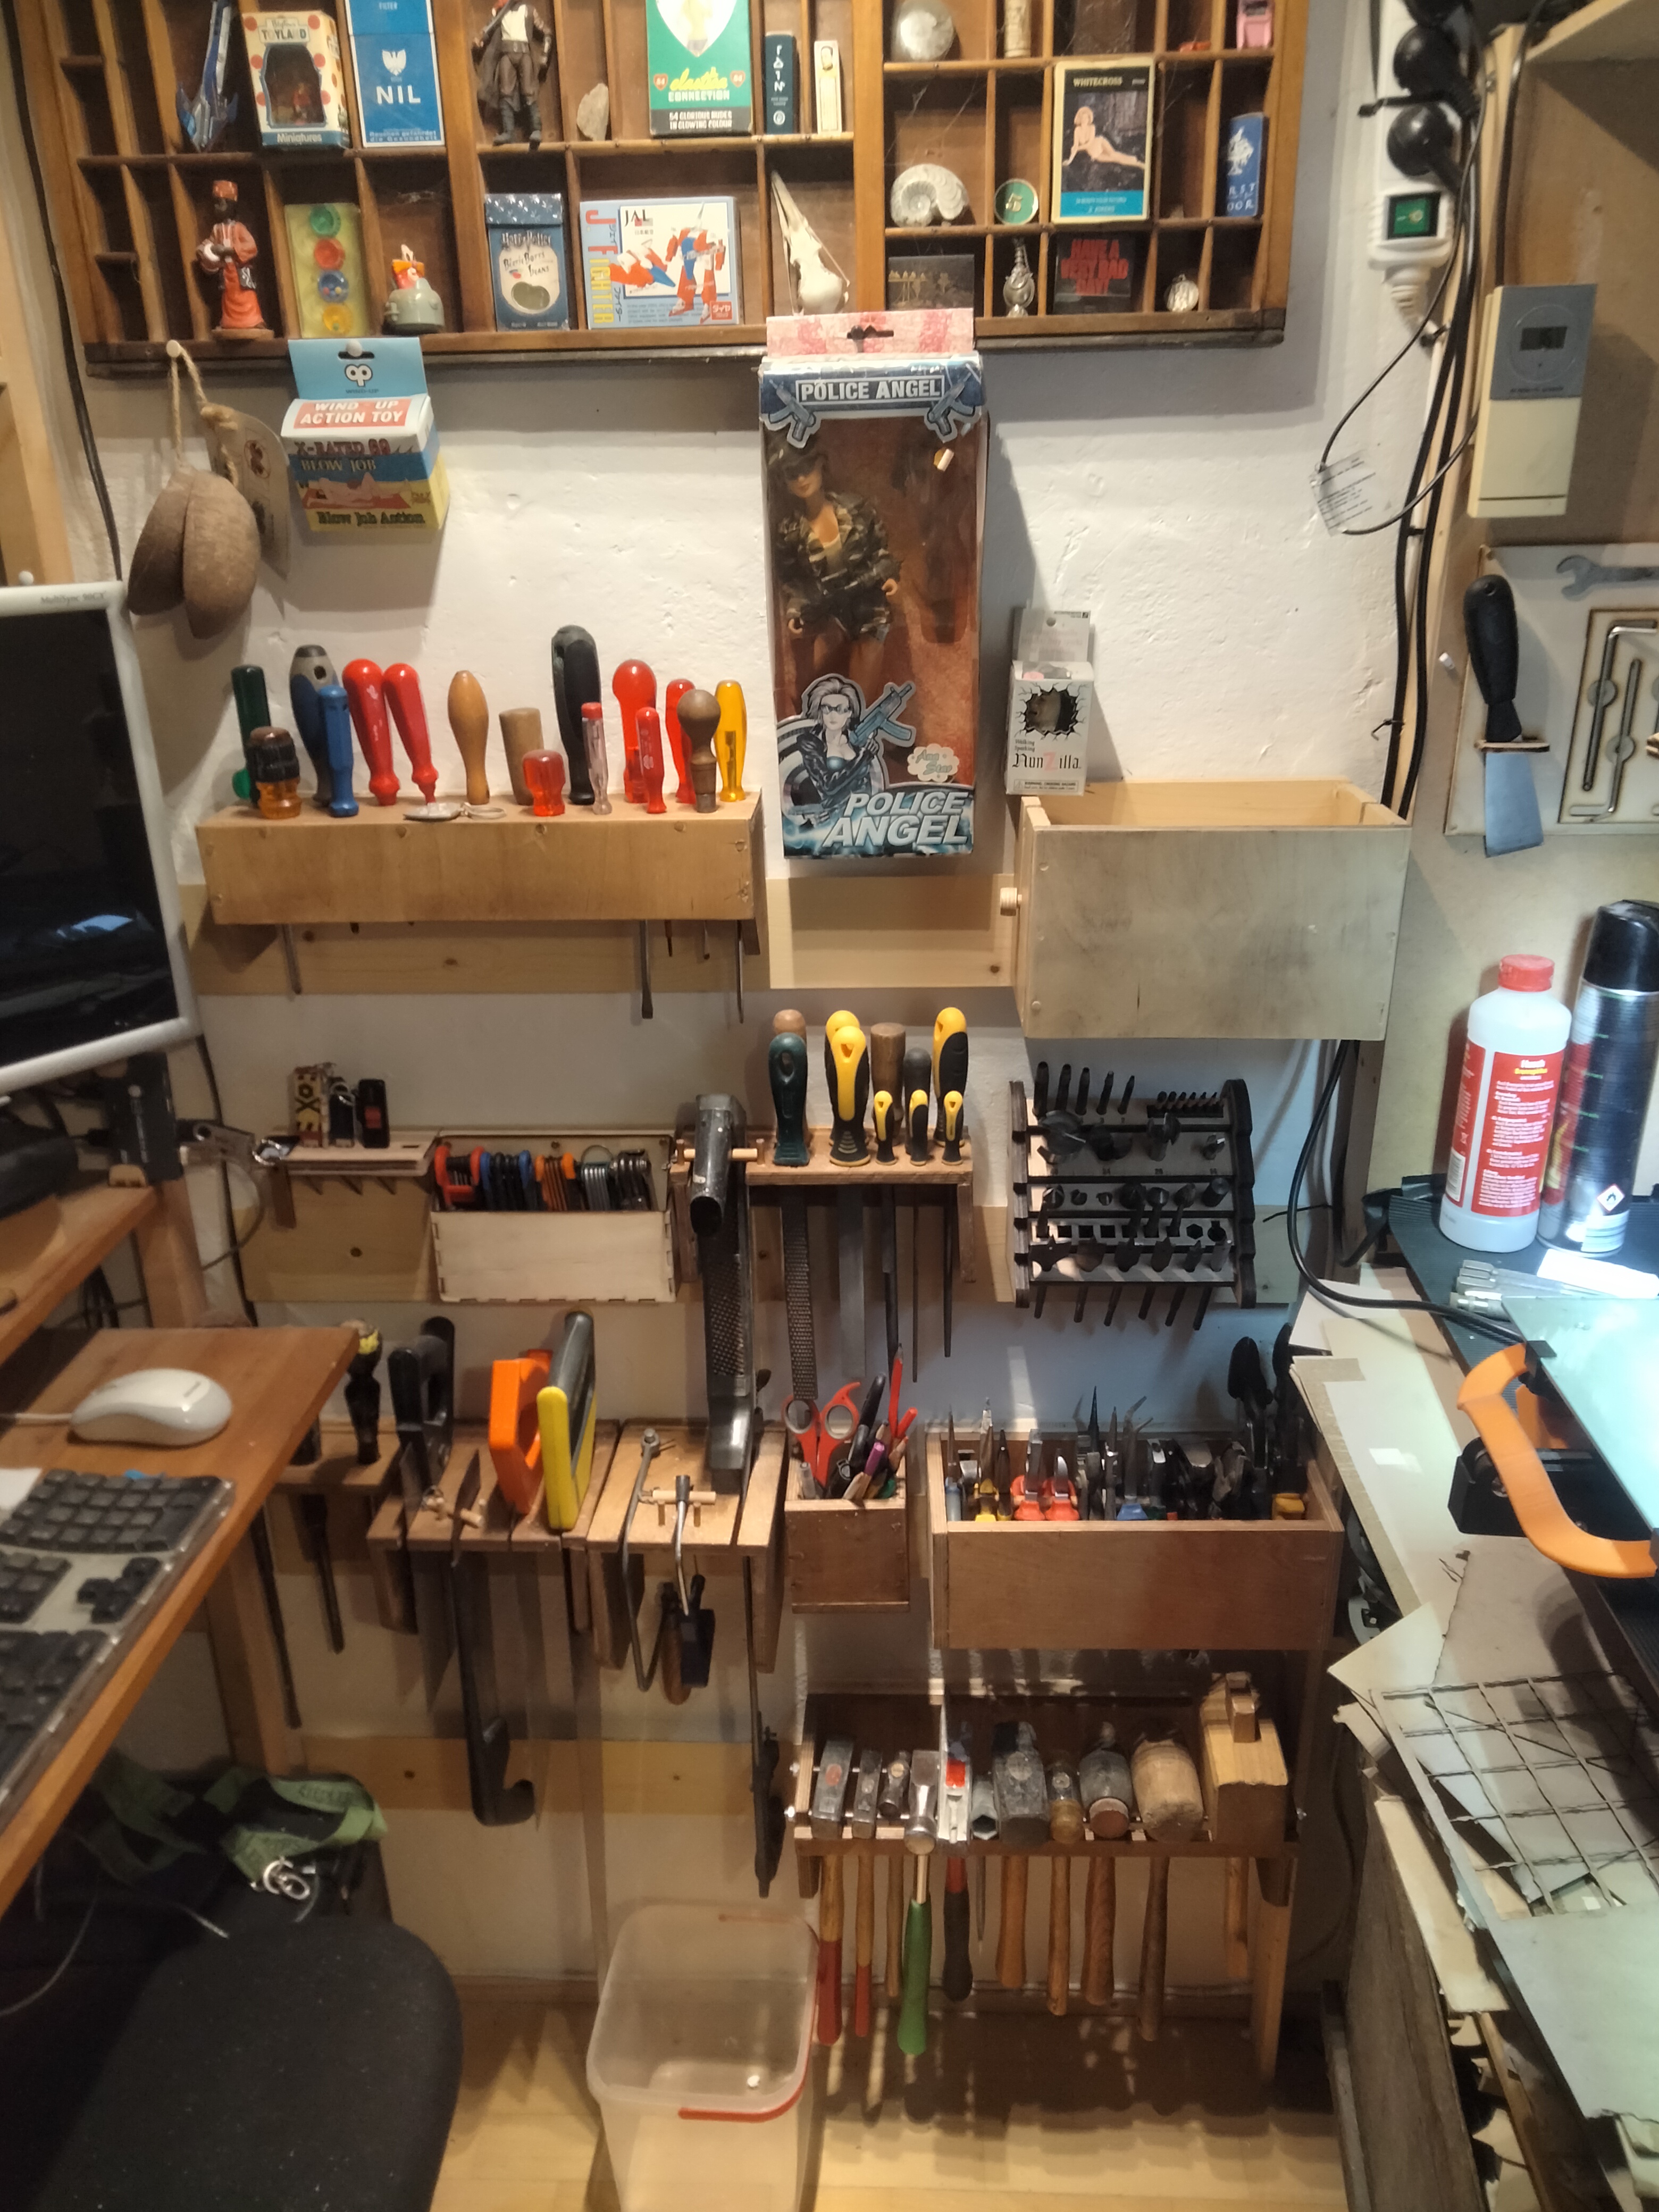
Tool cabinet slowly getting organised. I inherited it from my late Father in Law. It originally was well equipped with tools, but when I got it there were a lot of mysterious gaps which I am now trying to fill.
The corner is gloomy no more.
I have started painting a bit but the joy has been stolen and I am finding it hard to get my mojo.
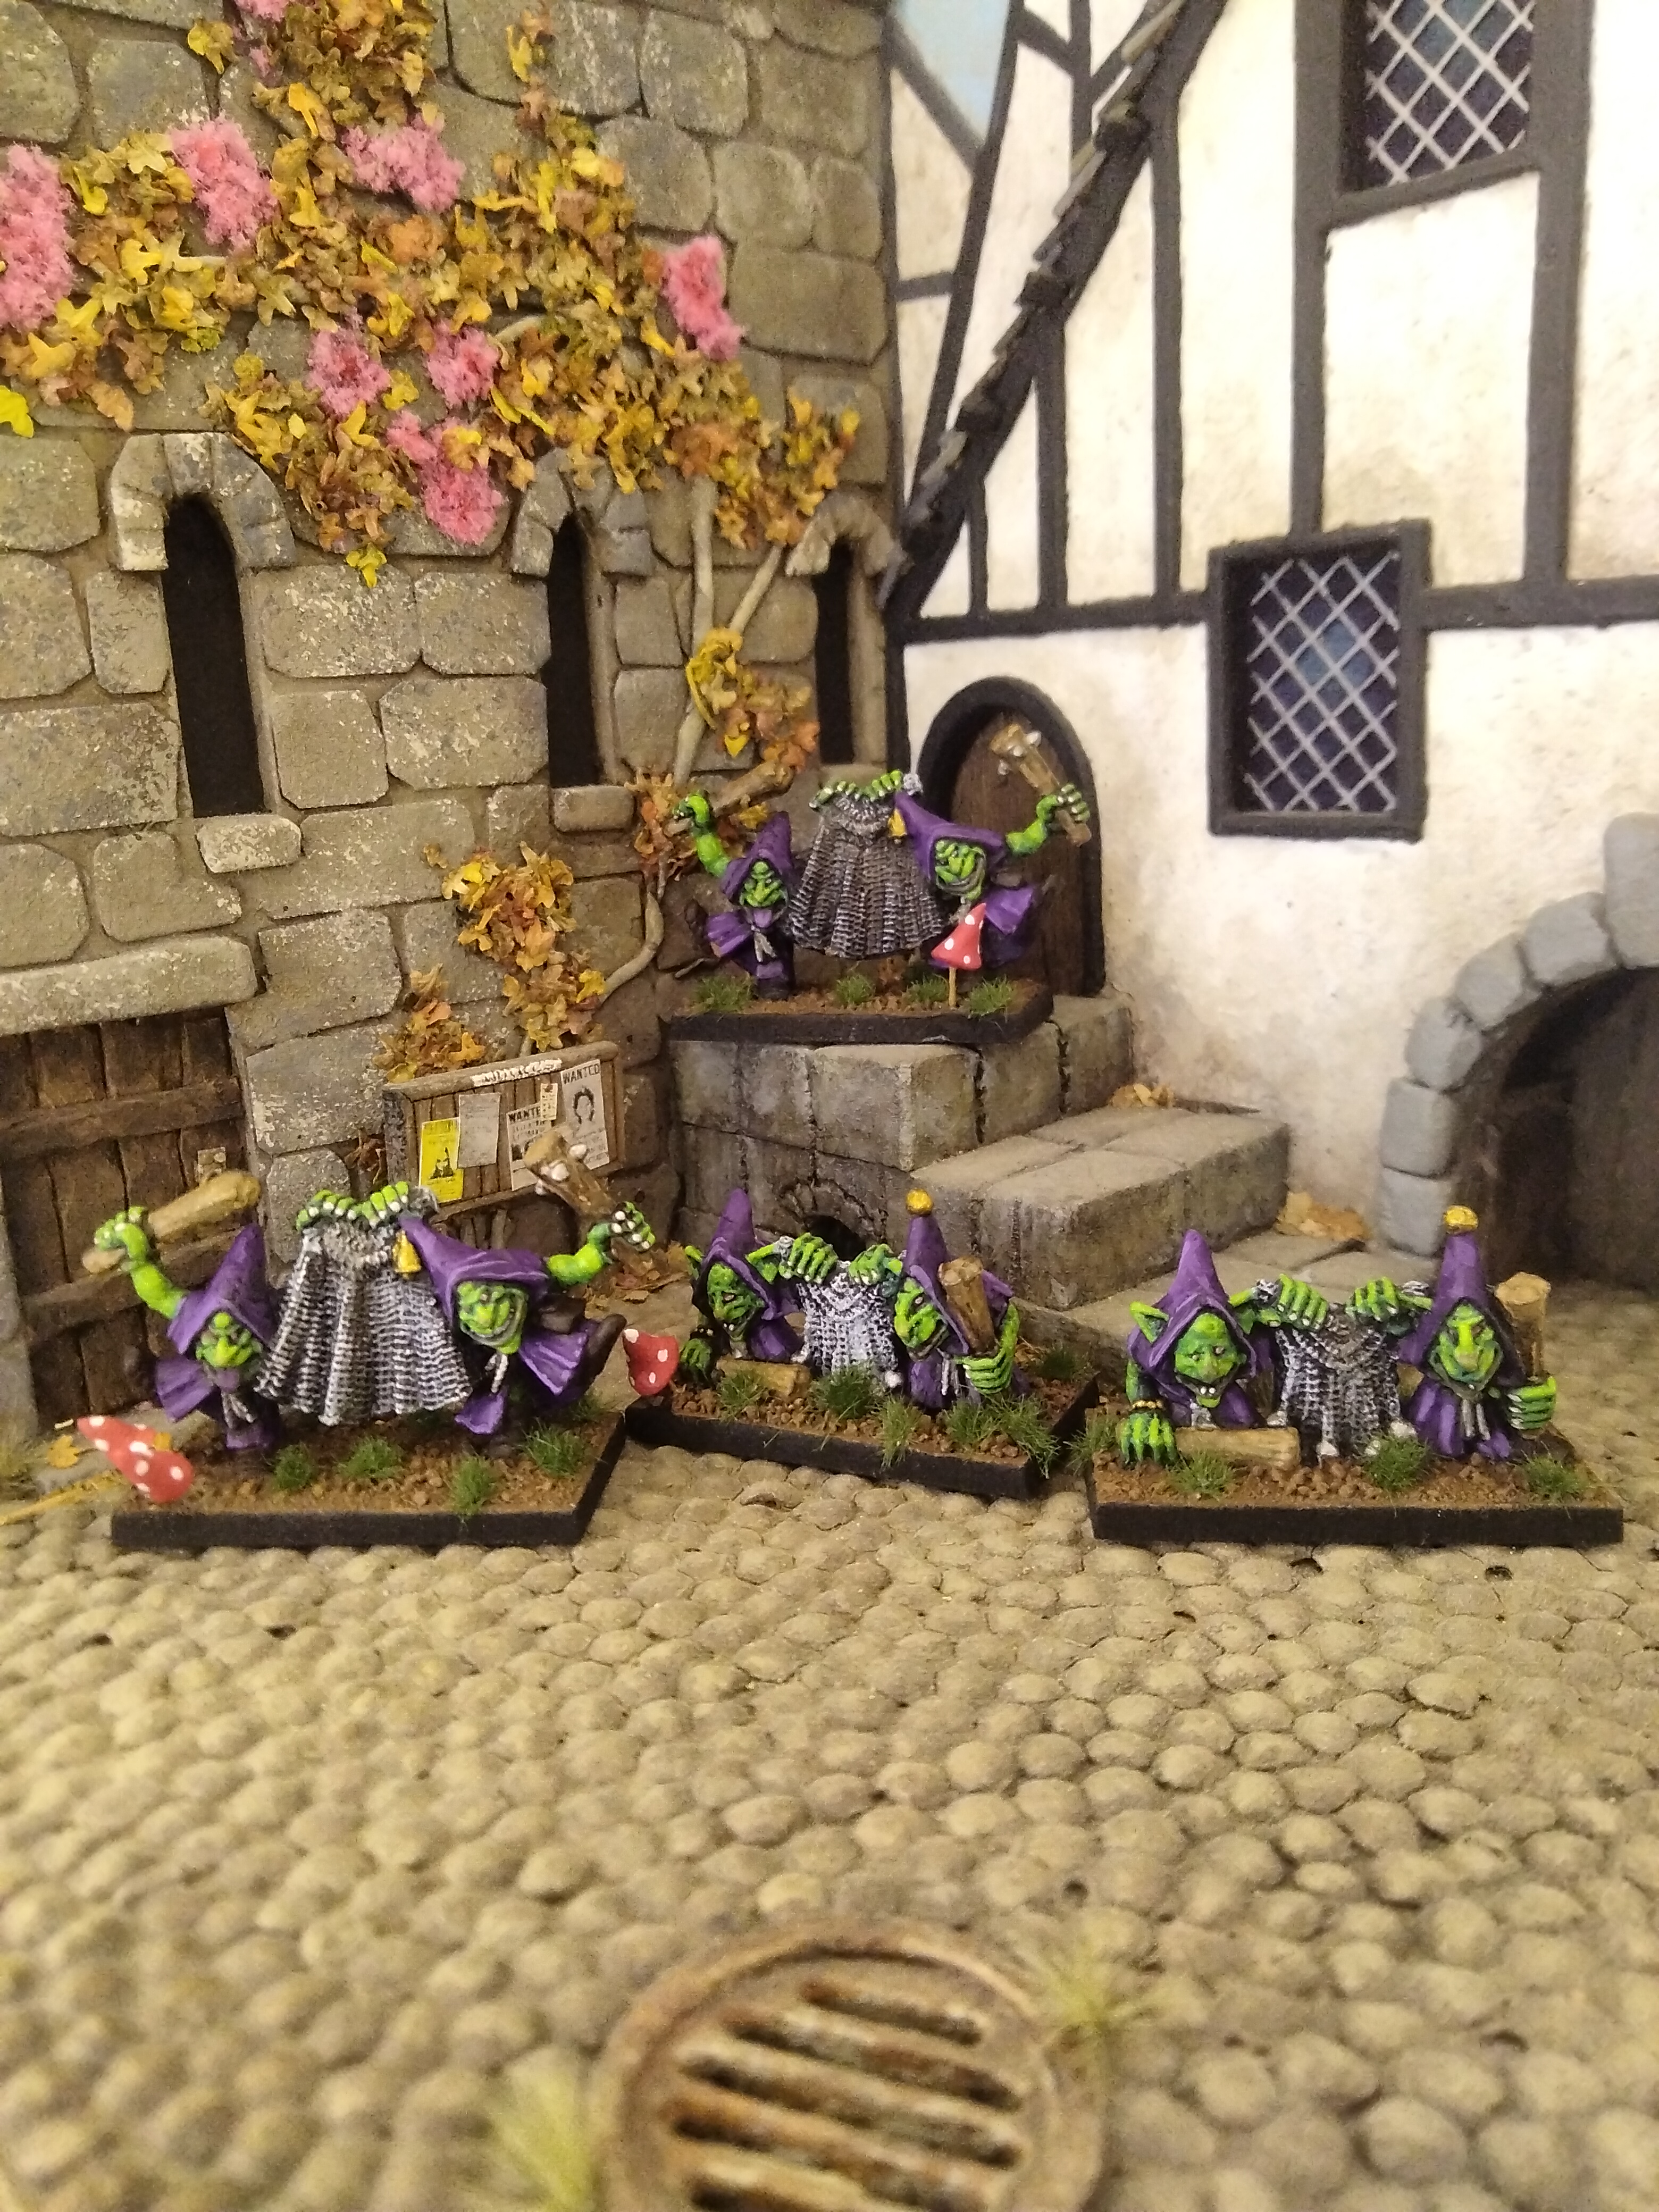
Some Night Goblin Netters that I got as a present
Wot i am workin on now
This guy is going to be part of an Empire Mercenary band. Based for Dragon Rampant.
I have been designing some bunker facades for my trench terrain
I must mention the competition being run by Old School Miniatures to design an Orc War Machine
Here is a picture heavy painting round up. Still struggling with fatigue and concentration. This is why I made this the first job of the day so it would get done.
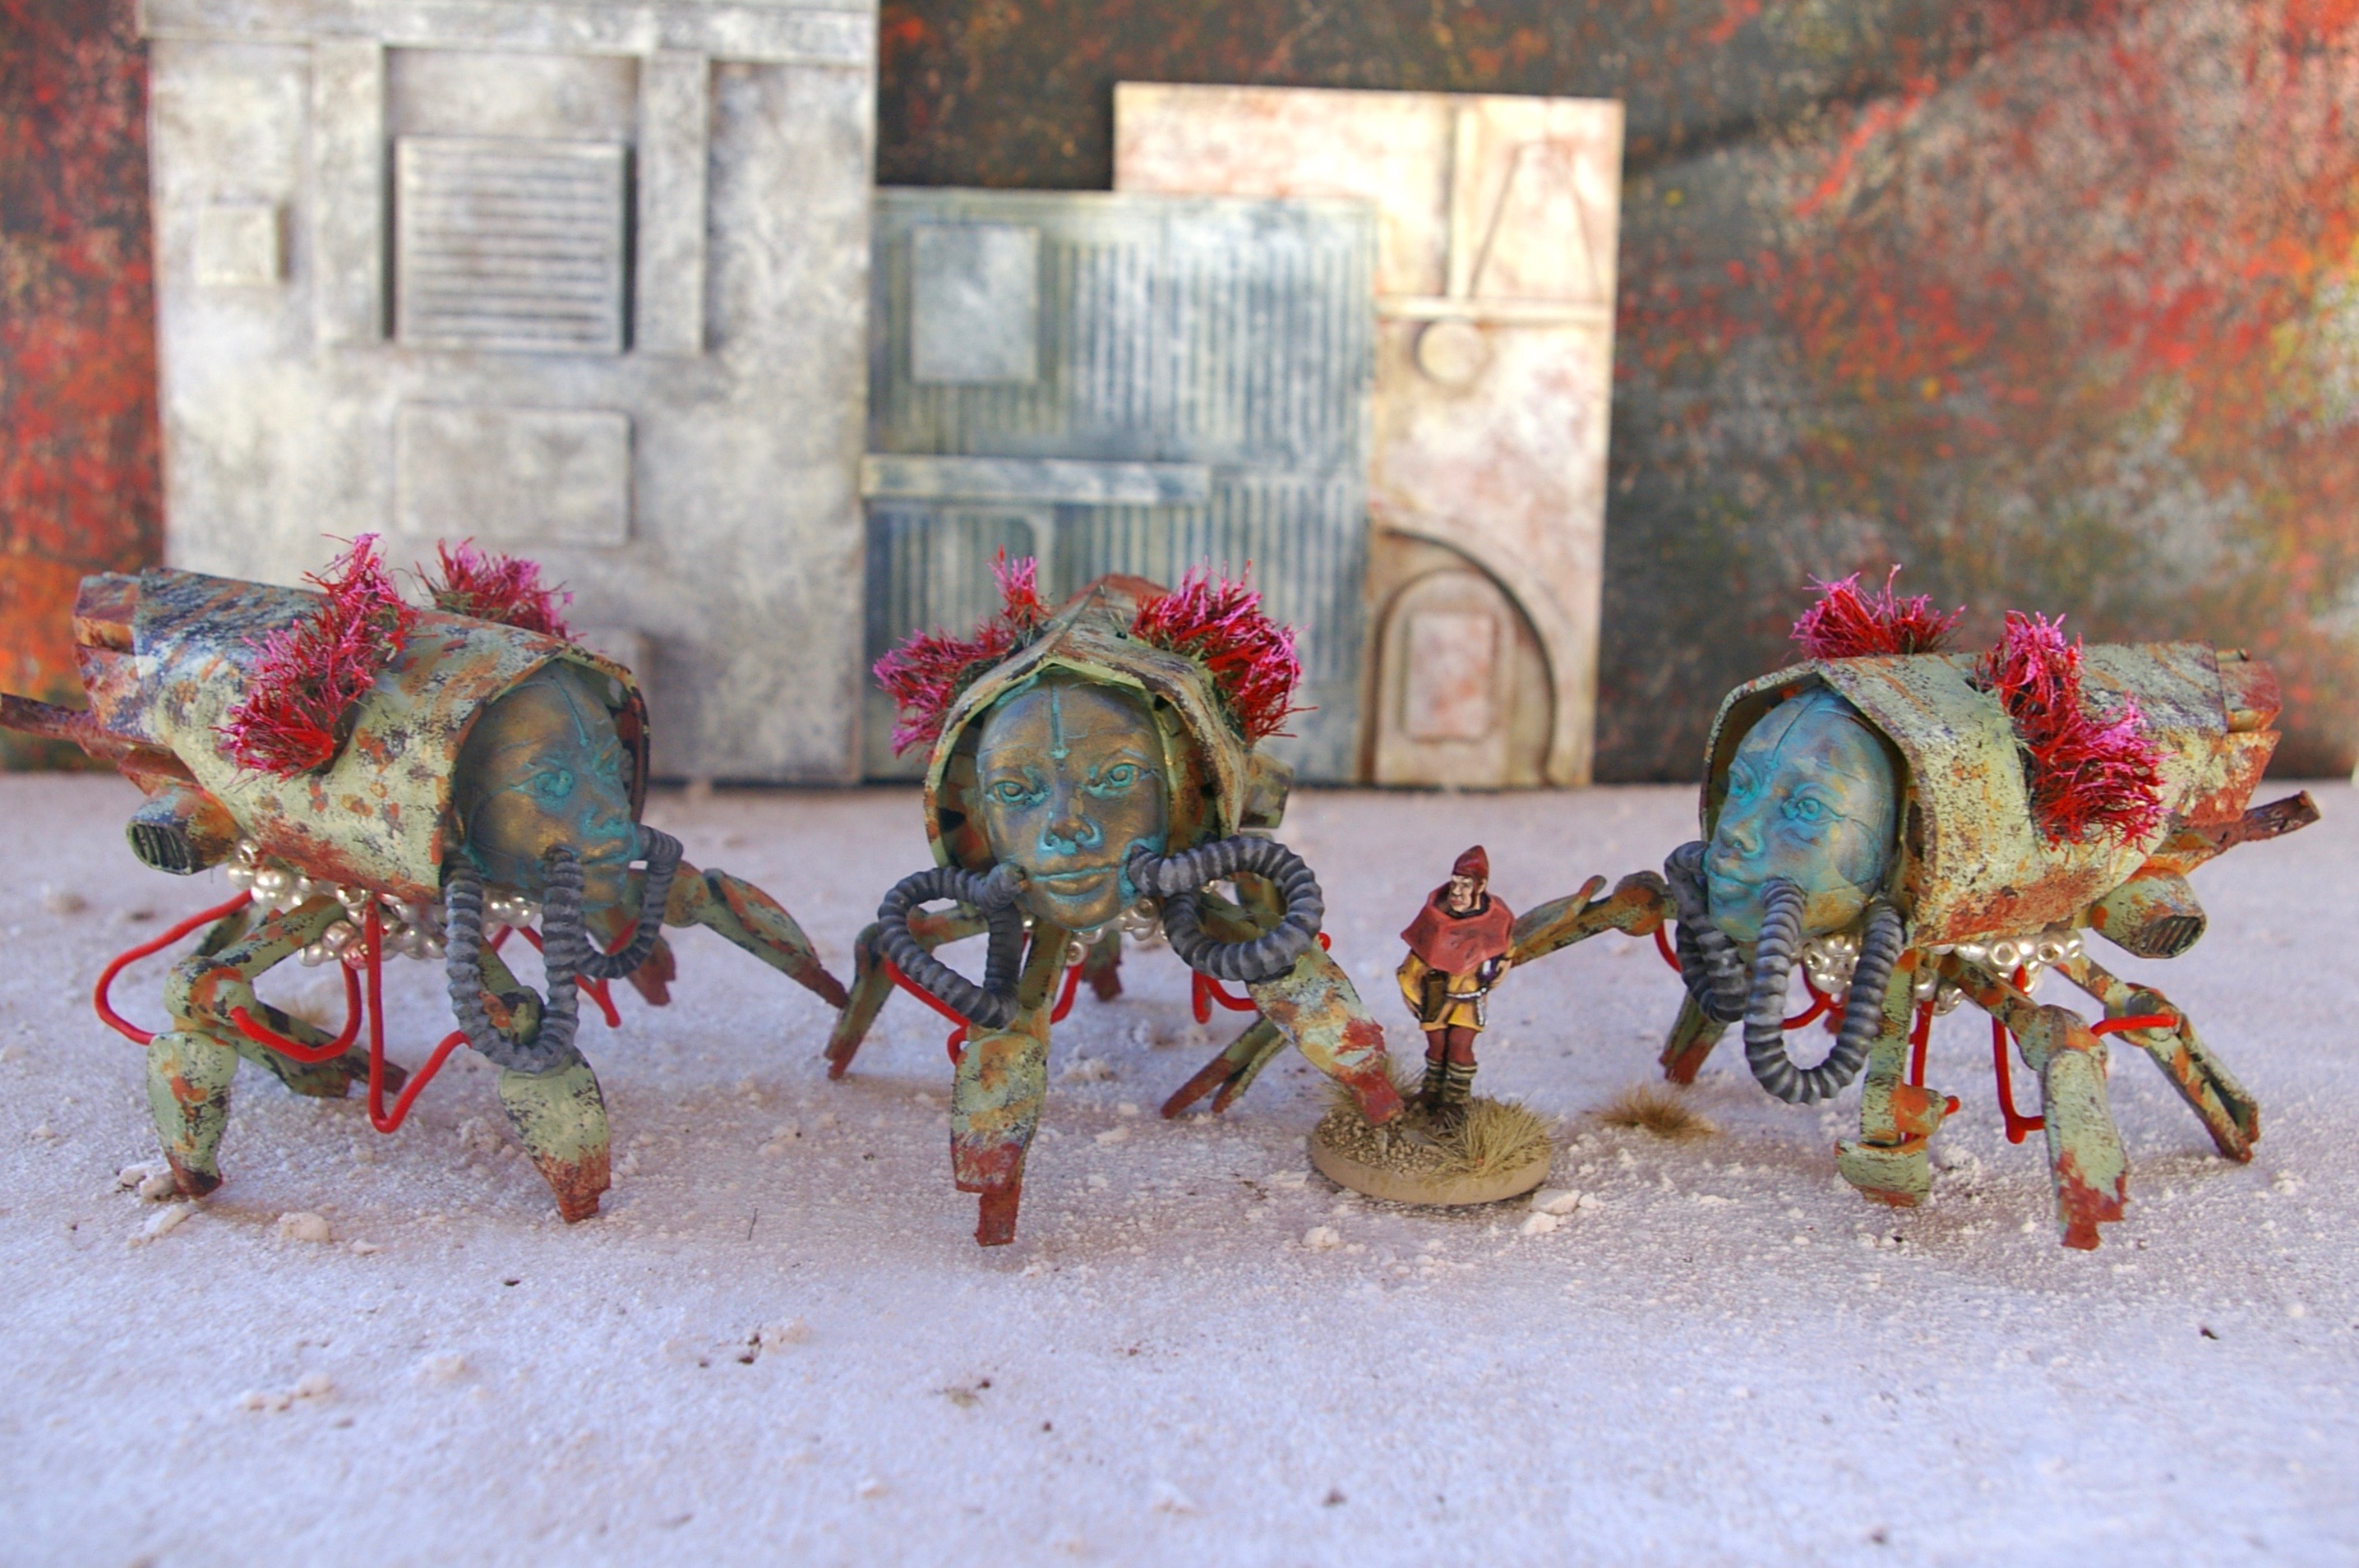
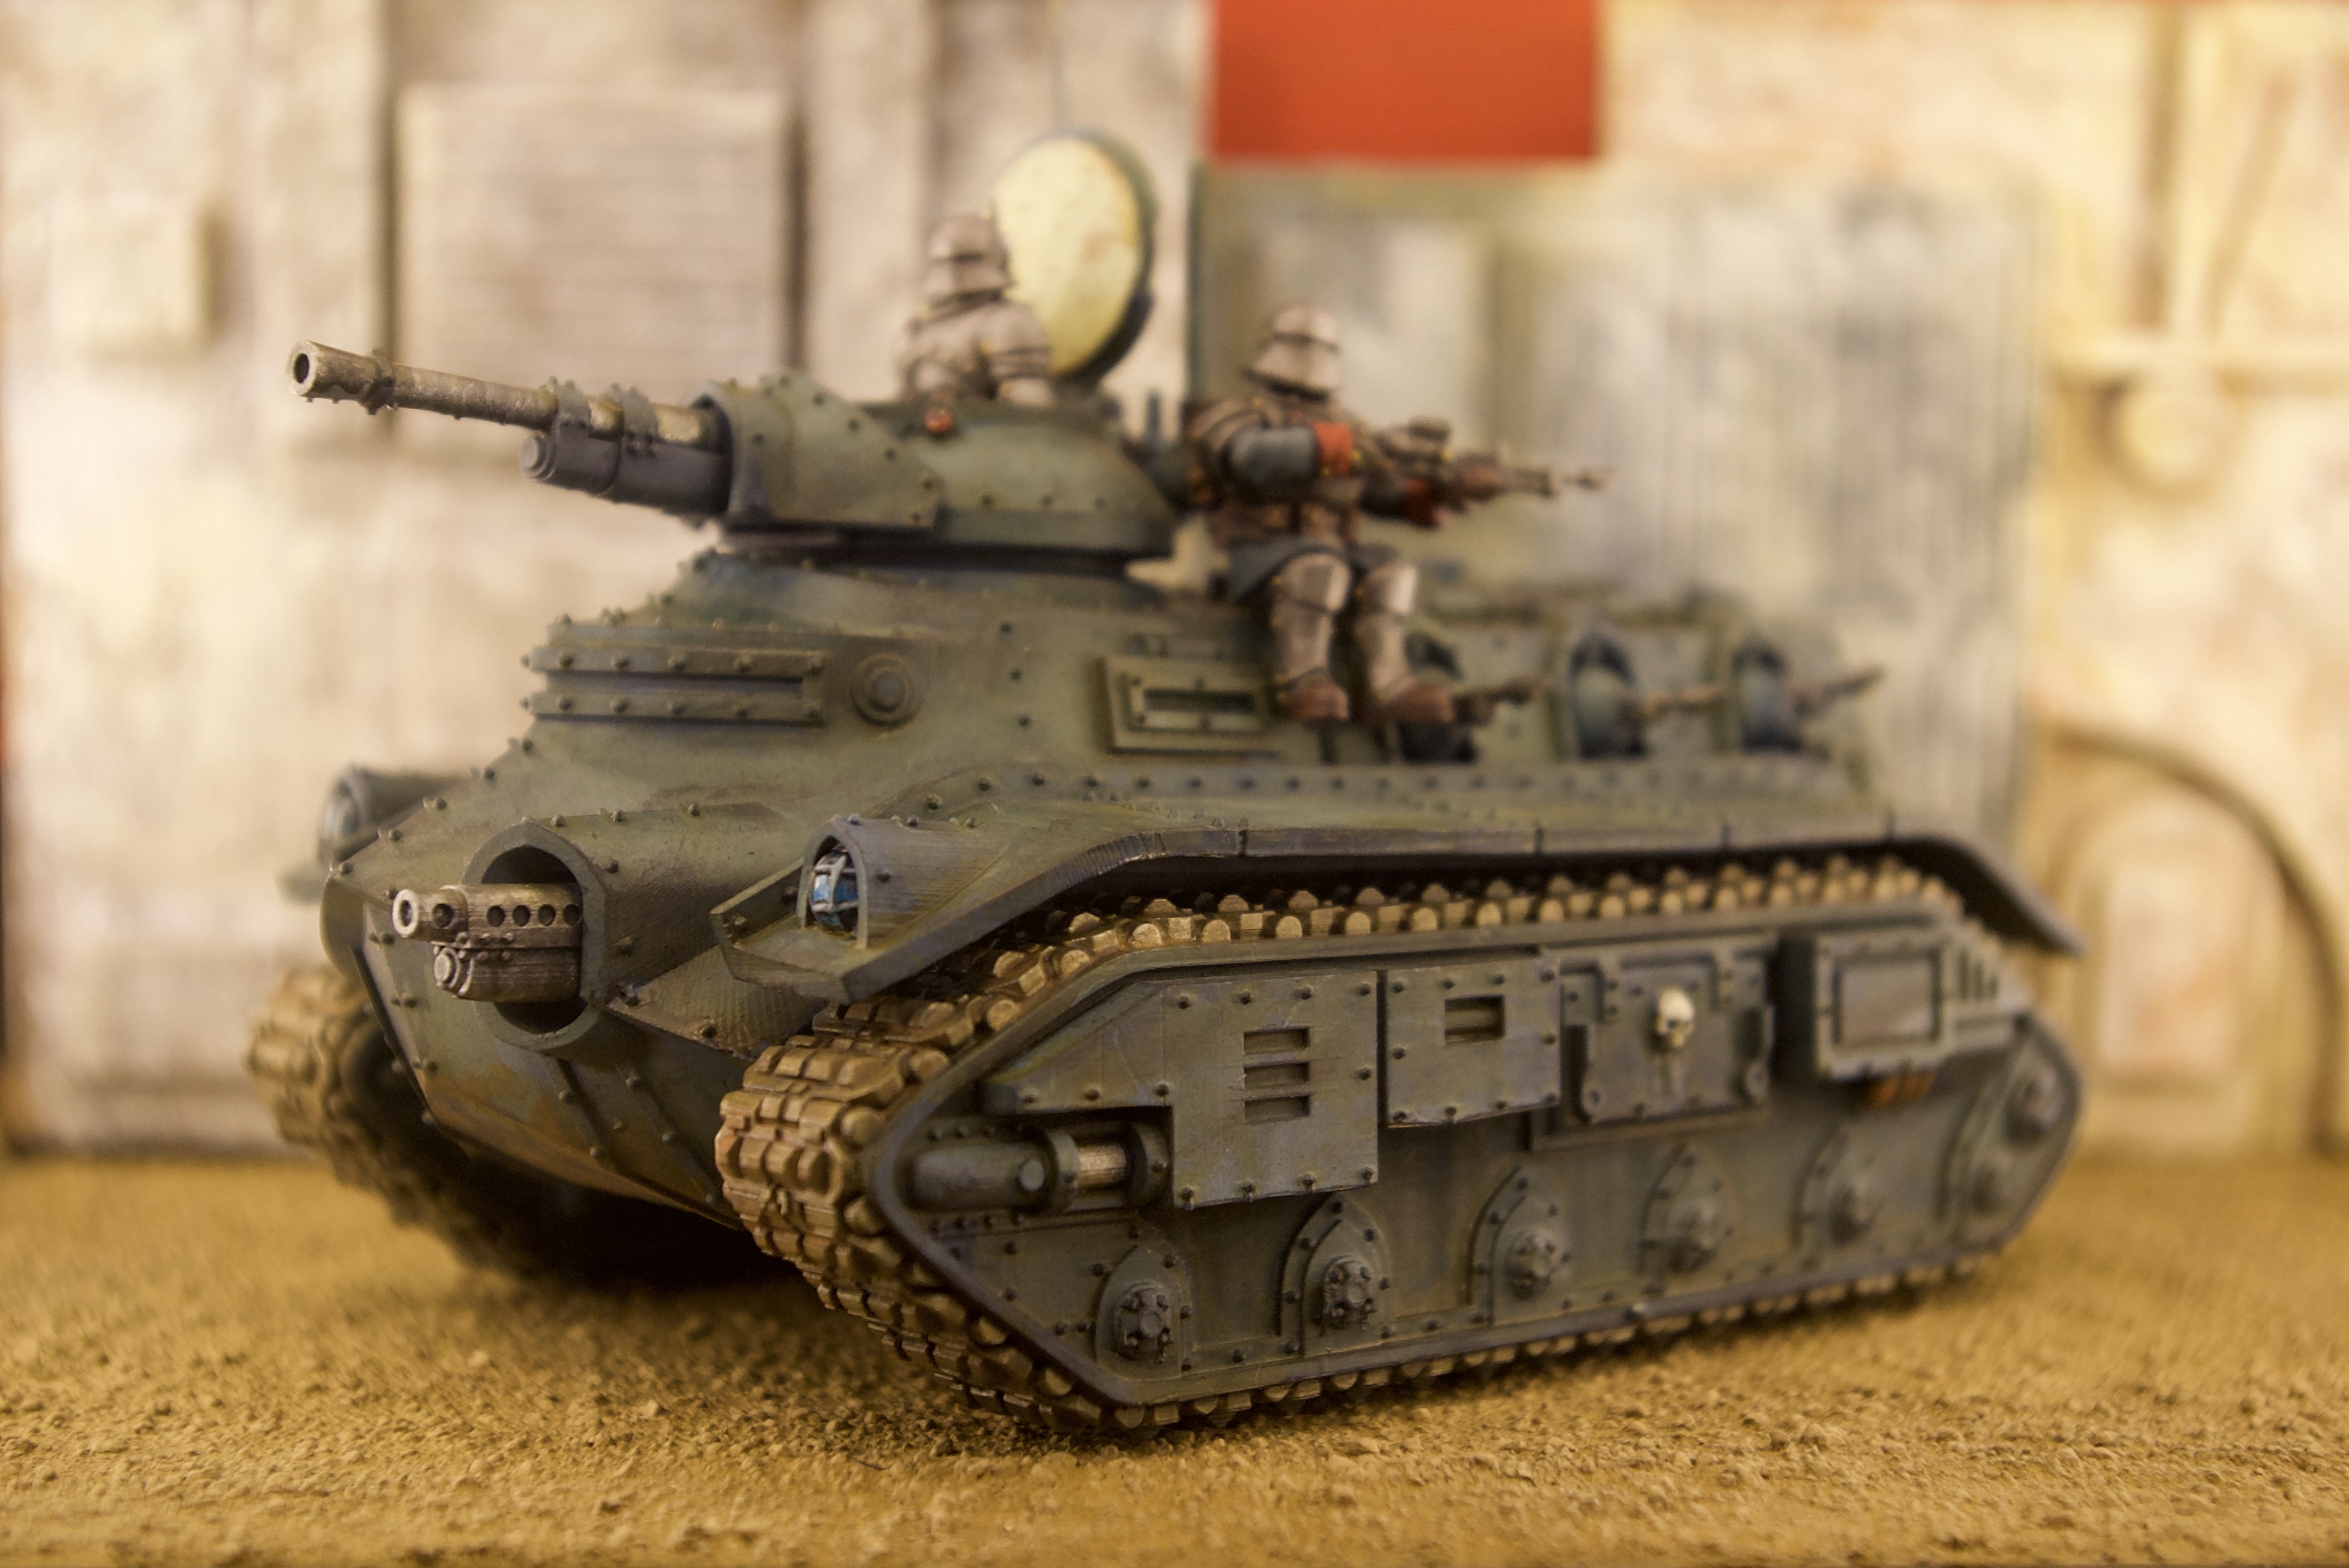
These are walking troop transports for my Traitor Guard. There are 3D printed parts from Knucklebones patreon, resin parts from Ramshackle Games and laser cut parts.
I am not quite sure what these are. 3D printed, laser cut, resin parts and physical modelling.
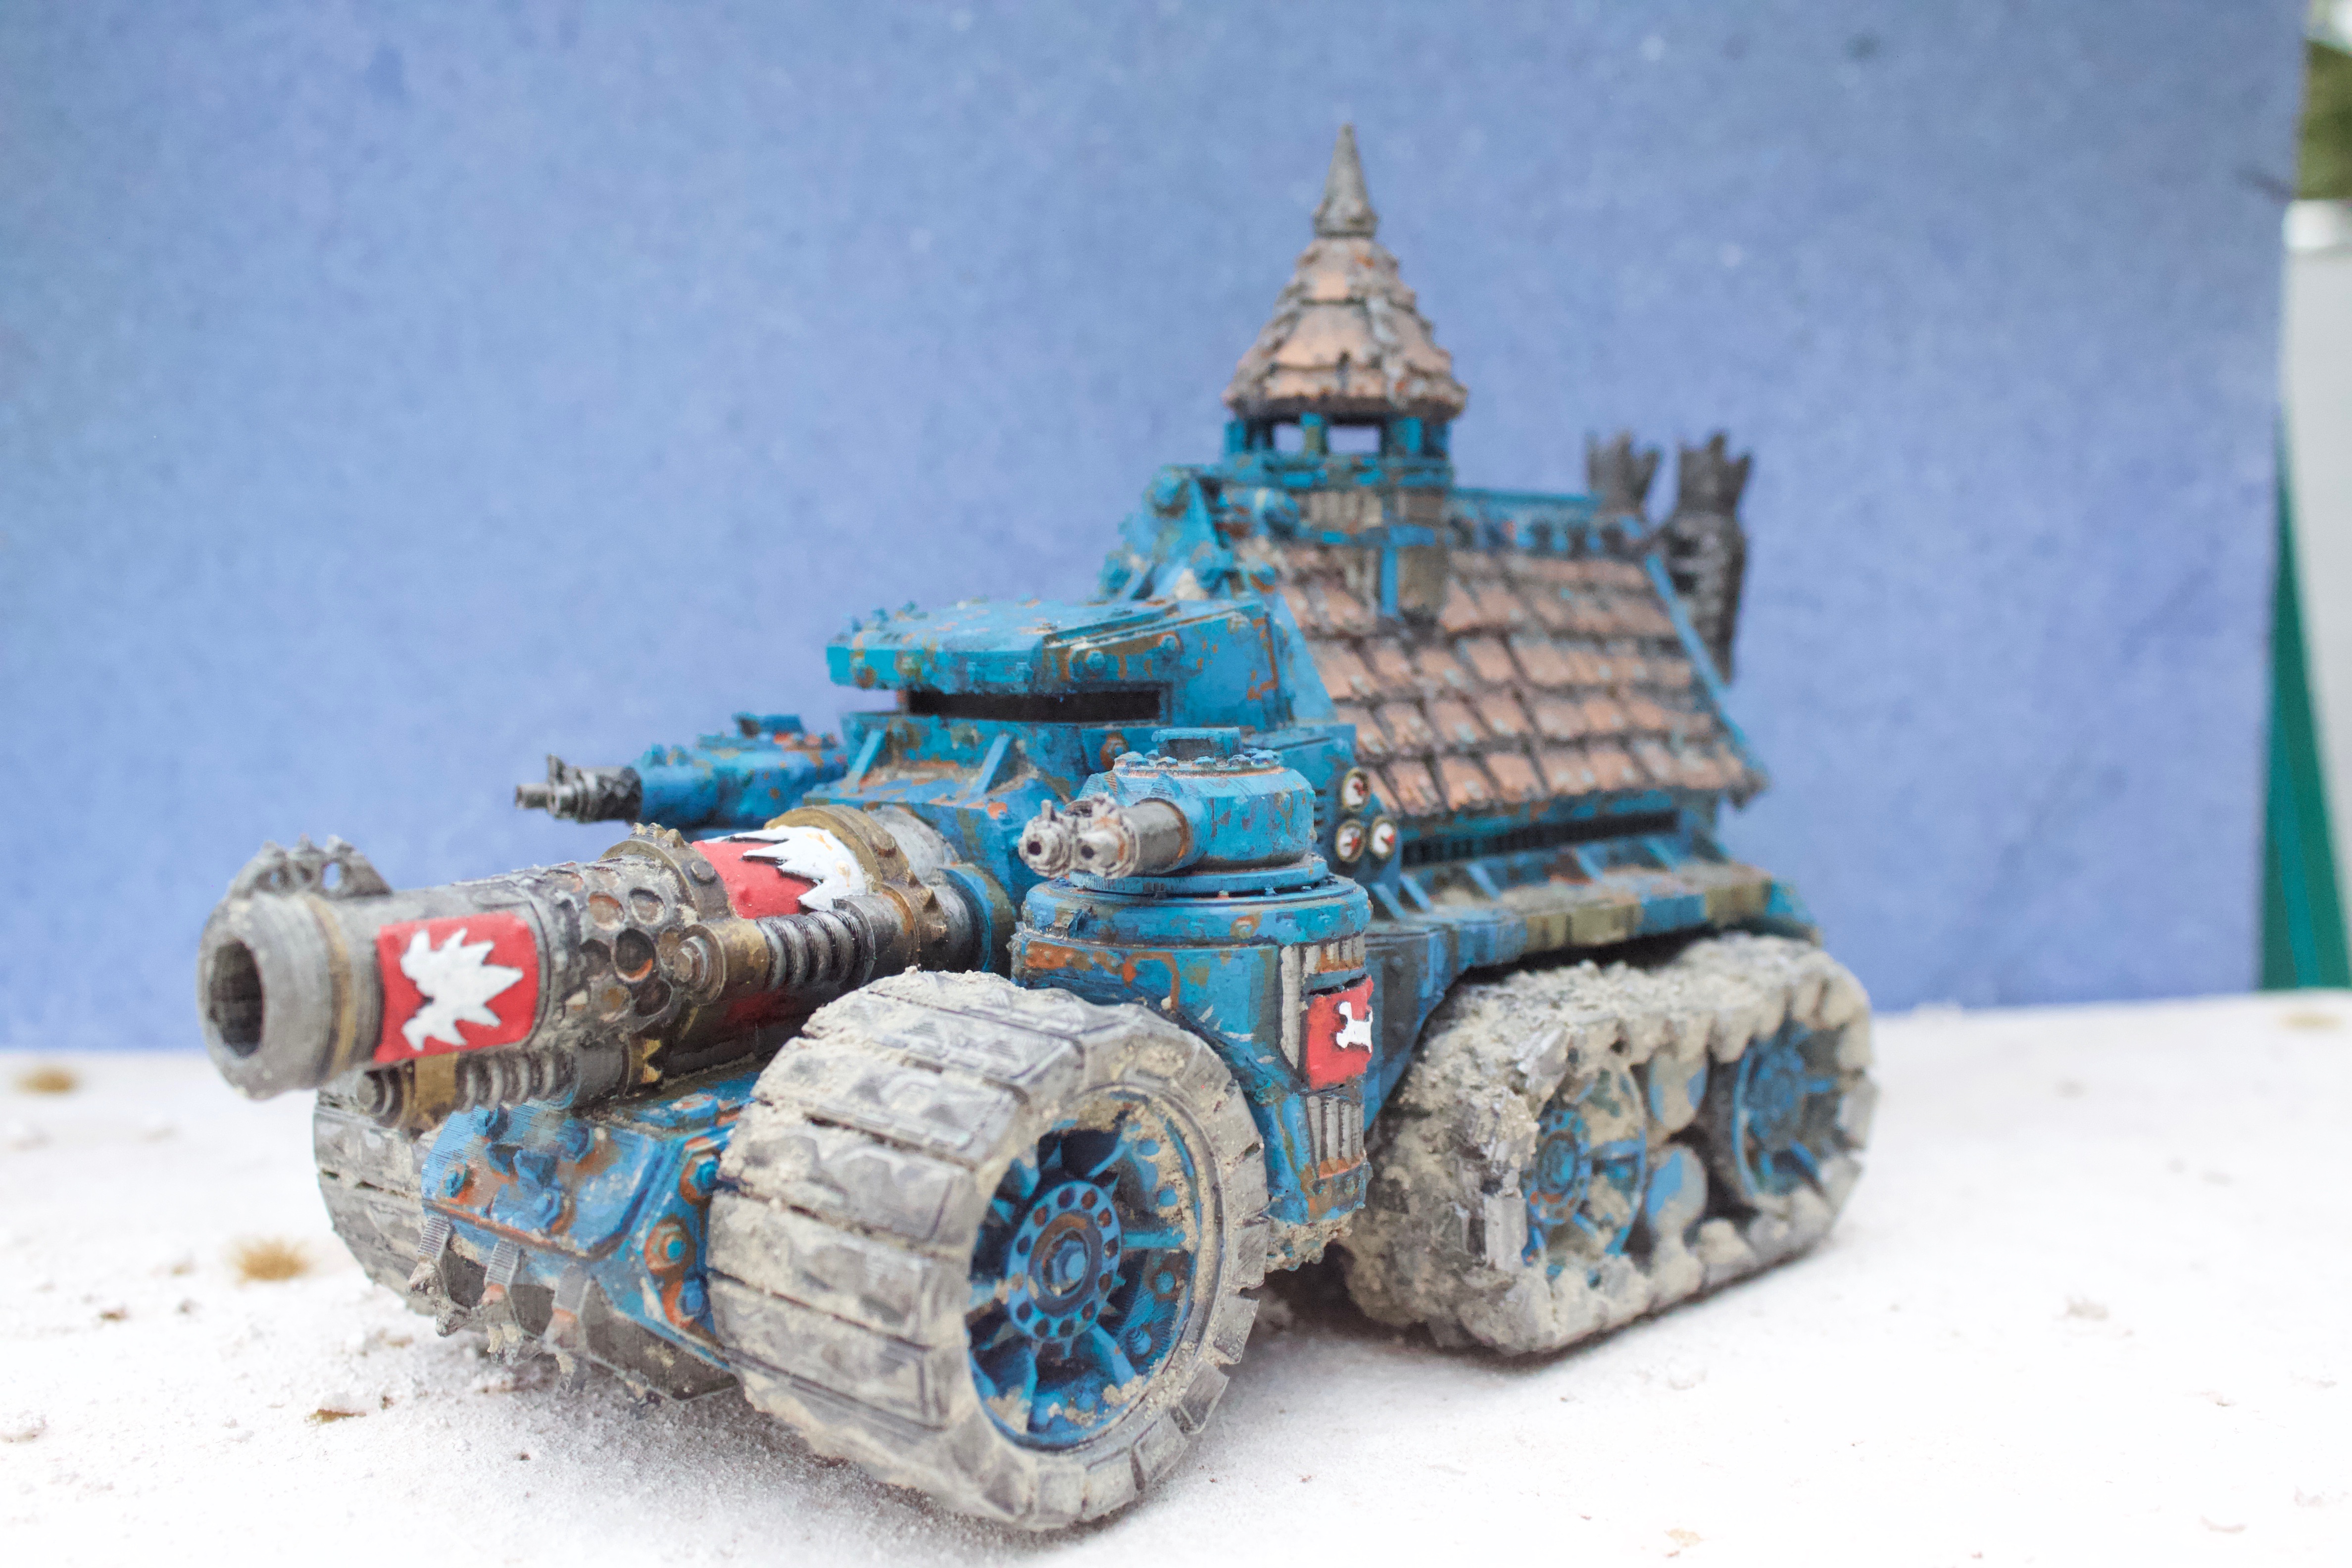
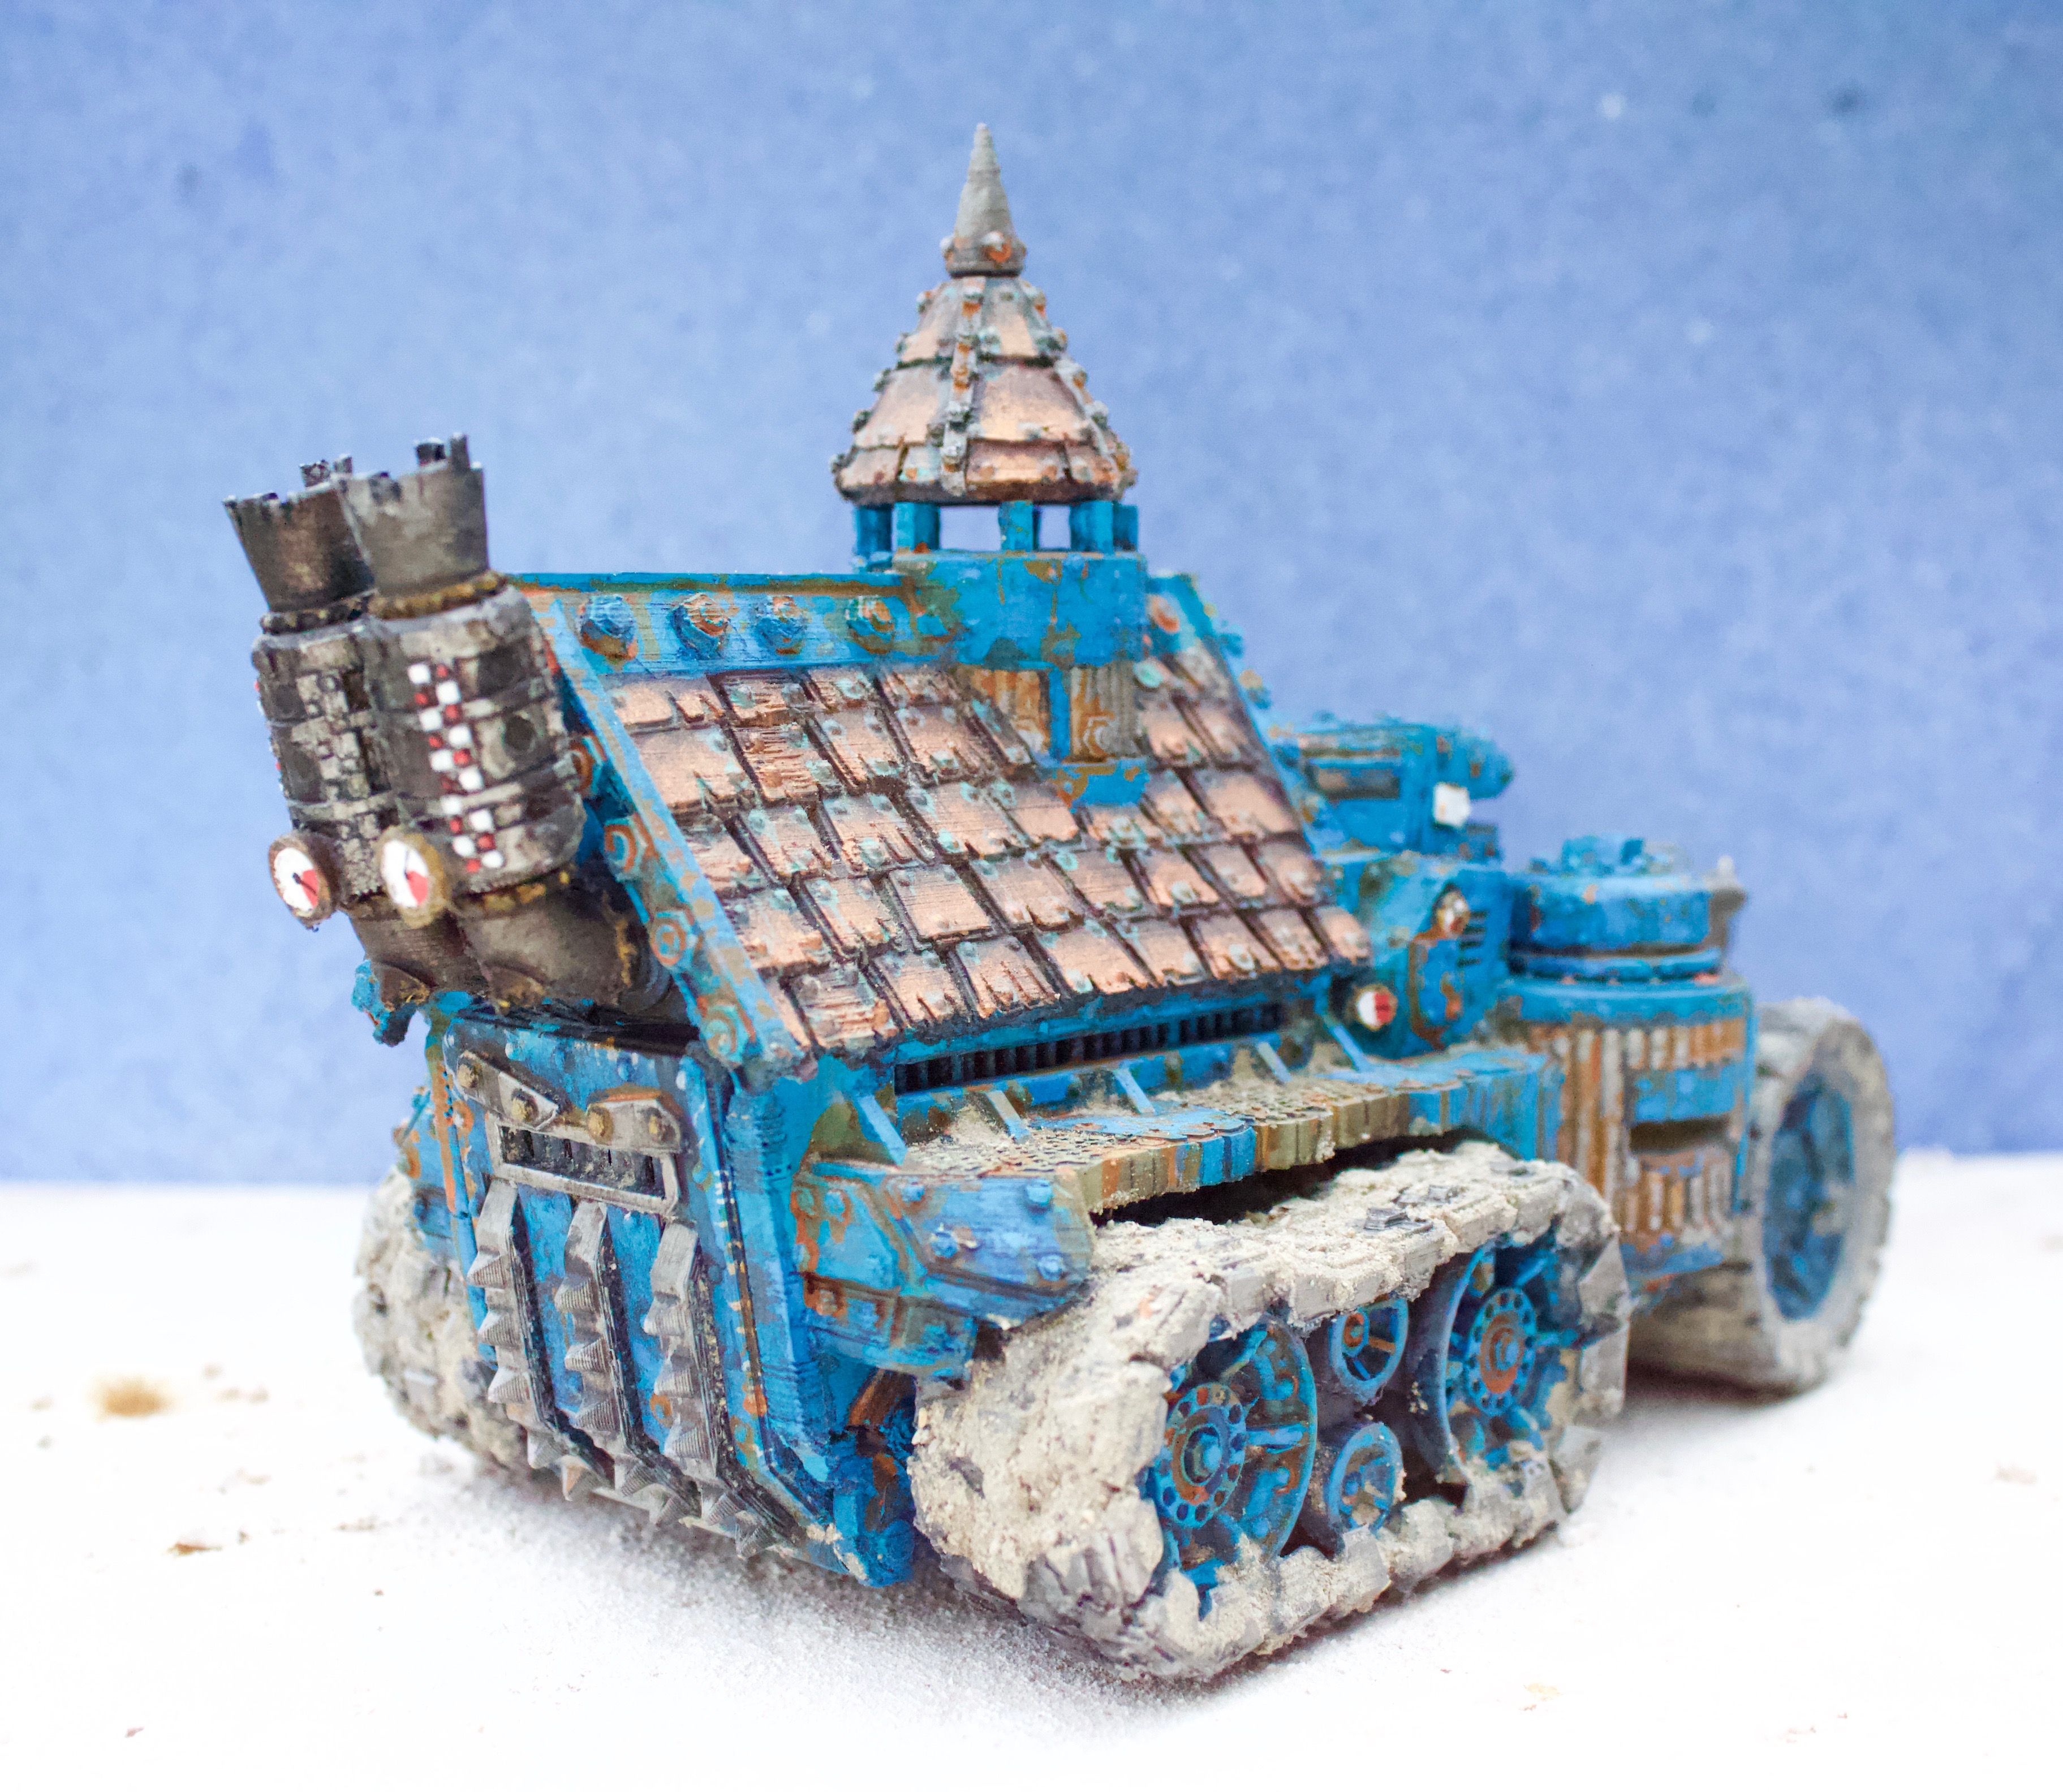
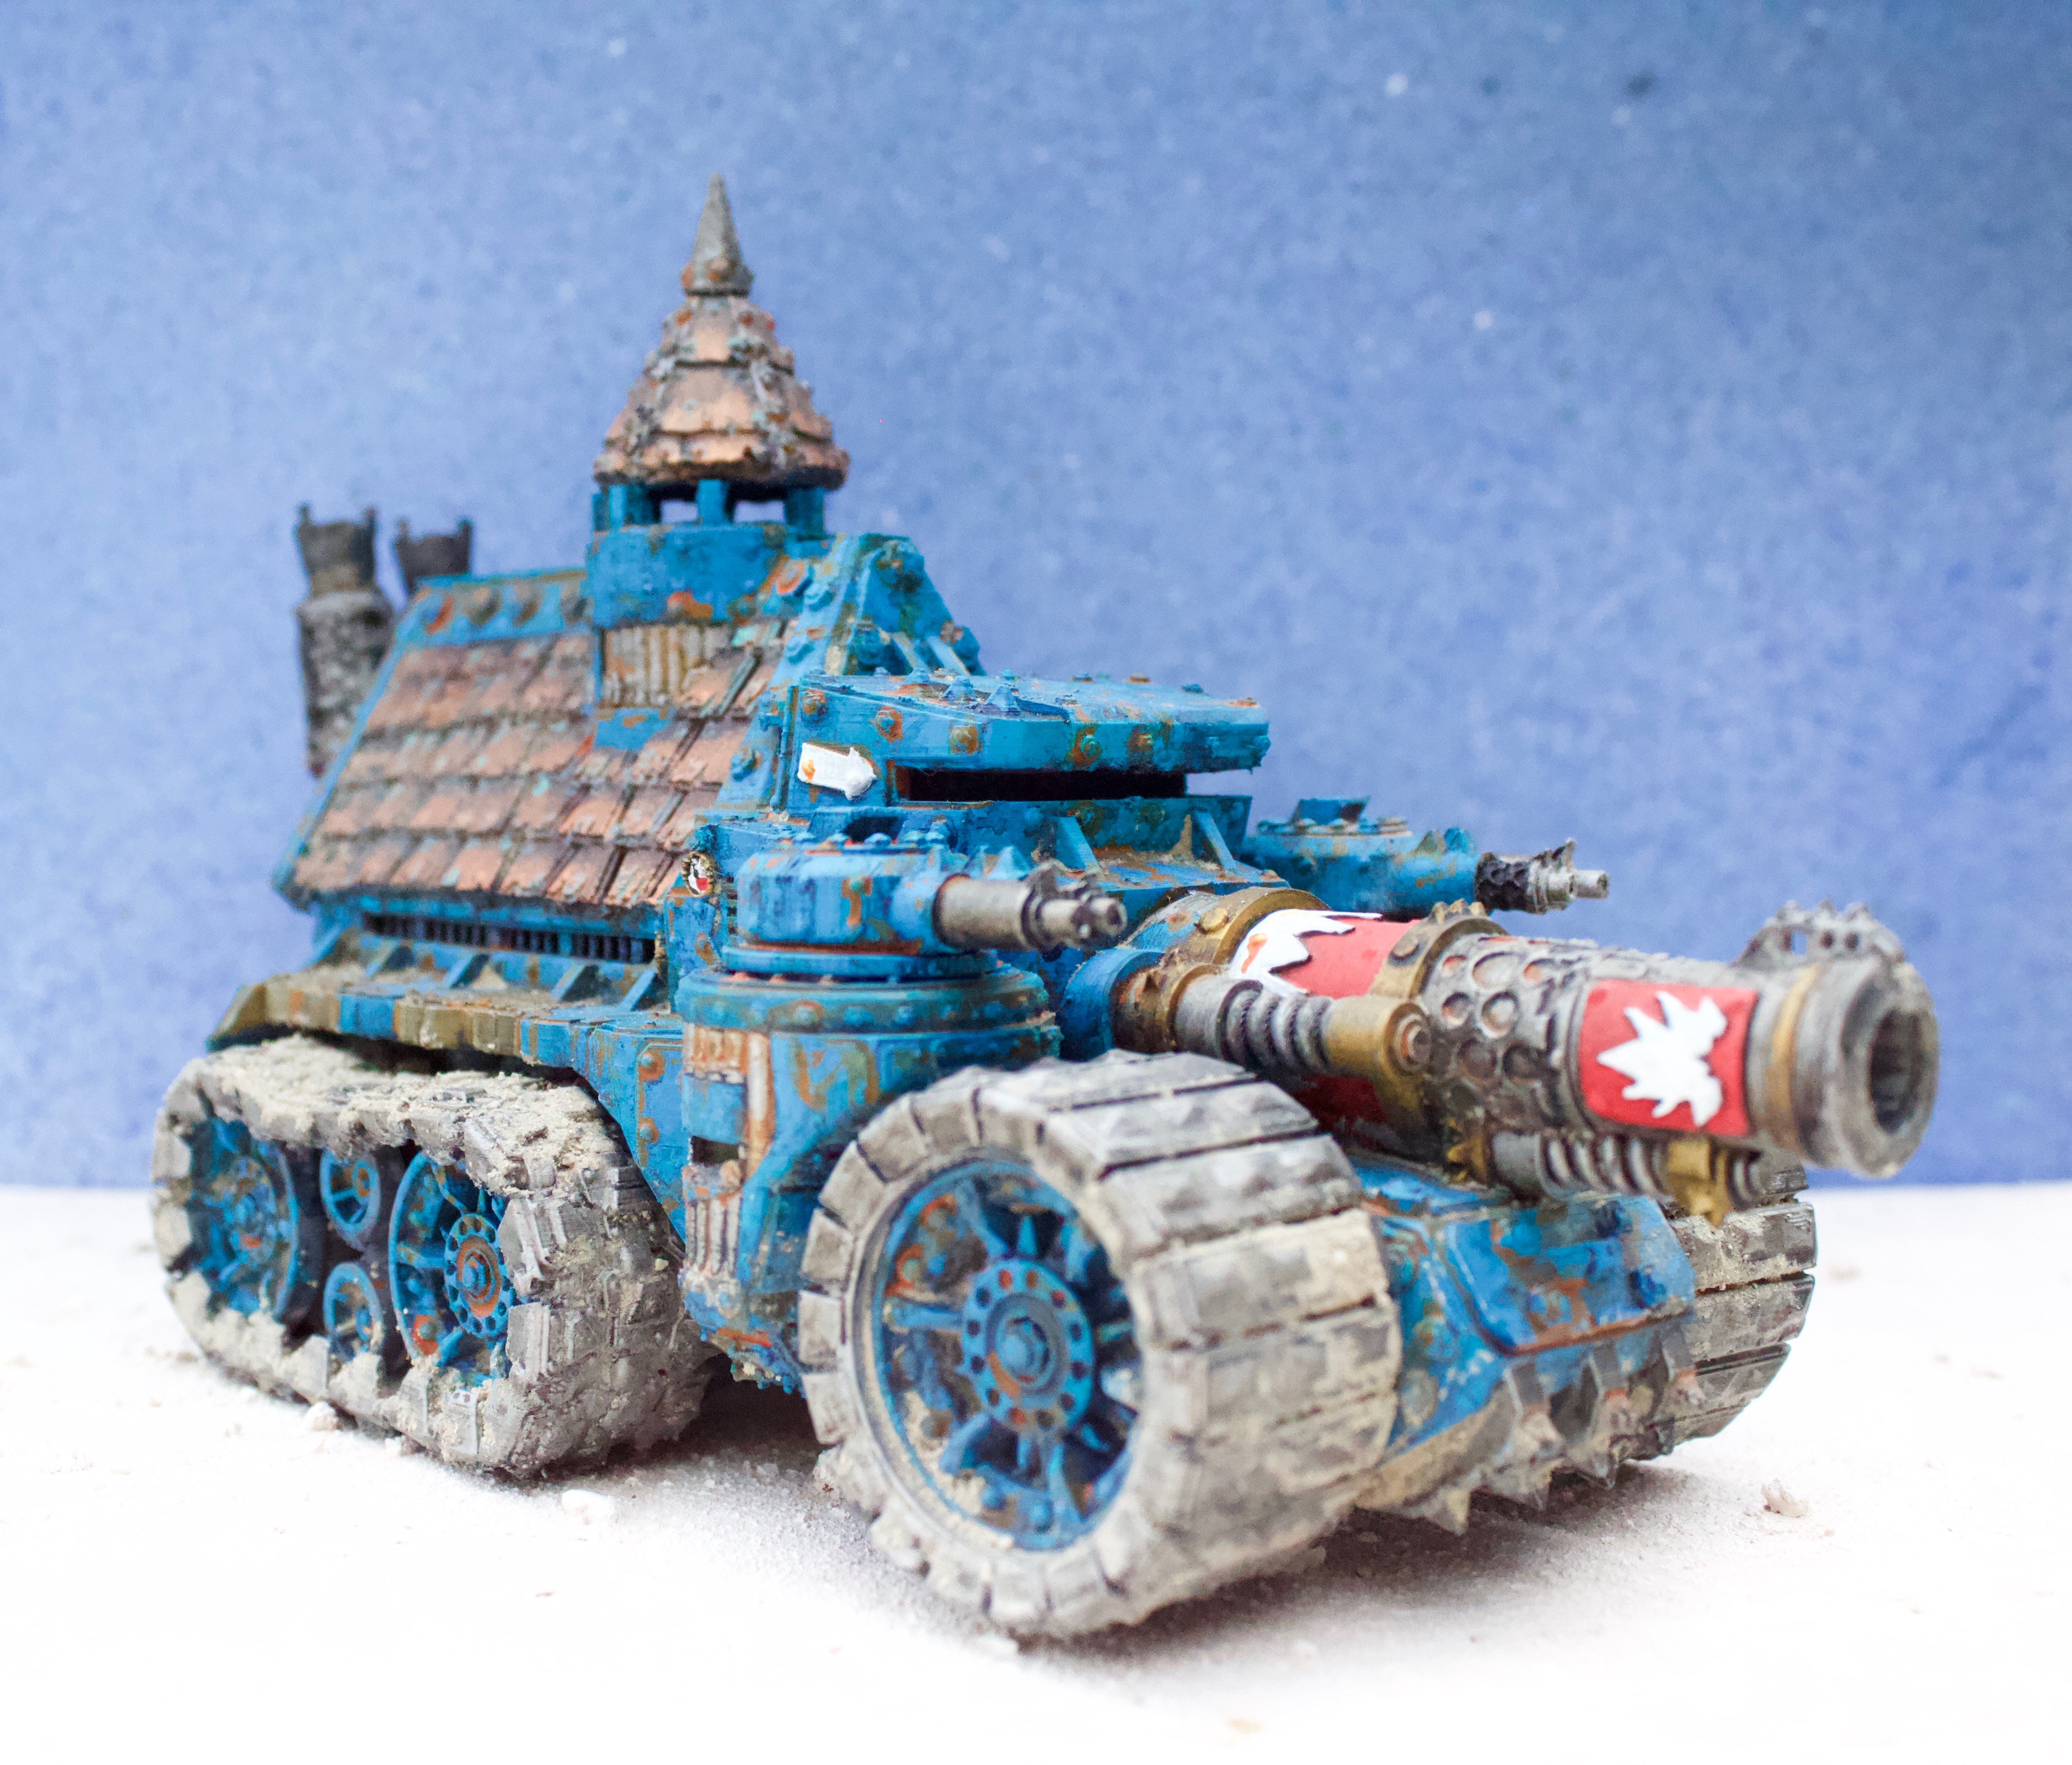
This is from Redgozfasta Patreon. The guy doing this wants to work his way through the Epic Orks collection, scaling them up to 40k size. This month (May) is the Battlewagon. One of the variations is the Weirdboy Tower which I am very much looking forwards to. Entirely printed on my Ender 3 FDM printer. My genius neighbour took my printer apart and rebuilt it totally square. The results are amazing, not resin quality but pretty damn good.
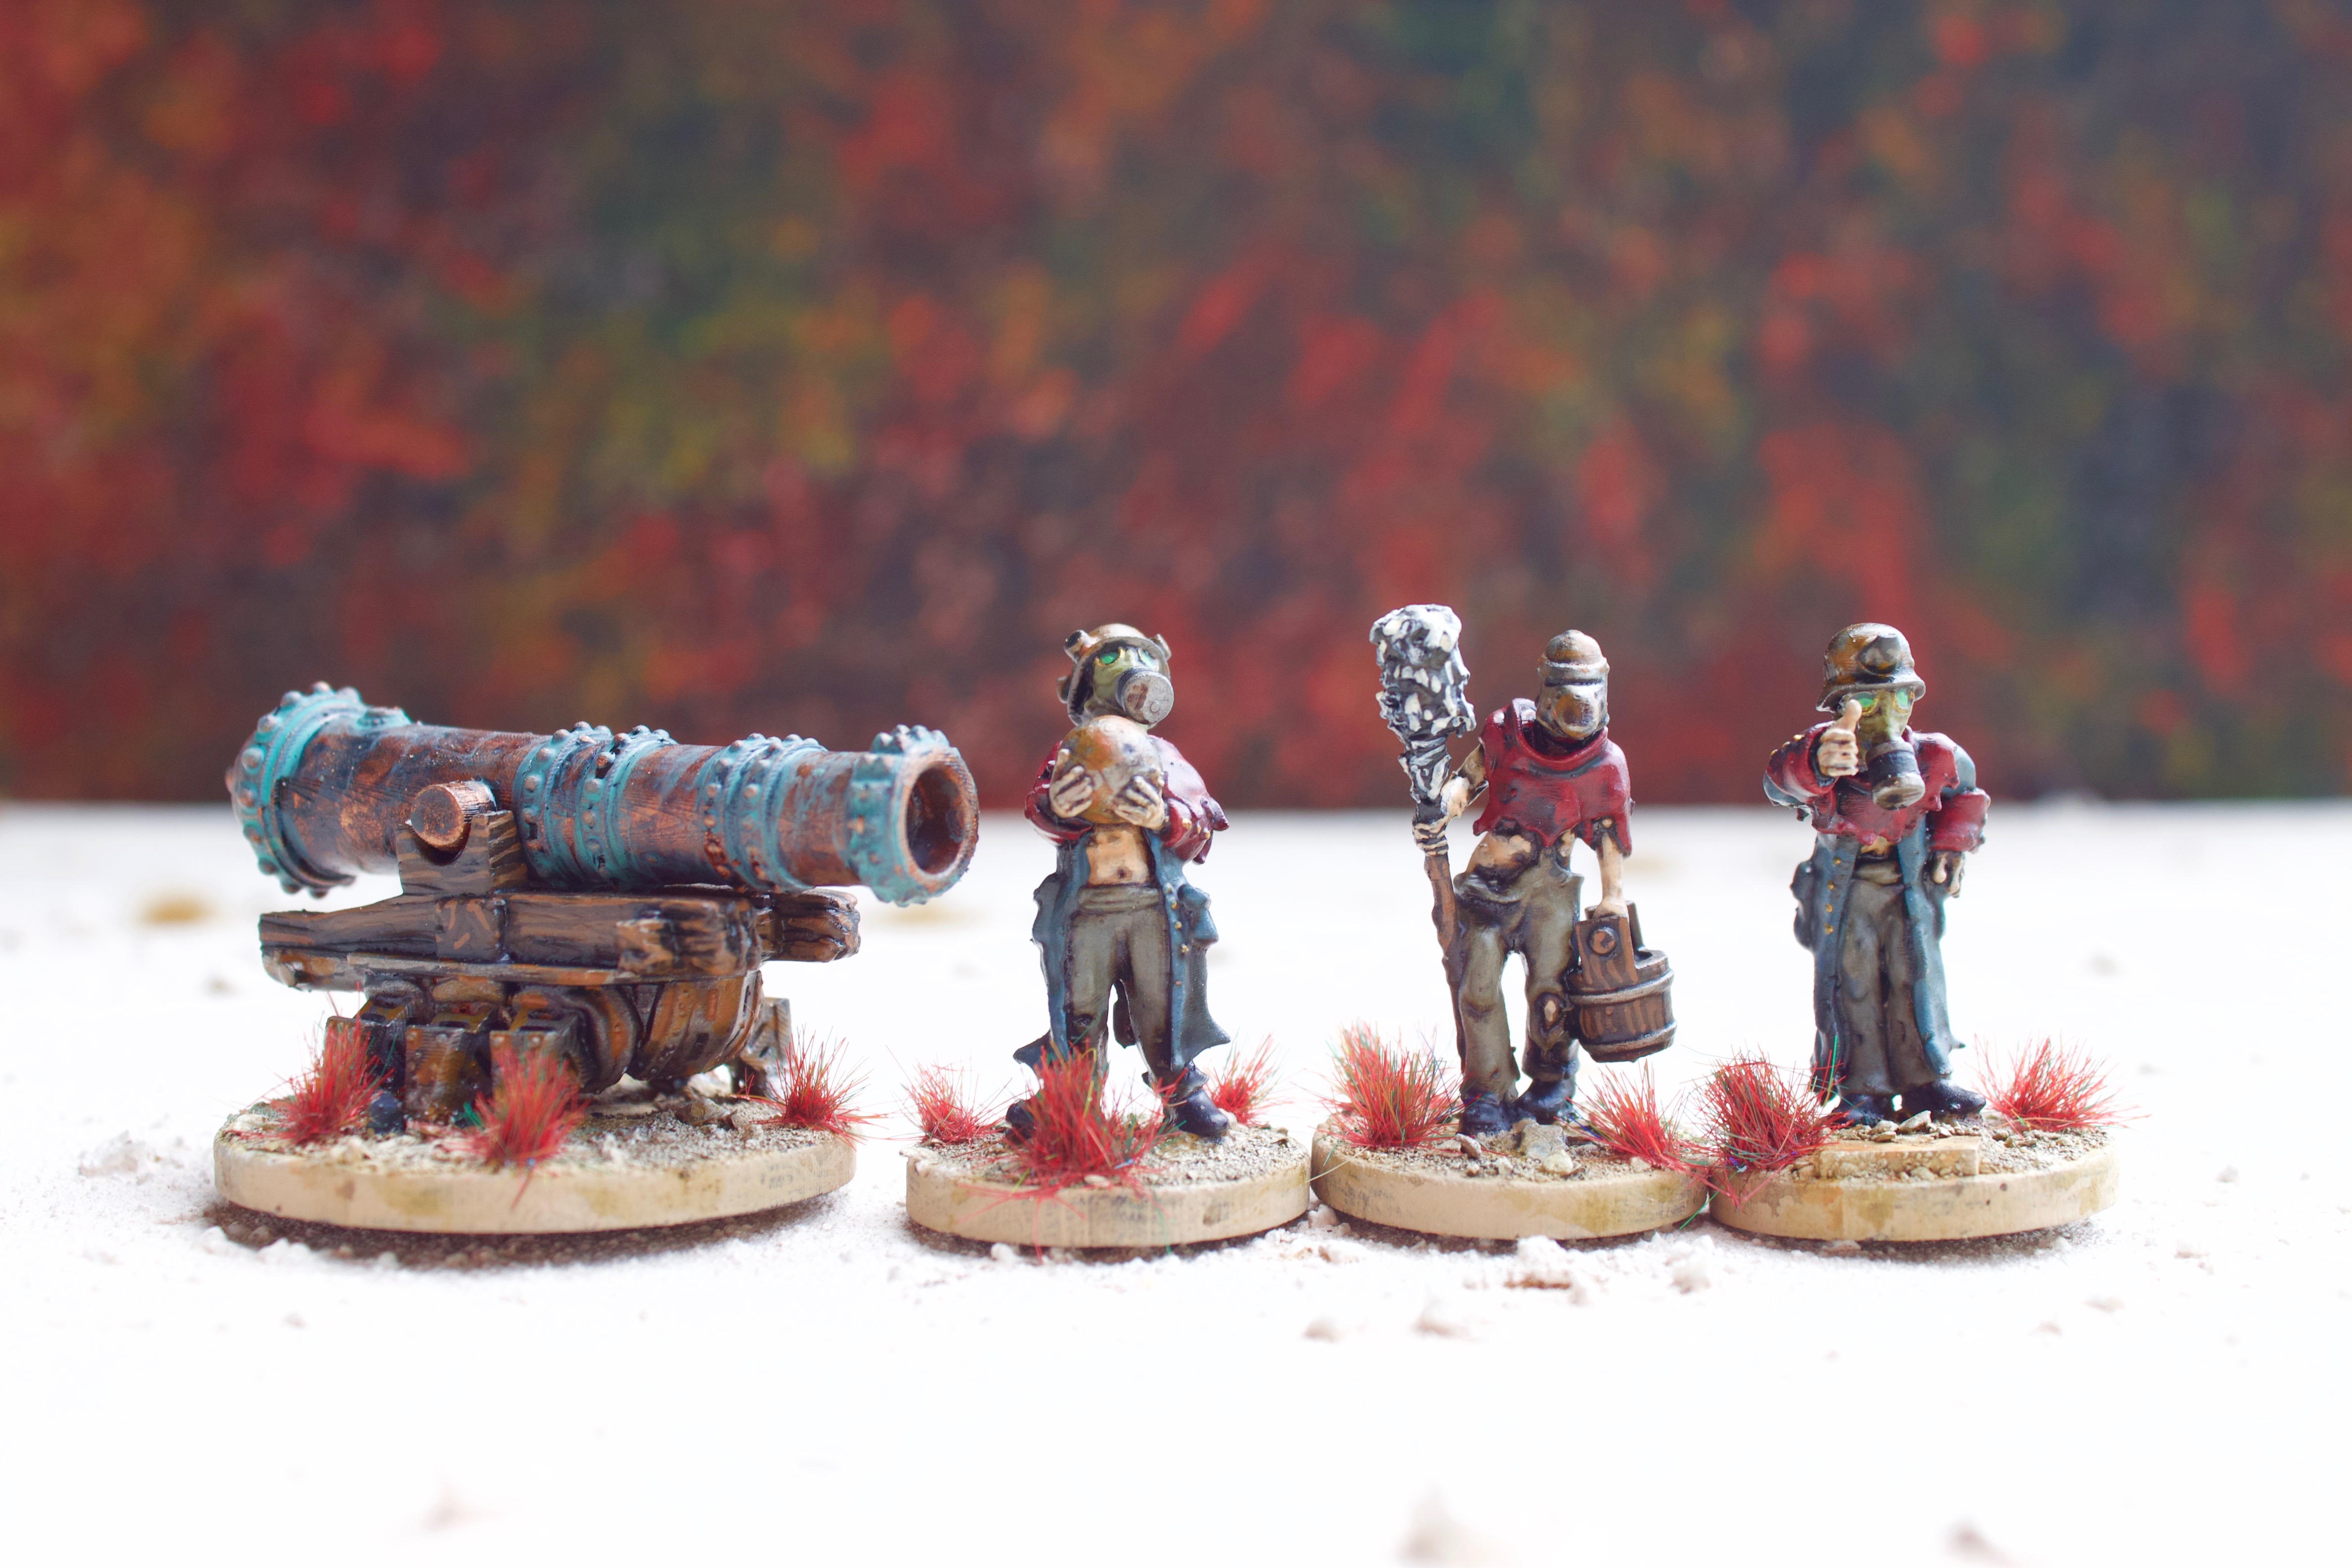
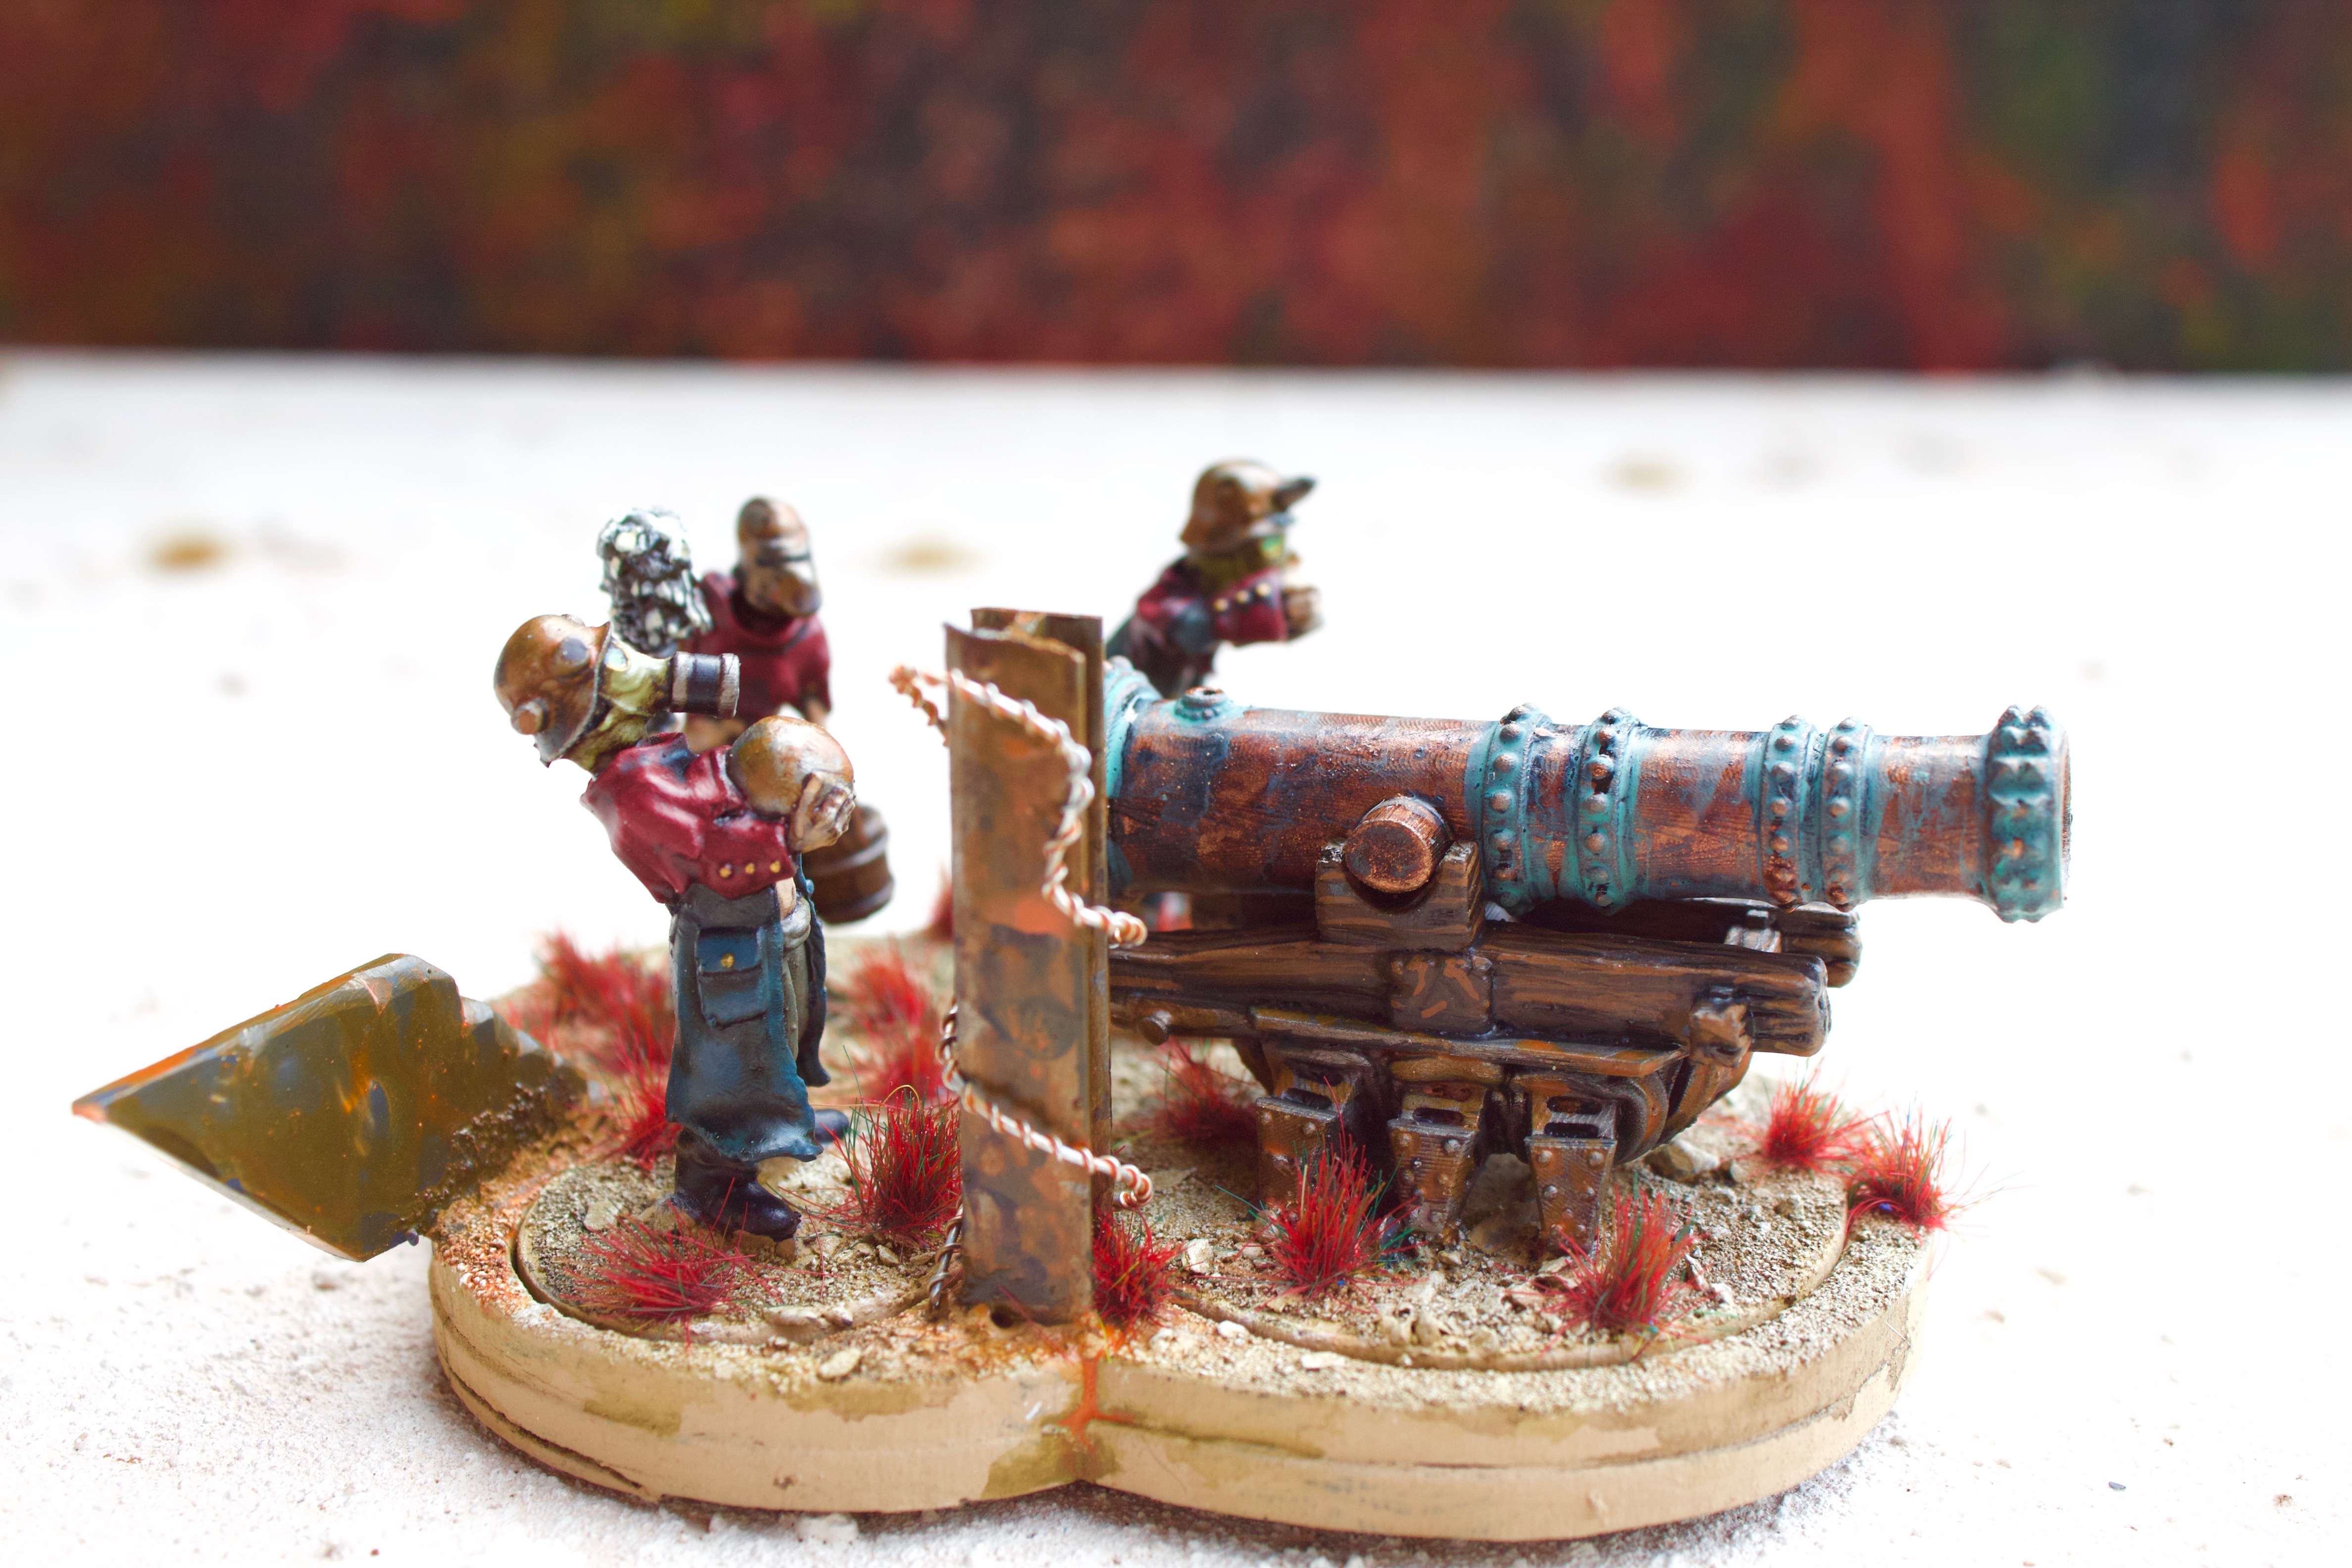
This is a gun crew for my Traitor Guard. This is all from Knucklebones patreon.
I have been under the weather for a couple of weeks now but have been testing negative. Earlier this week Number One Son tested positive and I was still negative. Upto this point I had been the only family member to be free from the Rona.
Thursday night I had a bad night with breathing difficulties and a savage sore throat. Not to mention sweats and chills. Friday morning I tested again.
Arse
Got booked that afternoon for a drive thru which has confirmed that I am a positive person. Just waiting on the variant.
About two weeks ago, before this all kicked off, one of the Patreons I sub to posted this picture.
Image copyright Knucklebones Miniatures.
I saw this and had to have a variant of it. Knucklebones had made some scuttling bug-like legs for a previous model. I chopped them up in Meshmixer and cut’n’pasted the bits to extend them. With this I lasercut some bits to make two open troop carriers. I’ll show them in a later post.
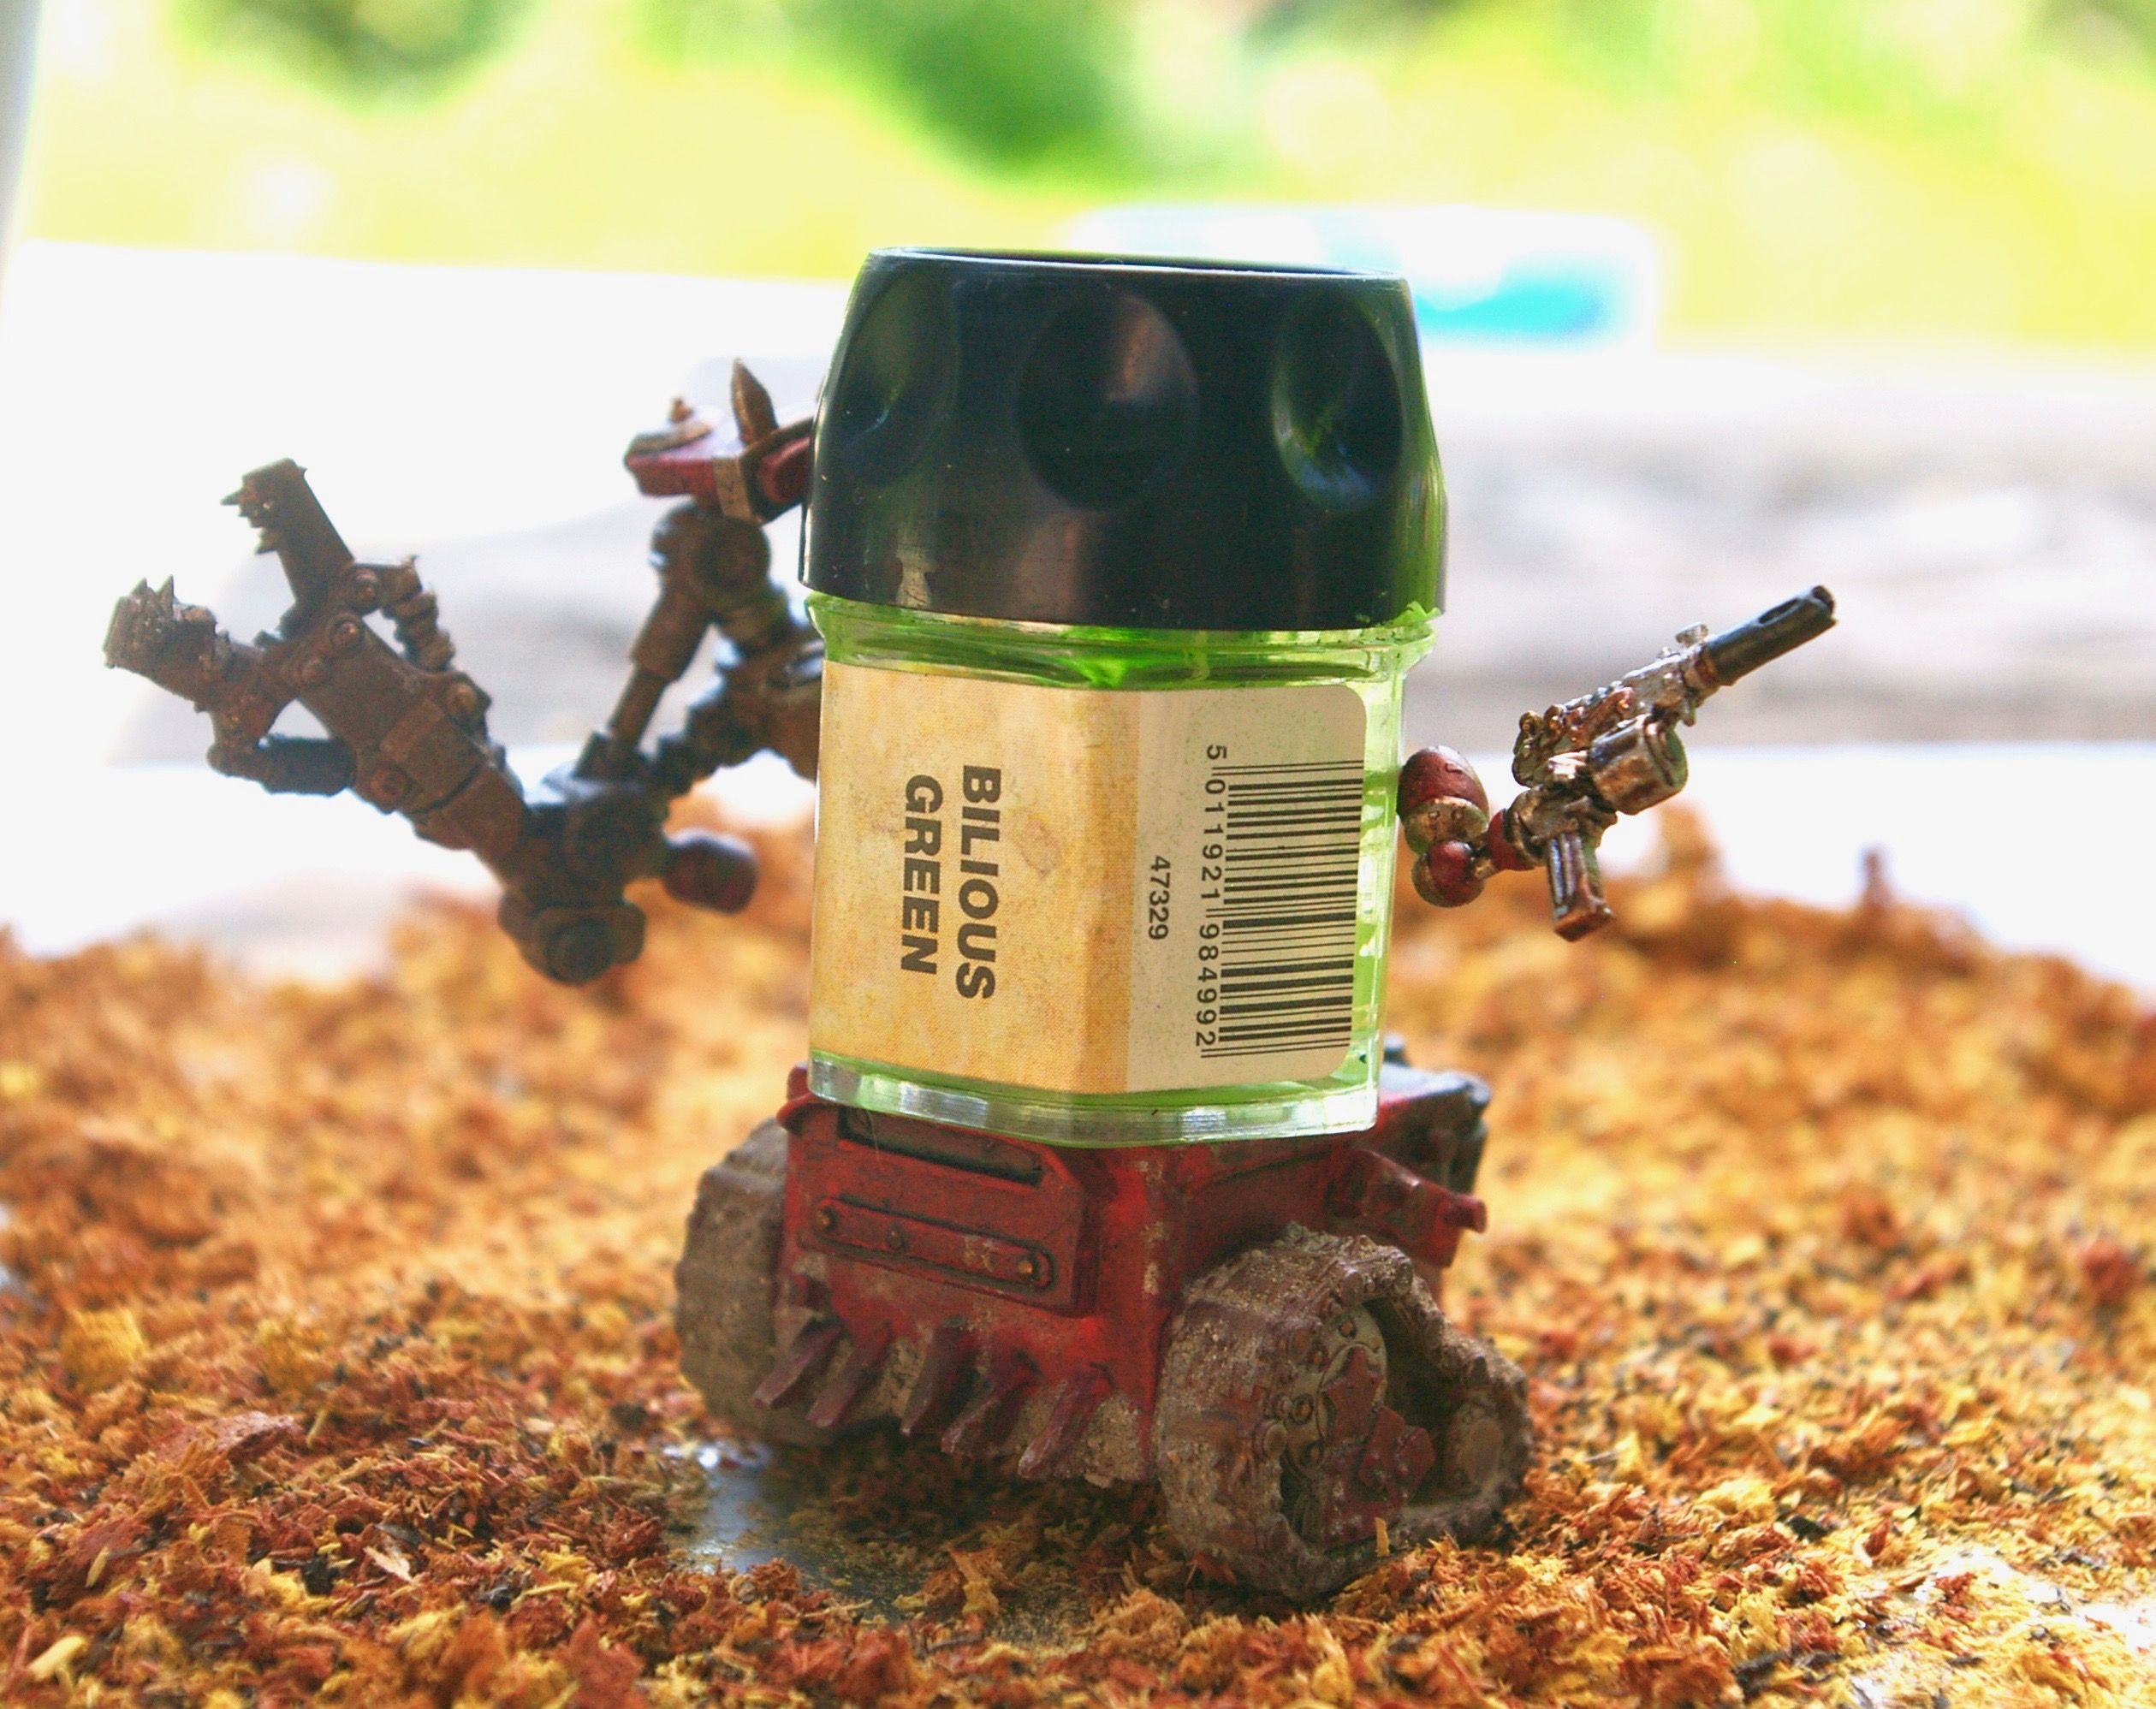
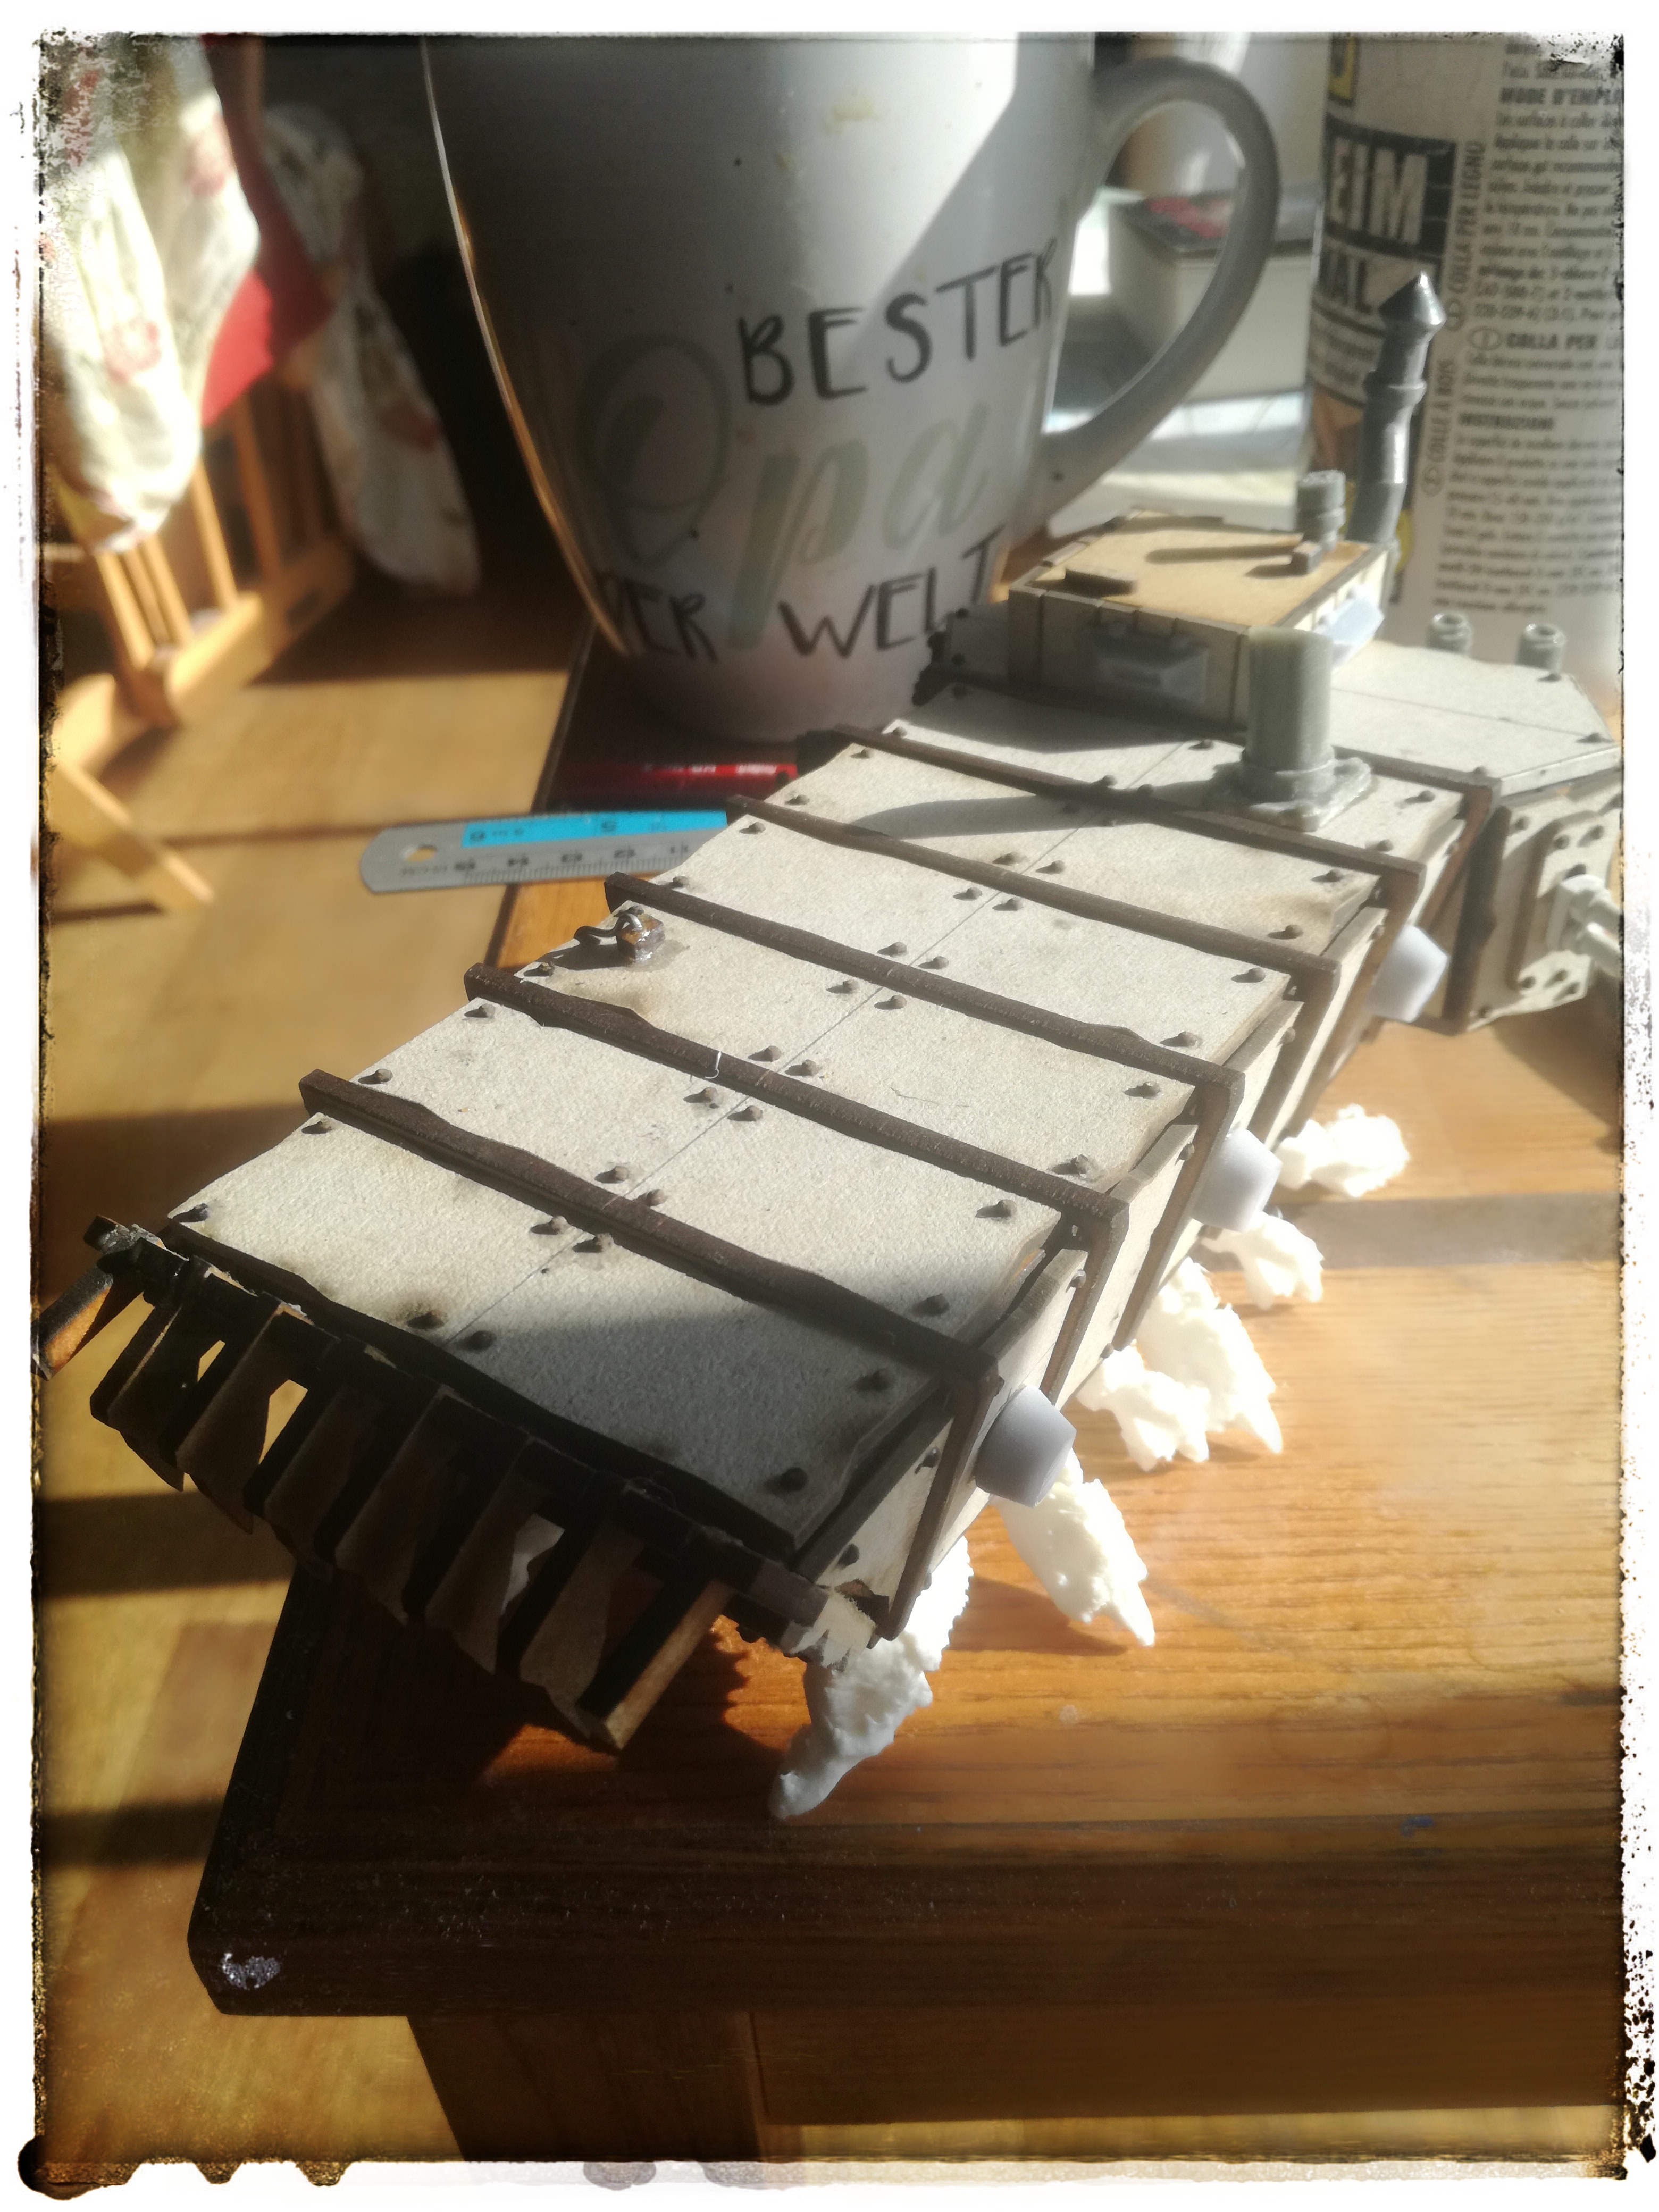
That idea lead on to me thinking about about an armoured variant. More parts were lasercut then Papa Nurgle visited. Not really having the strength or motivation I pottered a bit each day making it.
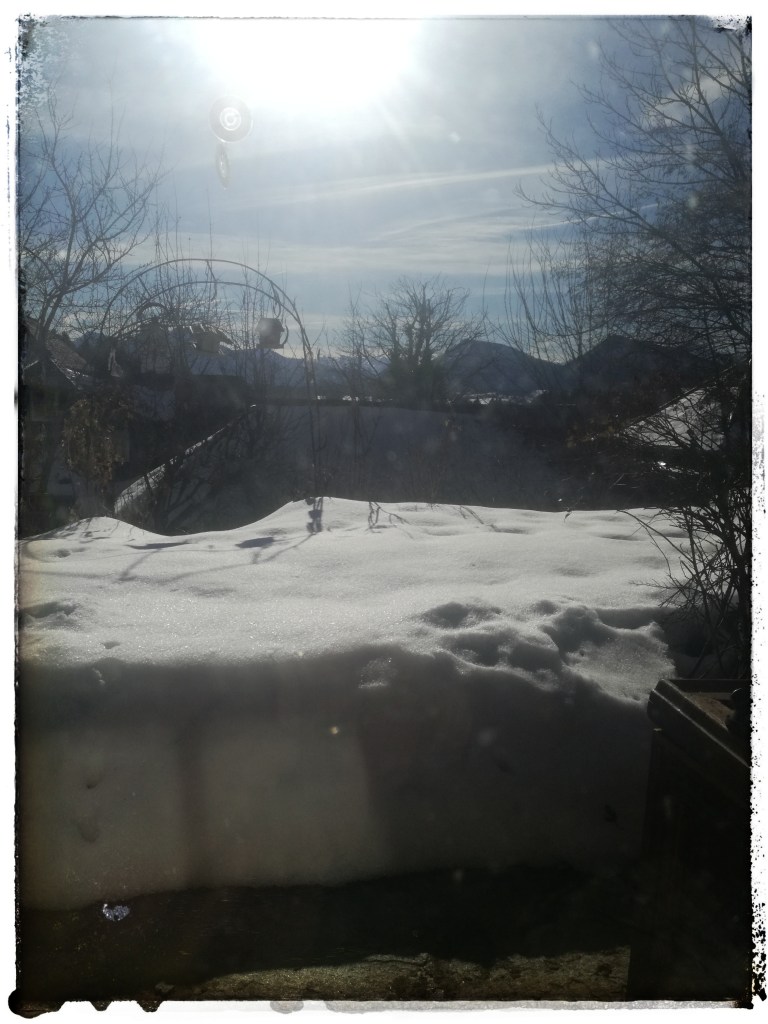
My little spot in the sunMy view
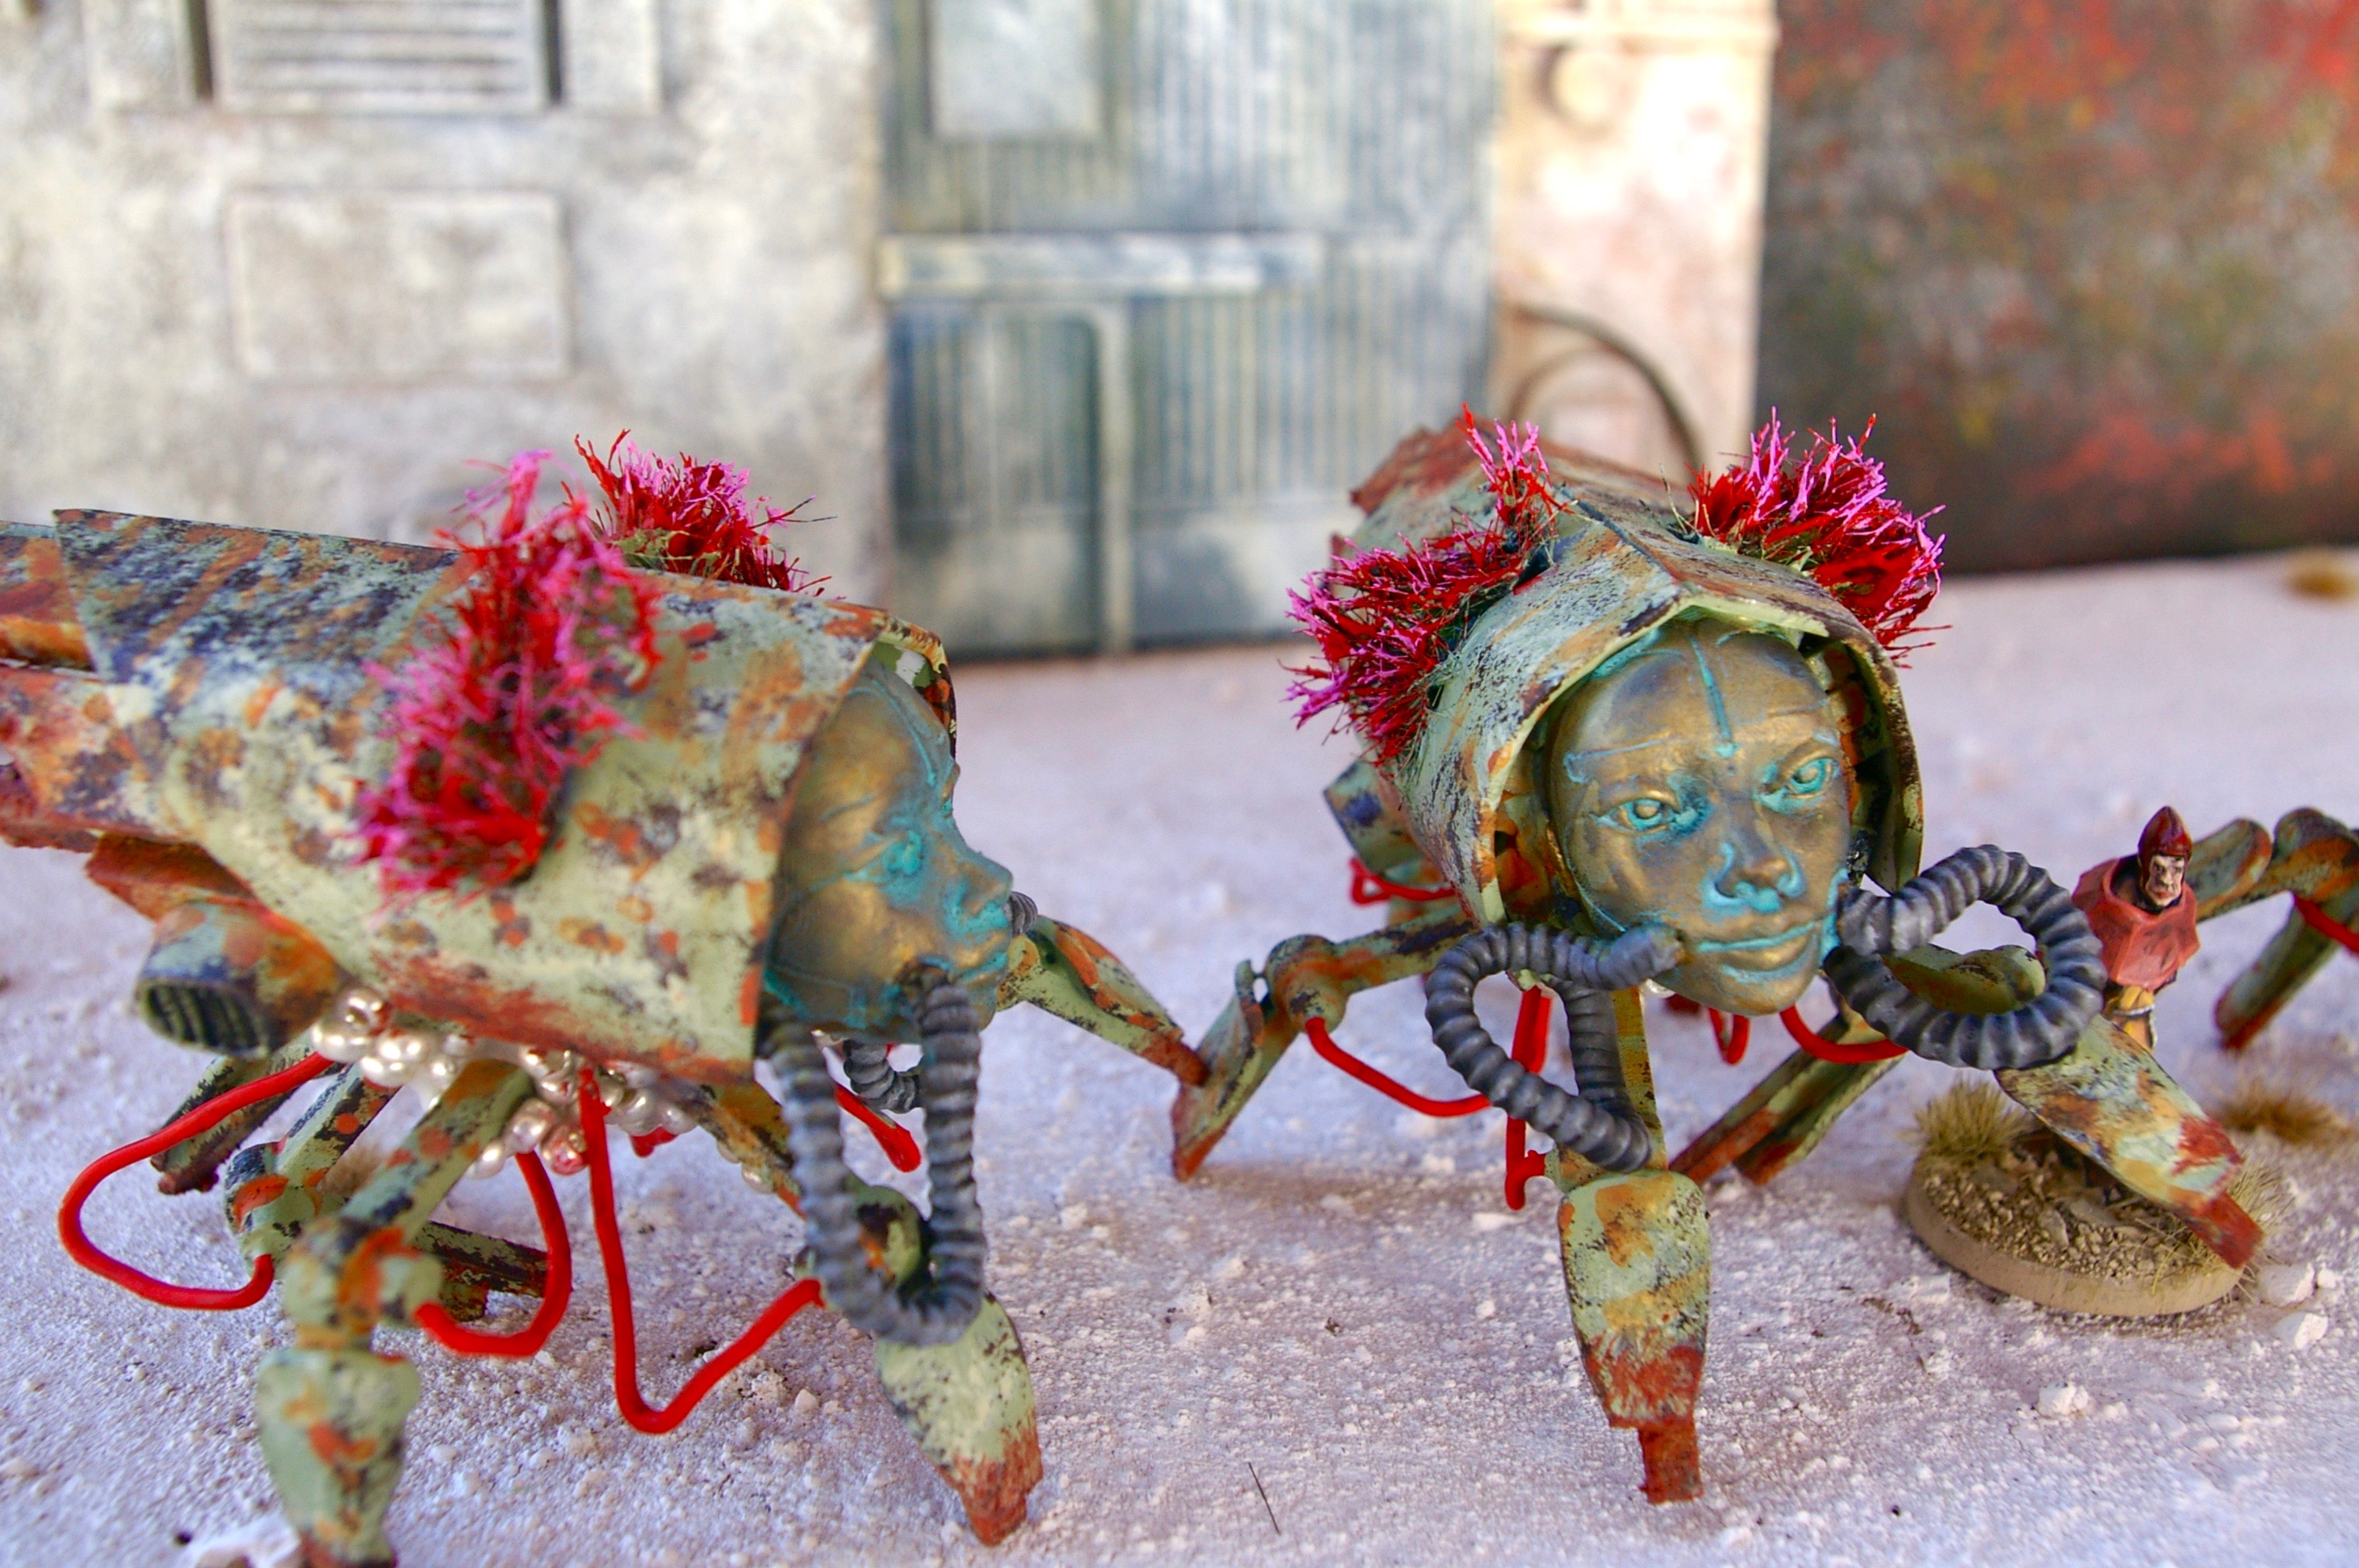
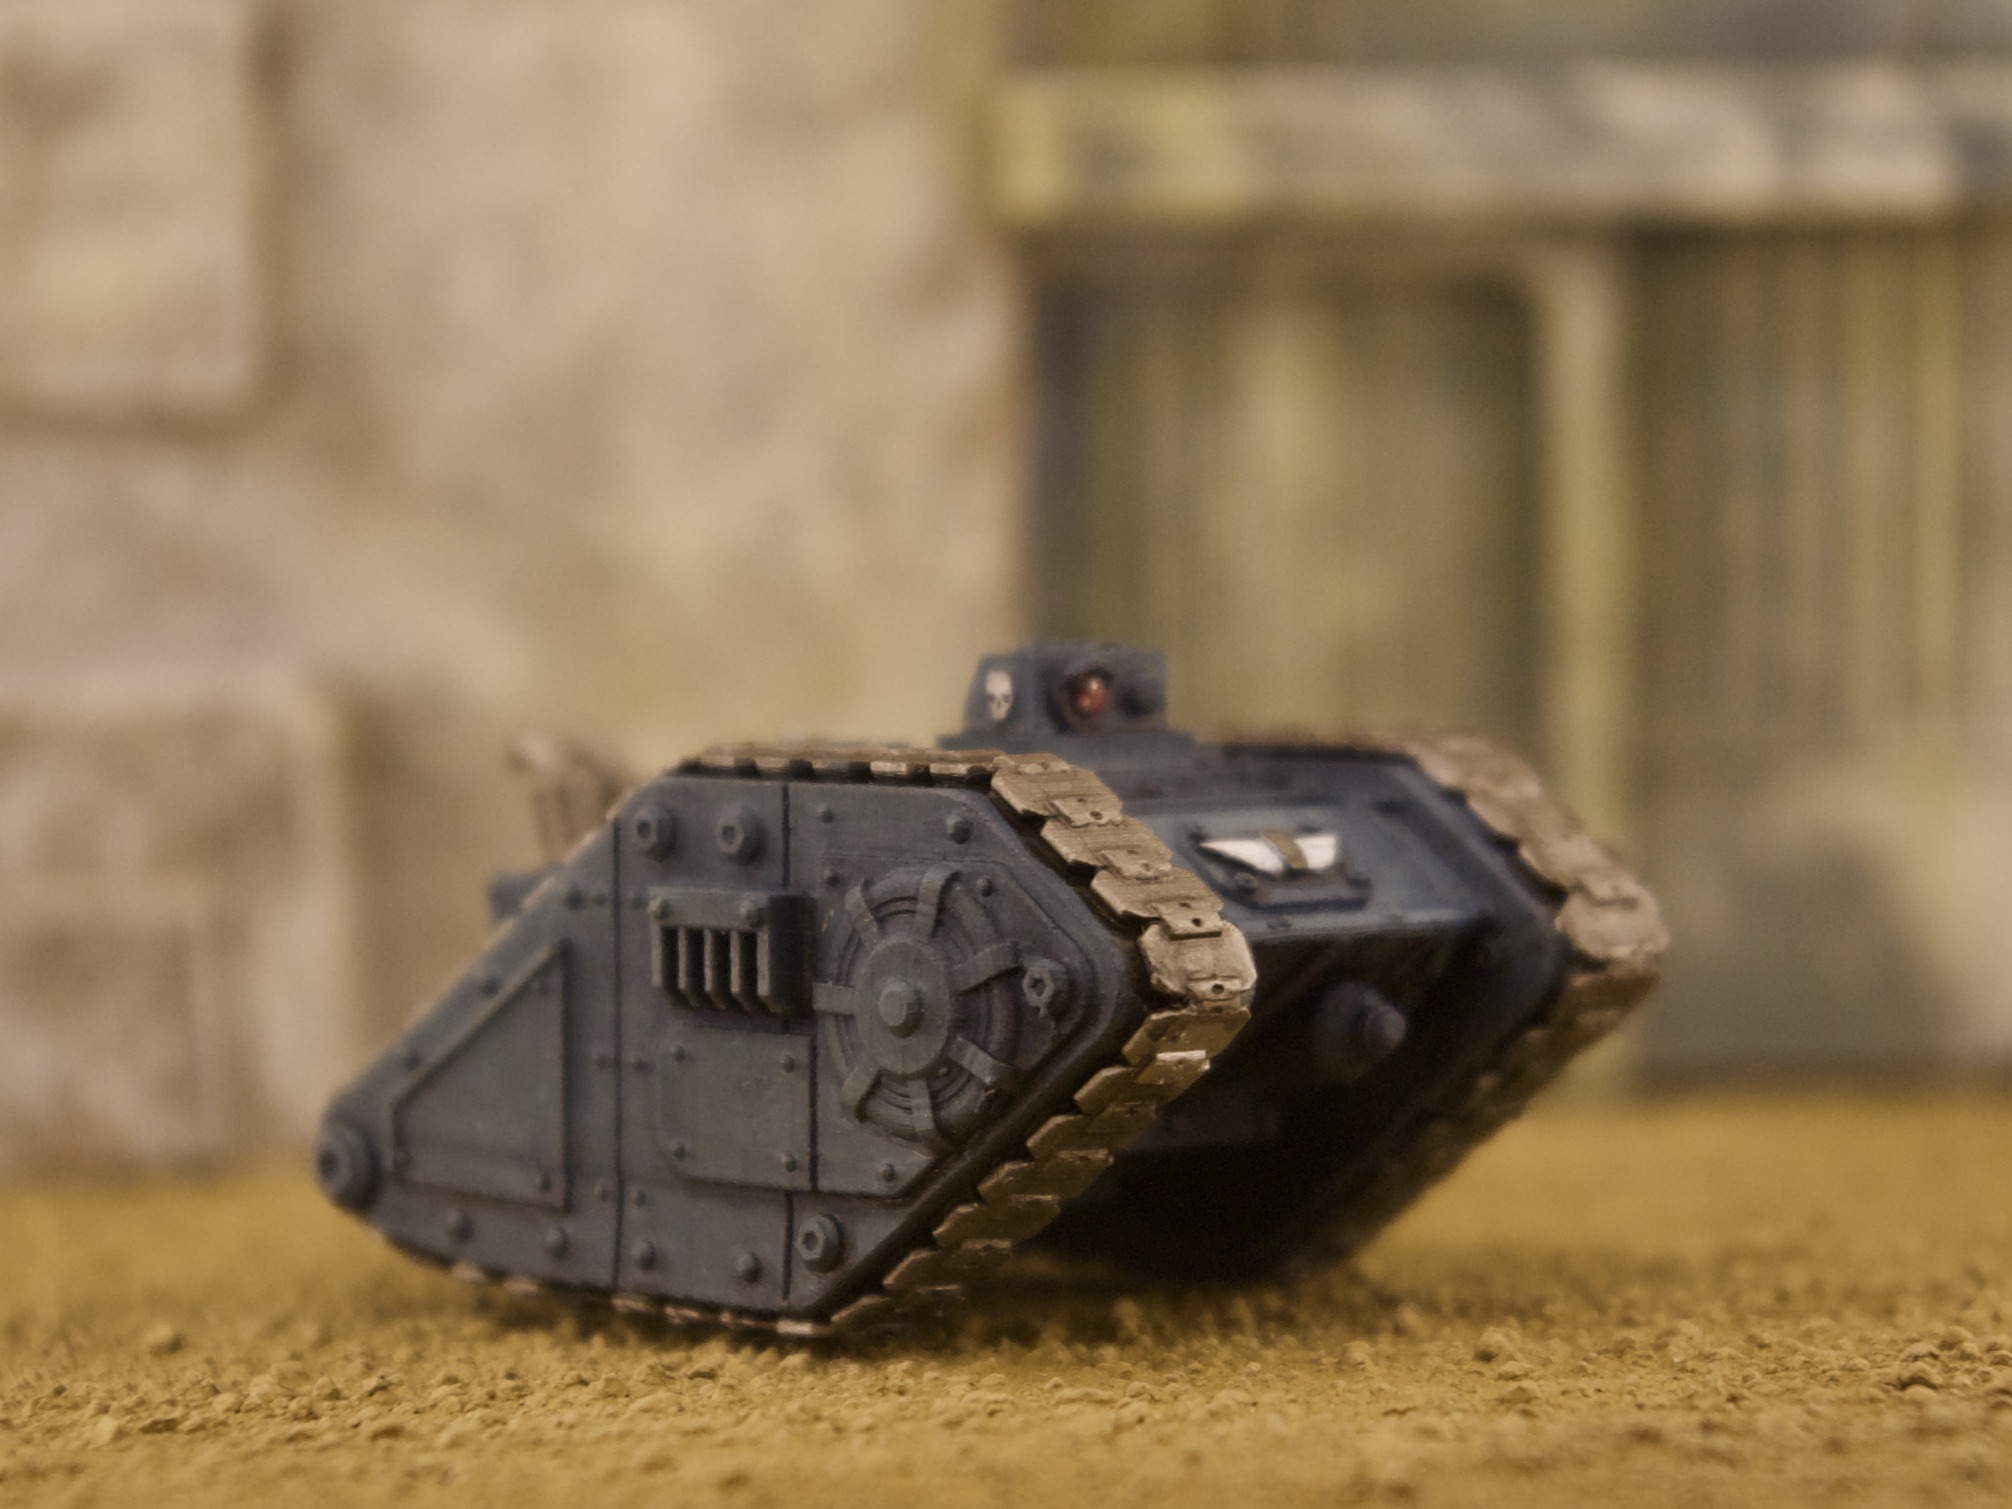
This is the result
The main body is lasercut mdf and card. Bolts are lasercut card. There are resin greebles from Ramshackle Games and 3d printed ones from Knucklebones. The legs are 3d printed and are derived from Knucklebones.
Due to computer malfunction I kind of lost track where I have been in painting. I will try and amend this by hijacking my Son’s computer.
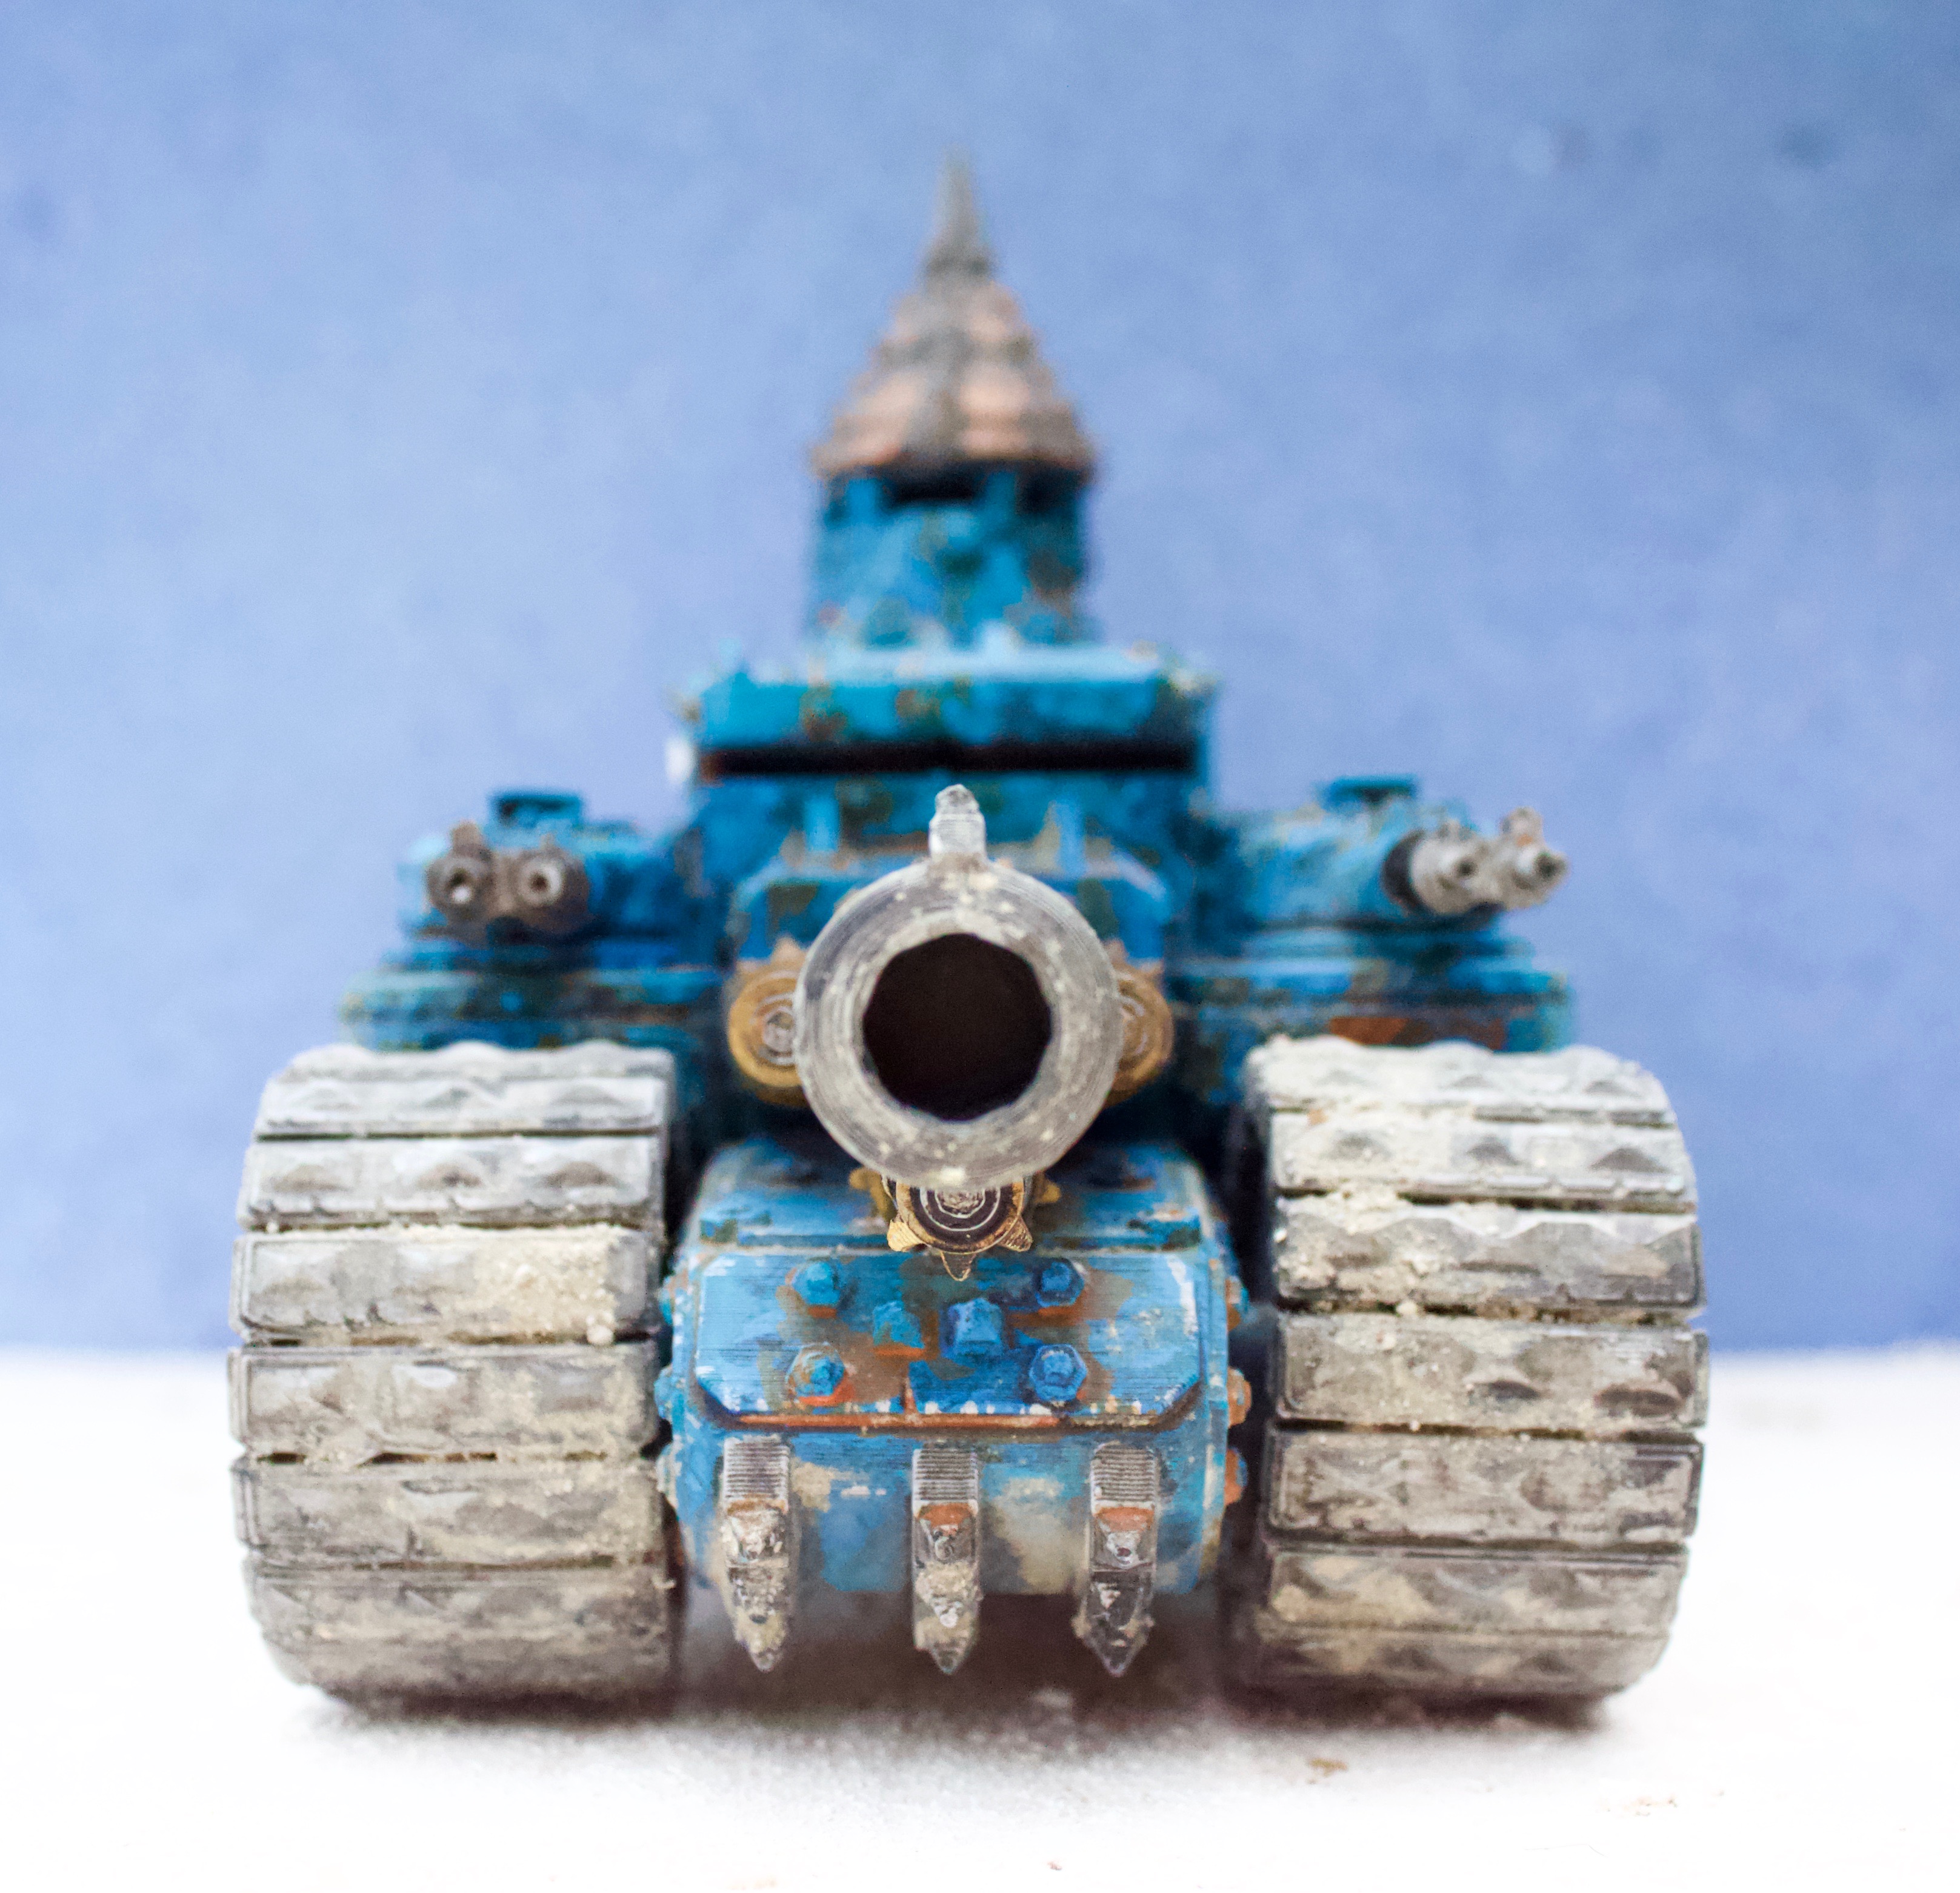
Lungbursta, inspired by plans from White Dwarf. Back in the day when we were encouraged by G`Dub to make our own stuff. Laser cut body and tracks from Ramshackle Games.
Gobsmasha, again from plans in White Dwarf. All laser cut parts.
Cyclops Demolition Tank. 3D printed from files gathered from a Friendface group.
Troop carrier 3D printed from The Makers Cult.
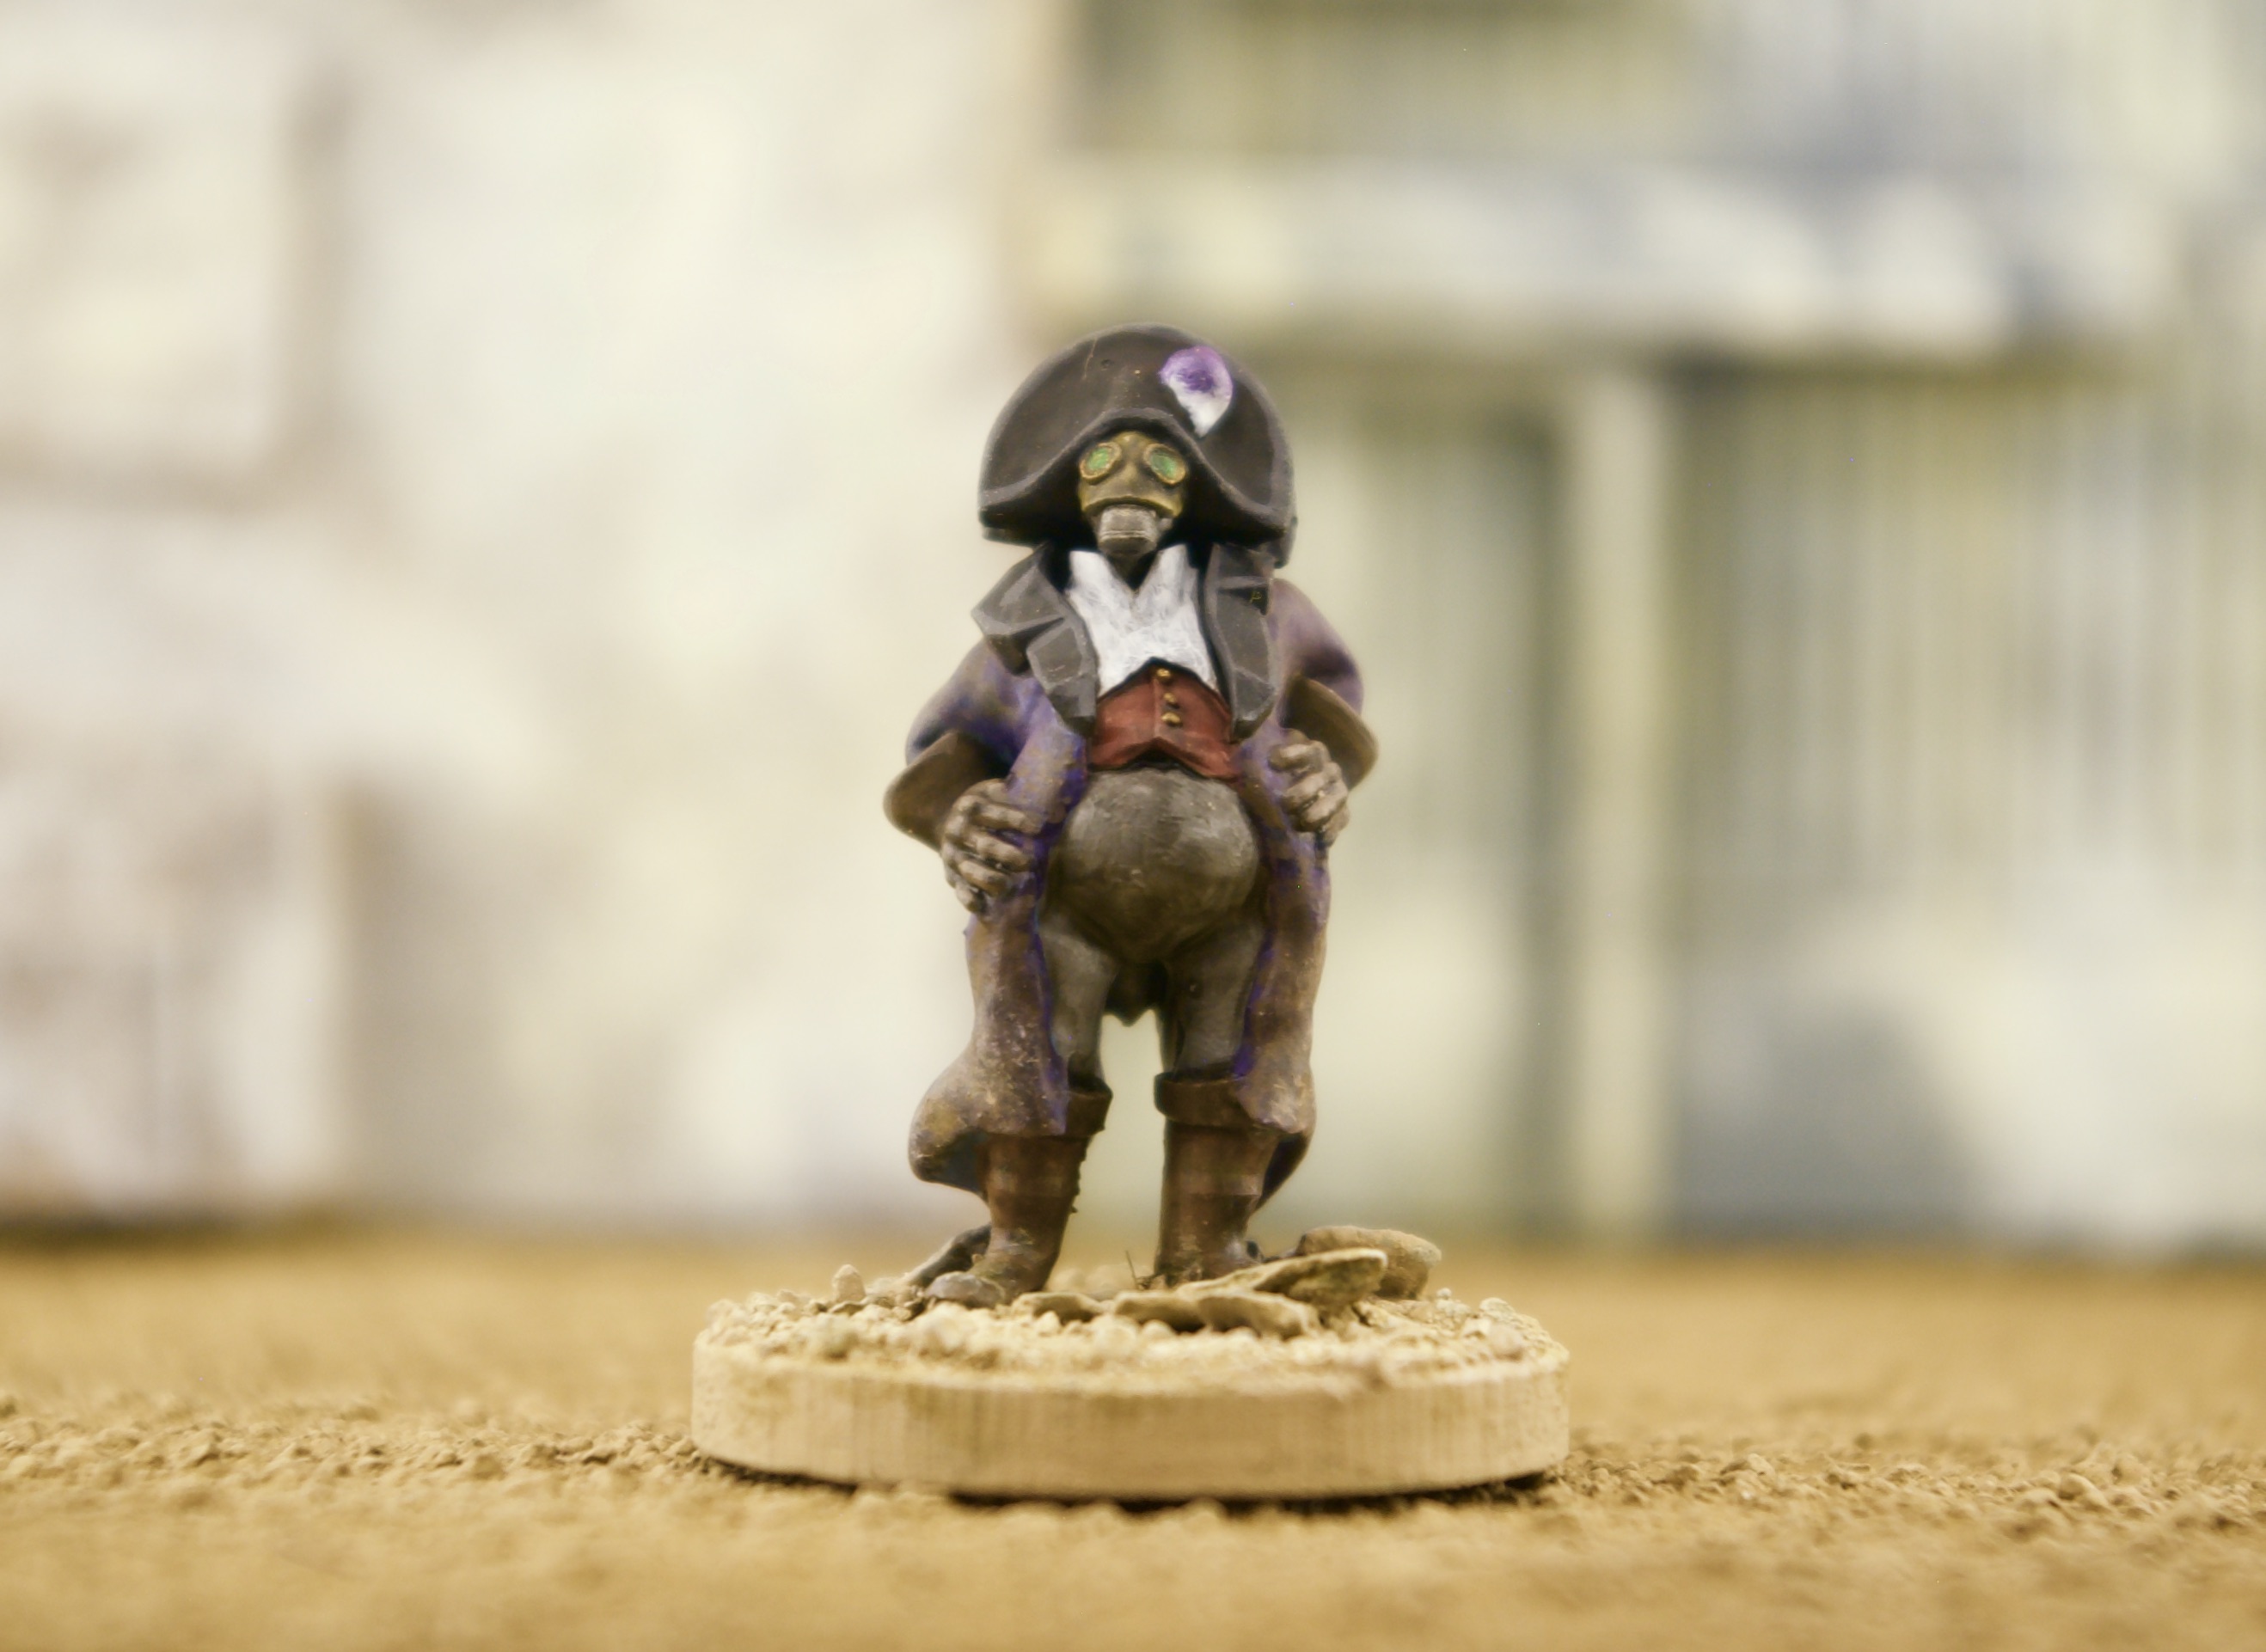
Sci Fi civilian 3d printed from files by Knucklebones Miniatures.
Sci Fi/Fantasy Librarian 3d printed from files by Knucklebones Miniatures.
Turnip 28 3d printed from files by Knucklebones Miniatures.
Isolation, over here in Austria, has eased. There have been no new infections in Salzburg. For us it has been rather lovely. The only fly in the ointment has been trying to get the Boys to do school work.
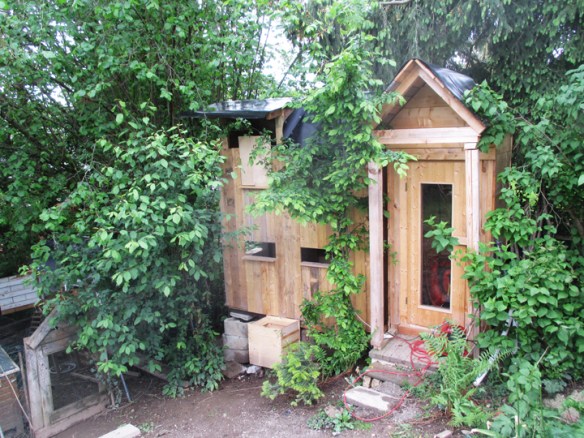
I have been painting and crafting away. I did make for my Boys a hideaway.
You can just about see it, dead centre to the left of my shed. Two storeys, each level being about 2m long, 1m wide and 1m high. The Boys love it and have been sleeping in it even when it snowed!
I have been cracking on with the 2020 Painting Challenge and have managed to do this years quota. This means I can relax a little and try and tackle some bigger projects. Heresy Dragon? Here is the progress roughly in order.
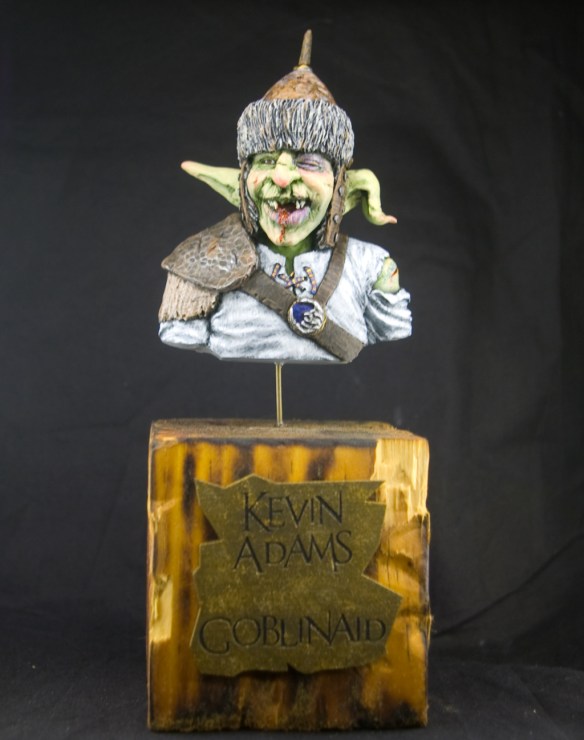
The German WW2 UFOFather Jack and the Hand of the EmperorThis was the bust produced for Goblinaid to support Kevin Adams after his assualt
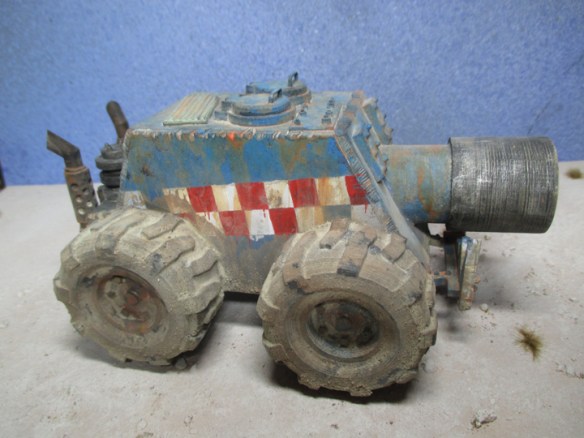
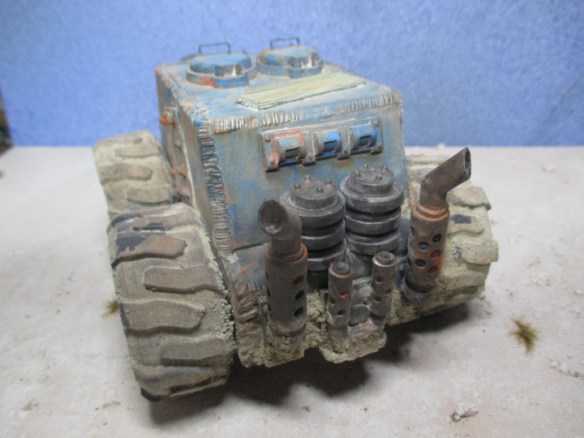
This was something I cobbled together. It is an old 40K Gobsmasha. I had 3D printed the wheels and gun barrel and then my printer went all spanner on me. So everything else, apart from the exhausts (from Ramshackle Games) was laser cut.
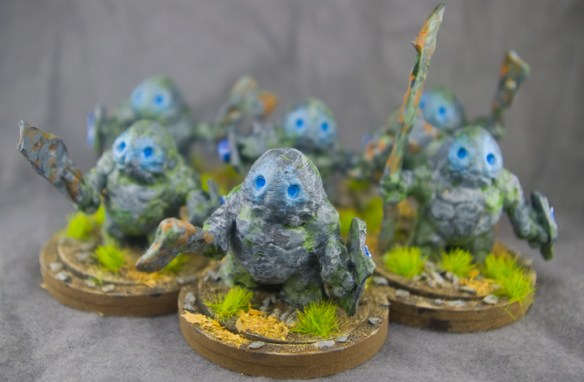
Earth Elemental for Dragon Rampant
These last two are also for my Earth Elemental Army used in Dragon Rampant. They are from Thingiverse and designed by DutchMogul. 3D printed by me.
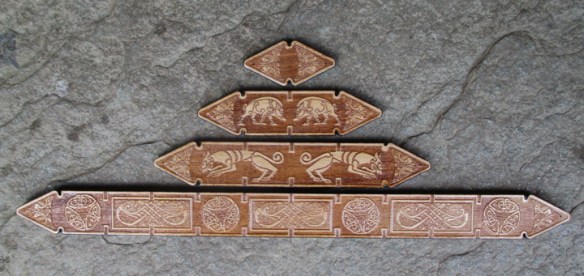
Here are some Saga Measuring sticks. Another game that looks interesting but I will never end up playing.
I have some more bits of crafting to post which I’ll do as soon as I photograph them.
You may remember a couple of posts back where I was getting excited about a Kickstarter from Grenzer Games. Some rather nice looking 15mm Romans. Not that I needed them. This project has been postponed. Here is why in their own words.
Never Defeated!
After a long discussion this week at Grenzer HQ we have sadly decided to cancel the project at this time, BUT, we will be back with an updated, new and shiny campaign, in 30 days. This time frame is an approximation due to the Corona virus situation in China, which has had an impact on the country’s industrial efficiency.
We have listened to what everyone has said in the comments, here and in forums and blogs, and are readdressing the campaign with your suggestions in mind. We are taking this time to address the overall production costs, which are quite honestly, killing us, and are the reason that the campaign funding goal and stretch goals were so high. So we’re gathering a new set of quotations that will help us achieve a product cost and funding goal that is a more manageable amount.
We are also coming back with some updated box content, and providing you guys with our fully fledged rule set At Lances Point, alongside the miniatures, which is what they are designed for. These will be available in a PNP (print and play) format from the Grenzer Games website – http://www.grenzergames.co.uk and look for the ALP page for more info.
The campaign page will stay open during this redevelopment time, so that we can still talk to you all, provide you with updates on what’s happening and listen to your feedback. We will also post a link to the print and play rule set so that you can download them, give them a try and tell us what you think.
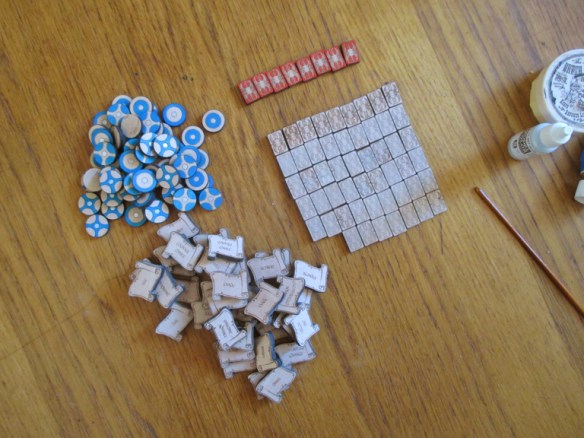
I had started preparations for the Romans by making some casualty makers and some order tokens.
I didn’t factor in how fiddly it is to paint the Roman shields
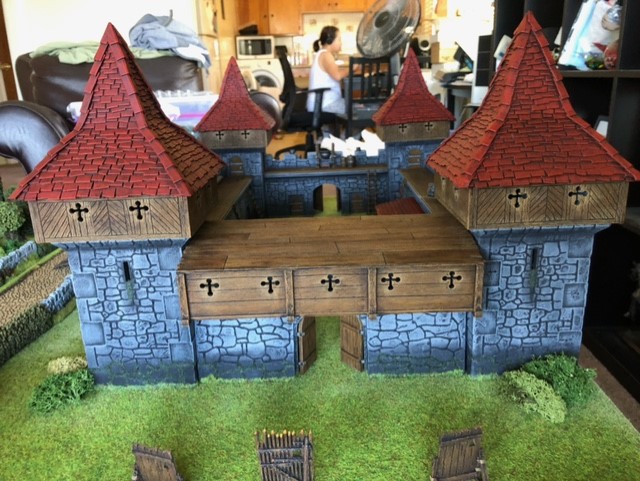
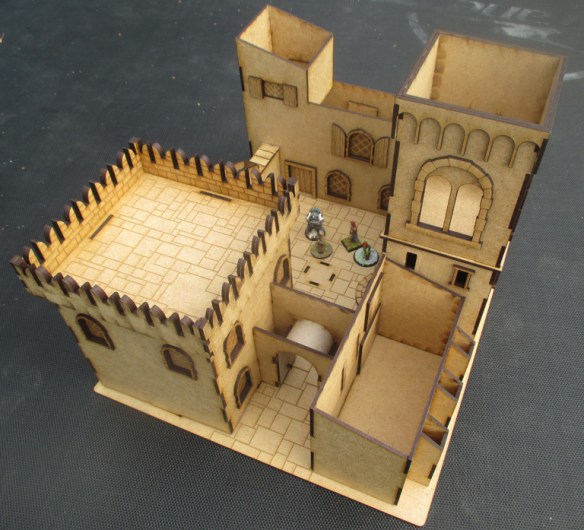
I kept coming back to this article and mulling over it. I really don’t have time to get distracted by another project but it was sooo tempting. Late one night I pulled out a piece of paper and started doodling. The next day some graph paper was procured. Too late! Project started!
As Mr. Bickley had produced his model from individual parts I decided to follow along and make mine in modules starting with the front gate.
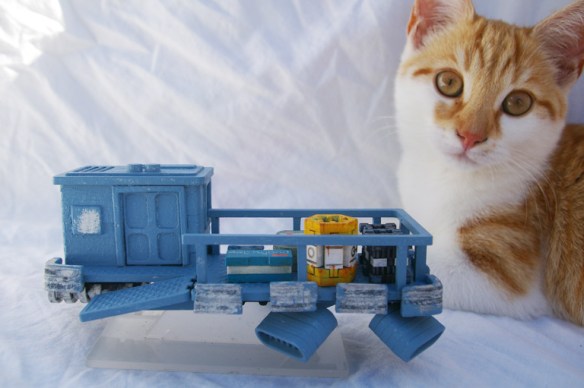
Upcock
Me being me, there have been a few upcocks in the design, but nothing that a hammer wouldn’t sort out.
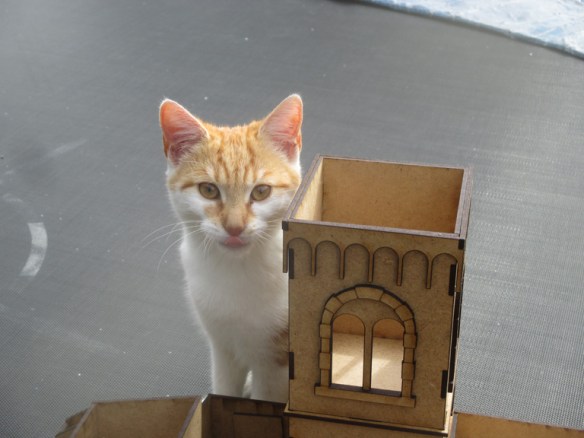
Obligatory kitten for scale
The original suppliers who inspired this build are:
This model was loosely inspired by a model I saw in the Trash Bash Bits group on Facebook. The original was made from a fly-swatter. It wasn’t quite what I had imagined but it sparked an idea.
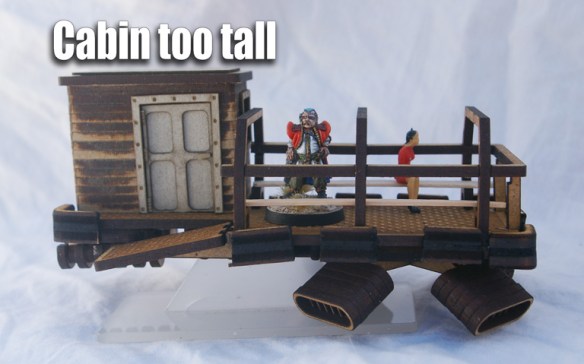
The first iteration looked like this.
Standing figure from Moonraker Miniatures and the seated figure is from a batch of “O” Guage model railway figures sourced from eBay.
There were some issues, some of which I addressed in the next iteration.
The next iteration was like this.
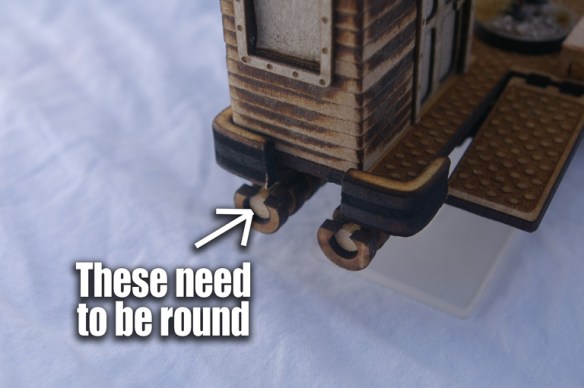
Correction required.
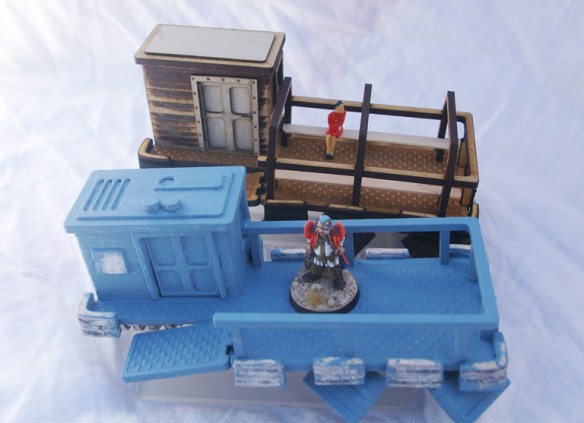
Comparison shot of the two. You can see I have added some extra detailing to the cabin roof.
Iteration two with cargo and kitten for scale.
Iteration three will elimate these issues and hopefully be the final model.
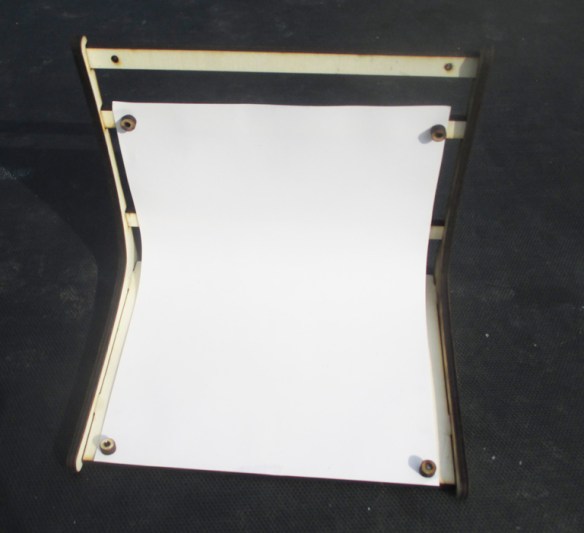
Tired of taping bits of paper to books in order to photograph figures I made a thing.
It is big enough to hold a piece of A4 paper and the paper is held in place with magnets. There is not much more I can say about this. Once I’ve painted more things you will be able to see how useful it is.
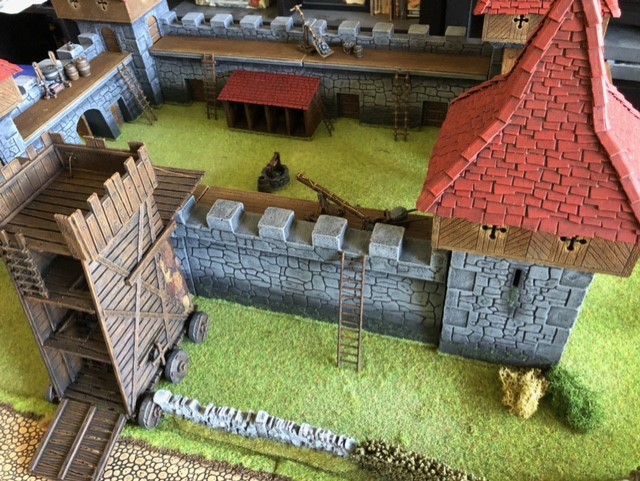
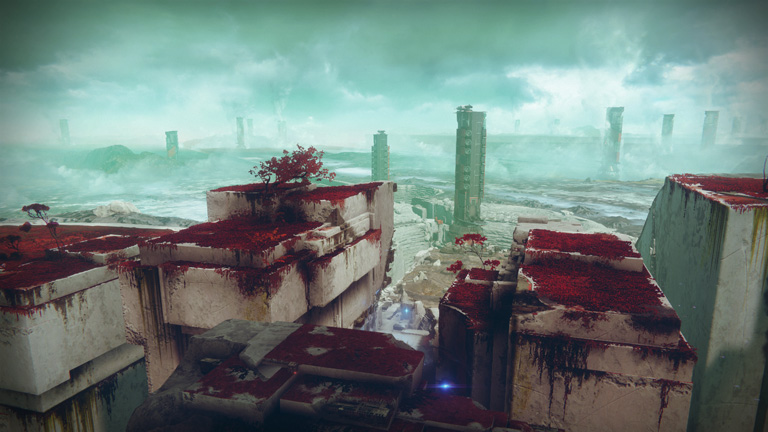
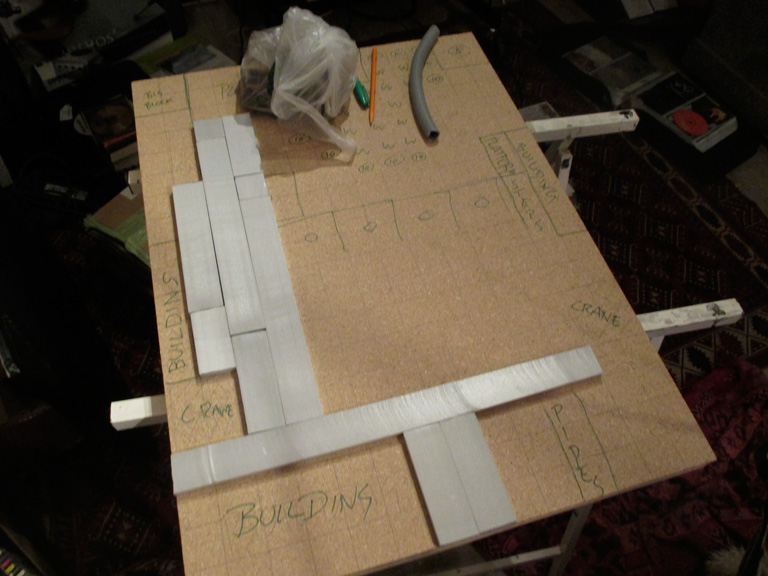
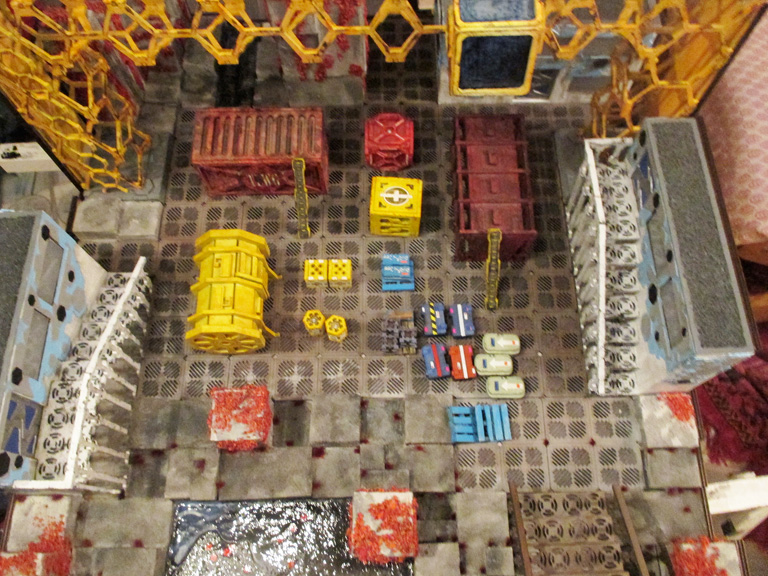
This is the second board that I made for the Tabletop Knights gaming day. My kind Daughter gave me a copy of Destiny 2 when she gifted me her old PS4. One of the worlds you visit is Nessus.
This is not my image and it is used without permission
I fell in love with the visuals and wanted to recreate them. In the small space of a Kill Team board I wouldn’t be able to do it justice, but maybe I could give a taste.
First up was to make flocking, My local DIY store gave me a small piece of pure white foam and the poundshop provided cheap paint to colour it.
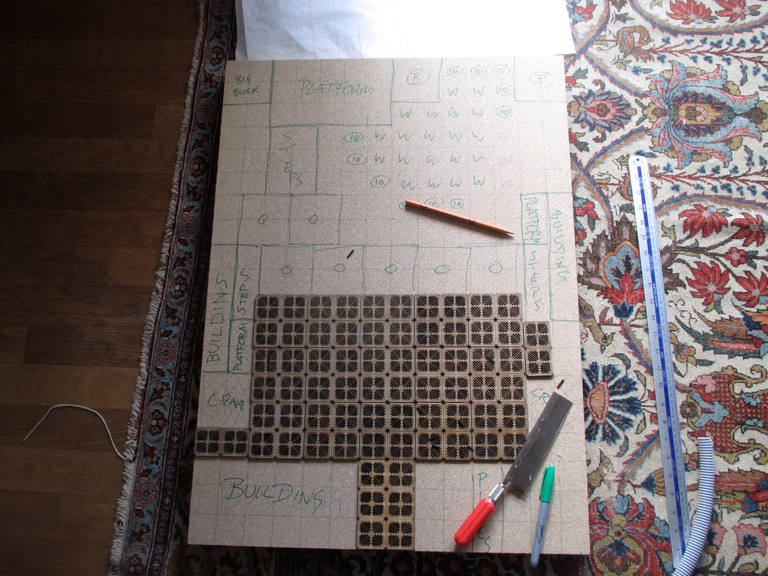
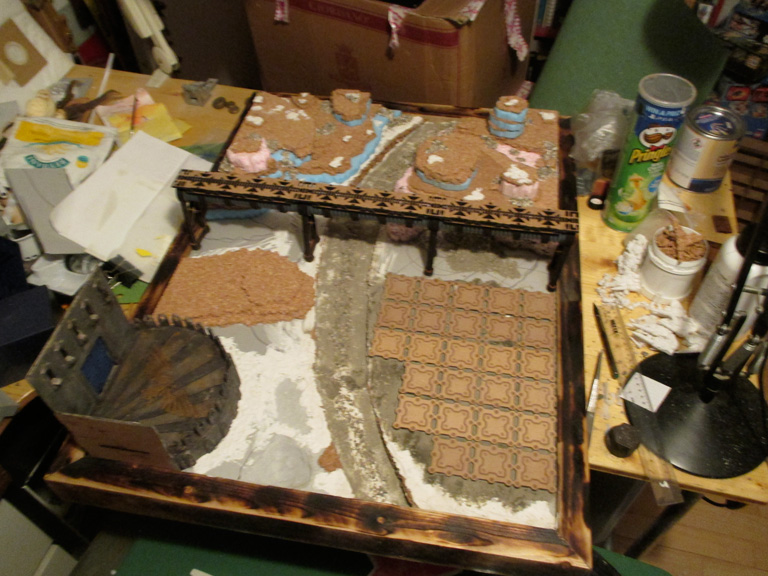
Planning out the board
Laying down 10mm of foam under the “metal” floor plates. I wanted them raised so there was some variations in the floor level.
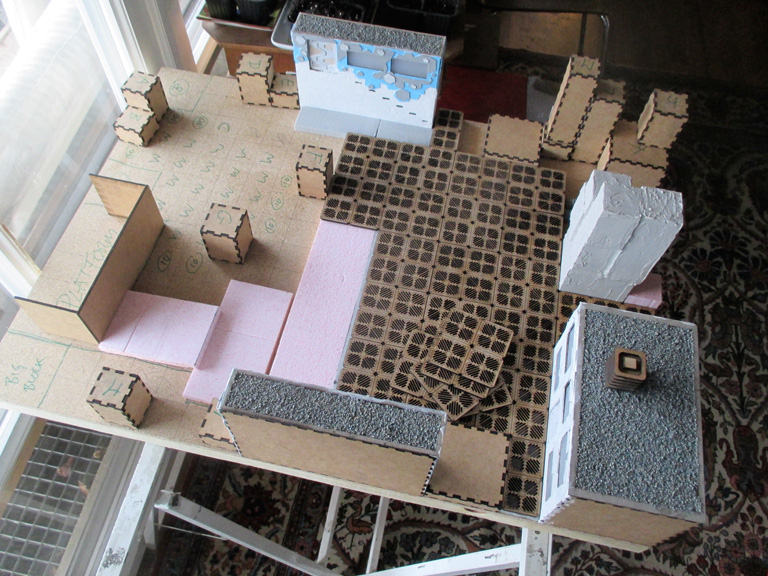
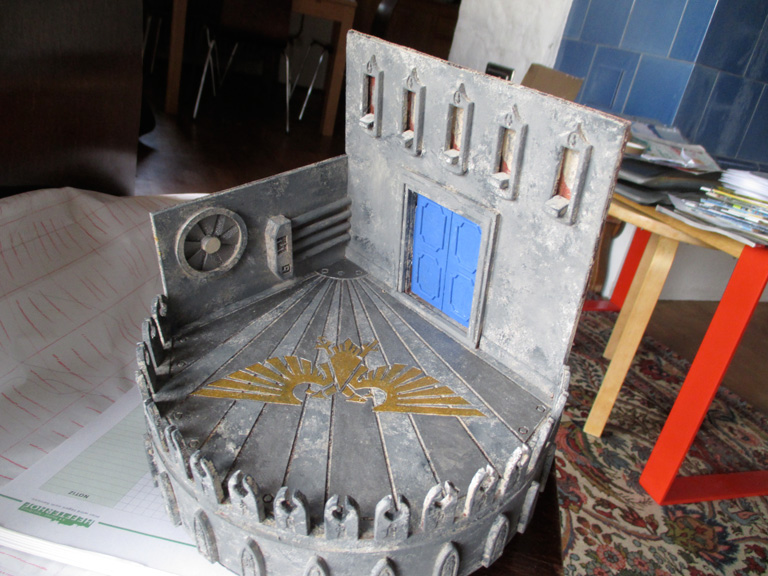
The buildings
Adding the sides for extra strength.
Glueing parts into position
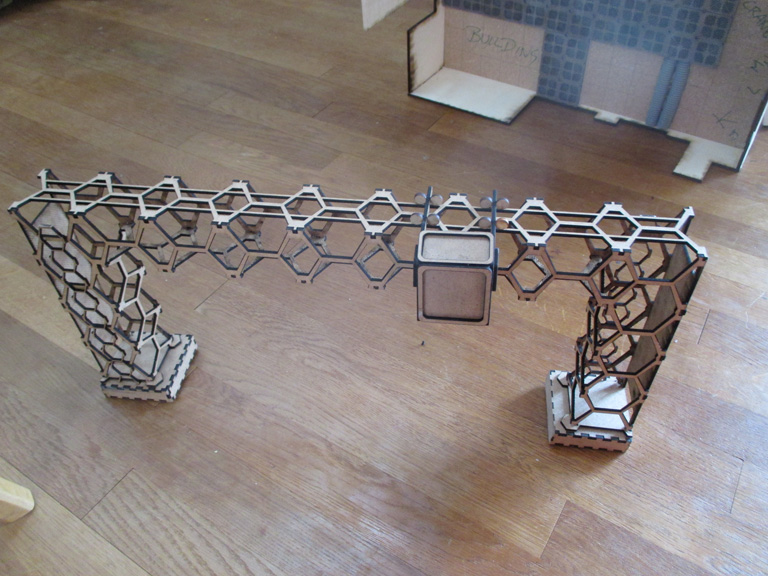
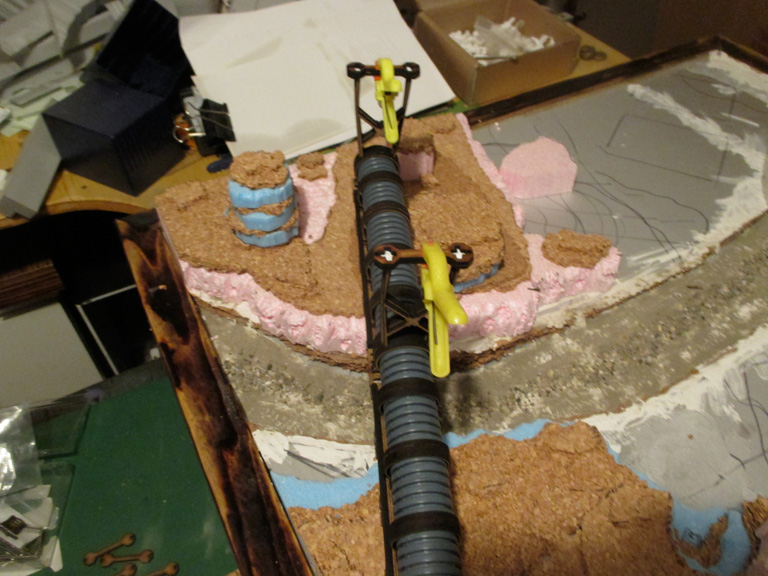
The crane
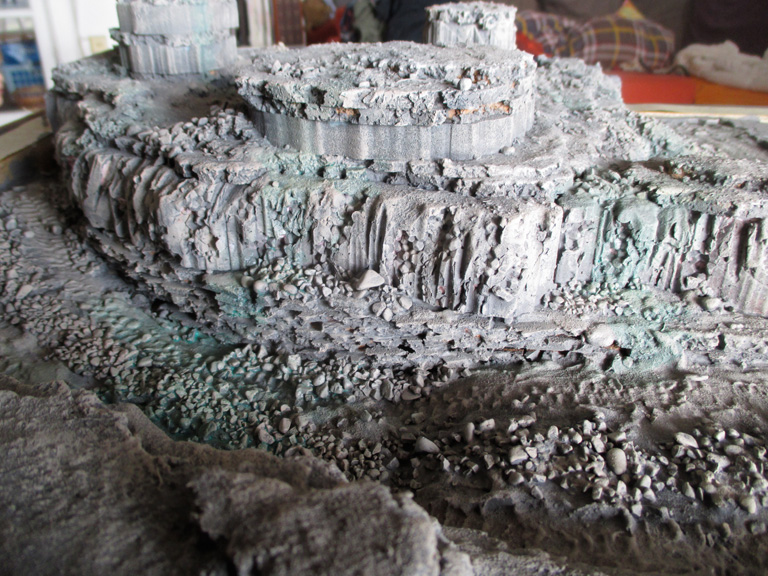
Adding colour and weathering.
More details.
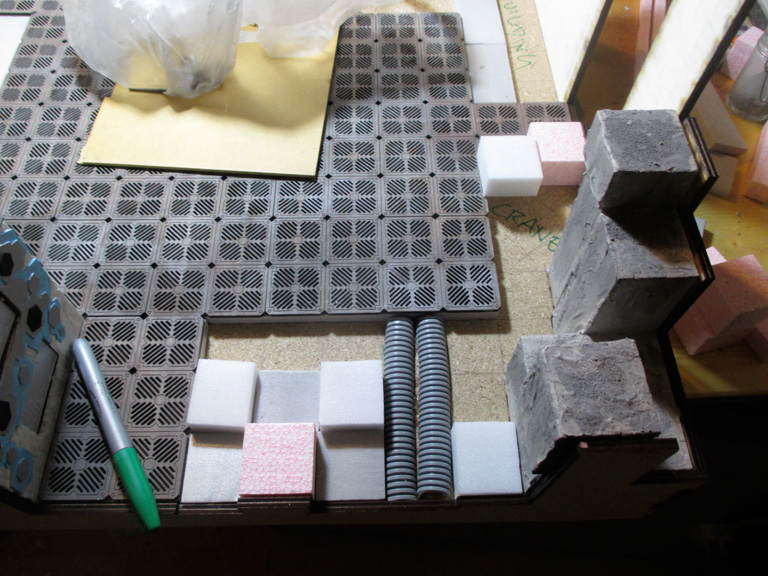
Some of the columns in place with vegetation.
Set dressing.
Over all I wasn’t so happy with this board. There were a few tiny mistakes. I didn’t like the colour scheme on the buildings. I would have approached it differently next time. I have no idea where I am going to store it now. I did offer it up for sale at the event, but no interest.
This is the first post of three regarding the Tabletop Knights show in Germany.
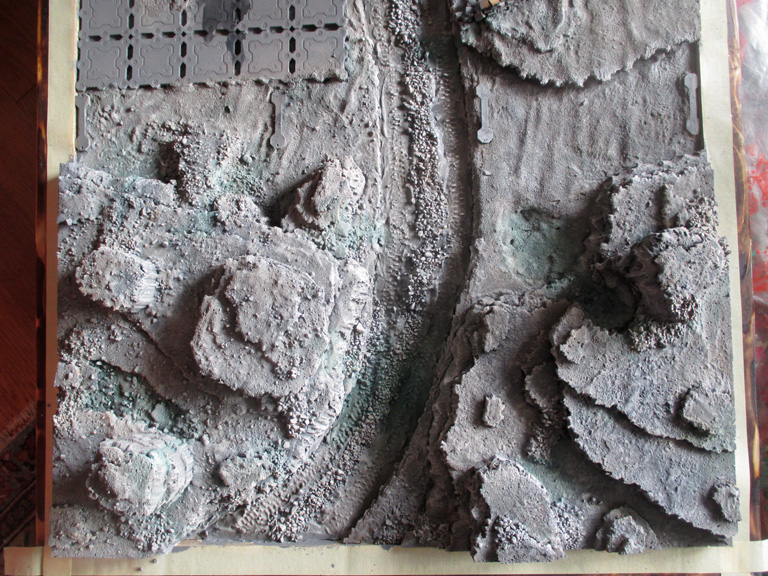
This will be about the first display board, Gone?
I saw this image, credit to whoever did this (if you let me know I will credit that person here) and thought, “I want this!” If you are interested I have a Pinterest page devoted to scenery. Look for Nik Green. I highly recommend Pinterest as a resource for keeping ideas from all over the interweb neat and tidy and in one place.
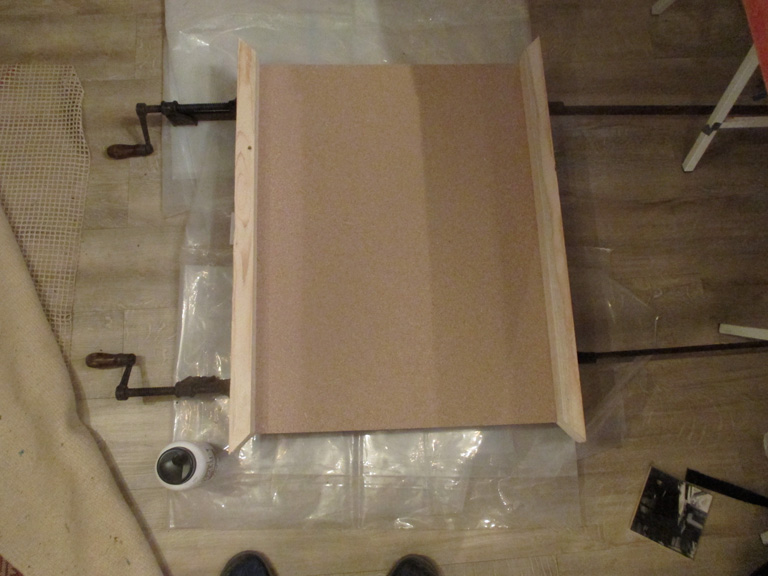
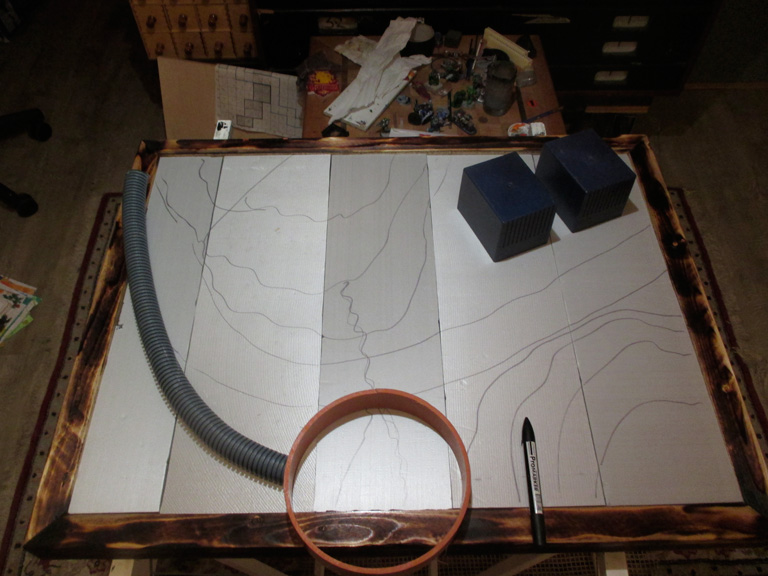
I got the dimensions of a Kill Team board, thirty by twenty two inches, and got two sheets of chipboard cut.
Clamping the sides
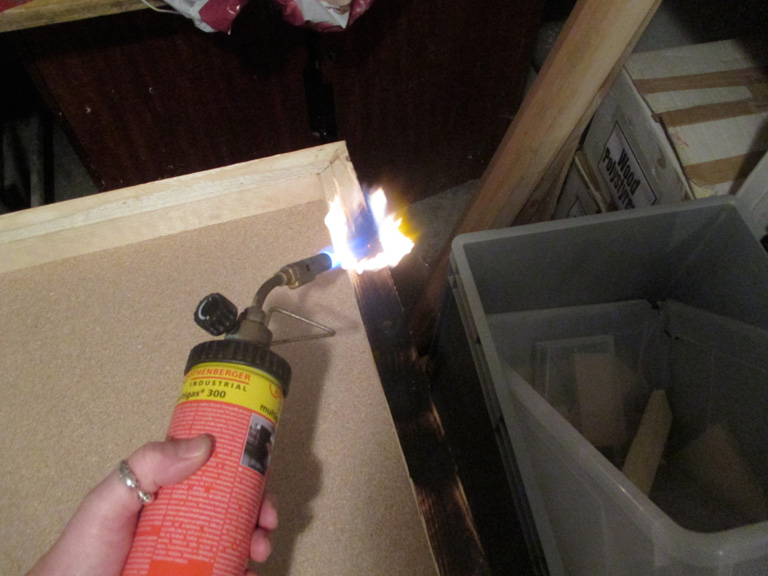
Burning the splinters off the cheap wood frame
Trimming the foam for the inserts with my Proxxon
Foam inserts fitted
Playing around with ideas
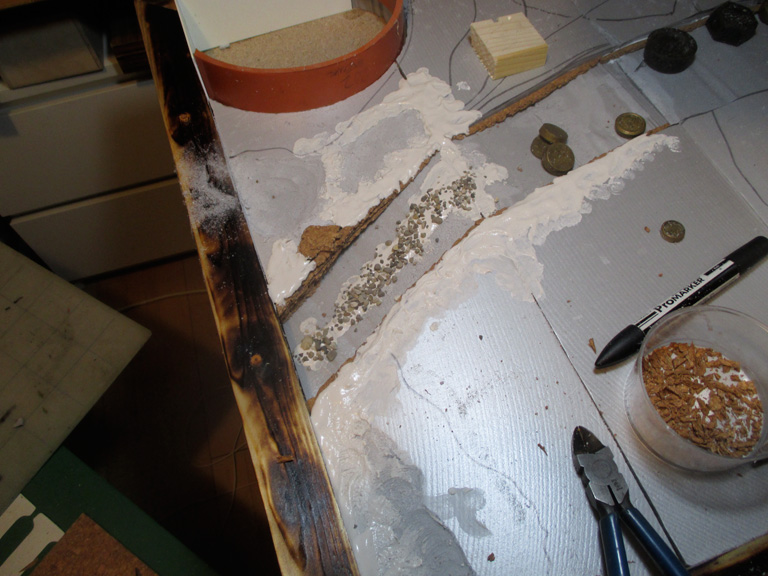
Track chopped out and starting to detail the edges with strips of cork tile
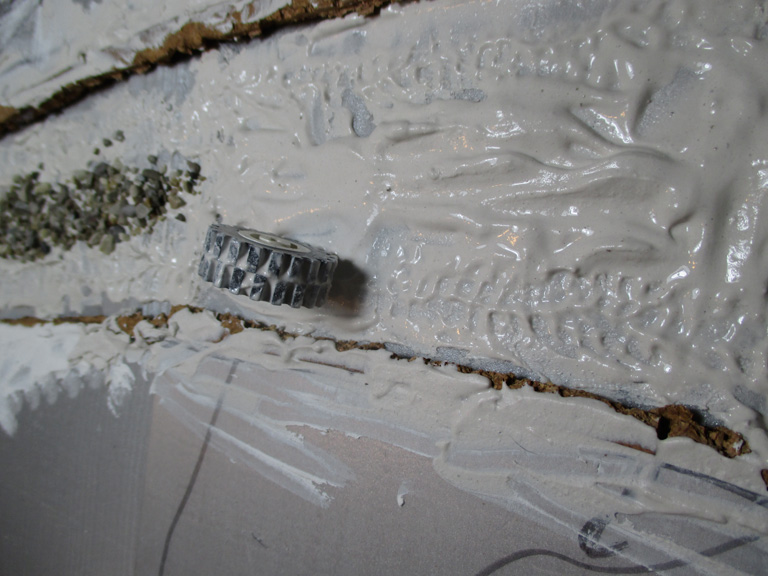
A Lego wheel being used for detailing
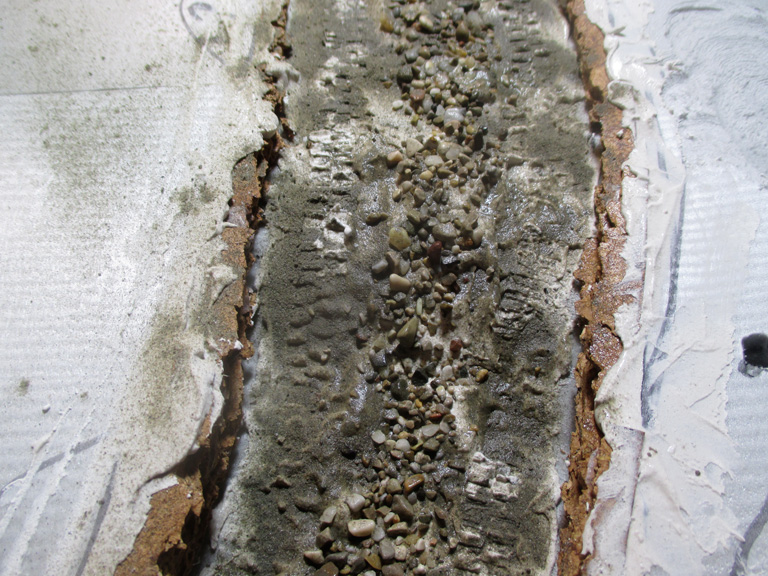
Gravel from Walersee and fine river silt used for detailing
Building before and after painting
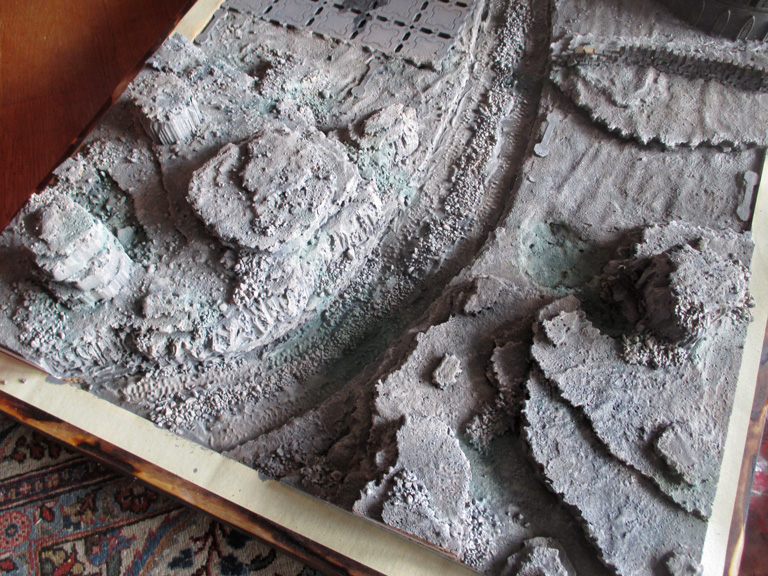
Starting to build up the layers
I made a pipeline out of some scrap pipe from a skip and some laser cut supports. I magnetised the feet so it could be removed for transportation.
Everything in situ
Silt! Silt everywhere!
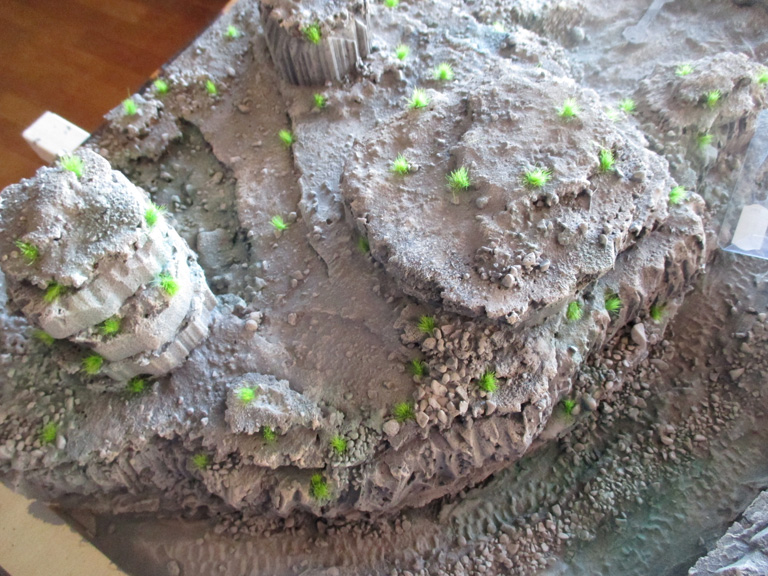
Paint and weathering applied
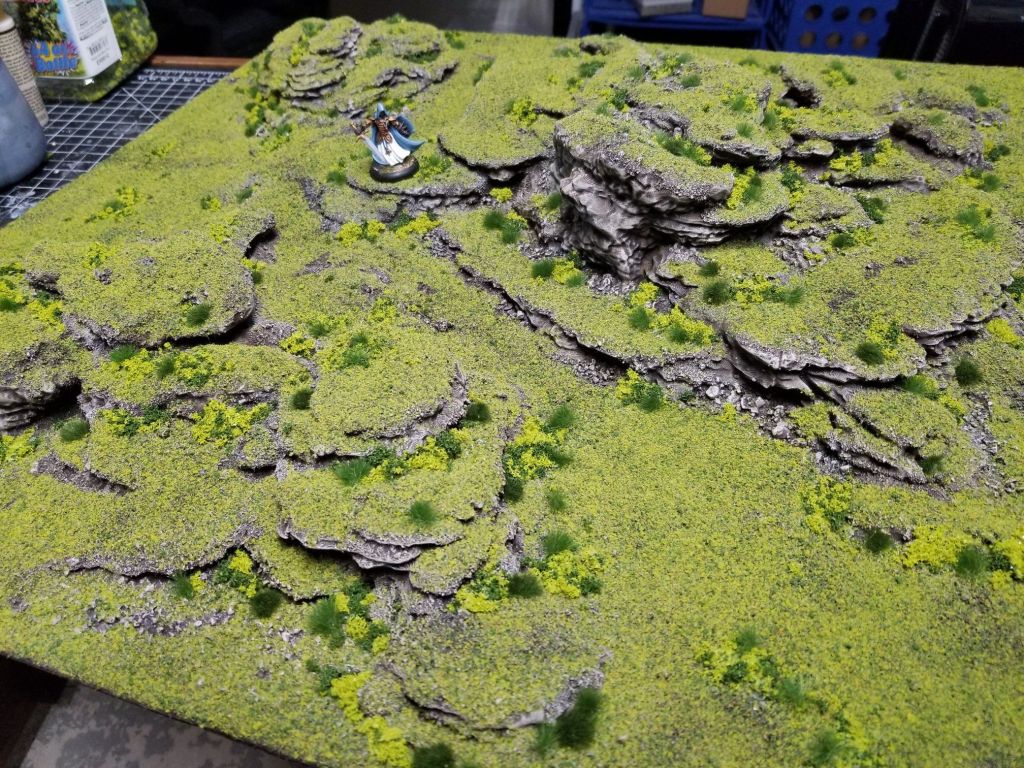
Tuft mania
And then scatter
I think the scatter needs to be more yellow to match the tufts. Added to this was some water effects. Overall I am very happy with this board. Some minor tweeks as noted are required.
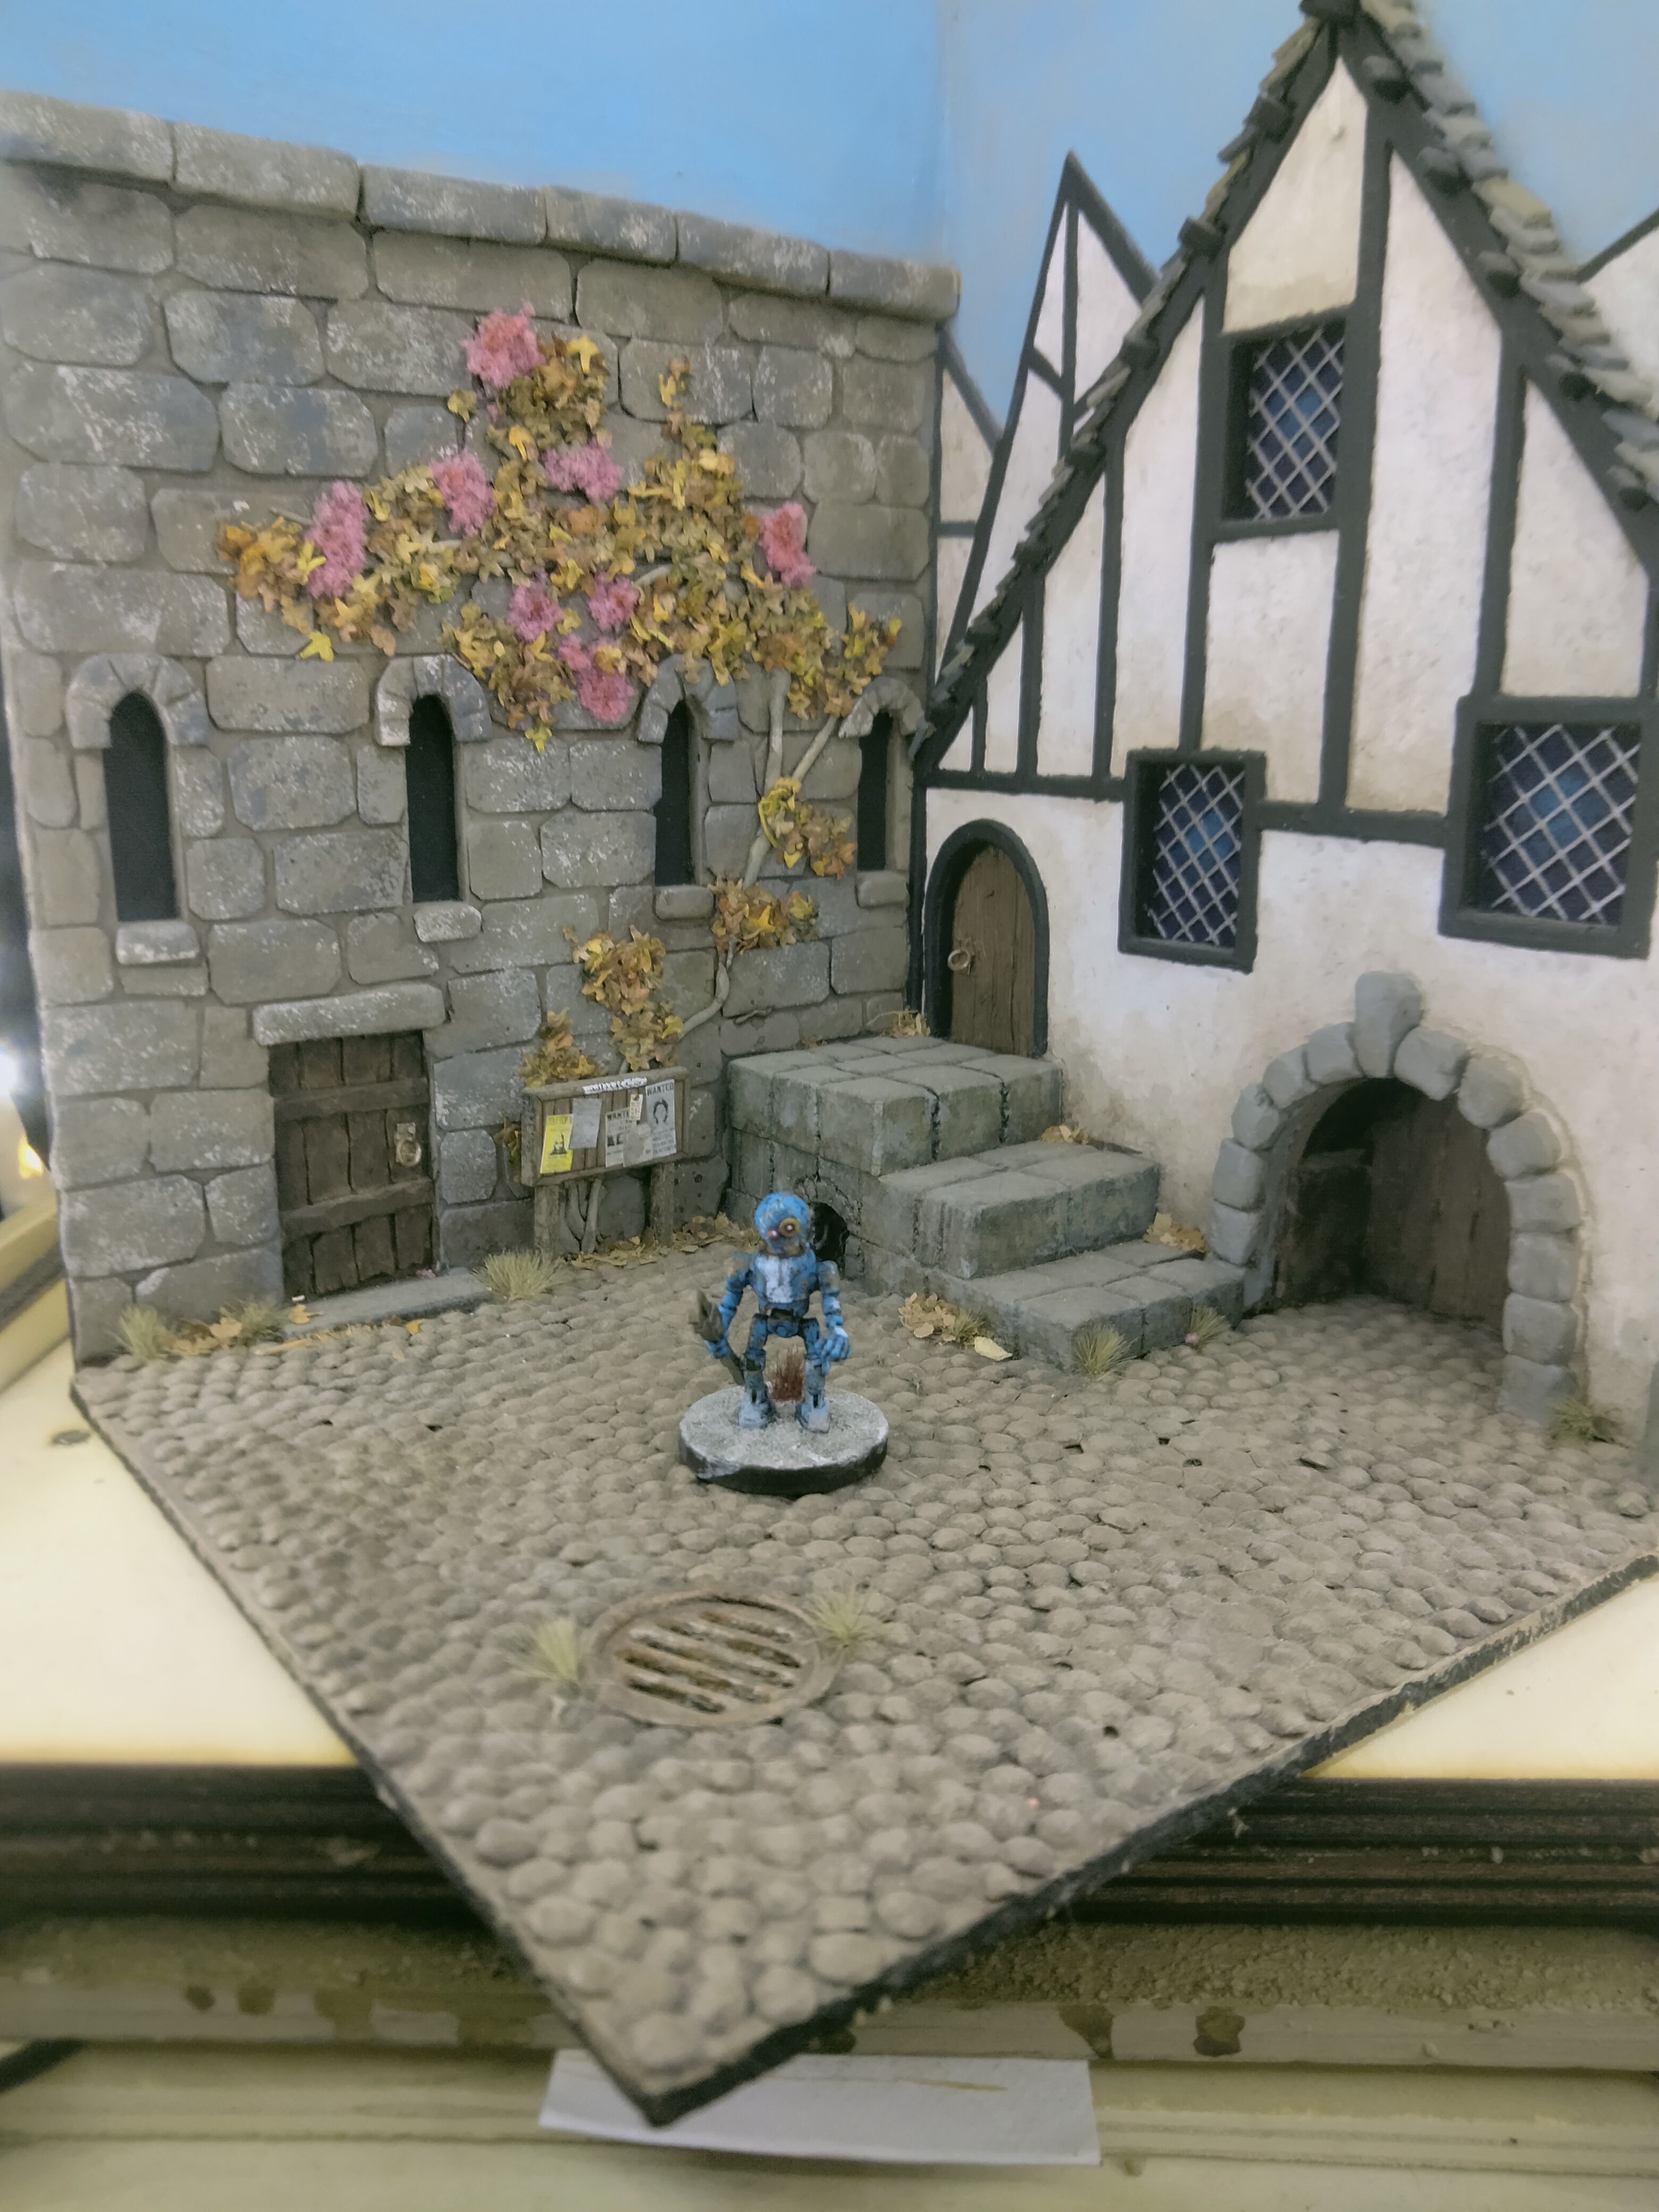
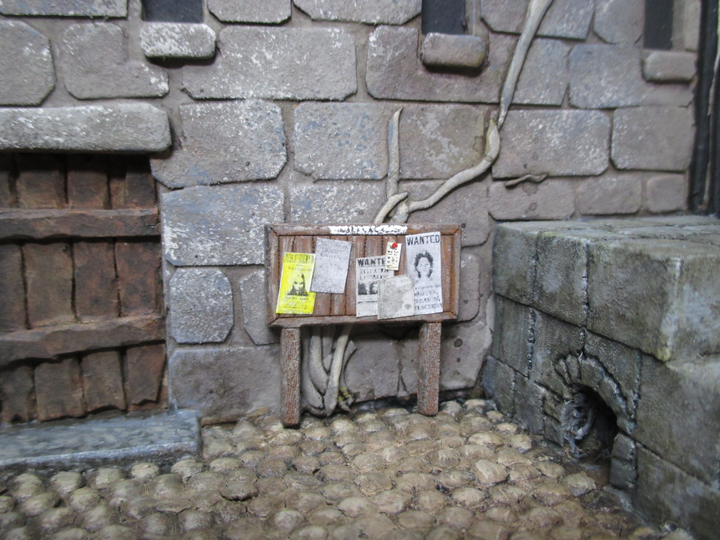
One day I will learn how to take decent photos of my painting. Maybe if I stop gadding about from project to project? One thing that I have seen has been a little photographic scenic corner made by one of the Oldhammer Community. That would be useful and wouldn”t take up too much space. So I set out to make one. This is my work in progress and I’ll post when finished.
Basic shape cut from MDF and steps from foamDetailing of door using coffee stirrers from your favourite tax avoiderFoam detailing of archLentilsA lot more lentils and some foam silsArial view of lentils, foam blocks and roof tilesA coat of household emulsionWash to pick out a bit of detailMiliput vineBit of whitewashA wash on the stoneworkWindows and woodwork. When was this taken?Sponging of stoneworkStarting work on sky and rooftilesA notice board