A little Renaissance fantasy

A disclaimer: this is totally ripped off from Wargames Illustrated 382 and David Bickley who built the original. You can read his blog here:

http://www.talesfromghq.blogspot.co.uk

I kept coming back to this article and mulling over it. I really don’t have time to get distracted by another project but it was sooo tempting. Late one night I pulled out a piece of paper and started doodling. The next day some graph paper was procured. Too late! Project started!

As Mr. Bickley had produced his model from individual parts I decided to follow along and make mine in modules starting with the front gate.

Me being me, there have been a few upcocks in the design, but nothing that a hammer wouldn’t sort out.

Obligatory kitten for scale

The original suppliers who inspired this build are:

http://www.charliefoxtrotmodels.com

http://www.warbases.co.uk

http://www.wargamesbuildings.co.uk

Some adventures in 3D Printing

Last year I stepped into the exciting world of 3D with an Ender 3 printer. It hasn’t been an easy ride, it is something that needs a big learning curve. It doesn’t quite work straight out of the box, requiring some tinkering. Also having an antiquated computer doesn’t allow for the installation of modern slicing software. The whole process has been a slightly frustrating hit and miss experience.

Here is my printer set up

I seem to collect rule-sets in the vain hope that my Boys might want to play with me or that someone in the area would have an interest in playing. HINT: if anyone in the Salzburg area would like to game, I have a nice gaming area and multiple rule-sets.

One set of rules that caught my eye and seemed to have a following, in the UK at least, was Dragon Rampant by Daniel Mersey. One of the rulebooks published by Osprey publishing. Osprey are producing some interesting and inexpensive rules covering a very broad church of areas. Worth checking out.

This interested me as you could play a game with nice streamlined rules and build an army with relatively few miniatures. I have enough Orcs and Goblins kicking about to make an army with zero expenditure. A friend, David Wood, scored a massive haul of Essex Miniatures Undead and sent me his spares. Some minor expenditure and voila a beautifully sculpted Bob Olley Undead army. A recent Kickstarter provided me with most of a Renaissance army.

If you are not aware of Thingiverse and are into 3D printing I would recommend that you go and visit. It is stuffed to the rafters with Arduino projects, electronics and workshop tutorials and of course 3D printer files.

http://www.thingiverse.com

Browsing through this cornucopia of stuff, this place is brilliant for gaming accessories, I came across some Mud Elementals. They looked so cute I had to print one.

And then another.

And another.

Soon an army emerged.

The Leader
I had some issues with layers so I may reprint.
Elite Foot
Magic User
Bellicose Foot
Heavy Foot
Light Foot I have another unit of these guys waiting for arms
Light Artillery
Ravening Horde Scaled down foot troops

These all came from a creator called Dutch Mogul

http://www.thingiverse.com/dutchmogul/designs

Check his designs out it is a one-stop-shop for gaming goodness. he also has a Facebook page.

http://www.facebook.com/IllGottenGames

Now I’m off to check on my printer and maybe do some painting. If I don’t get distracted by kittens.

Transport skiff

This model was loosely inspired by a model I saw in the Trash Bash Bits group on Facebook. The original was made from a fly-swatter. It wasn’t quite what I had imagined but it sparked an idea.

The first iteration looked like this.

Standing figure from Moonraker Miniatures and the seated figure is from a batch of “O” Guage model railway figures sourced from eBay.

There were some issues, some of which I addressed in the next iteration.

The next iteration was like this.

Correction required.

Comparison shot of the two. You can see I have added some extra detailing to the cabin roof.

Iteration two with cargo and kitten for scale.

Iteration three will elimate these issues and hopefully be the final model.

Nessus

This is the second board that I made for the Tabletop Knights gaming day. My kind Daughter gave me a copy of Destiny 2 when she gifted me her old PS4. One of the worlds you visit is Nessus.

This is not my image and it is used without permission

I fell in love with the visuals and wanted to recreate them. In the small space of a Kill Team board I wouldn’t be able to do it justice, but maybe I could give a taste.

First up was to make flocking, My local DIY store gave me a small piece of pure white foam and the poundshop provided cheap paint to colour it.

Planning out the board

Laying down 10mm of foam under the “metal” floor plates. I wanted them raised so there was some variations in the floor level.

The buildings

Adding the sides for extra strength.

Glueing parts into position

The crane

Adding colour and weathering.

More details.

Some of the columns in place with vegetation.

Set dressing.

Over all I wasn’t so happy with this board. There were a few tiny mistakes. I didn’t like the colour scheme on the buildings. I would have approached it differently next time. I have no idea where I am going to store it now. I did offer it up for sale at the event, but no interest.

Gone?

This is the first post of three regarding the Tabletop Knights show in Germany.

This will be about the first display board, Gone?

I saw this image, credit to whoever did this (if you let me know I will credit that person here) and thought, “I want this!” If you are interested I have a Pinterest page devoted to scenery. Look for Nik Green. I highly recommend Pinterest as a resource for keeping ideas from all over the interweb neat and tidy and in one place.

I got the dimensions of a Kill Team board, thirty by twenty two inches, and got two sheets of chipboard cut.

Clamping the sides

Burning the splinters off the cheap wood frame

Trimming the foam for the inserts with my Proxxon

Foam inserts fitted

Playing around with ideas

Track chopped out and starting to detail the edges with strips of cork tile

A Lego wheel being used for detailing

Gravel from Walersee and fine river silt used for detailing

Building before and after painting

Starting to build up the layers

I made a pipeline out of some scrap pipe from a skip and some laser cut supports. I magnetised the feet so it could be removed for transportation.

Everything in situ

Silt! Silt everywhere!

Paint and weathering applied

Tuft mania

And then scatter

I think the scatter needs to be more yellow to match the tufts. Added to this was some water effects. Overall I am very happy with this board. Some minor tweeks as noted are required.

Picture this

One day I will learn how to take decent photos of my painting. Maybe if I stop gadding about from project to project? One thing that I have seen has been a little photographic scenic corner made by one of the Oldhammer Community. That would be useful and wouldn”t take up too much space. So I set out to make one. This is my work in progress and I’ll post when finished.

Basic shape cut from MDF and steps from foam
Detailing of door using coffee stirrers from your favourite tax avoider
Foam detailing of arch
Lentils
A lot more lentils and some foam sils
Arial view of lentils, foam blocks and roof tiles
A coat of household emulsion
Wash to pick out a bit of detail
Miliput vine
Bit of whitewash
A wash on the stonework
Windows and woodwork. When was this taken?
Sponging of stonework
Starting work on sky and rooftiles
A notice board

February

As a reward to myself, I am not a fan of batch painting, for finishing the Gnomes I painted this fellow.

I couldn”t get the figure I was after (see previous posting) so I got this guy. Originally from Forgeworld, I got him second hand from The Troll Trader. He’s allright for a Truro Boy. https://thetrolltrader.com/ He will be the squad leader in a unit of Beastmen in my Not Imperial Guard 40K army.

Obviously I got distracted after that. So rather than finishing the Dwarf Skiers from Old School Miniatures, sorry Jamie. I found these really cute Elementals on Thingiverse. https://www.thingiverse.com/thing:3388214 I wasted (no) time in printing off a load and here is a test paint of one.

These are going to be based up for use in Dragon Rampant. Not that I am ever going to play it, more’s the pity. At the moment in the queue I have a: Renaissance Army from a recent Kickstarter, Undead Army mostly comprised of Bob Olley Essex Miniatures (gorgeous sculpts, I ended up buying some more to fill the gaps in my collection), Orcs and Goblins from my spares box and now an Elemental Army.

And then a couple of weeks ago I got a box of bits from Jamie. https://www.oldschoolminiatures.co.uk/ I got more distractions in the shape of more Gnomes. I’d asked for a unit of Undead Gnomes to go with my Undead Army and in the package was this guy.

I had to paint him immediately. I made a totally impracticle 20mm base for him to go on.

Now I need to crack on with two Kill Team display boards which need to be finished in about six weeks time for a show in Germany.

Maybe learning to play the game might be useful?

The Reever’s Arms

2018 is the year of extracting digit. My old gaming buddy, mugodice.wordpress.com, had wanted an inn for his games a couple of years ago and I had been putting it off.
The brief was that it had to occupy an eight inch square footprint.
So spoiling his birthday suprise here it is.

First off the block

troopers
A really quick and dirty job. These are from Dreamforge Games and I’ll be using them as Storm Troopers in my Not-Imperial Guard Army. It was a quick hose with the airbrush and a few little brush additions. Not my best work, but I just wanted to knock one out and have something on the table in a couple of days.
These figures actually deserve a bit more time and attention as they have some lovely detail.

Reflections on 2017

I’m somewhat late on this one as I’ve been laid low with a rather unpleasant flu-like lurgy.
A quick catch-up on a couple of pieces from my last post.
barbarian
Here is the Barbarian from the OS Miniatures Company. This was a challenge that I undertook to have him painted before Christmas. Nobody else took up the challenge which was a pity.
santa
This was from Warmonger Miniatures, again painted up for Christmas.
There is one more figure which was supposed to be my last figure of 2017, but the lurgy stopped that. I’ll post when it is finished.
Old age seems to have telescoped the year. Blink and I’ll miss it.
The first three months were taken up with making the Rogue Stars display board. April/May I did some landscaping in the garden converting a be-shrubbed steep slope into a flat grassy terrace.
June/July/August were at Electric Love. I had a great time and it gave me enough money to buy my own small laser cutter.
The rest of the year seemed to evaporate, lttle jobs around the house and making bits with my loot from the summer.
2017
Here is a group shot of what I finished painting. There is a lot more half finished and the 2018 goal is to finish all the half started jobs from the past few years, the Heresy Dragon being the main target, get all that out of the way so I have a clean slate. Then one project at a time, start it and finish it.
Yeah right!
Product of the Year 2017
On reflection it has to be the laser cutter. It’s small and slow but it has enabled me to prototype ideas and to make stuff on the fly. Christmas cards, party invites, party bag goodies, cake icing molds and gift tags just to name a few bits and bobs.
Heroes and Zeroes
Firstly the Heroes.
At the top of the list are the Facebook friends; EvH, DW, SR, ME and CF. They have been a constant source (sauce?) of inspiration, advice and encouragement. I might actually meet some of them in RL oneday.
Then comes the figure manufacturers who have gifted me with lovely toys this last year.
Ramshackle Games
http://shop.ramshacklegames.co.uk/index.php
The OS Miniatures Company
https://www.facebook.com/OldSchoolMinis1985/
Avatars of War
http://www.avatars-of-war.com/eng/web/index.php?option=com_content&view=article&id=59&Itemid=51
Warmonger Miniatures
https://www.warmongerminiatures.com/
Finally Revolution Events
https://www.revolutionevent.com/
For fun, education and loot.
Now to the Zeroes
Wayland Games for lengthy delays, poor communication and their unwillingness (or inability) to combine orders.
TNT for their lack of customer service and making life just that little bit harder.
Games Workshop for tantalising me with the new rules for 40K, promises of fewer books and then conveniently forgetting about all that.
The new plastics are beautiful though.

Hobby Cheating

I have just stumbled across this YouTube channel.
https://www.youtube.com/user/PhatWOP001/featured
By a guy called Vince Venturella.
Full of interesting little nuggets of information. I’ve just watched one on oil washes which makes me want to ditch my Army Painter Quickshade which has been my goto solution for just about everything.
Now to find time to watch the other hundred or so videos.

Stuff wot I made

Warning: Picture heavy!
This is a collection of photos of bits and bobs I made over the summer. I “operate in the autism spectrum” to give it it’s official designation, diagnosis seven years ago. So it has been comparatively recently that I have found out why I act or behave the way I do. It has been a revelation because I can see why I approach things in a certain way or why I just don’t really “get” people. One of the things that I have discovered about myself is that I like things to be tidy and organised. The state of my environment reflects my mental state and vice versa. I am more likely to be happy in an organised environment.
This collection of images shows my growing obsession with tidy/organised, and it helps bring stuff together that I had spread over several boxes in different locations.


This is a spray booth I have made from plastic mounting board (from Electric Love, a running theme throughout this post), LED strips from a flohmarkt and a bathroom extractor fan. At the moment the extractor hose doesn’t connect to anything as yet. In all this cost me just under fifteen Euros.

A box to store my various Dremel bits in. Made from an old Sacher Torte box where I engraved the lid.
http://www.sacher.com
make3
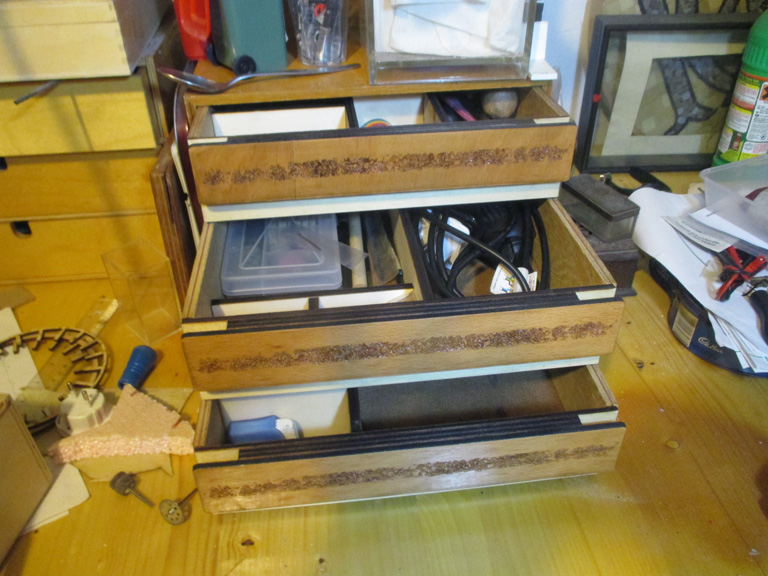
A set of drawers, from the recycle centre, which had cracked plastic drawer fronts. I replaced them with some lasercut wood. I’m using them to store my glass working tools and my spare Dremel.
make21
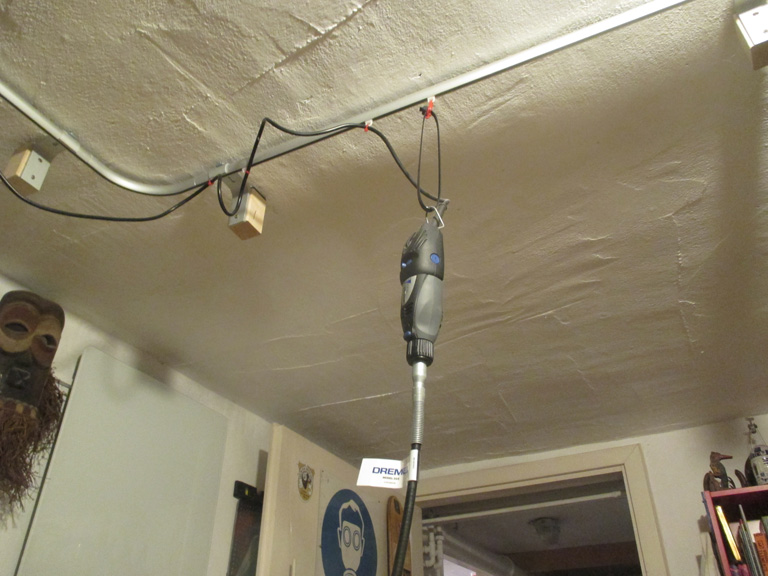
I have another Dremel with a flexible drive which I’ve mounted on a curtain rail above my workdesk.
make4
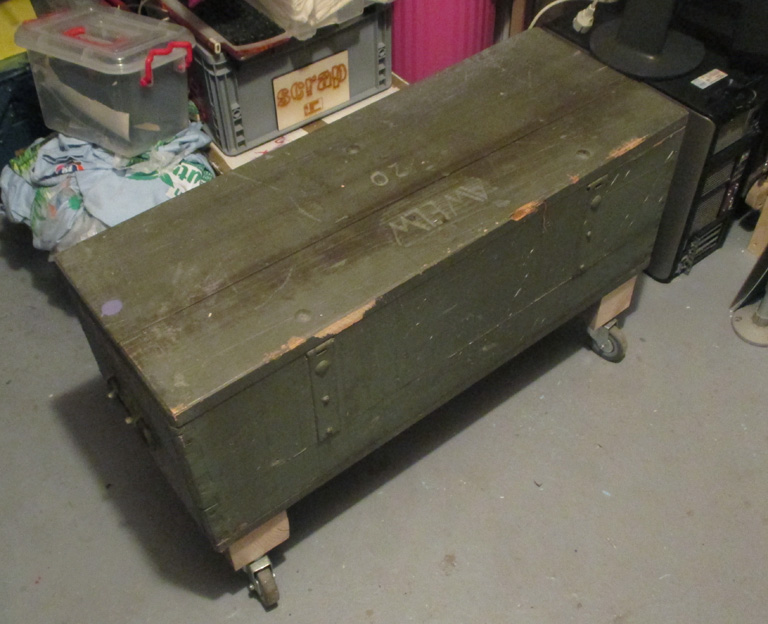
My work chair has been acquired by Number 2 Son for his desk in his bedroom, so I needed something to sit on. This came from recycling and I added a bit of timber (Electric Love) for height and some wheels from Hofer. I works well and I’m using it to store electrical cabling which once filled a box on my workshop shelves.

More bits from Electric Love. I have been storing my lasercut stock in shoe boxes, but it didn’t look very professional when I went to shows. The grey boxes were thrown out because they had had holes drilled in the bottom and were deemed unfit for further use. They were ideal for me. I cleaned them up, they had been used as storage boxes on the site quads, so very quite dusty. I used more of the plastic mounting board to make dividers. Next job is to work through my computer files and organise properly. This links to my next post. Watch this space. I also got an empty champagne box with no lid. Quick trip to Bauhaus and Happylab and voila! a new lid.
make5
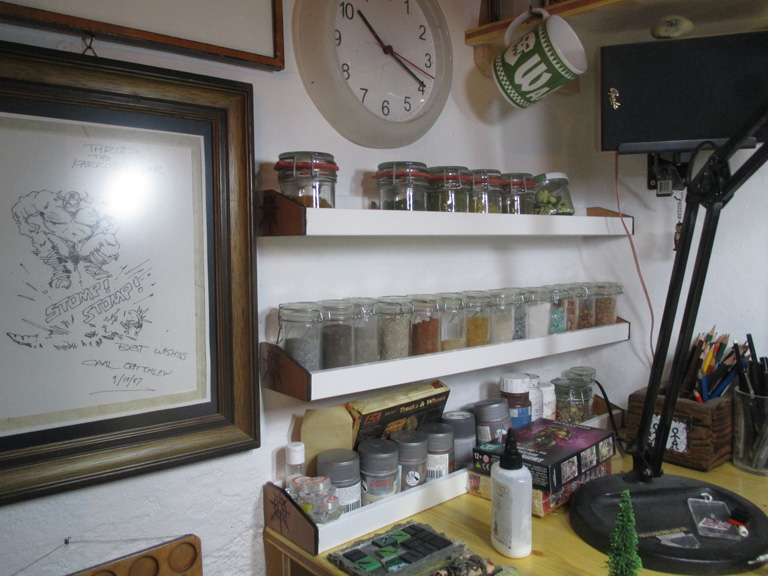
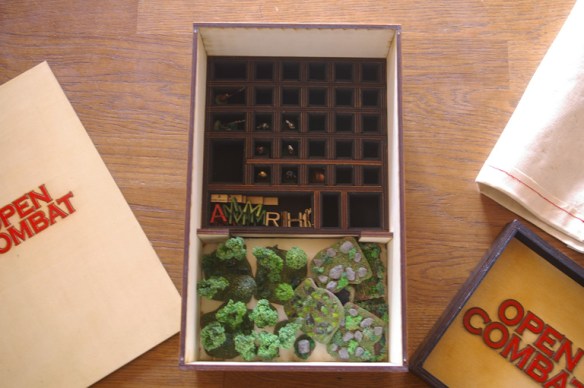
These shelves, again chucked out from Electric Love, are ideal for storing my basing supplies.
make20
While working on site we would lug around big tool crates filled with everything we would need. Clearing up at the end of the festival each tool crate had handfulls of loose screws. Logistics got some under-employed jungs to sort them out by size into empty beer glasses. Once all the shelves had been restocked there was a crate of sorted screws left over. They were going to be binned so I grabbed them and took them home. I made these screw boxes with some leftover MDF.
make8
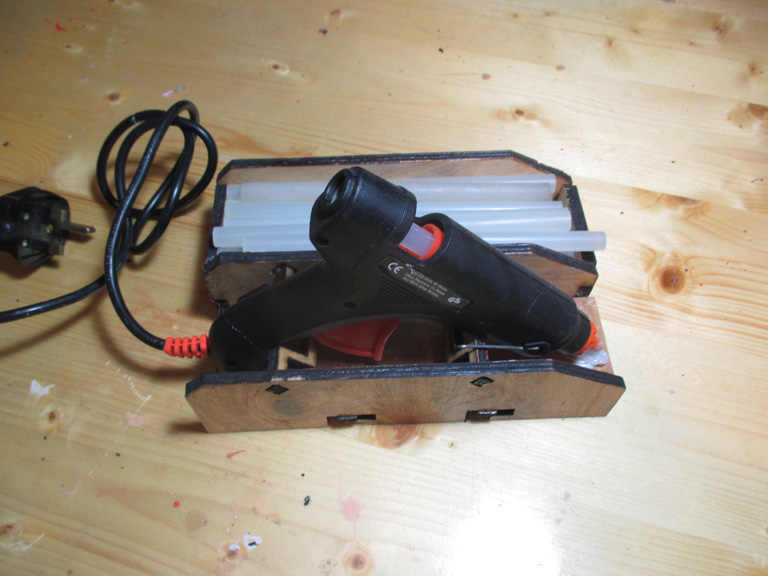
Hot glue-gun holder, instructions from
http://www.instructables.com

A box for my hot-wire foam cutter. An eBay purchase. Sadly the vendor failed to supply the correct plug. However, my super talented neighbour wired in the correct cable.

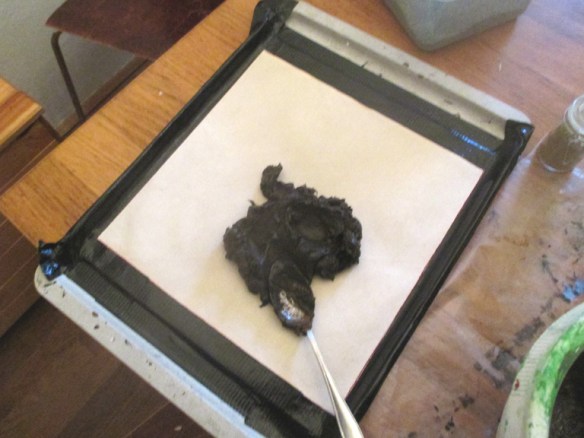
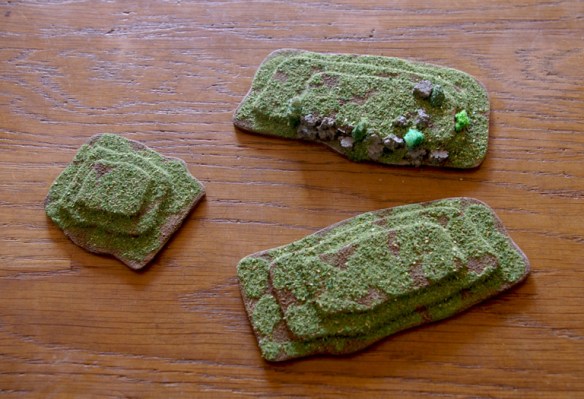
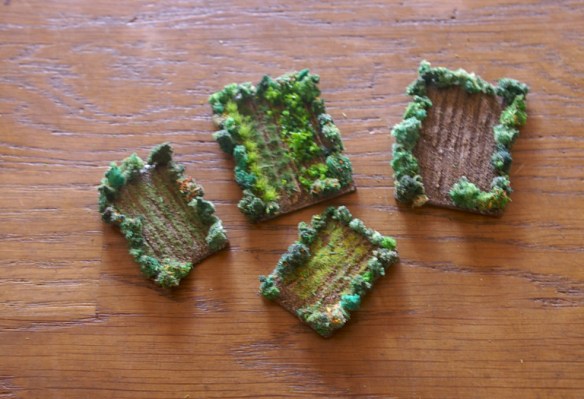
This is my self-made clump maker. You can see my first attempts at making clumps. Not too bad, but not perfect.
I have now taken advice from this site
http://www.youtube.com/user/TheTerrainTutor
and ordered better materials.
Progress report to follow.

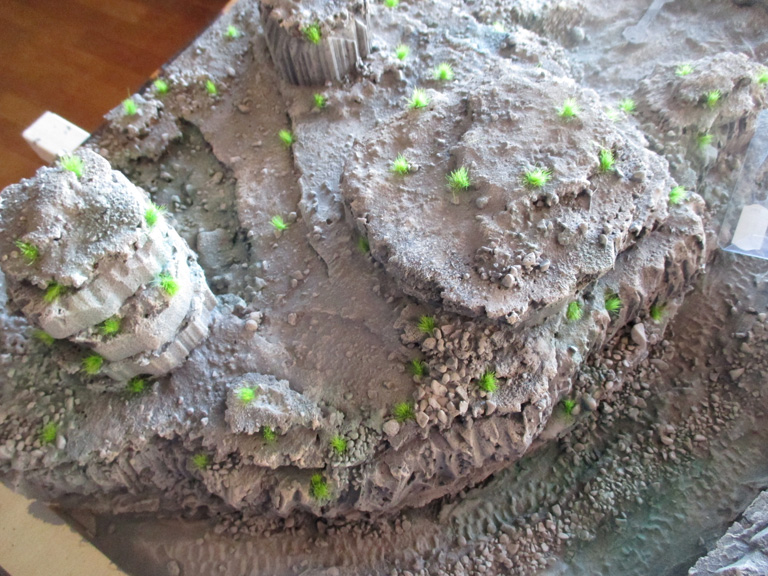
This links in to my clump maker. Flower tufts. I’m using sawdust from work which has been dyed with cheap acryllic paints from my local pound store. More details to follow.

Boys hard at work in the workshop and the finished blasters.

The Saga of the T-Shirt

Some of my longterm readers may remember a post from early 2015
https://grumpyoldtin.wordpress.com/2015/03/02/januaryfebruary-work/
Well I never heard a word of thanks or received a t-shirt. I was a little disheartened by this.
Anyway, earlier this year somebody posted on the Oldhammer Facebook Community page that a group from Exeter was planning to attend BOYL.
BOYL, Bring Out Your Lead, is sort of THE event to attend for Oldhammerers. Hosted at Wargames Foundry it is a chance for people to meet up and play games with old figures and game systems.
https://www.wargamesfoundry.com/pages/oldhammer
I posted asking if anybody knew Joe Bloggs, the guy who’d asked for the illustration. I got a response asking why and I replied that I was the illustrator and I was still waiting for my t-shirt.
I did get an apology from Joe and the promise that the t-shirt would be sent.
But I did get another message. Would I be intersted in letting my illustation be used for a new miniatures company? There would be some lead and a t-shirt in exchange.
This company had just run a Kickstarter for a very Oldhammer Gnome army which I had fallen for big-time but didn’t have the funds to back.

My response was immediate and in the affirmative.
Just after this Joe sent the t-shirt. It was a less than positive experience. The shirt had been worn and then washed, for which I was grateful. I don’t know why, because most of my clothes these days come from flohmarkts (I’m not very cash rich at the moment),I just didn’t want to touch it. But more dissapointing was the fact that the design had been printed in white on a black t-shirt. Had I have known I would have produced reversed artwork. The t-shirt looked awful.
A couple of weeks ago I got a parcel from OS Miniatures.
In it was;
A t-shirt
tshirt
And some minis from a new Kickstarter
ski
https://www.kickstarter.com/projects/882426675/old-school-miniatures-presents-the-alpine-dwarfs?ref=profile_created
arse
And a gnome which I couldn’t resist painting
gnome
I’ve had further good news.
My illustration is the basis of a miniature sculpted by John Pickford.
dwarf
AND would I be interested in producing some more illustrations, potentially to be used for future miniatures.
A nice little project for those long winter nights.
logo
http://oldschoolminiatures.blogspot.co.at/

Salute 2017

I would have written this a lot closer to the event, but I was a bit put off by events and didn’t really feel like communicating.
This was to be my fourth visit to the Austrian Salute, my third as a trader.
Plans had been made since Christmas to make and paint a display board. The aim was to win the prize for the best game. i may be crap at sports and generally poor at life but I really wanted to be good at something for once in my life. My wife thought I was bonkers and said that if I applied that much energy into other areas of my life who knows what i might achieve. I have proposed that she teaches me guitar for the next two and half months. It is something I have always wanted to do for a very long time. I actually bought a guitar thirty years ago. So maybe the time is now.
Note: this tuition hasn’t happened.
Two and a half months of feverish building and prevarication and one afternoon of actually playing the game. This seemed to throw up more questions than answers.
I had a t-shirt printed up for Number One Son and made sure the Gameboy had plenty of juice.
n1s
We arrived slightly later than planned which didn’t seem to be a problem as the venue hadn’t quite got it together to open up. Omens of later.
Setting up was slightly difficult as I had both Boys trying to “help” but it did get done.
salute17
I managed to persuade my Son to play, but he only lasted half an hour as the Gameboy was more exciting.
After a very disappointing lunch (sent back for being unappetising after an hour wait and rude and abusive staff) it was back for the afternoon.
In fact the lunch experience spoilt the whole show for me and I wasn’t really in the mood for anything.
On the plus side, I did win best gaming table.


My overall impression was that it was a lot sparser than last year.
A more eloquent view of the show can be found here
http://www.battlebrushstudios.com/2017/03/show-report-austrian-salute-2017.html