I have been painting, still not a joy, as yet. But plugging away and chipping away at the pile on my desk. I realised how much I had missed having a window to look out of. I moved my painting lights upstairs. Now printing off some paint racks to free up some desk space. Photos to follow when set up.
Now to a photo dump of work done.
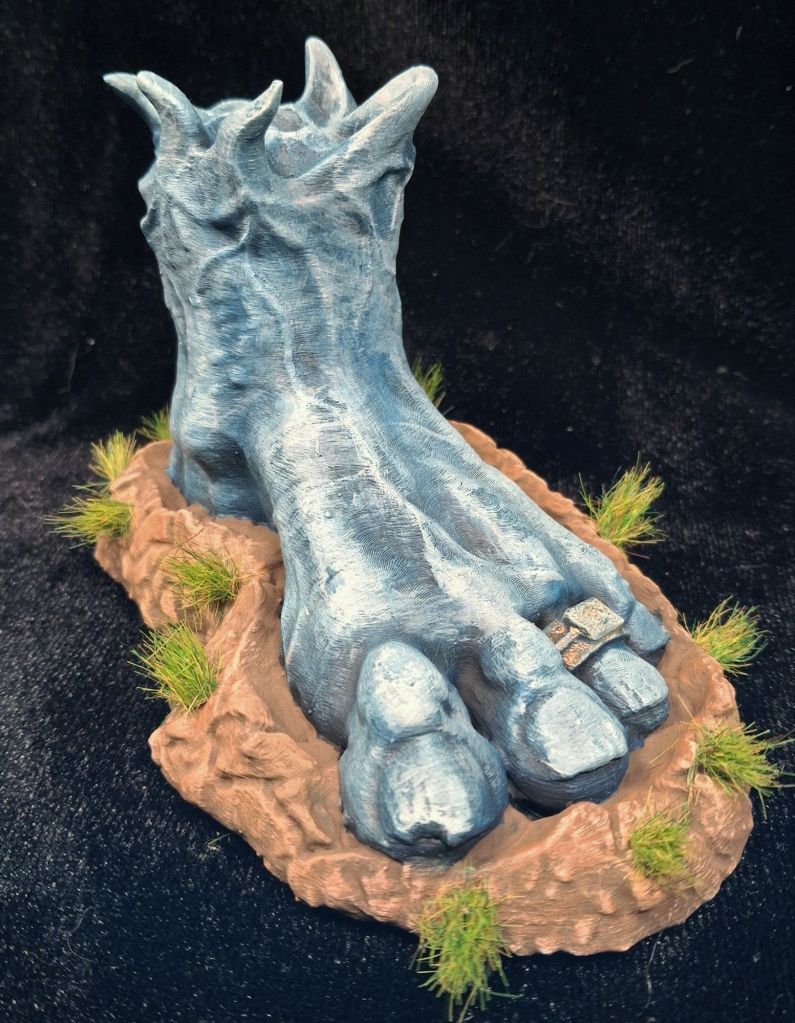
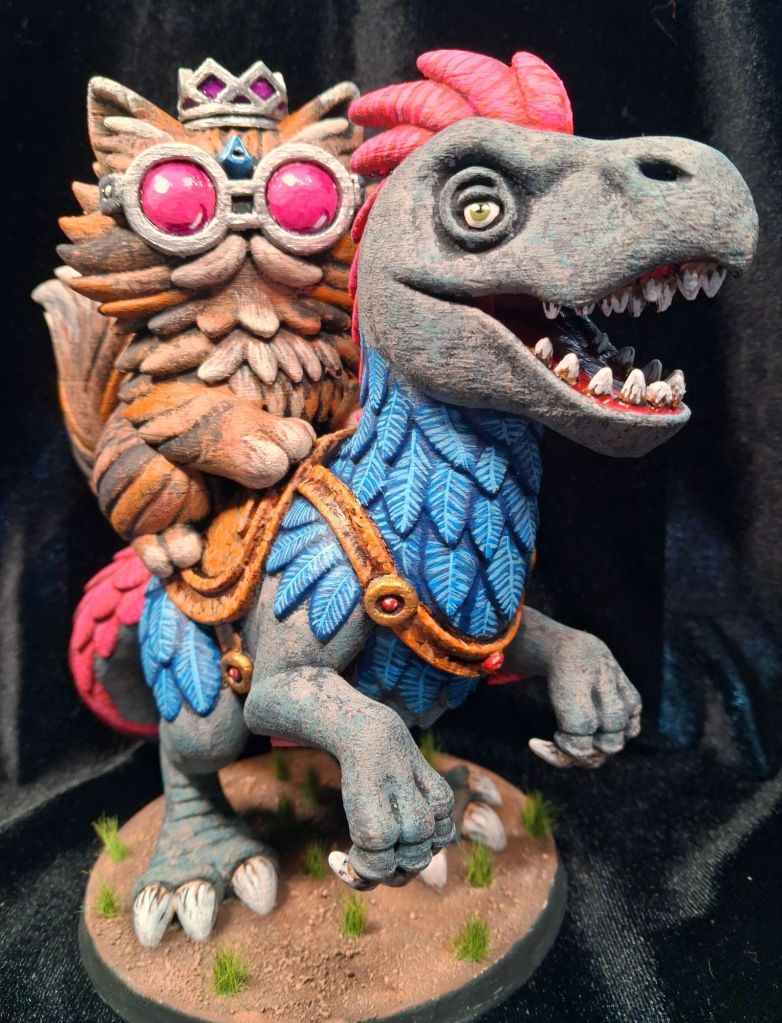
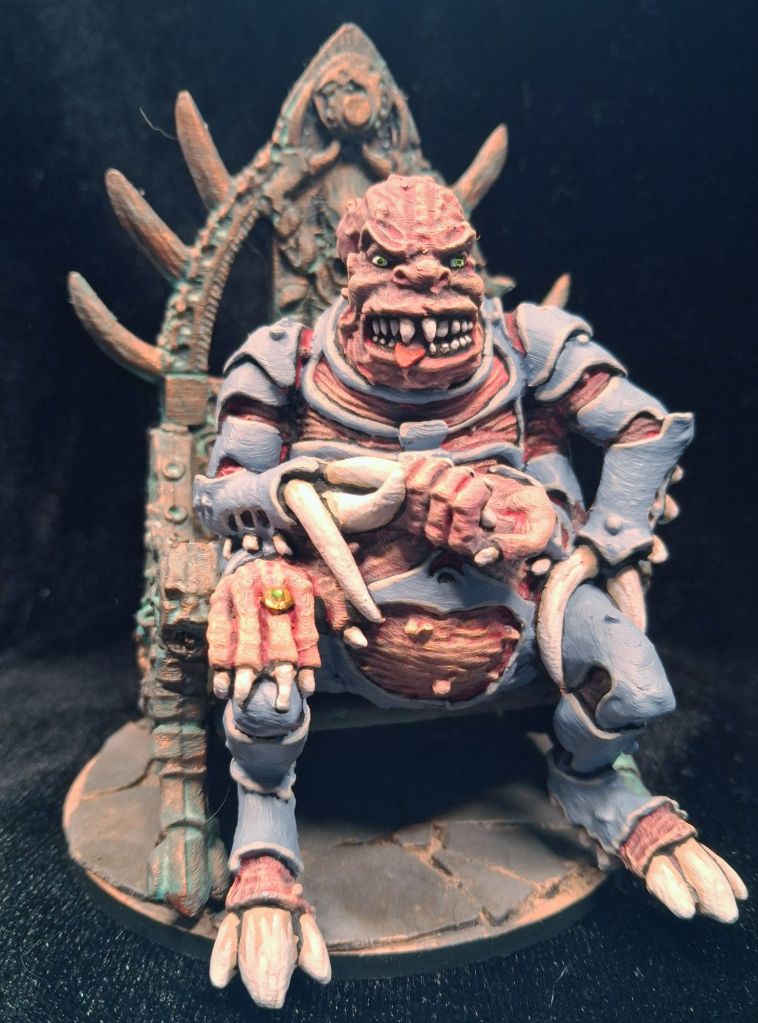
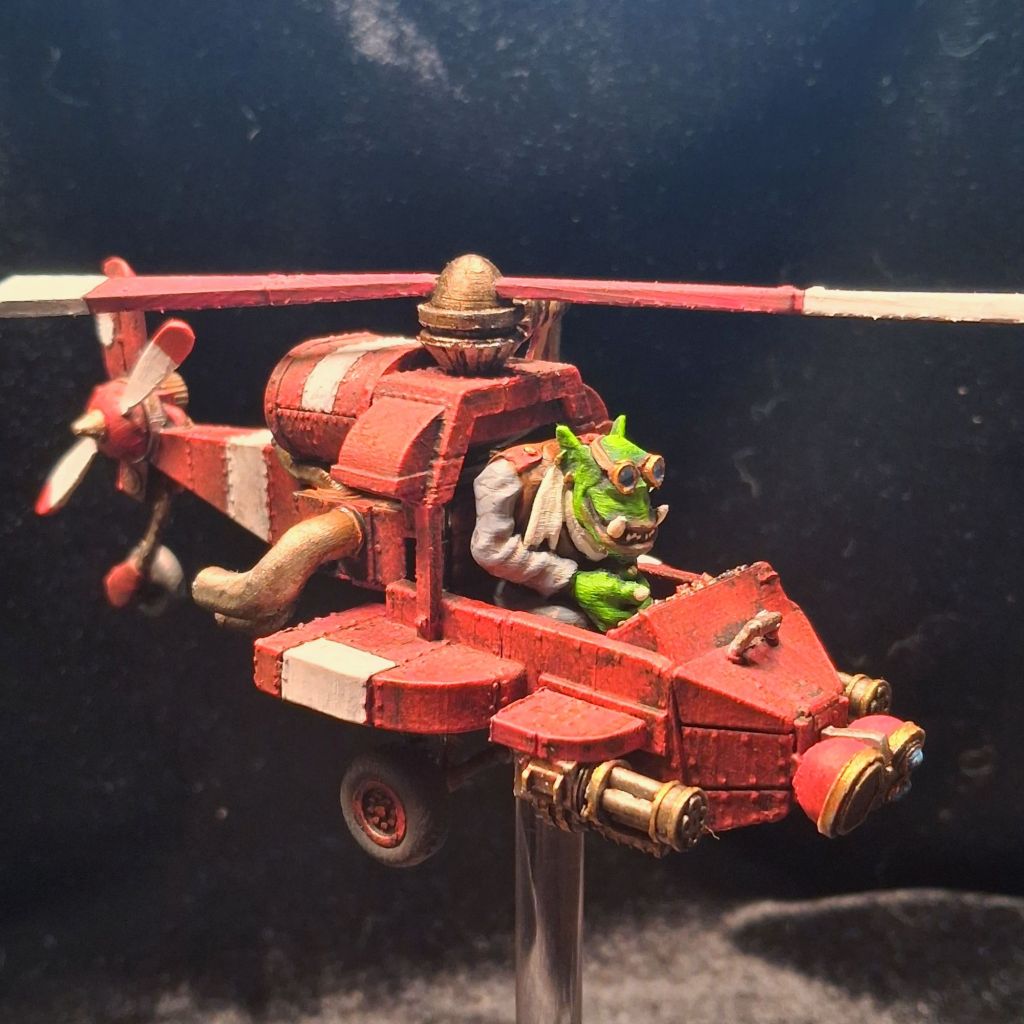
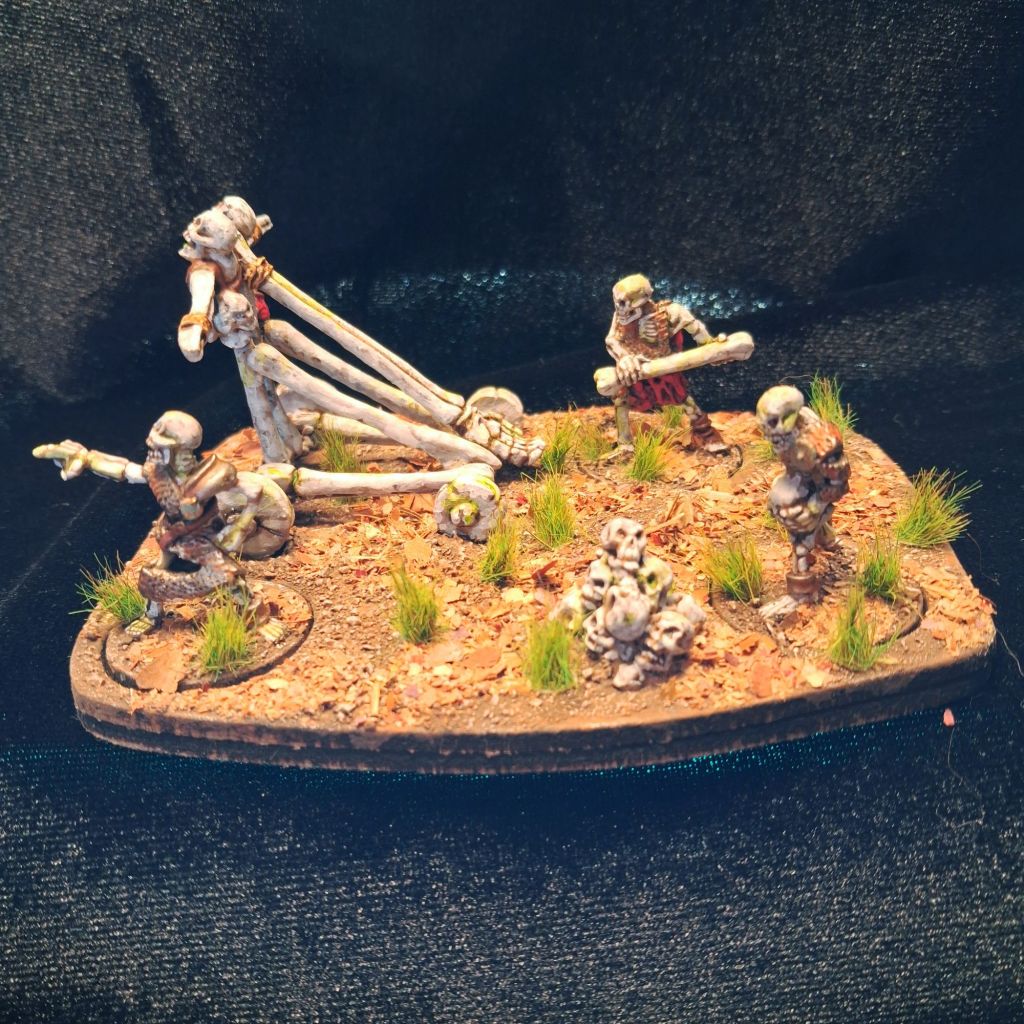
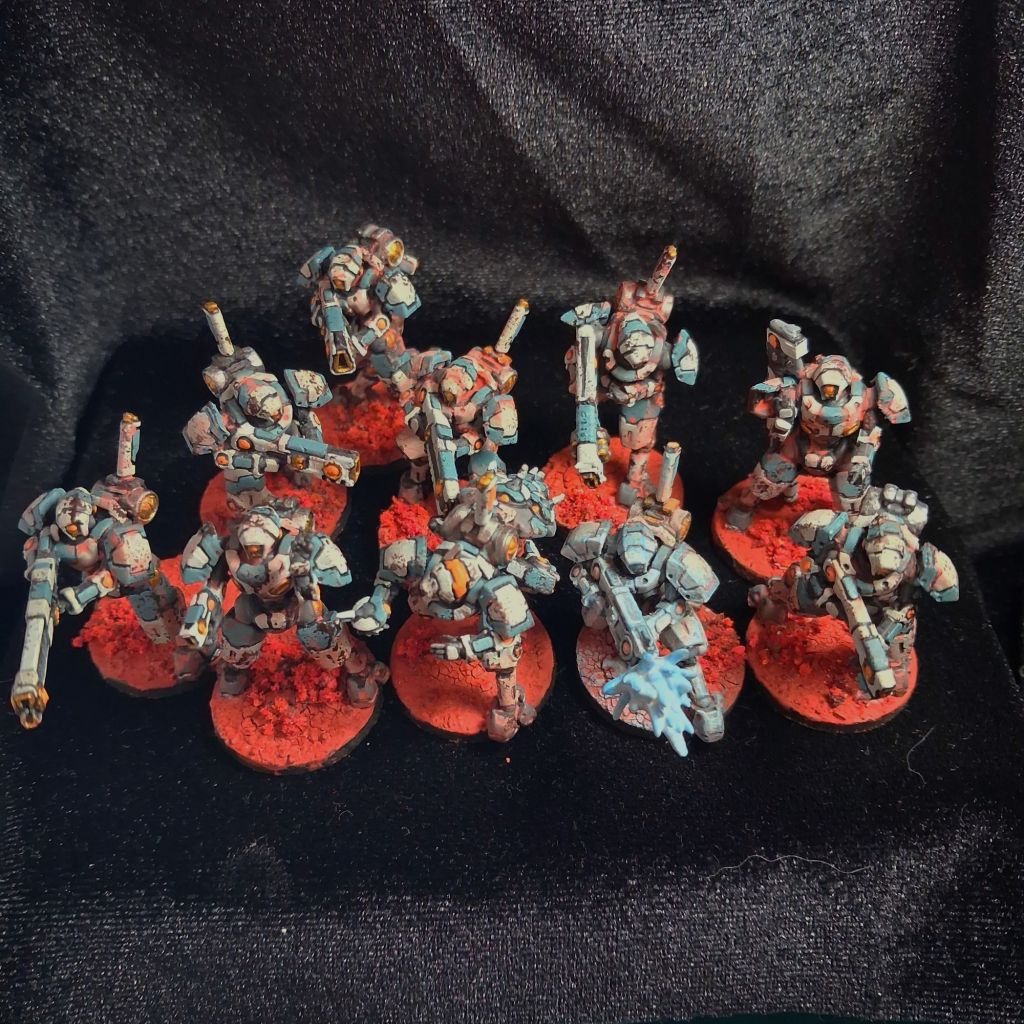
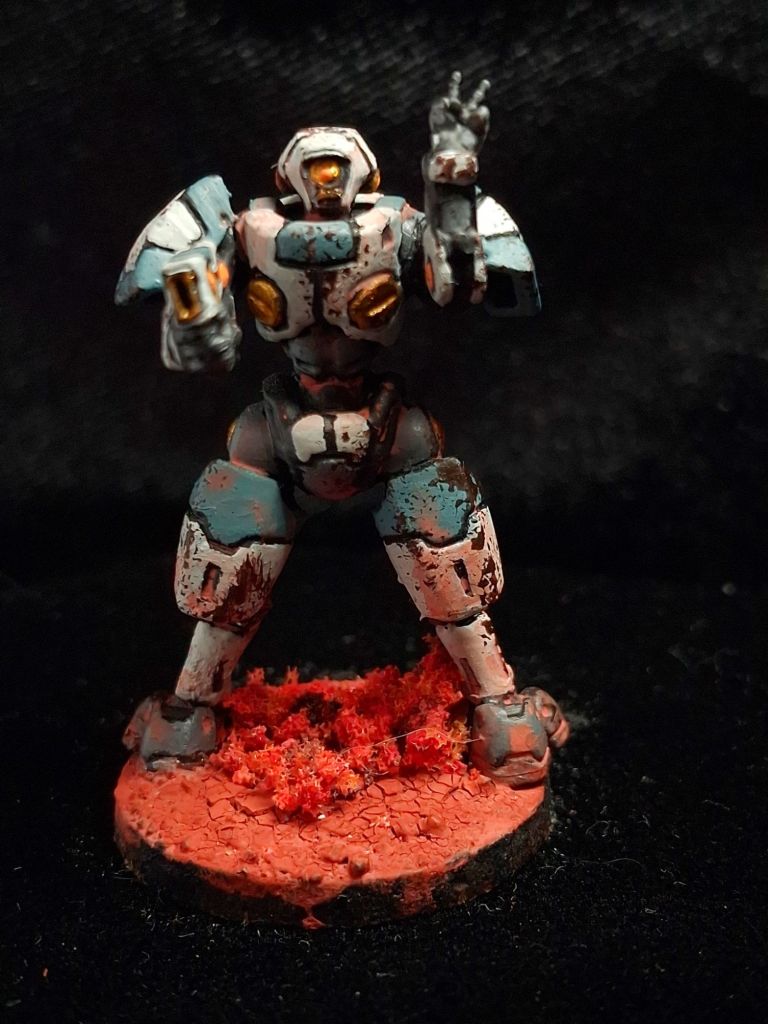
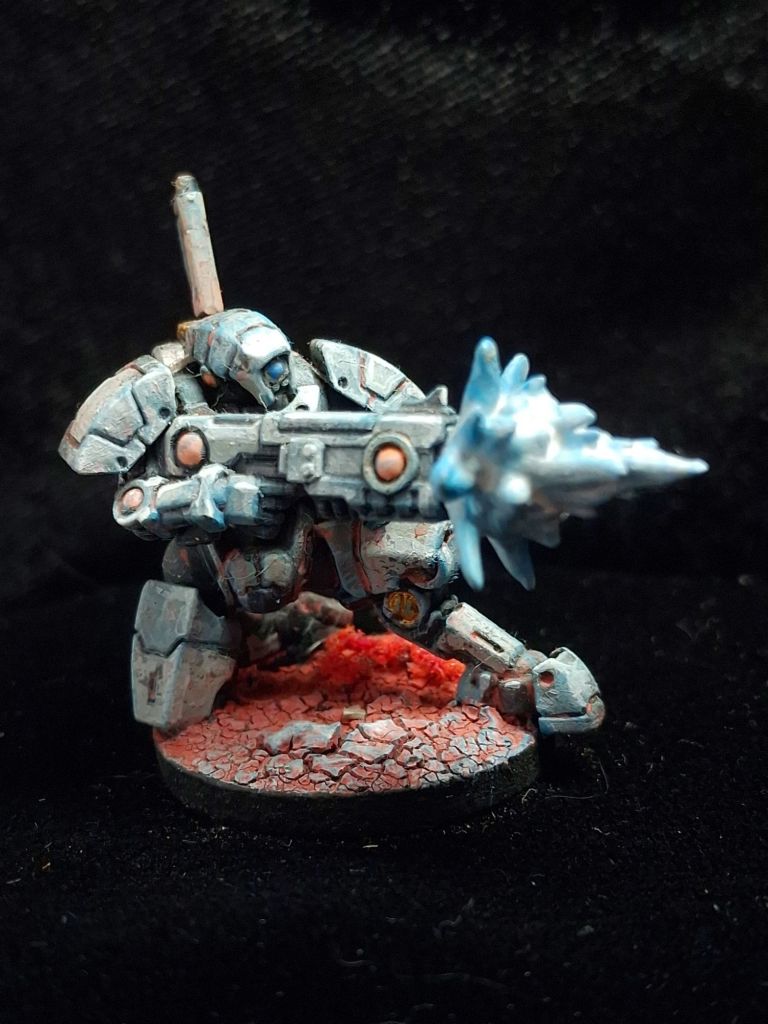
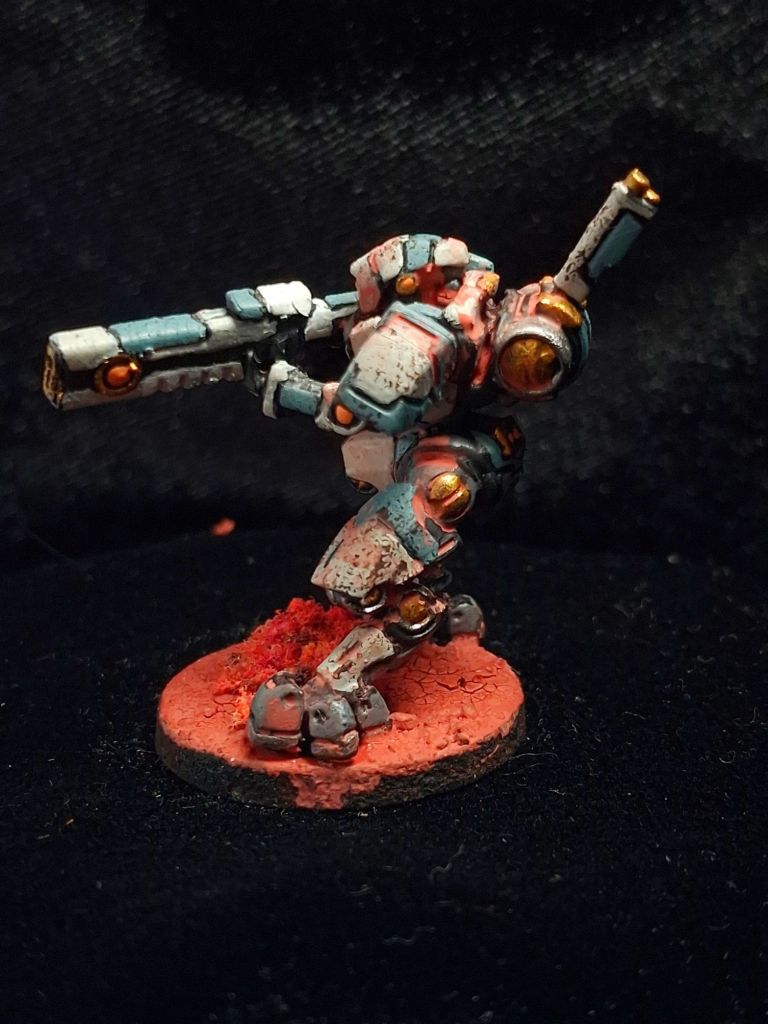
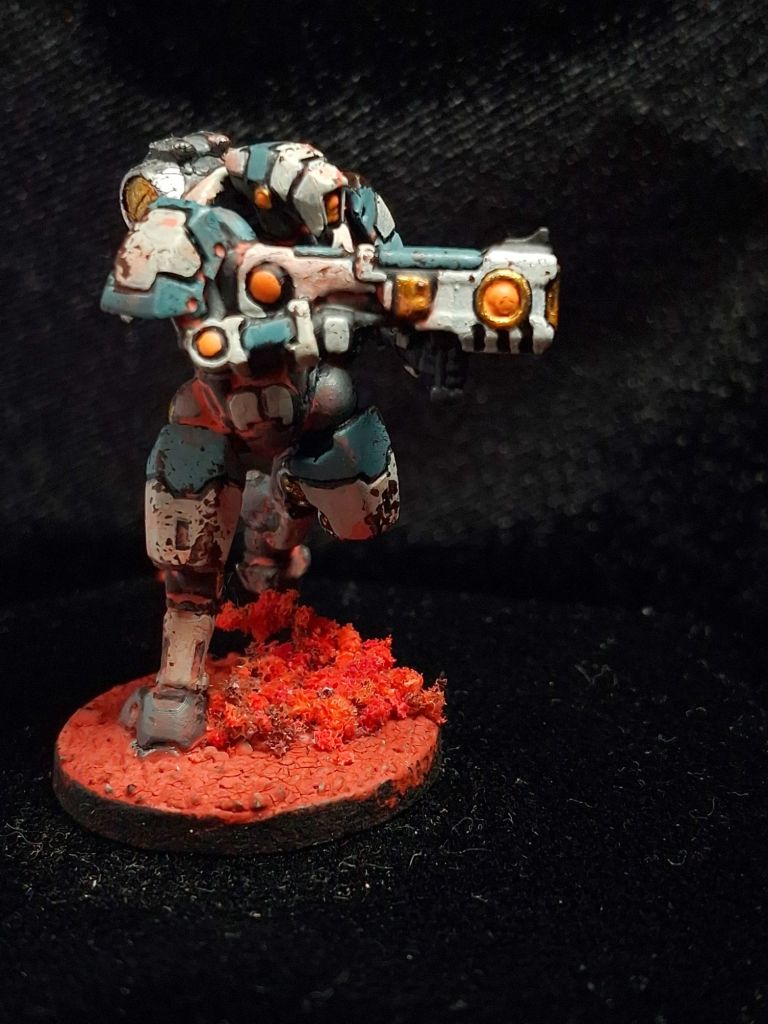
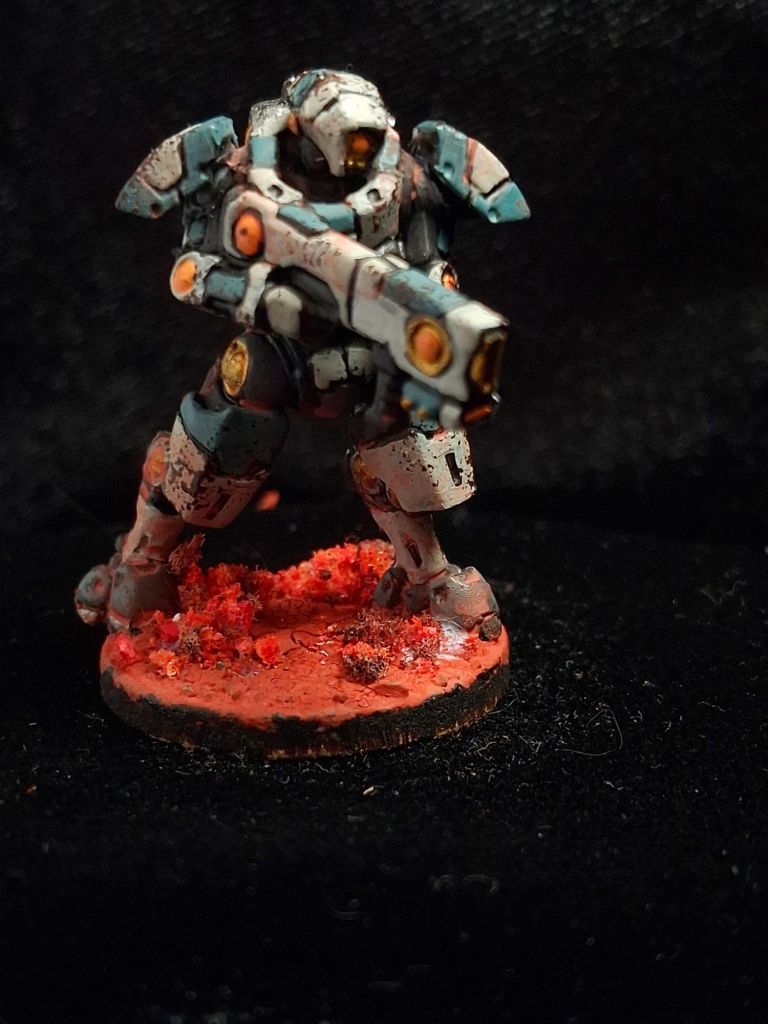
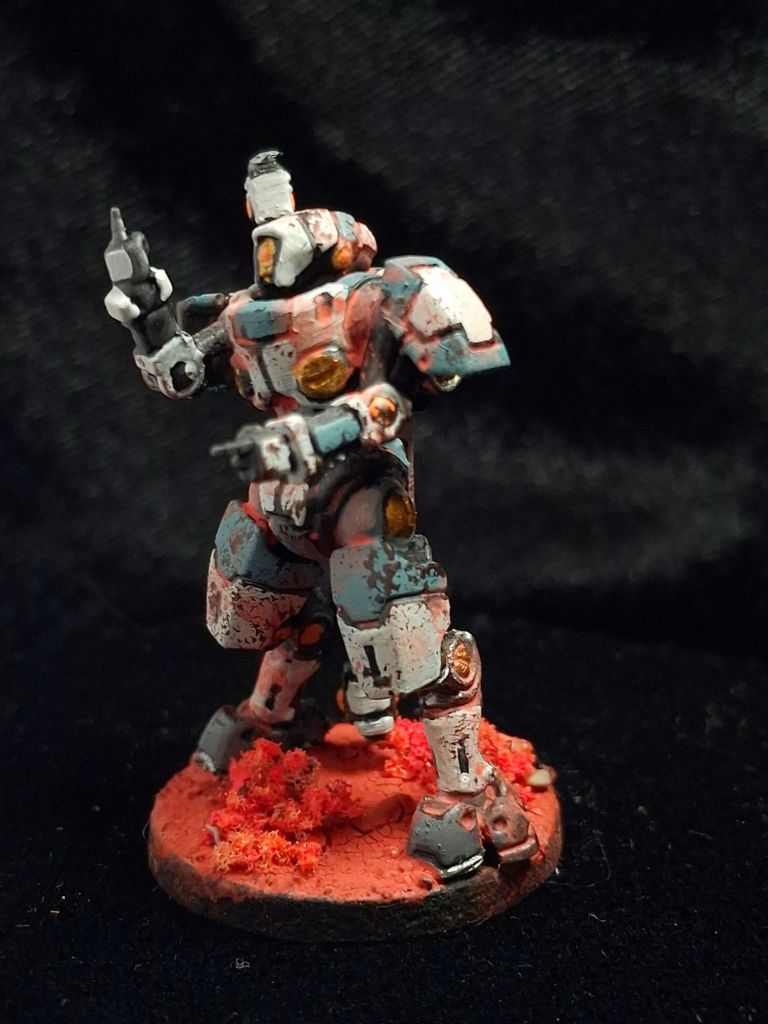
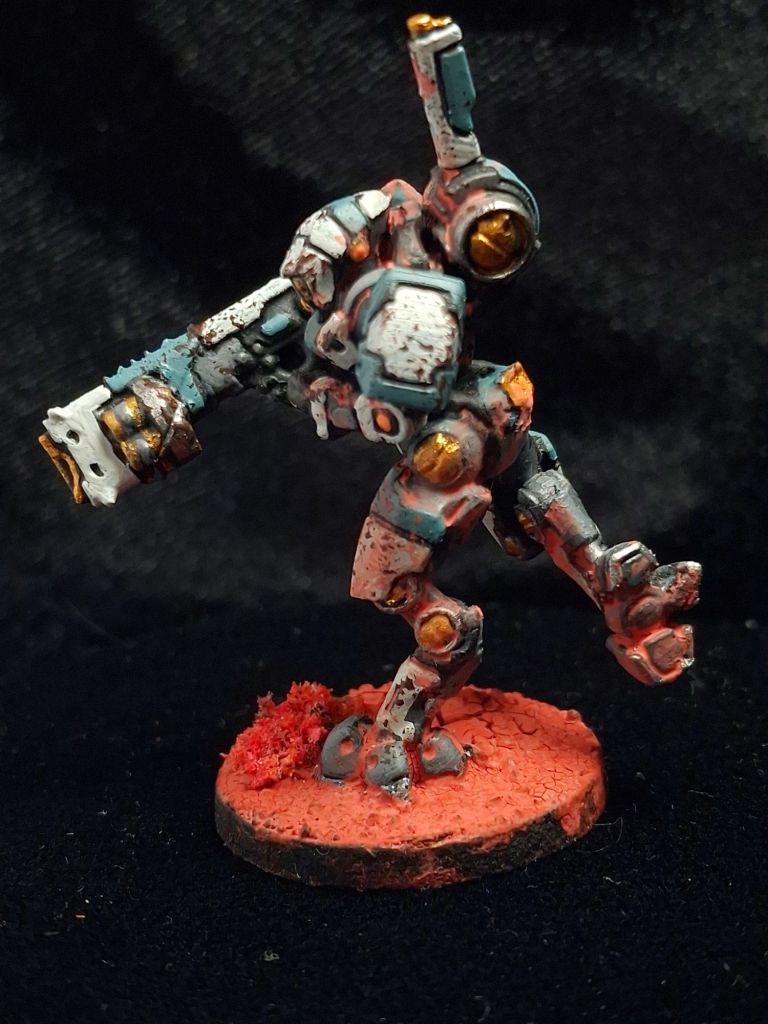
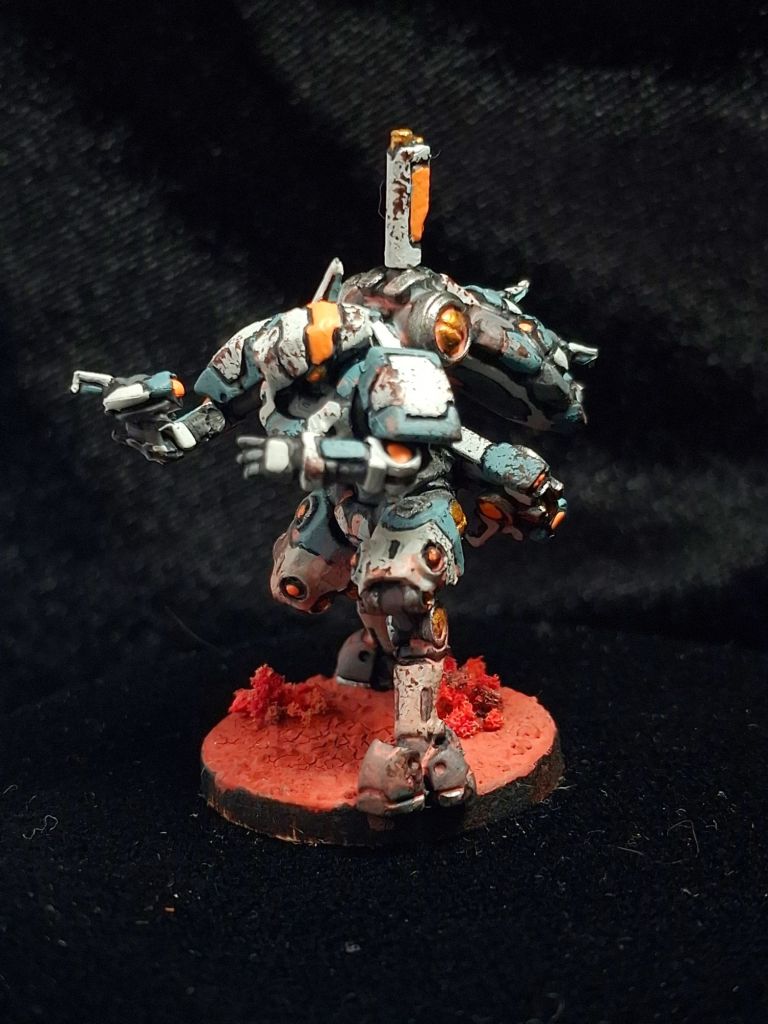
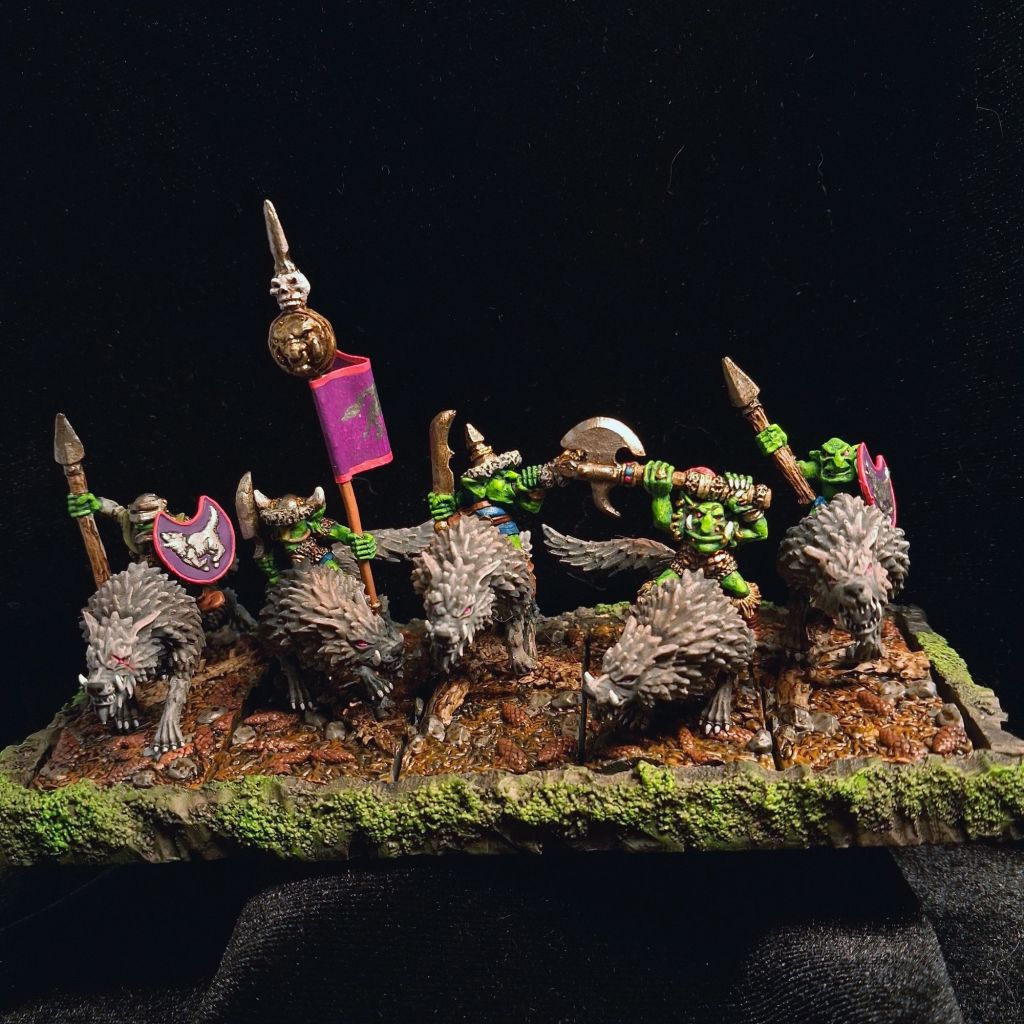
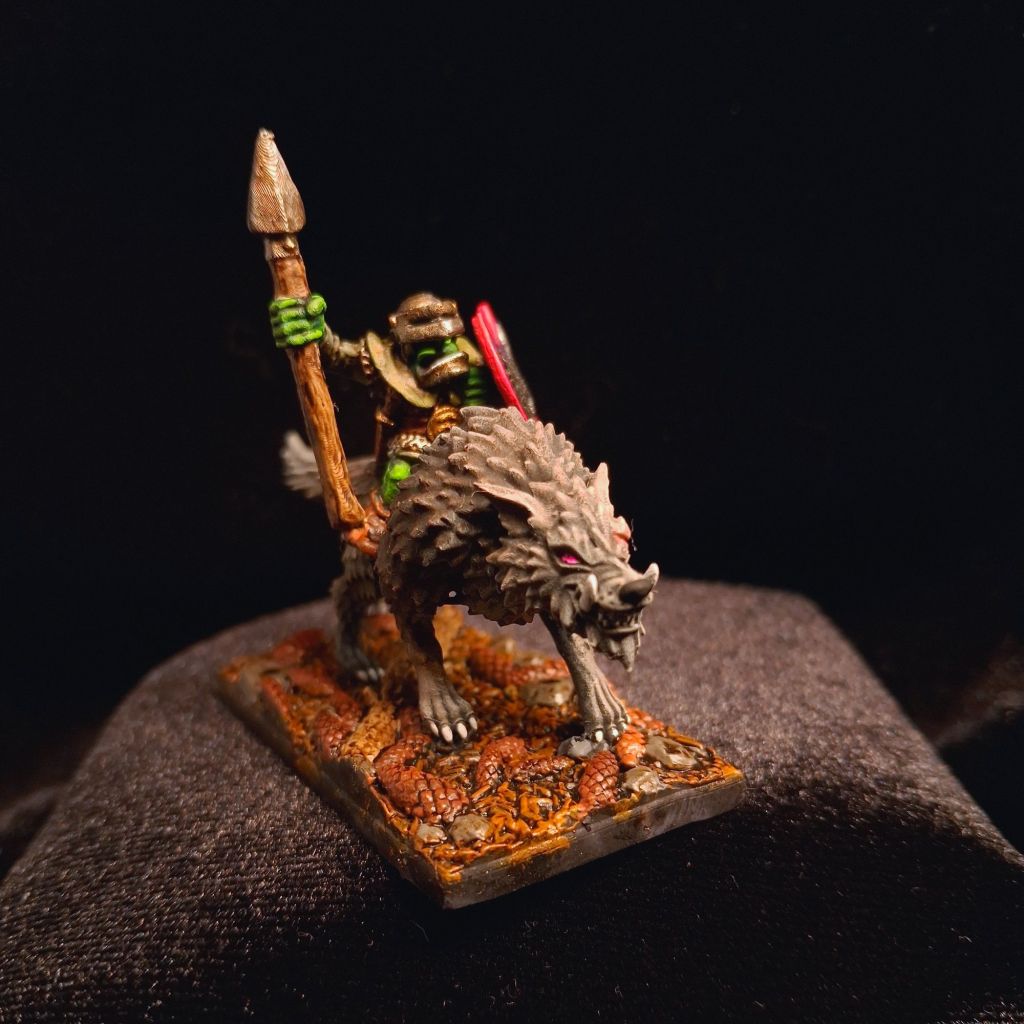
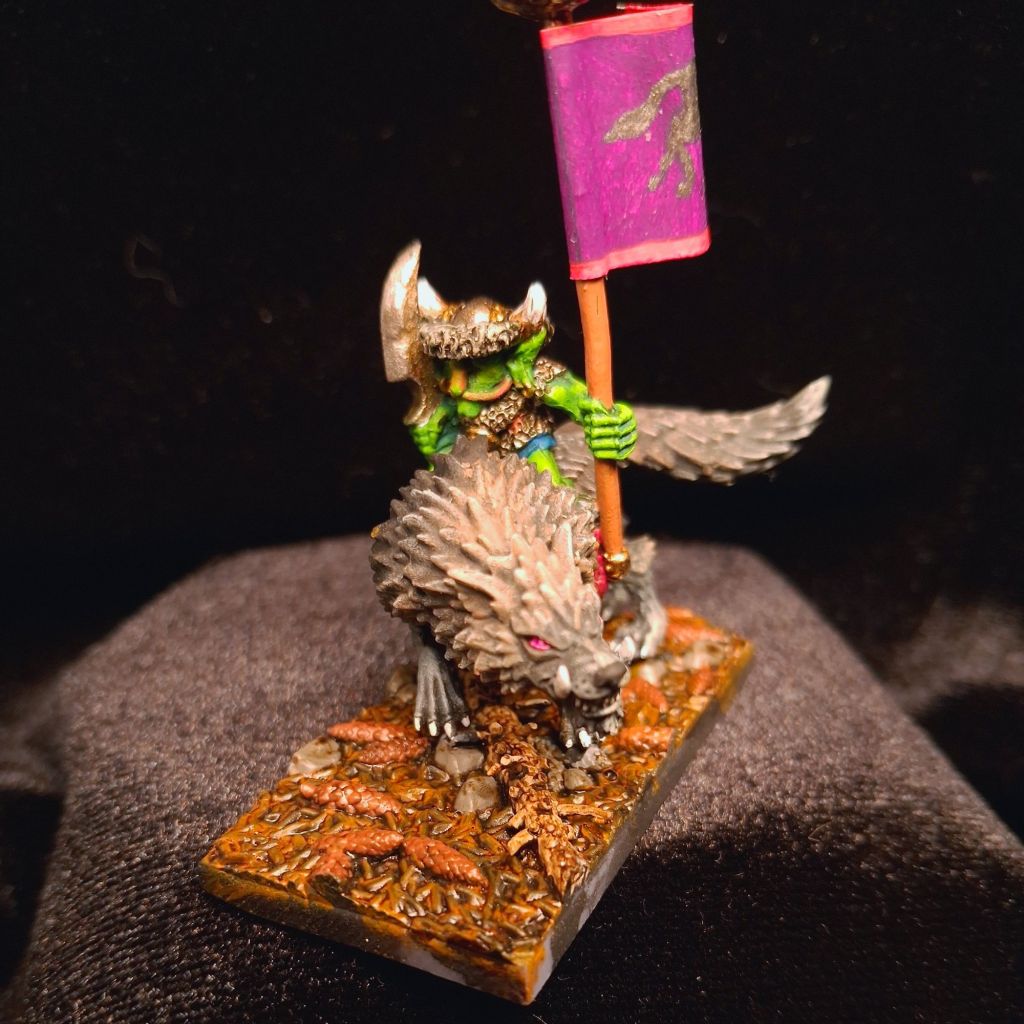
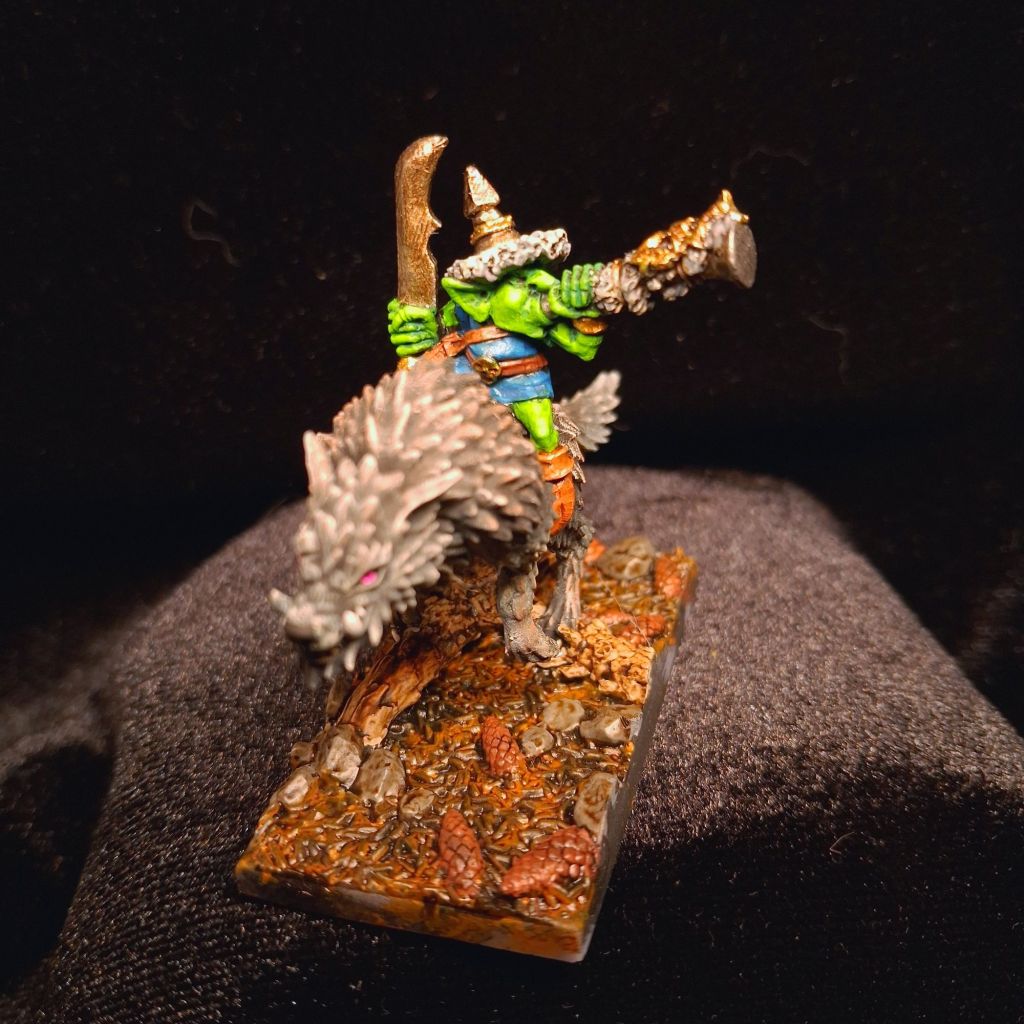
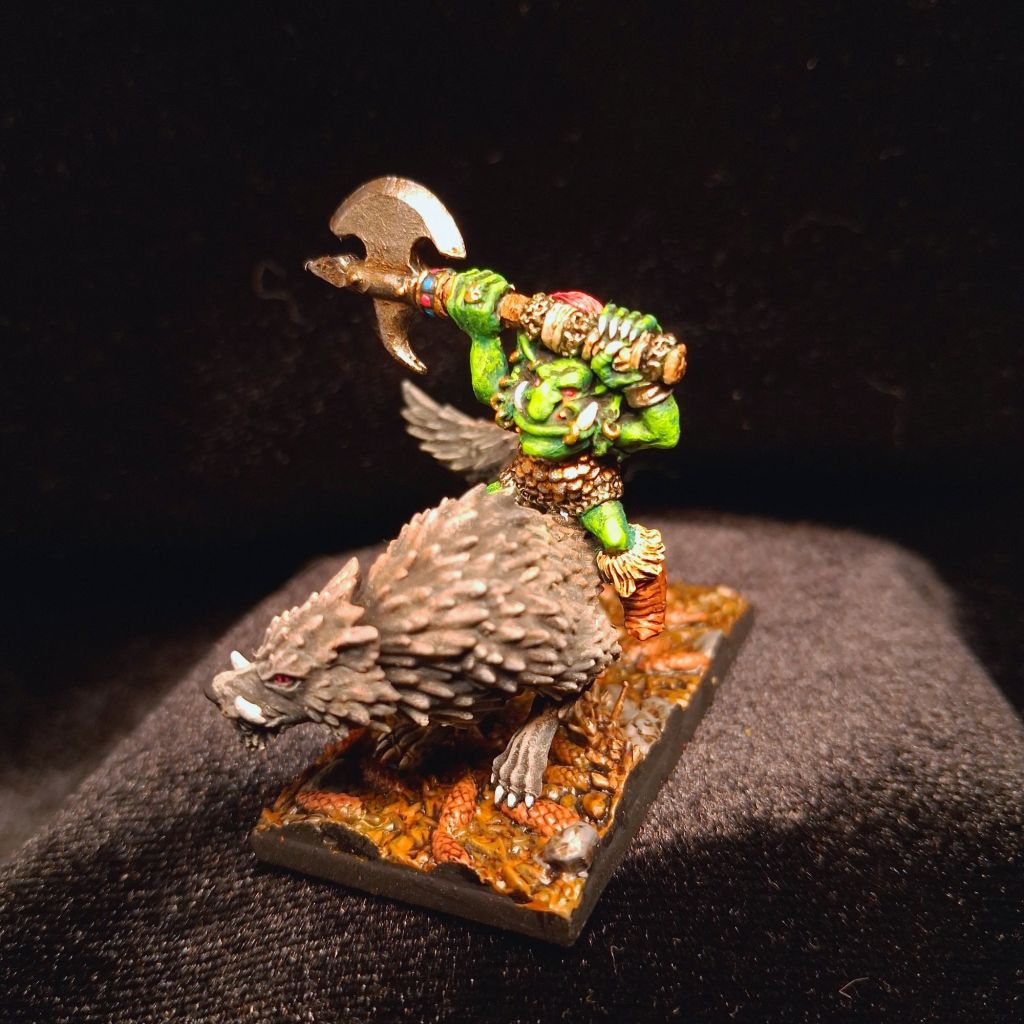
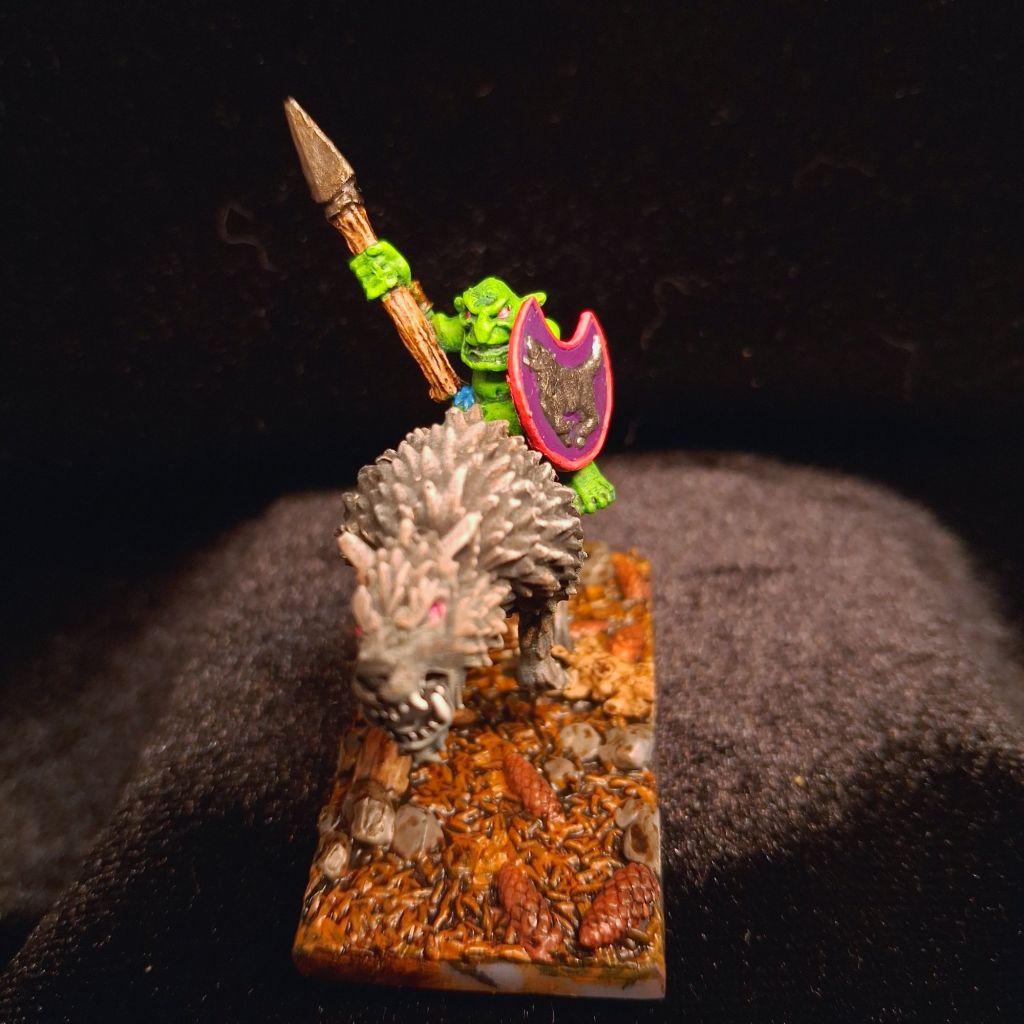
Foot of GorkPrincess Donut on Mongo I have been listening to Dungeon Crawler Carl.Genestealer PatriarchDeth KoptaSkull Chucker based for Dragon Rampant Tau proxy Pathfinders from #PipermakesFlowerpotWulfridersMdf containersSet dressing
That’s it for now.
The Sun has started making an appearance and it’s now warm enough to sit outside.
I am a fraid to say that this year’s resolutions are a repeat of last year’s. Of which I barely achieved any. The big plan to print and paint a 2000 pt proxy Tau army stalled. The reason? I hate batch painting and the unit I started last Summer is still on my bench. I will try a new approach, paint one figure at a time. Maybe this approach will work?
I still have this malaise and it is really hard to get motivated. I use my journal to chivvy me up and it is satisfying to tick off little tasks at the end of the day. It’s not helped by my taking blood pressure medication making me really fatigued. Apparently this will change as my body becomes acclimatised. Adding to this is the fact that I have nothing to look forwards to. Each day is a repeat of the last. I do remind myself that, unlike a lot of people at the moment, I am warm, fed and have a roof over my head. Also not helping are my biopsy results coming back positive.
Youth is wasted on the young.
BUT I did start, and finish, a few projects which had been started and then shelved years ago (in some cases). And I aim to keep on going with this. It is quite satifying taking boxes of bits and putting them together and freeing up some space.
I have been a little more diciplined regarding painting what I print before I start a new project. But there are several boxes of half started projects and I plan to tackle them this year.
My PC is under utilised, mostly being used as a home cinema setup and for gaming. Despite me saying, “No gaming here!”. The biggest time sink at the moment is Star Wars Outlaws.
One big project I would like to attempt is to get an overview of my Lead Mountain. Just so I know exactly what I have. I think I will start with my Orks, figure out what I need and sell any surplus.
This is something I keep meaning to post for several weeks. Motivation for anything is hard. I have my journal where I set myself daily tasks and that can be struggle at times. There is no sat around moping, I am constantly busy, but it seems so pointless. Mostly I have set myself the task of going through various projects which have been started and the abandoned as I get distracted by something new and shiny. Generally they seem to be scattered around in various boxes, so I have been compiling them into one box or actually trying to finish them. One project, some Ork barricades was started twenty years ago. I have now started slapping some paint on them. I need to reduce my clutter which can seem overwhelming at times.
Back on topic, my new computer. It was a budget build and some mistakes were made. But lessons were learned.The reason I needed a new computer was that my old iMac died (again), it was the graphics card. A known problem, Apple had used a cheap solder which degraded over time. I could have bought a new card for about 200 Euro but there were two problems. Firstly my clever neighbour who has helped me over the years with technical stuff had died. And secondly the iMac really struggled with with anything processor intensive like Blender or BambuLabs slicer.
In all I ended up spending around 1600 Euros, this included several bells and whistles. Knowing what I know now I wish I had saved up a bit more and bought some more advanced parts to future proof. As I said it’s my first time.
On to what I ended up getting.
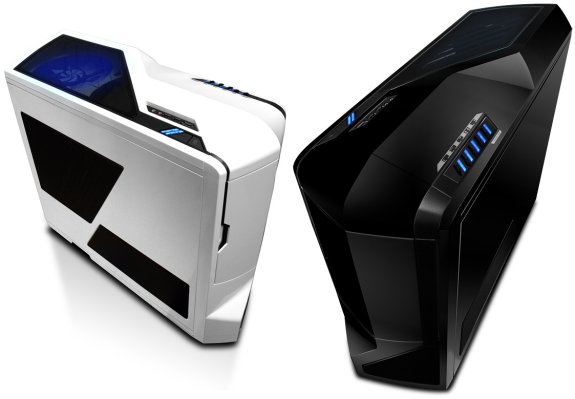
I bought two parts second hand. The first was this case. The NZXT Phantom full tower. Originally from around 2010. I now regret this. It looks lovely but it is huge and not really up to the job with modern components. It cost just over 40 Euro, with P&P, another 30 or so and I could have got a modern case.
The next second hand part was a BeQuiet! 750W Gold PSU. It arrived boxed as new and at half the price I would have paid if I had bought it new. No complaints.
For the monitor I chose the ODYS i27 monitor with a fancy Monitor mount.
Motherboard is an ASUS TUF Gaming B550 with wifi. Processor is AMD Ryzen 7 5700. 32gb of Crucial DDR4 ram. 1tb ssd. The GPU is NVIDEA GeForce RTX 3050. I got roasted so badly online when I had posted my build spec. When I had been researching it had been recommended as a decent budget GPU. So I am not quite sure where all the hate is coming from about this.
I did spend, probably too much, a bit on a keyboard. An Epomaker Leobog Hi86 mechanical keyboard with a solid aluminium body. It weighs a ton and feels so lovely. This I do not regret.
Tasteful
A Samsung Galaxy Tab 6E was bought for use as a graphics tablet. So far I have spent over five hours with Technical Support trying to the registration sorted out. It requests that a verification code is sent to my phone. No problem. However the code takes upto twelve hours to arrive. The verification window is two minutes. The helpdesk people haven’t been able to sort it out. Maybe there is a problem with my network? Well how come we are communicating almost immediately? They refuse to stray outside their script and when I request an upchain I’m told that there are no supervisors. I can’t request an escalation as the ticket is open. I am promised call backs which never happen which means I have to repeat the problem again to another person. GRRR!
My old scanner finally gave up the ghost. It was an Epson with the ability to scan negatives. The replacement cost was eye wateringly expensive. So I have gone with a Canon.
Money was spent on various USB cables, velcro strips for cable tidying, desk light Mouse, Mousemat, influencer lighting strips and a USB hub.
For sound I dug out my old speakers.
Nice
Once it is dark I will attempt to take some pictures so you can see it in all it’s influencer glory.
I made something new. Don’t worry this time it is hobby related.
Years ago when I was taking the Boys to the playground I spotted something buried in the mud by the swings. I couldn’t tell what it was and being bored I dug it out with the help of stick. It was a mini tripod. I cleaned it up, stuck it in a corner and forgot about it.
I have started to use my “Handy” for taking photographs but I have a little trouble with camera shake. During my recent tidying I came across it. And now that I can laser cut again I had an idea.
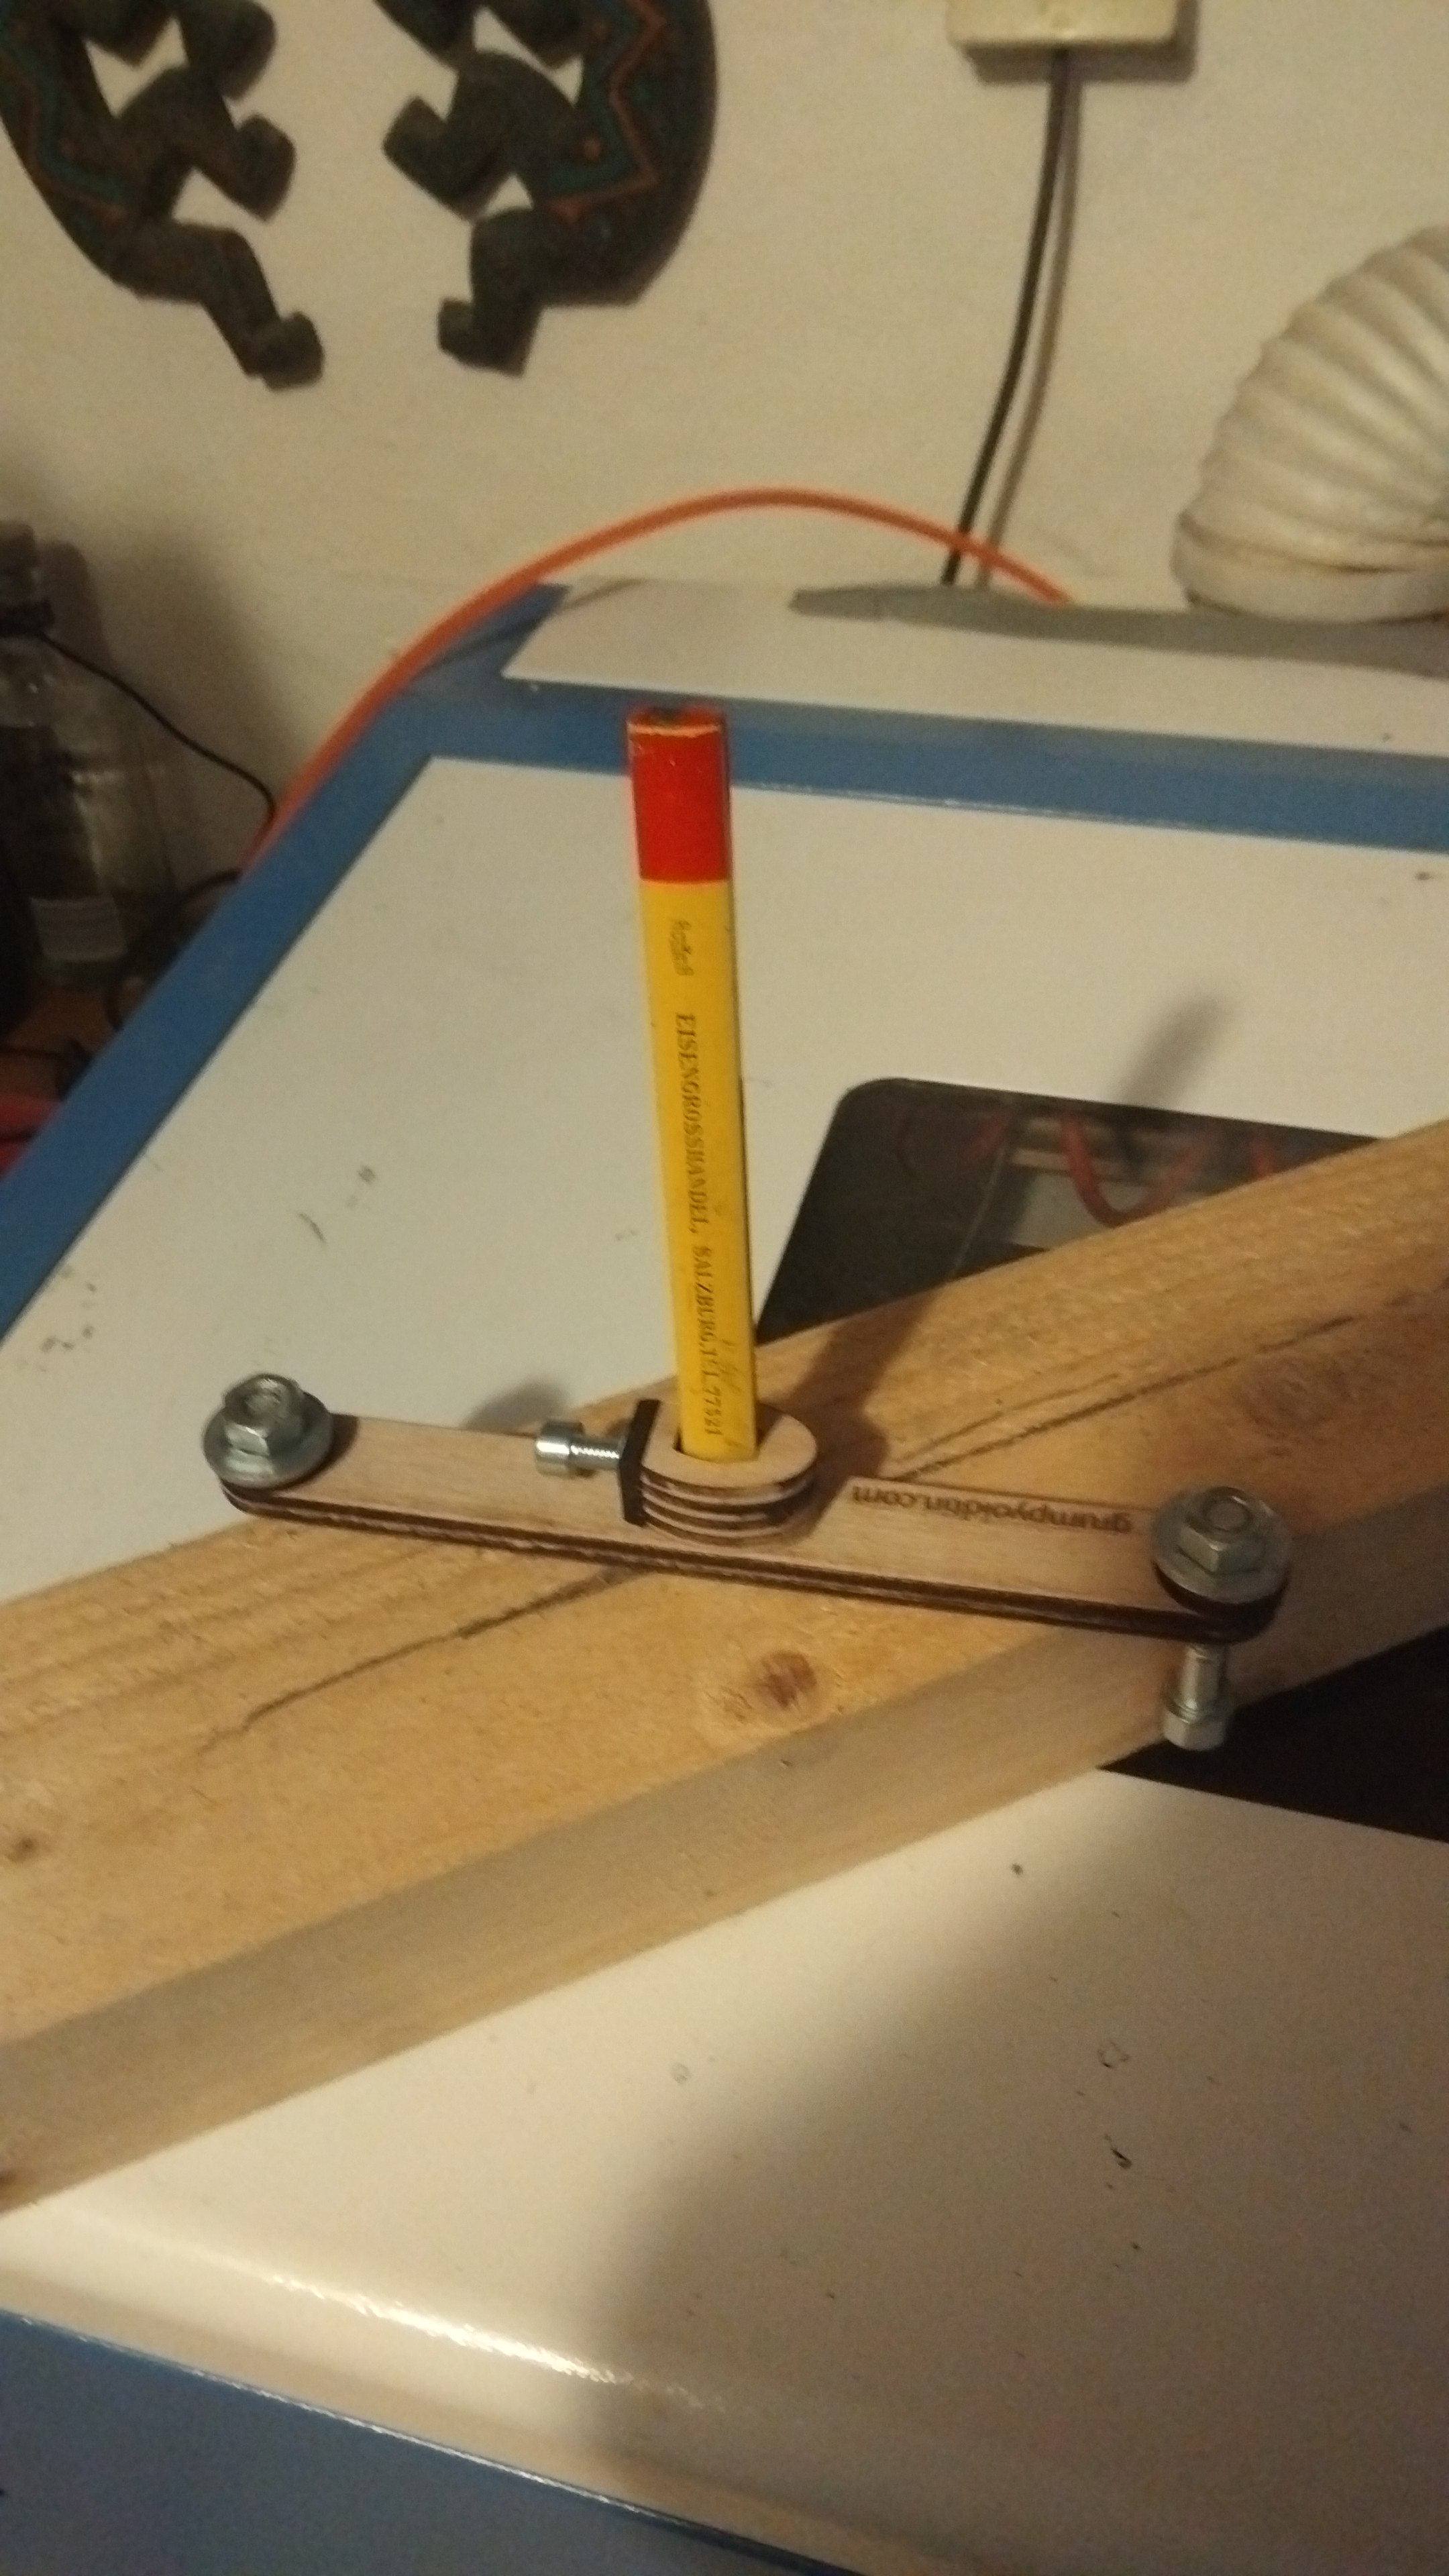
I was browsing through various woodworking tools online, as you do, and came across a centre line marker. It is probably not something I would use frequently, if ever, but I looked at it and thought, “I can do that!”
This was the first iteration using bolts that I had in abundance from Electric Love waste.Here it is in operation but the bolts wobbled and didn’t give a satisfactory result. And the bolt used to secure the pencil was awkward to tighten.Iteration three.
I replaced the side guide bolts with dowling to reduce the wobble following the adage, “Keep It Simple Stupid!” I wish I had discovered woodworking forty years ago rather than recently.
Don’t worry dear Reader I will be returning to the Hobby. This Blog needs a bit of a refresh and I plan to make some changes. My catalogue of lasercut bits needs a lot of trimming. I would like to start photographing my figures properly and make the gallery images standardised. And as the Mancave has stumbled to a halt I want to delete it and start a page focussing on the tools and equipment I use.
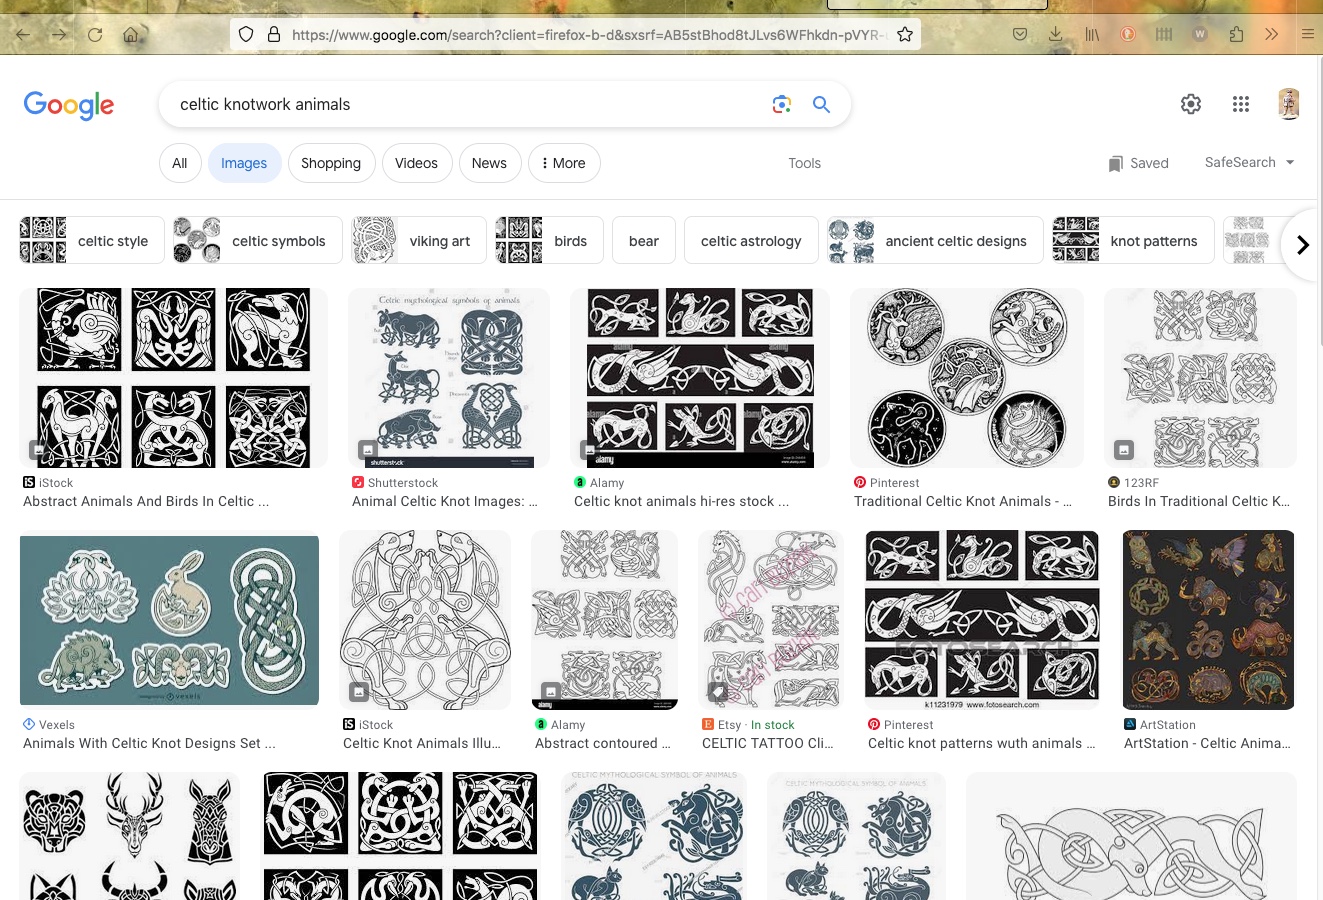
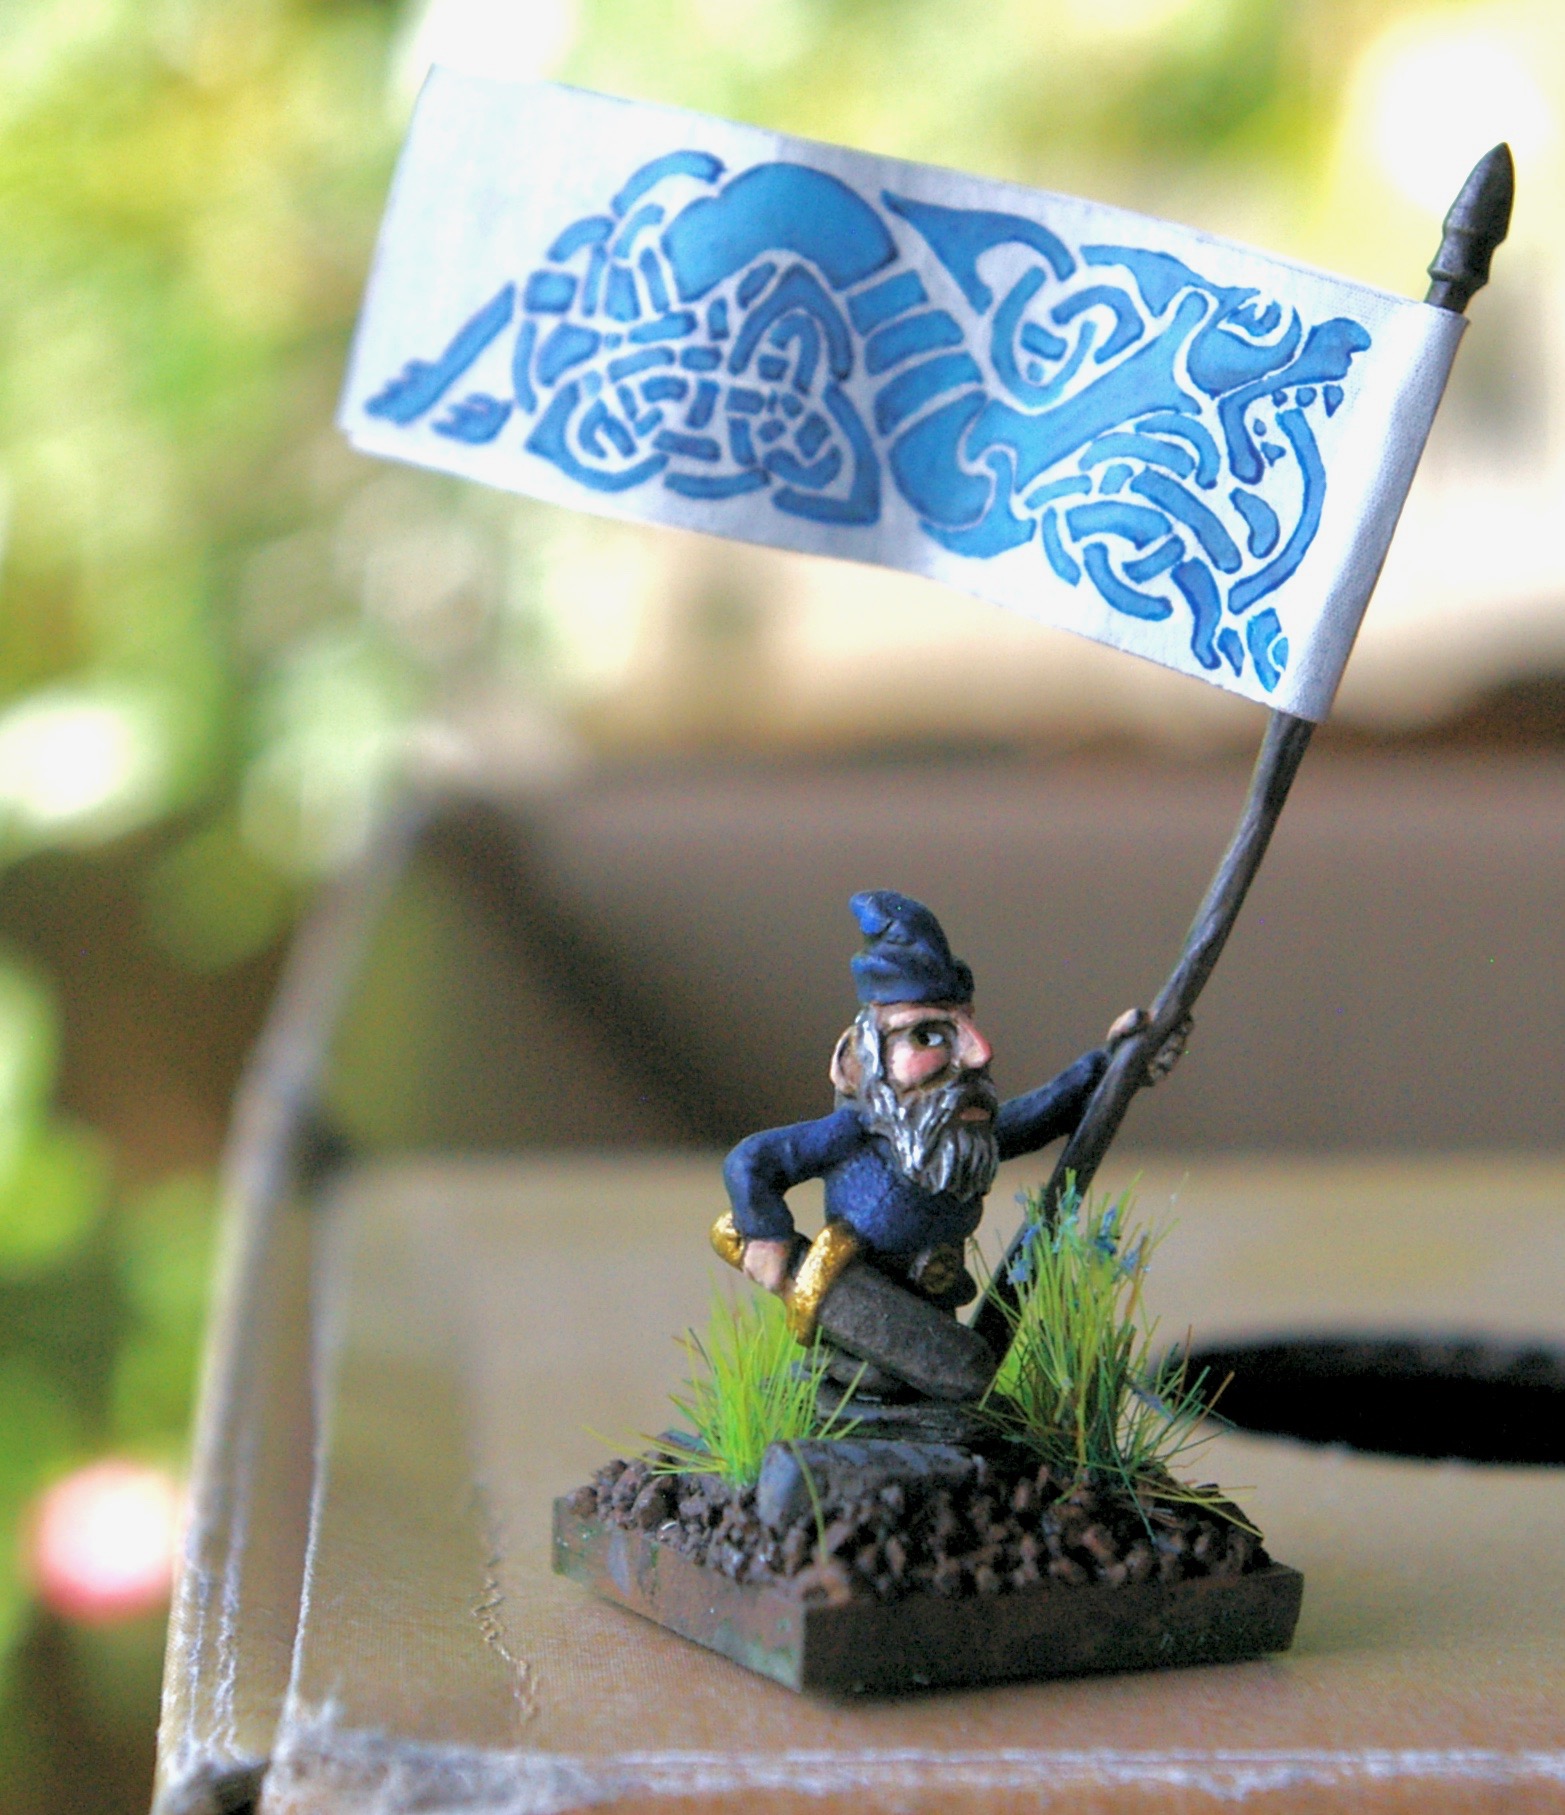
I don’t know if this a “Cheat” or not, but this is the way I make my banners. Using my Gnome Army as an example, I go to Google images. As I wanted a sort of Celtic look I typed in “Celtic Knotwork Animals” and got a result like this.
Then I download the images I like and resize them in Illustrator and print them out. I have a small sheet of plywood which I then tape them to.
Then I carefully paint between the lines. Once dry I cut them out and fold them around the banner pole. Et voila!
I have something to “Top off” my life
My Wife and partner of twenty two years, who I love dearly, announced two weeks ago that she no longer loves me and wants to separate.
She does not want to talk about it as it it is all over as far as she is concerned.
I am devastated.
I gave up EVERYTHING to move here to Austria with her and the Boys. I am feeling pretty lost.
I have started writing down how I feel. But I am not sure if this blog is the right place to put my feelings out there.
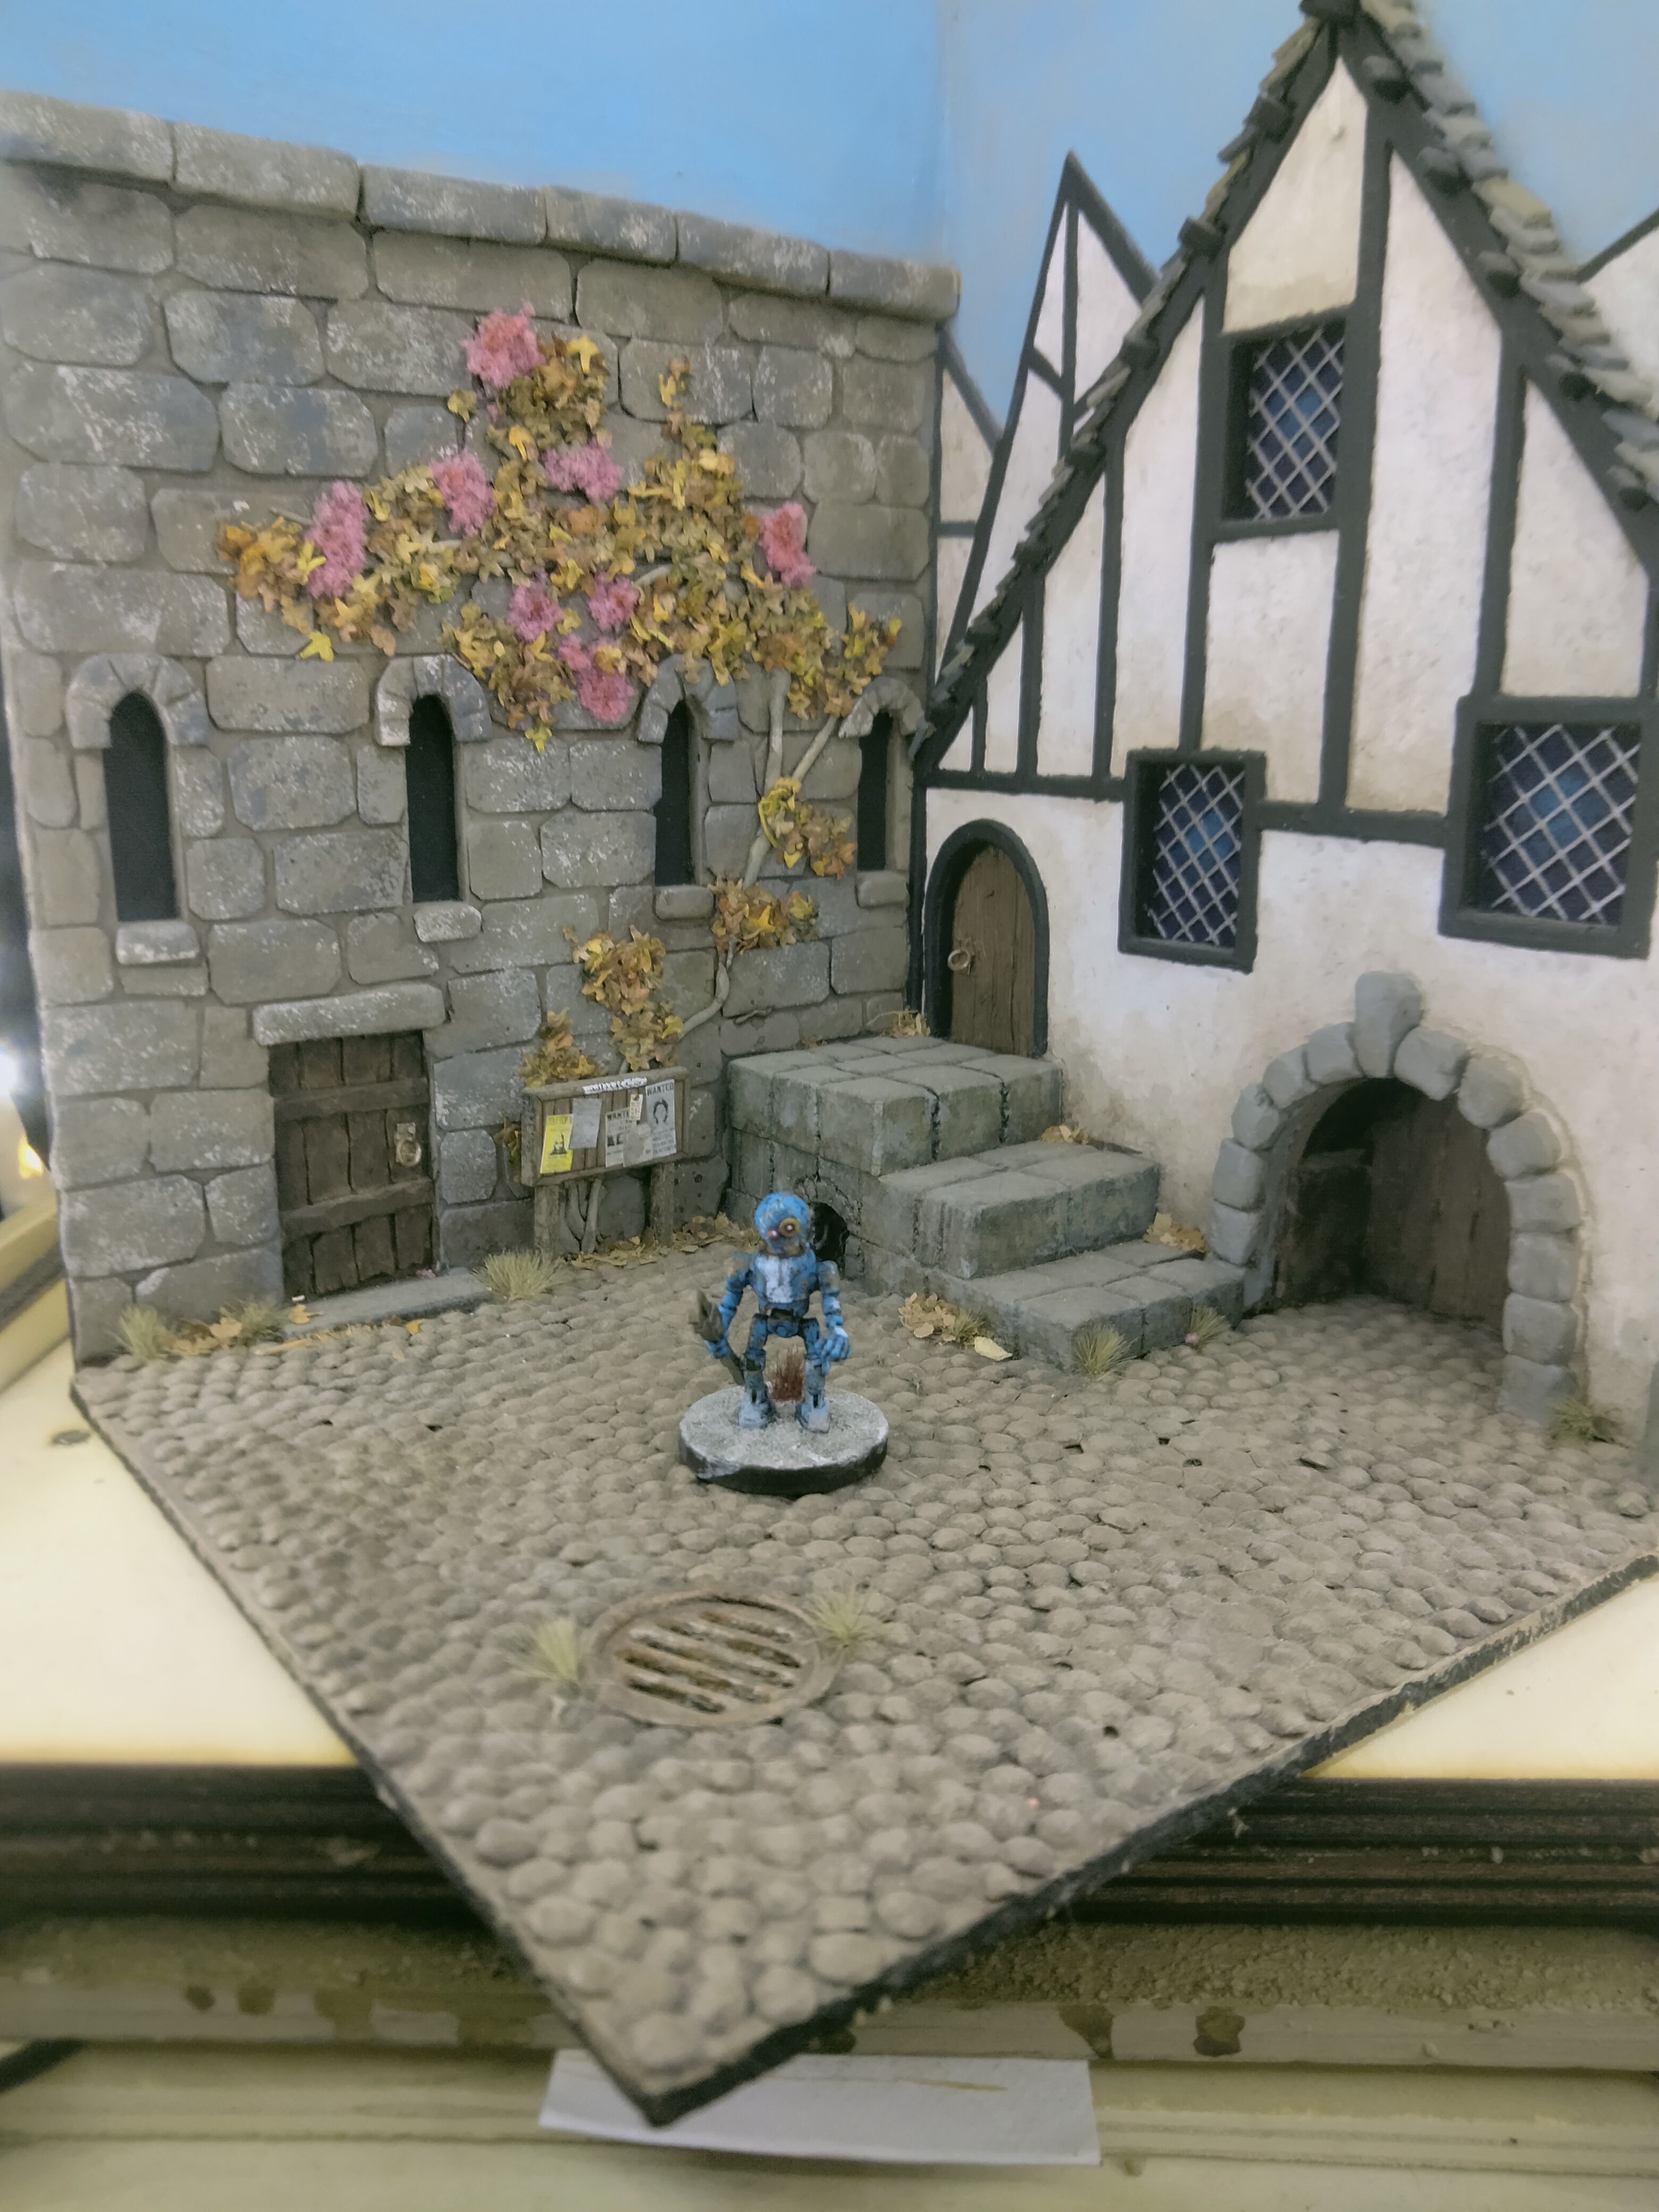
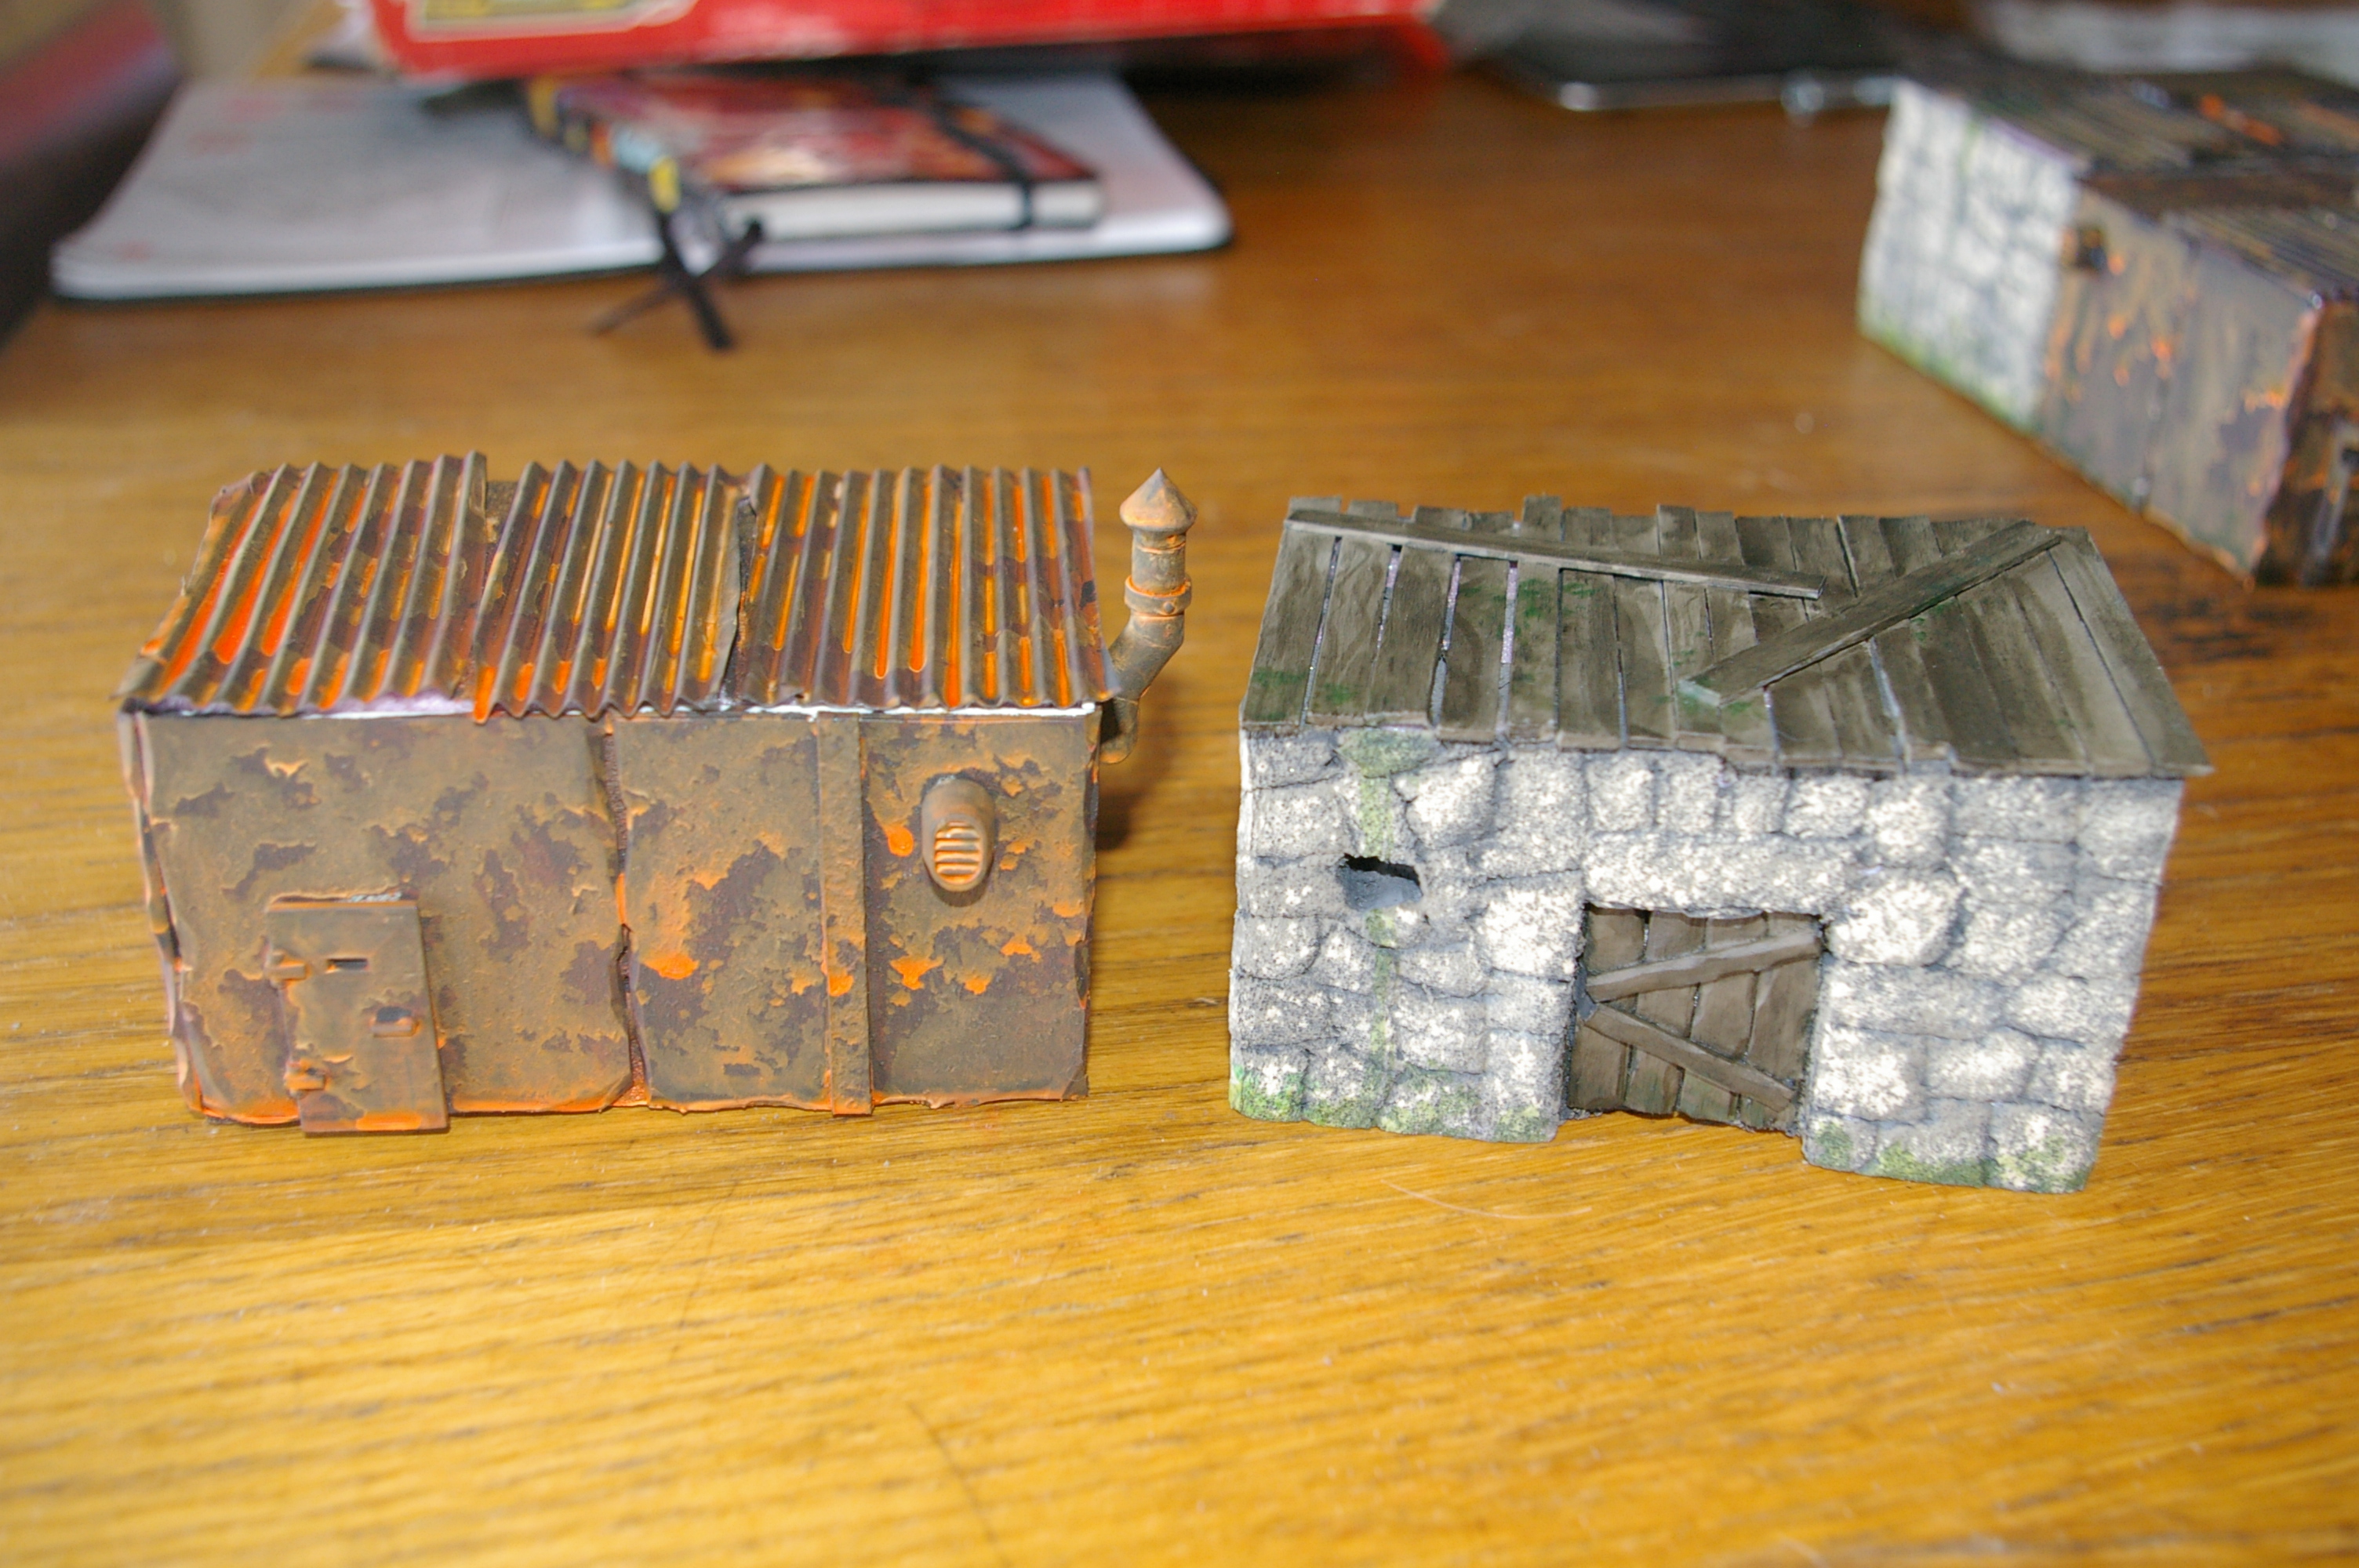
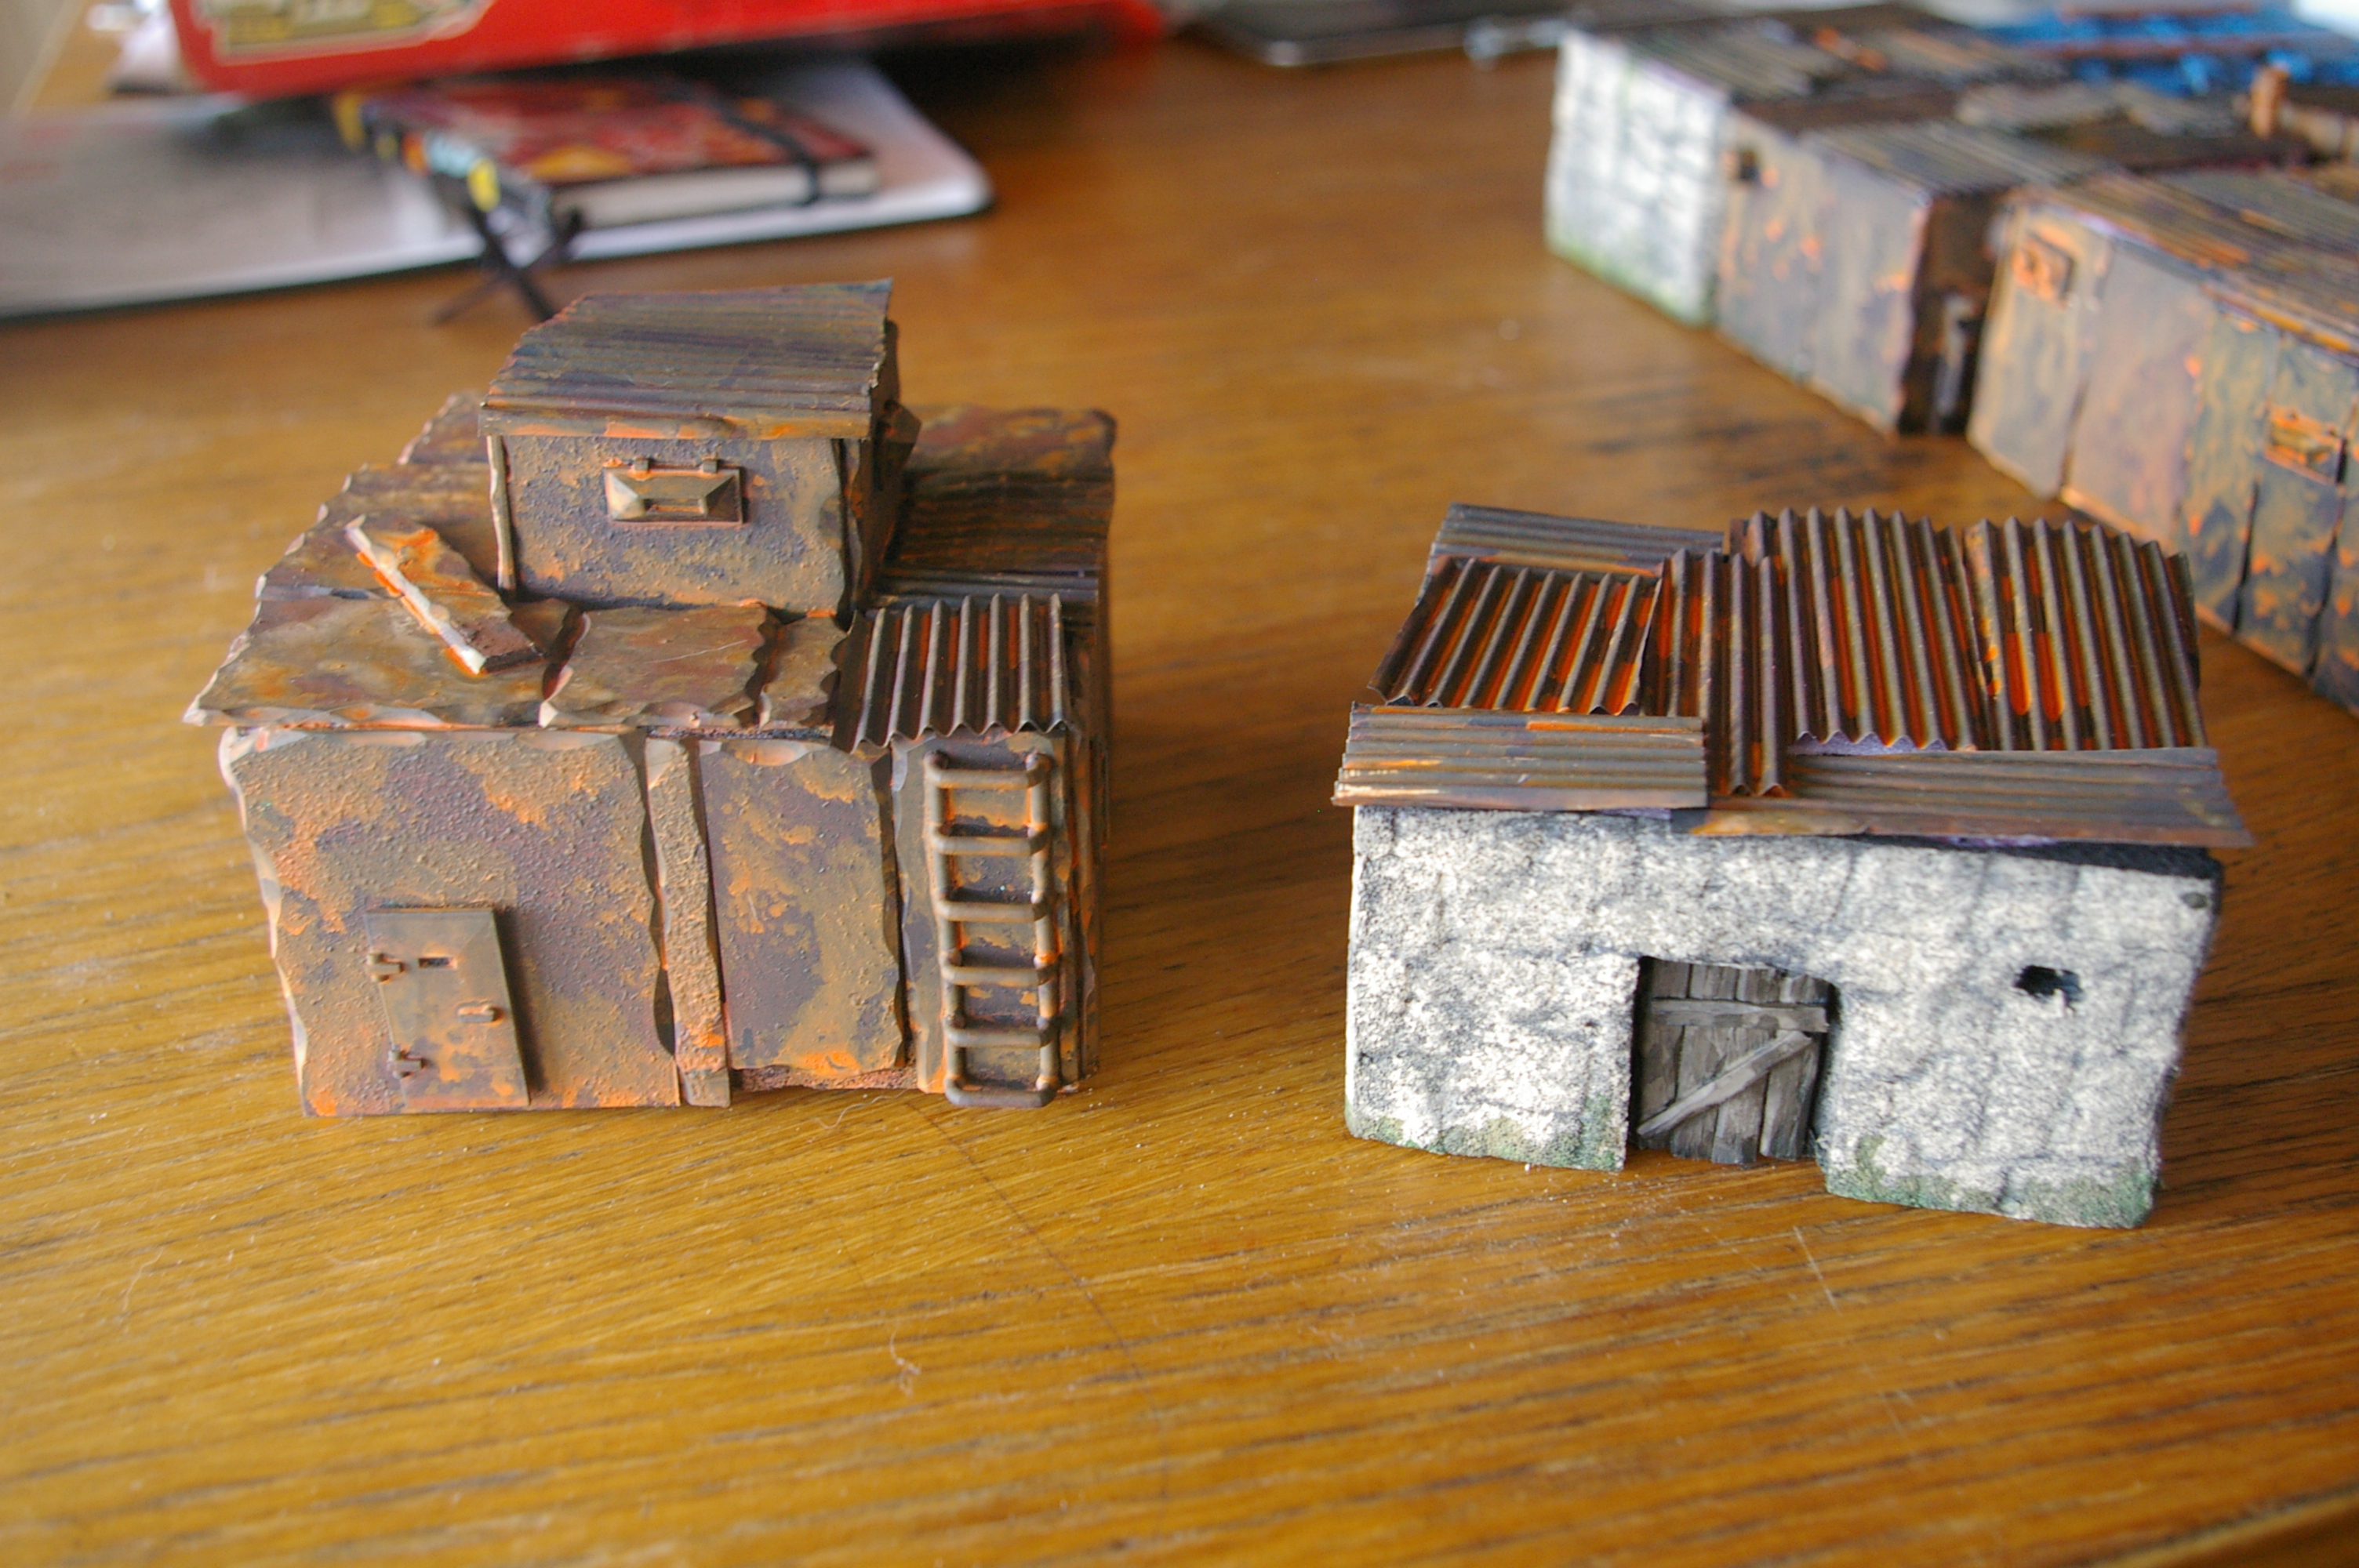
Work on Weasel Town has been plodding along slowly and now that the nice weather has started I can work outside. Originally the floor ducking (correct word?) was laser cut card but since I no longer have access to a good laser machine I have started 3D printing them. Work had stalled because of a lack of them. The home laser I have lack power because it is a cheap Chinese tube and it’s life has expired. My Blender skills and confidence have improved a tiny bit so I used it to created the ducking which I then printed out on my Ender 3.
One regret is that I didn’t look at my original card tiles as they are slightly more elegant. Mind you once they are coated in mud and grime and observed from three feet away I don’t thing anyone will be criticising the design aesthetic.
I had started designing modular tiles as way to to have a flexible tabletop. One lesson I have learnt, is to to be consistent. That way I could have integrated my ruined desert city tiles with the trench system. Possibly the way to go is to make a series of risers so the tile heights match up.
The reason I had started going modular was because of this Kickstarter.
However by the time I actually get the book I probably will have moved on to something else, rendering it redundant.
Anyway, grumbling aside, The author Michael Martin has a Youtube channel. TWS Tabletop Workshop. One of the videos was about making a diy crackle paste.
The ingredients were diatomaceous earth. This looked interesting as I want parched earth for my terrain tiles. Amazon had some but it was a touch out of my budget. Which let’s politely say is near zero.
Owning pets sometimes has an upside. We needed cat litter for our seventeen year old cat. She spends her days curled up on our bed and doesn’t venture out much. We had got a new brand which looked soil like. After she had used it, she is a prolific pisser, the litter started to crackle when dried. Interesting. Are you pondering what I’m pondering? I took some clean litter mixed a bit with PVA and stuck it on a piece of MDF. The result was really good. I then mixed up some more and applied it to one of my terrain tiles.
Rookie mistake! Make sure you put an under colour down first.
I have to experiment now and work out proportions so that consistency is maintained.
This is a link to the product and for eight litres I think that is a pretty good price. The only ingredient is Bentonite which is an absorbent swelling clay consisting mostly of montmorillonite (a type of smectite).
I’ve been hankering after making some modular trenches for a while. I started but when I laid them out earlier this week it seems that I do not have nearly enough. Plus I did not have any “kinks” (not sure of the correct terminology) to stop a gunner standing at one end of a trench and taking aim down the entire length.
One of the rule-sets I was reading, “The Last War” talks about a settlement in the wastelands. For some reason it caught my fancy. A tidying up job at the beginning of the year was sorting out my movement trays and I had a whole lot of crude plasticard ones that I had made about twenty years ago. This has left me with a big bag of plasticard. I also have some big sheets of pink insulation foam recovered from some building work nearby.
I wonder…….
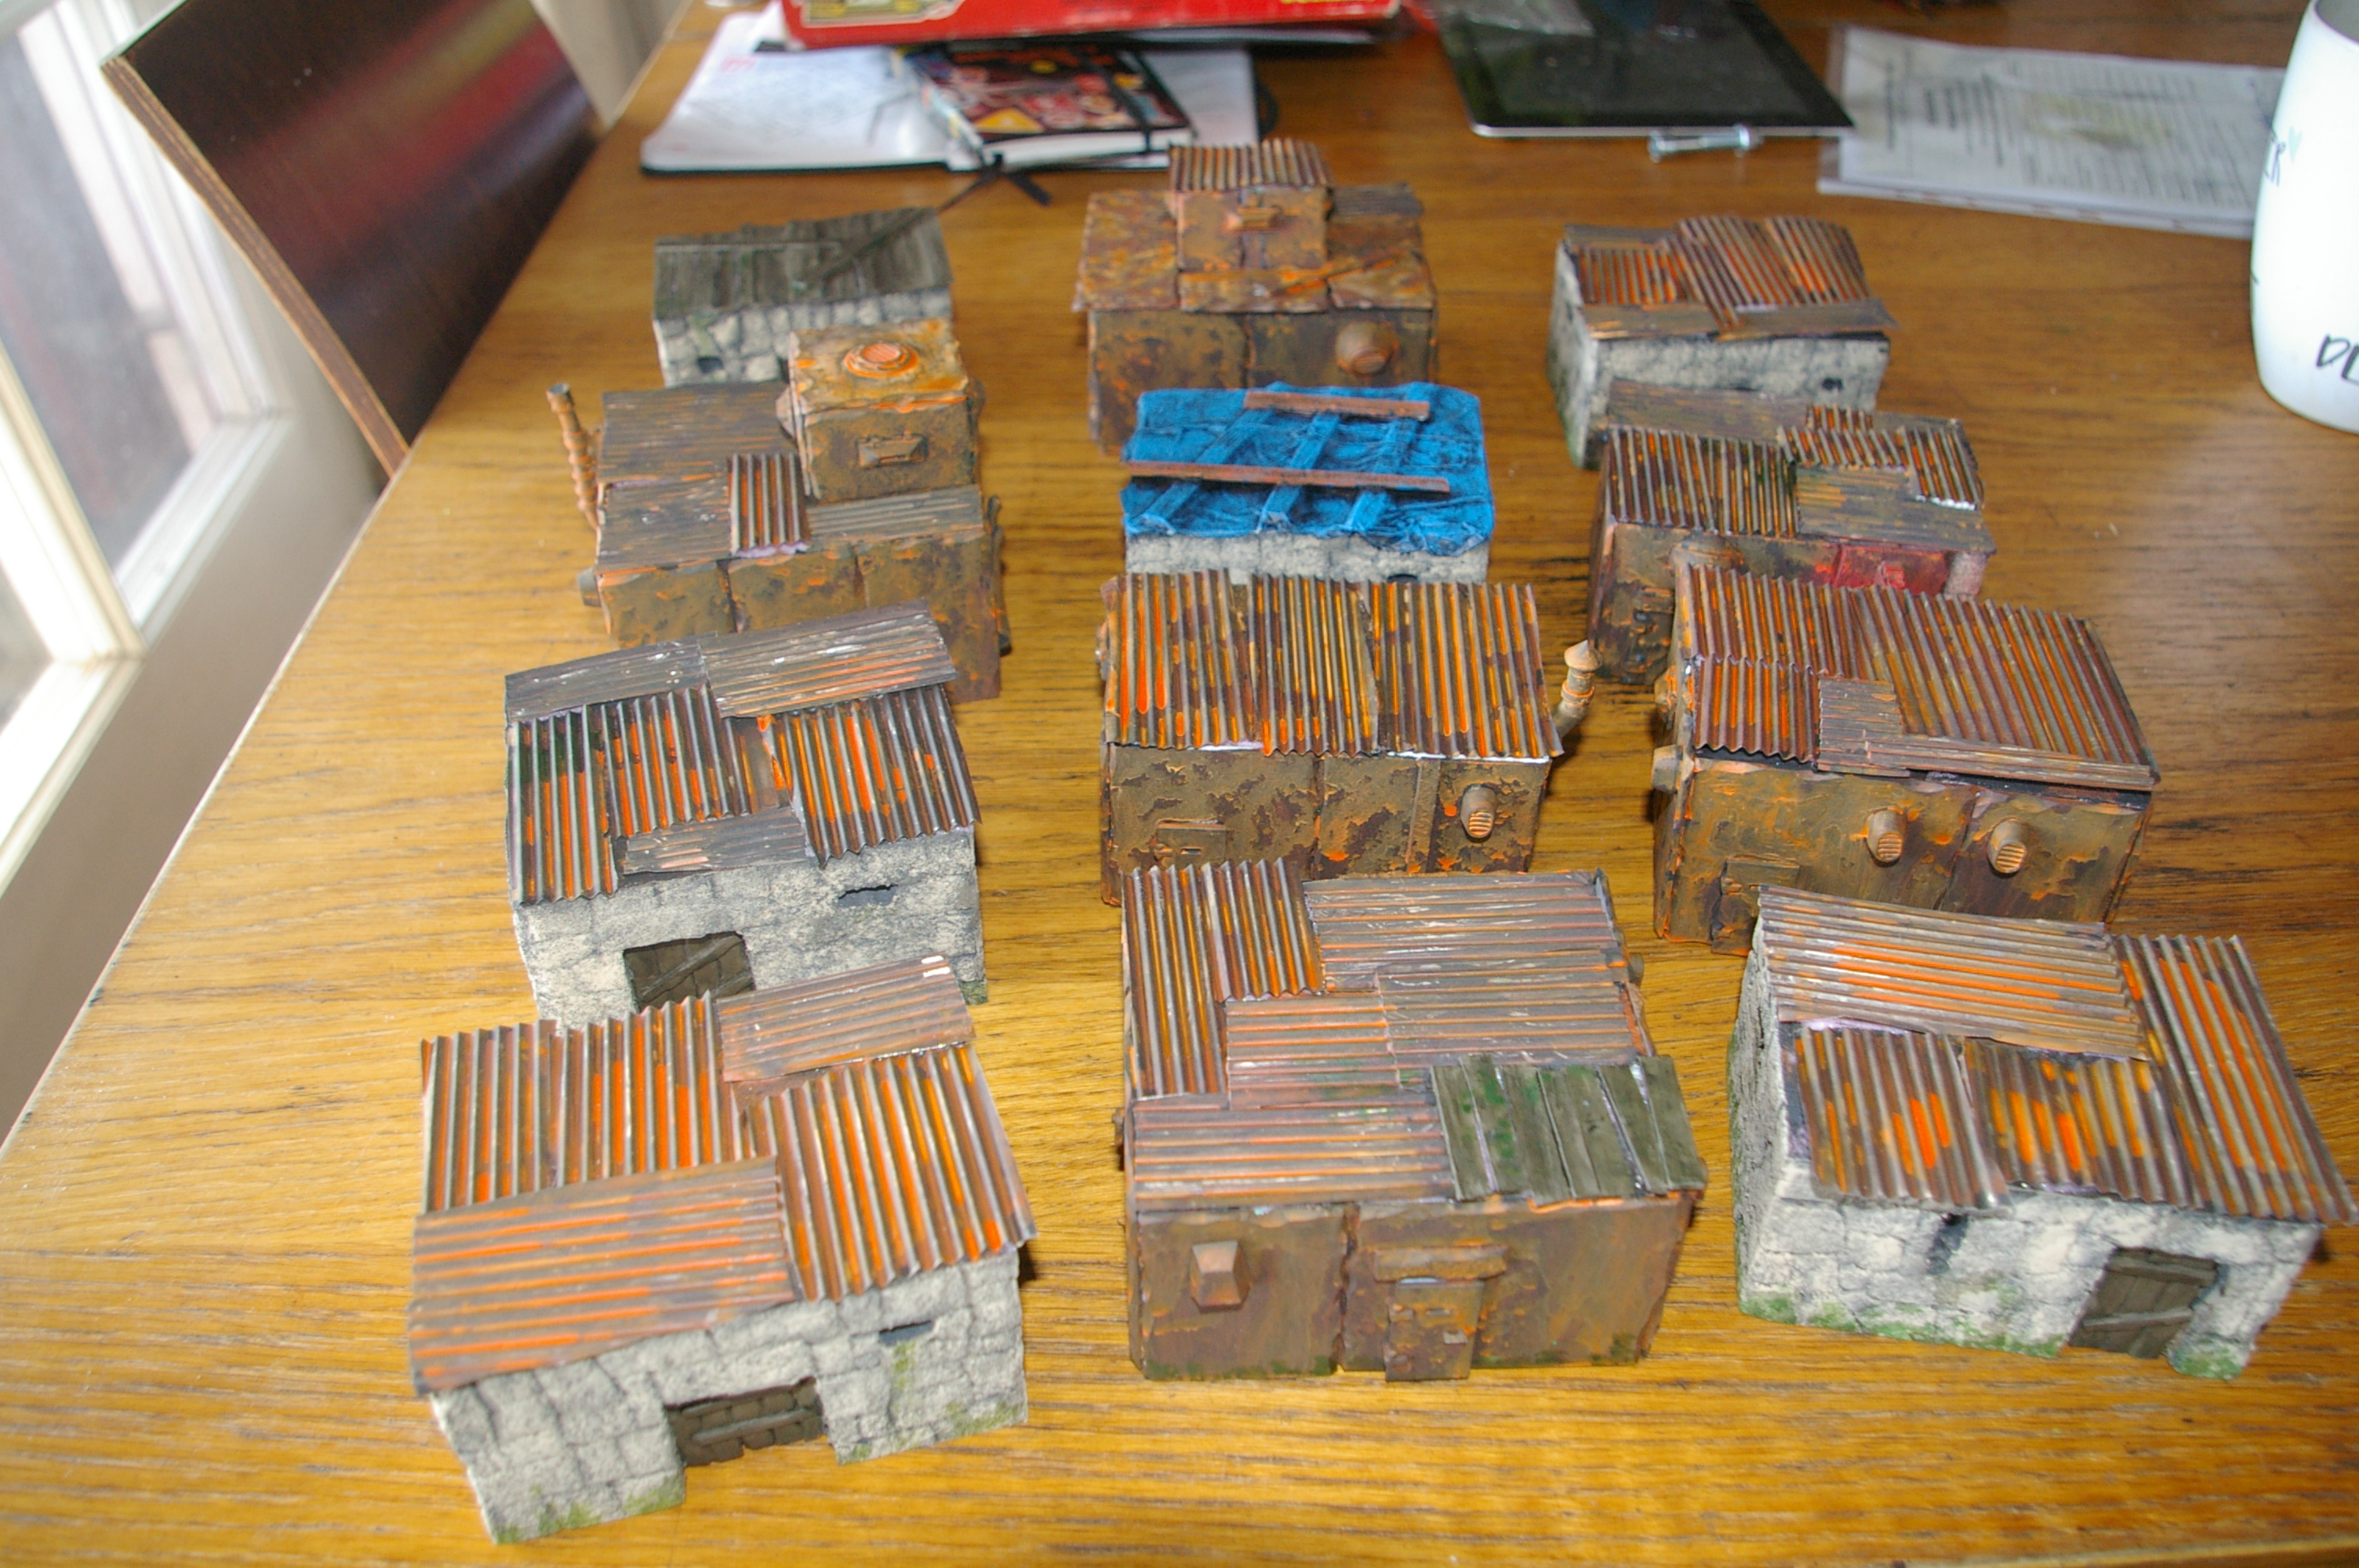
Weasel Town surrounded by trenches
The finished group
I added detailing with resin parts from Ramshackle Games and 3D printed parts from Knucklebones Miniatures. The tin roofs were made from Red Bull cans run through a corrugator from Green Stuff World. I found out later that this is just a toothpaste squeezer rebranded for twice the price. Painted with household emulsion paint. The rust was done with Green Stuff World Rust paint, which is frankly rubbish and I wanted to use it up.
I thought I had documented the making process, but when I stuck the memory card into the computer there was nothing to be seen.
I have a few more pictures to add, since May. May? Where did the time go?
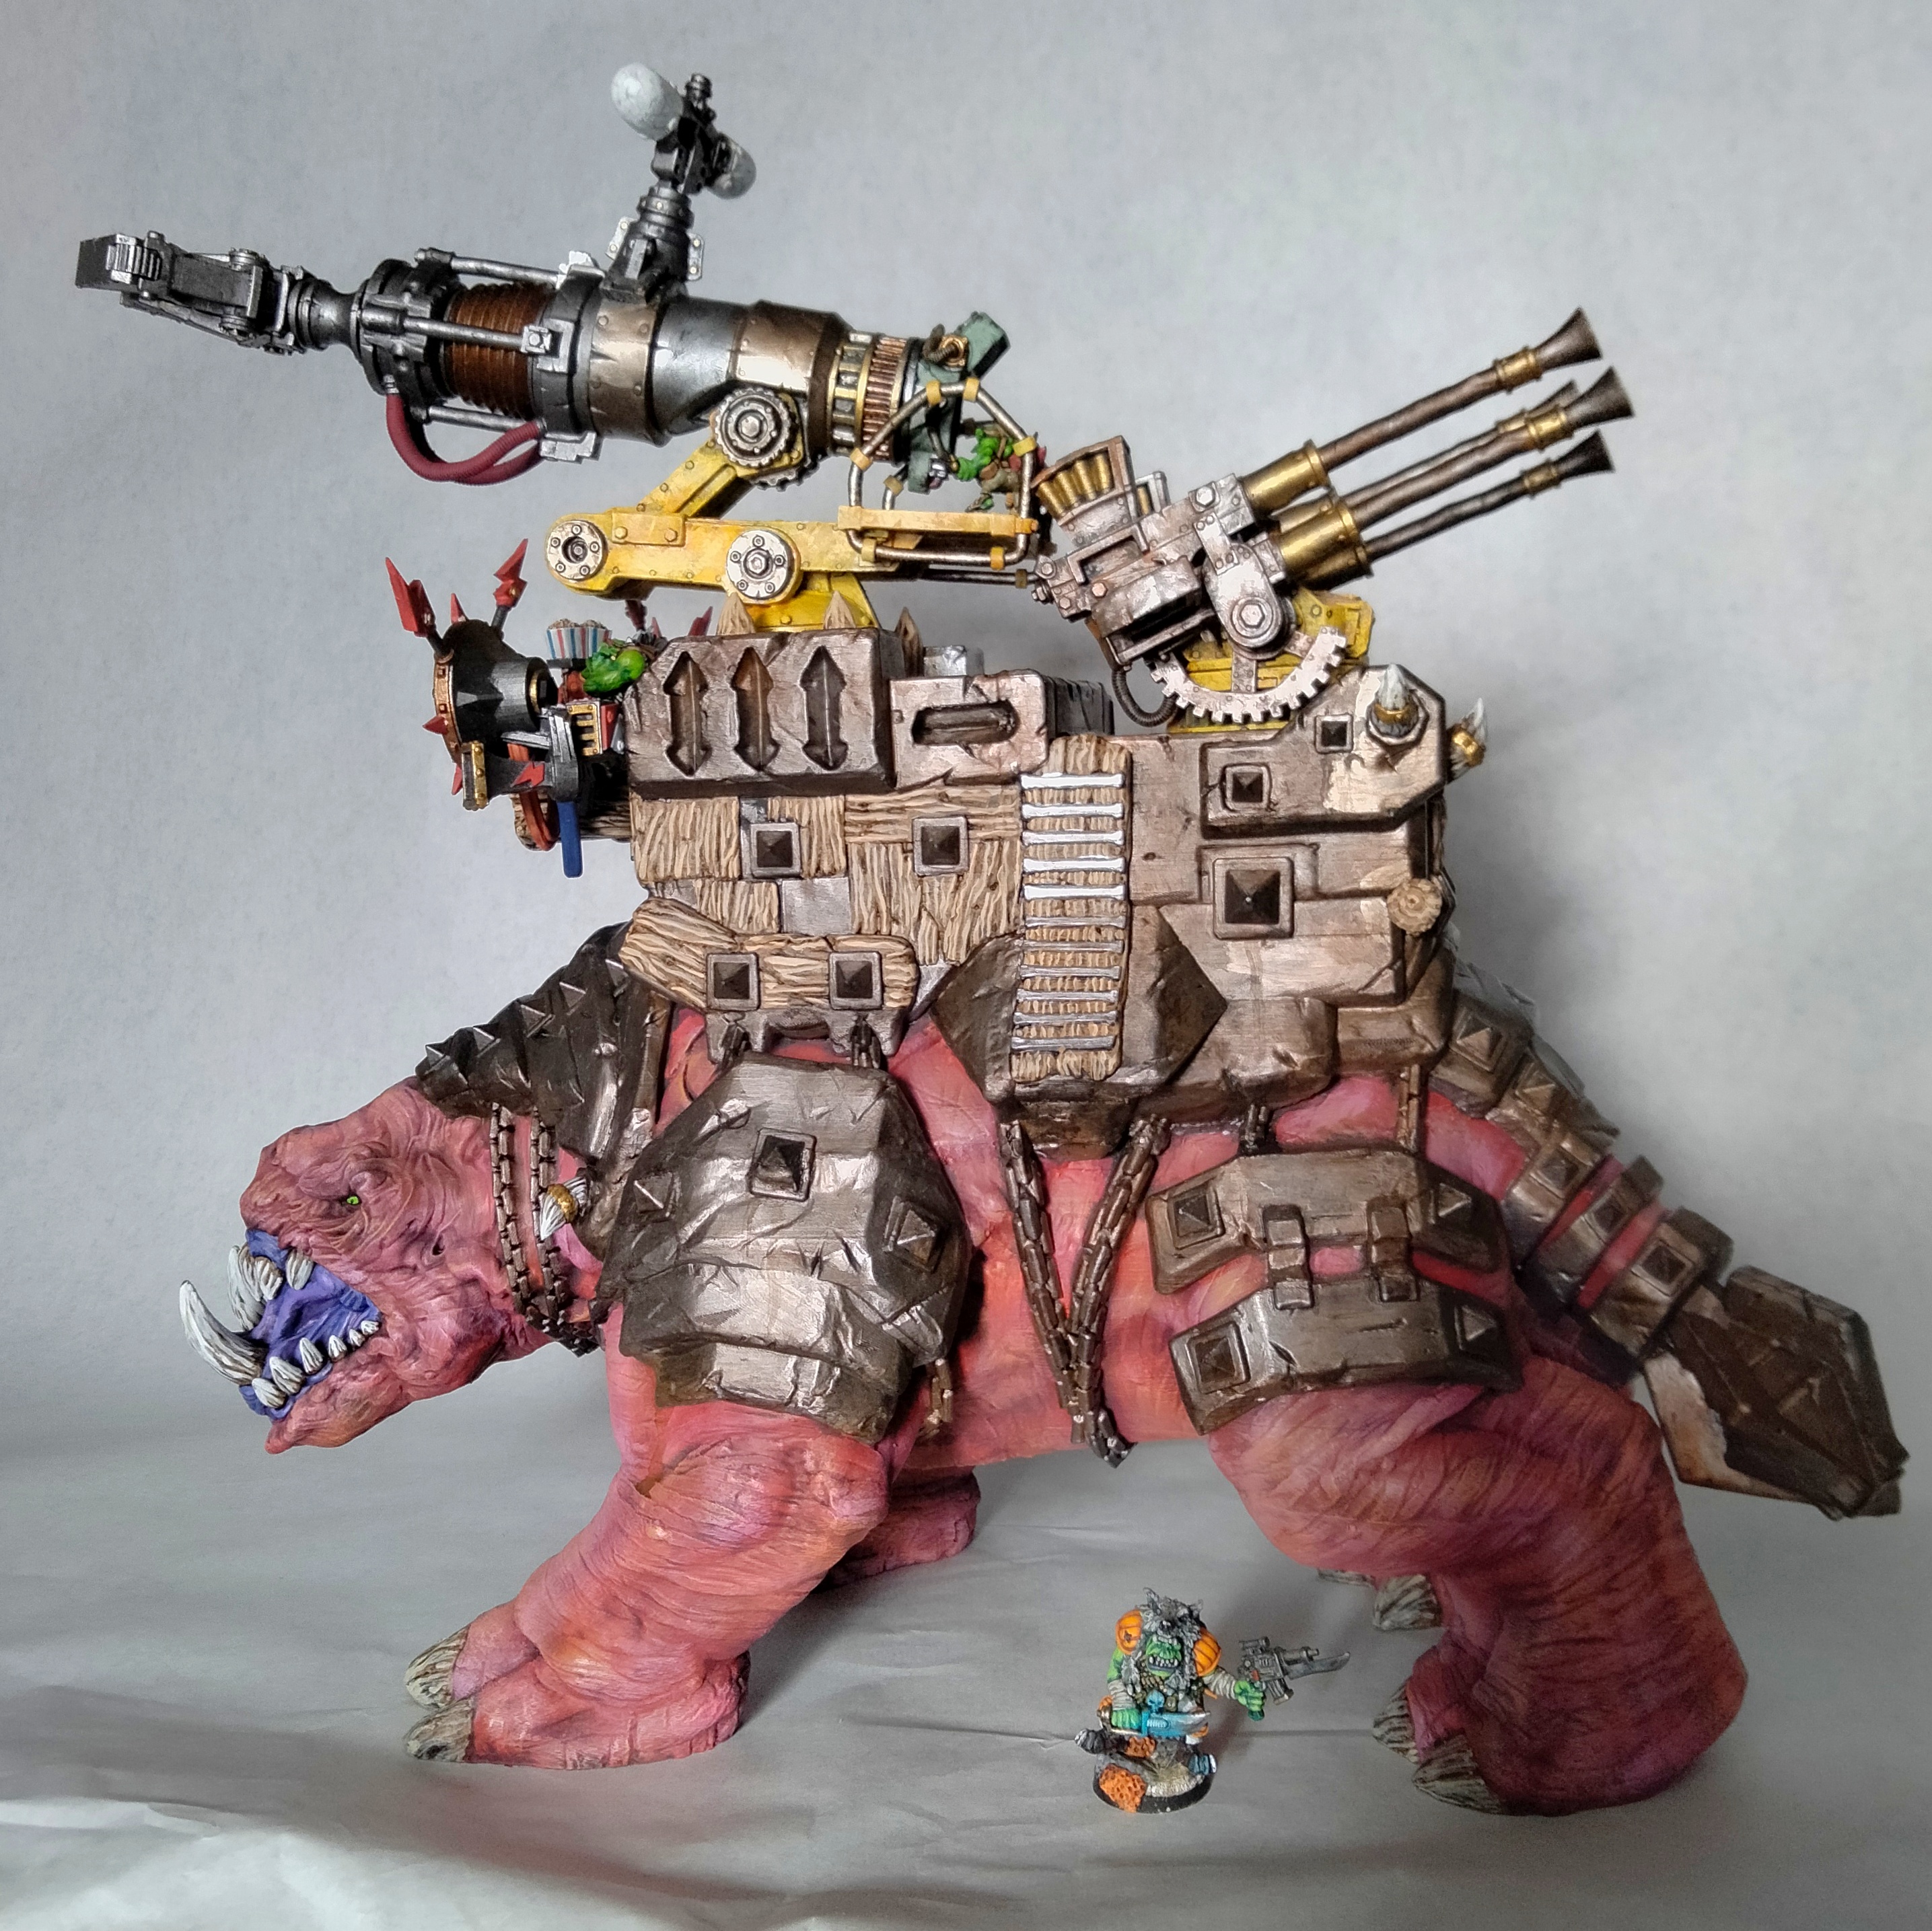
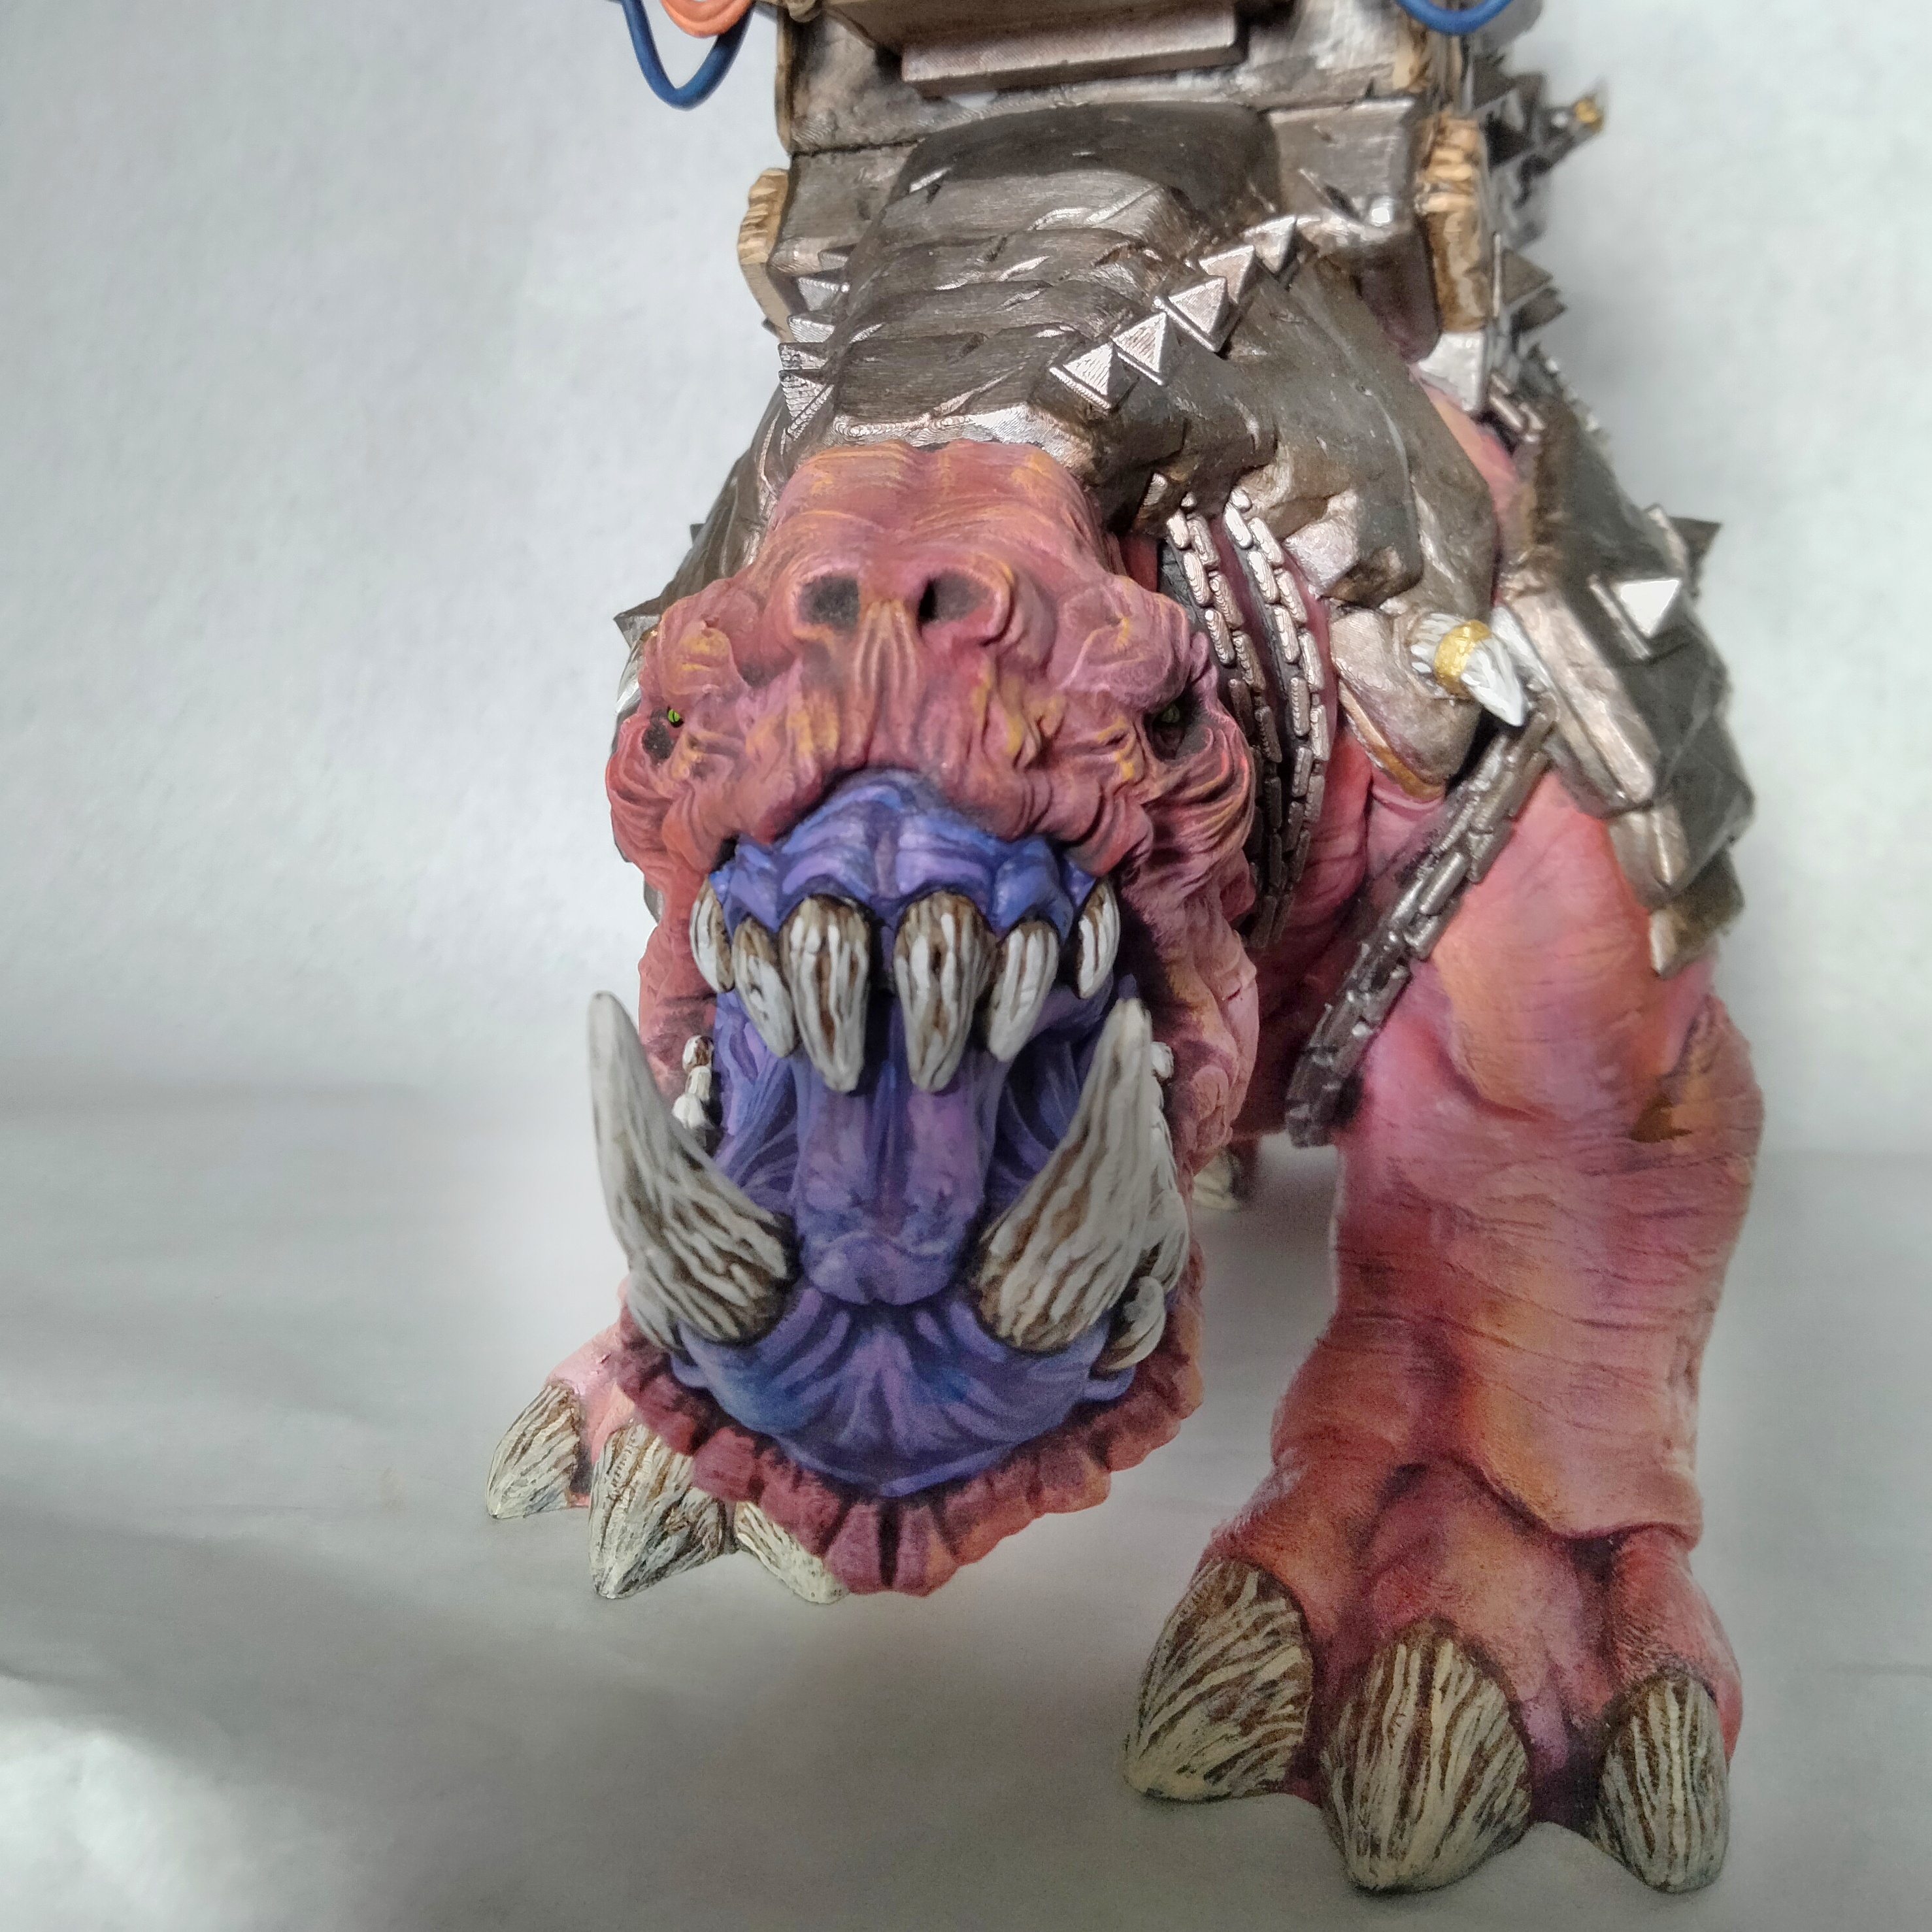
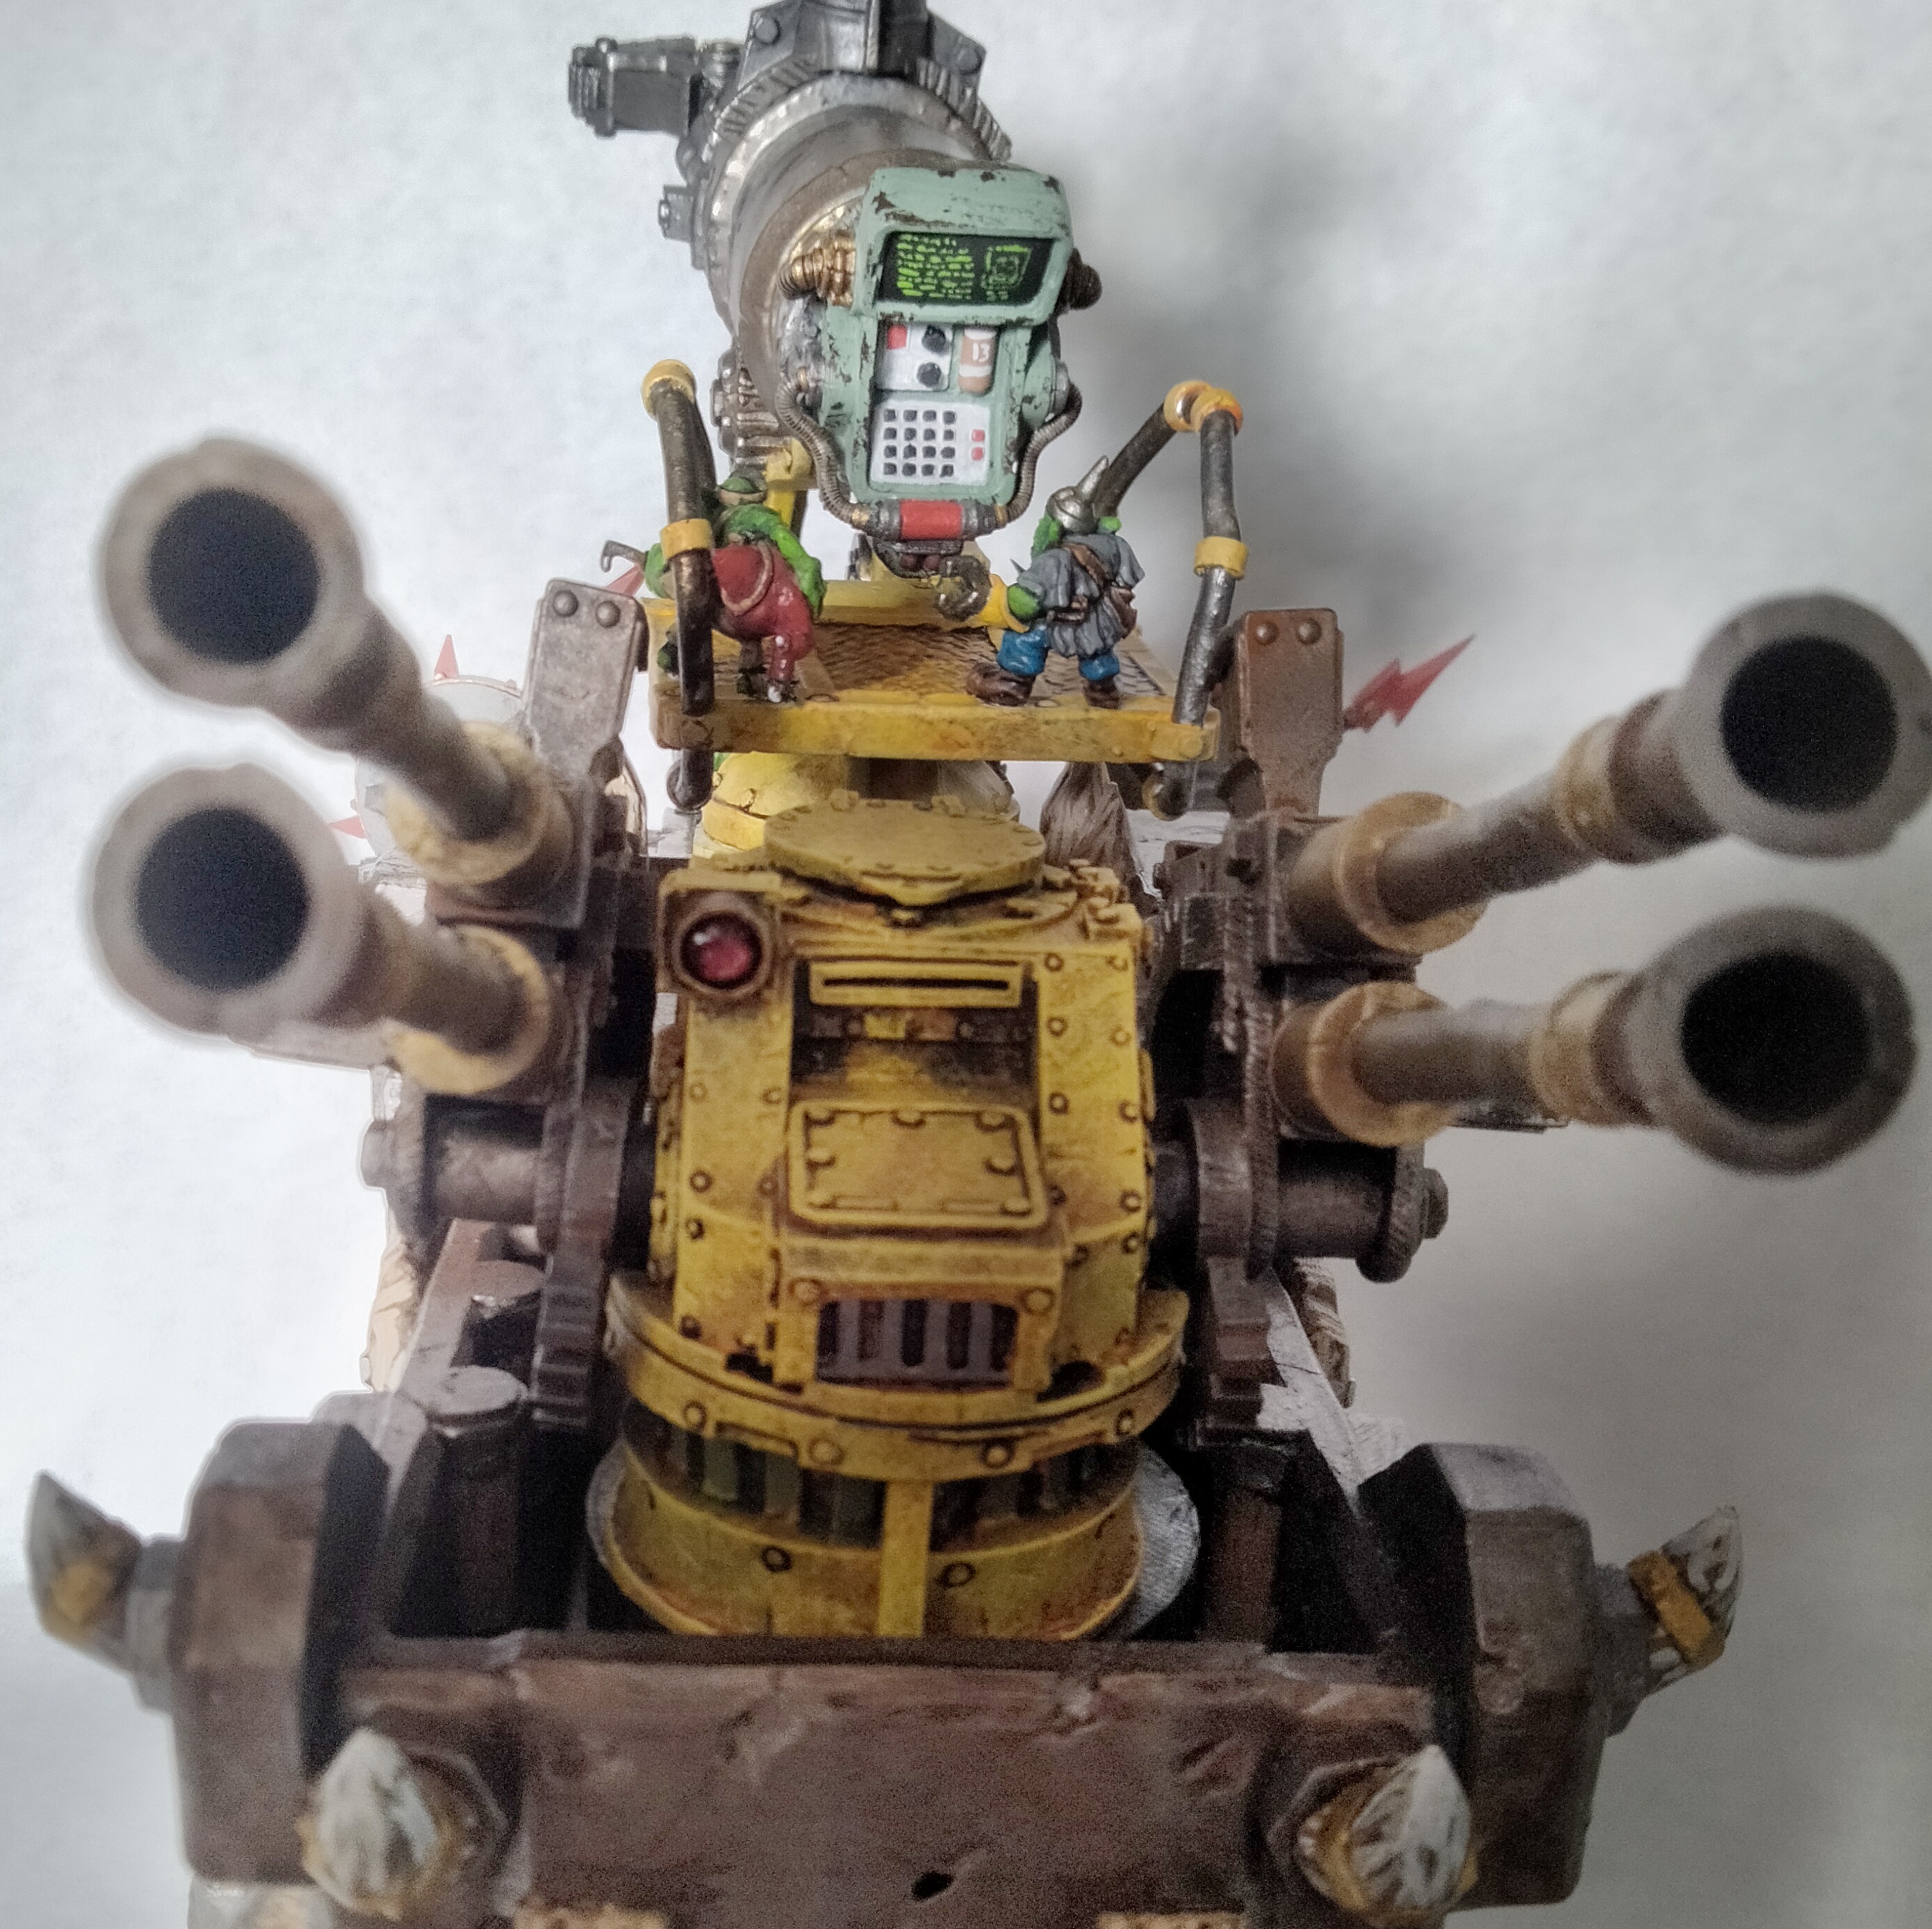
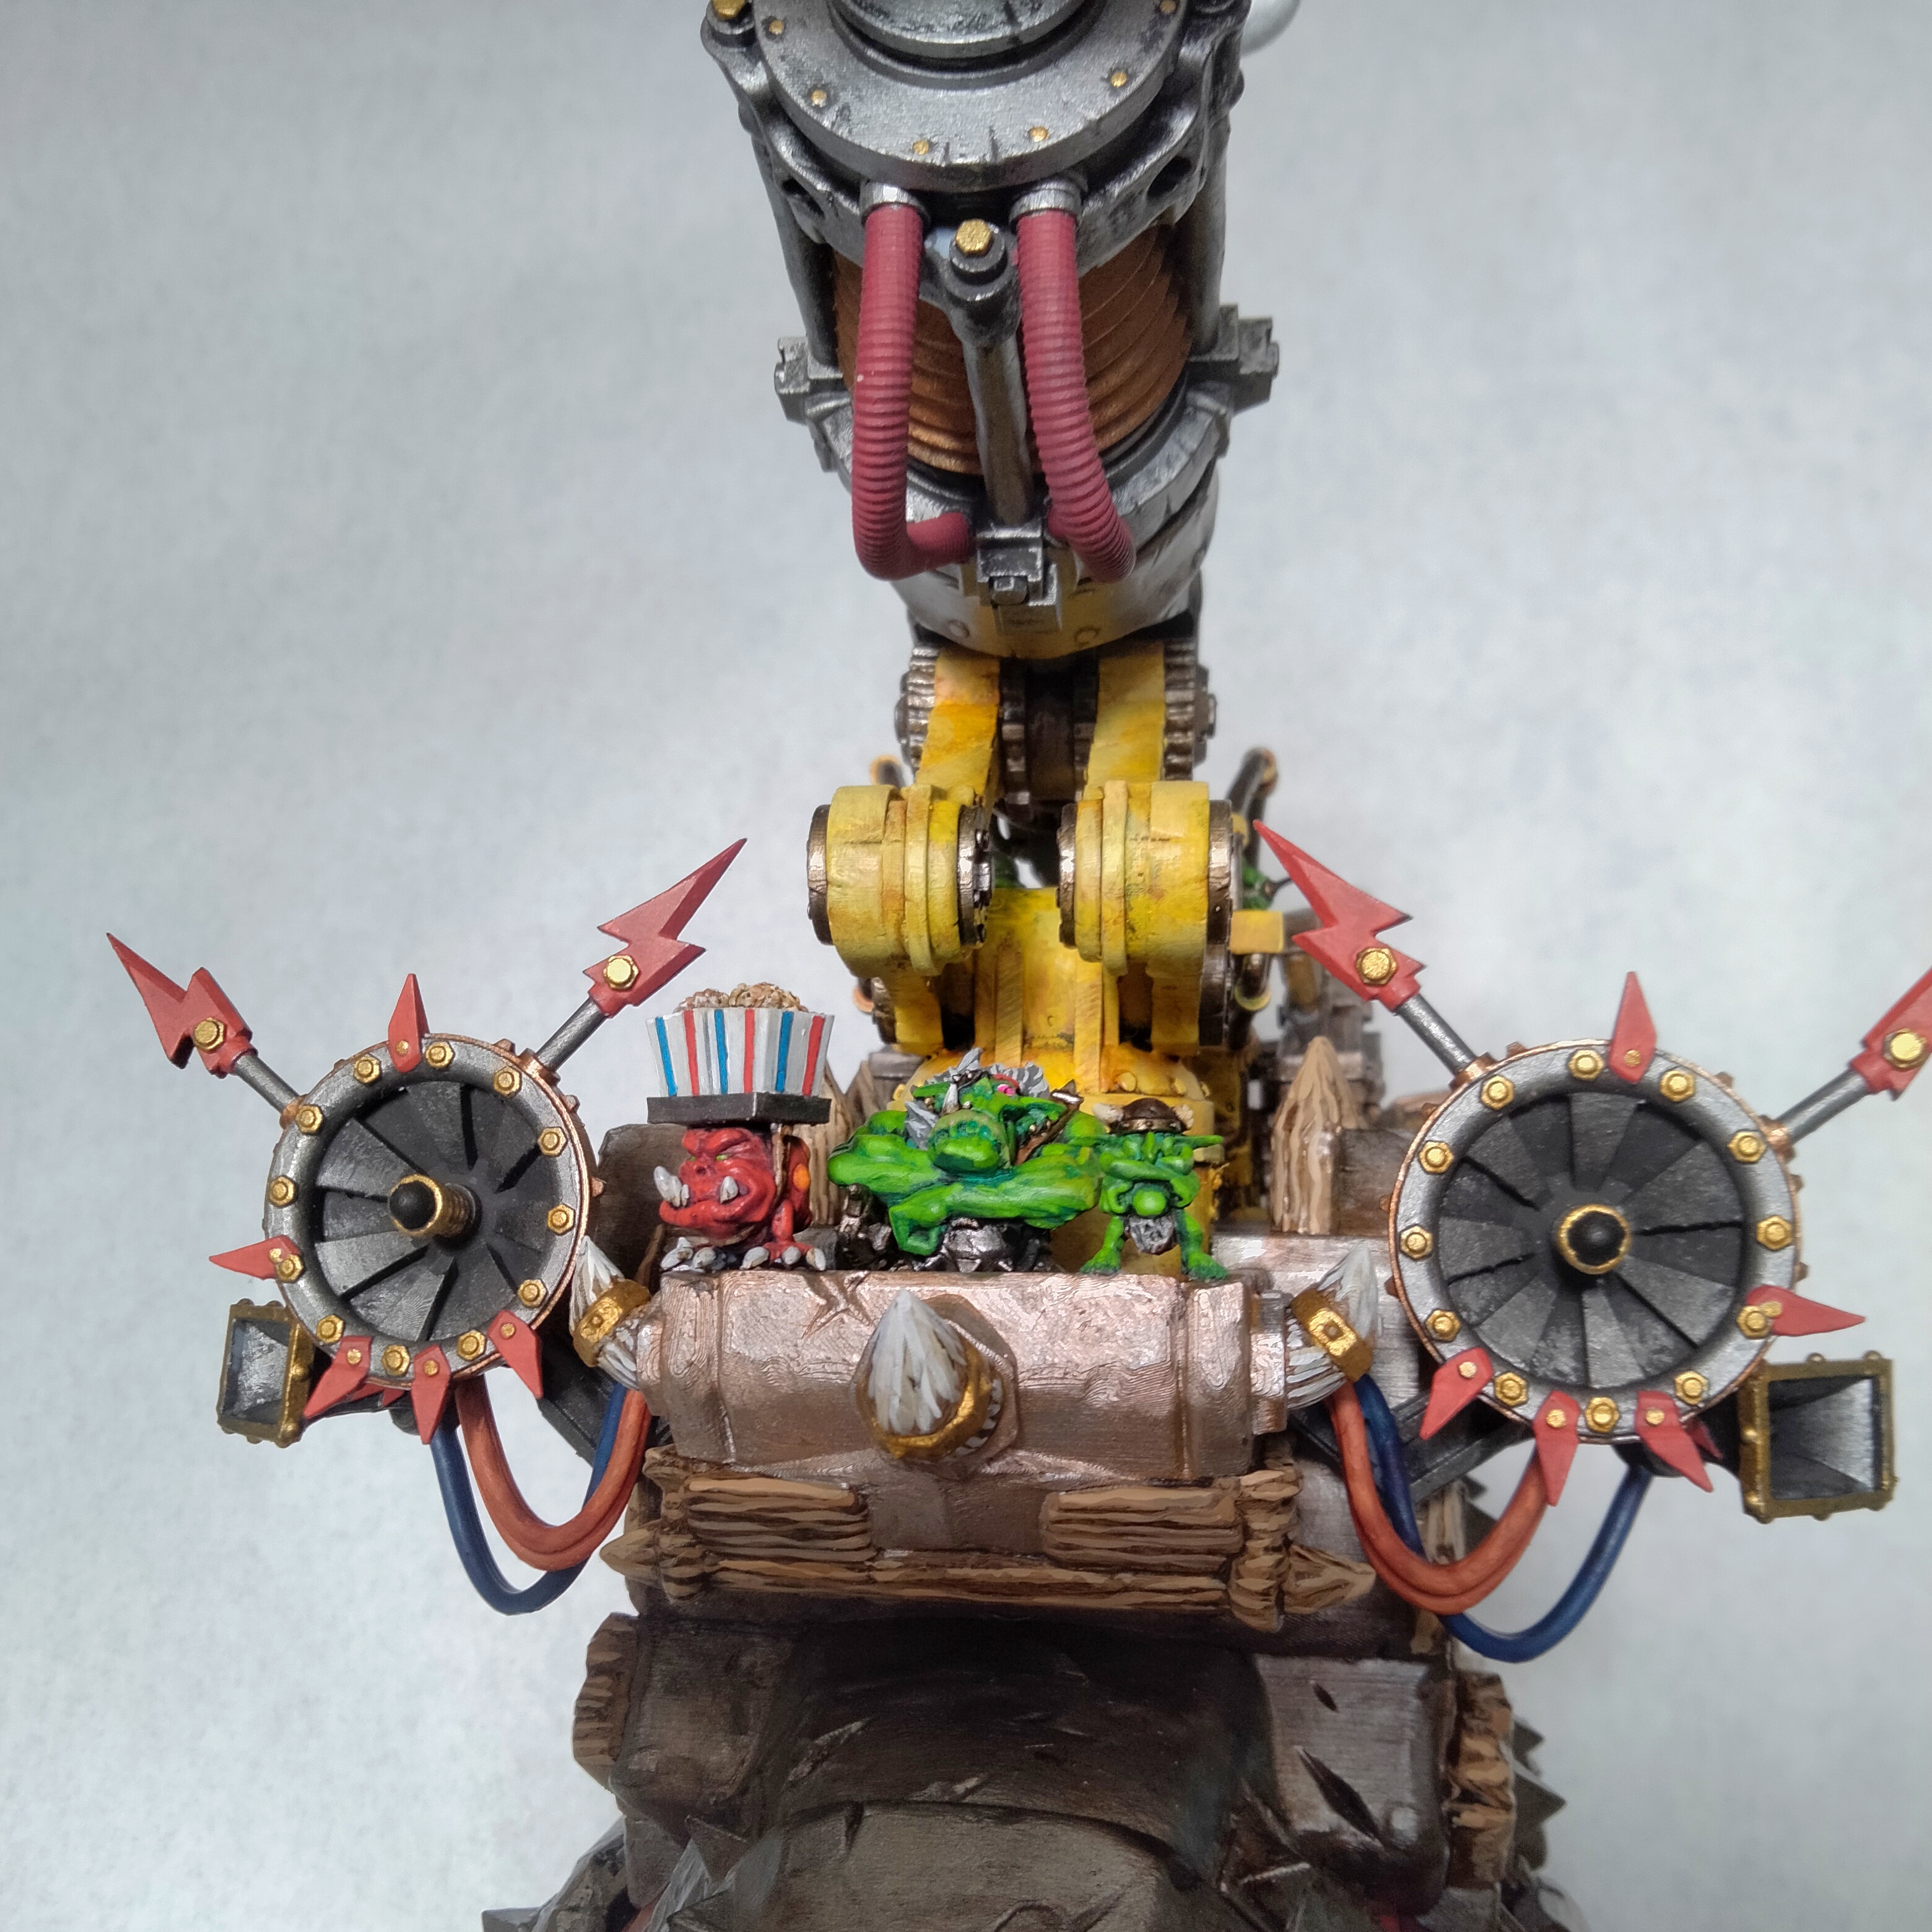
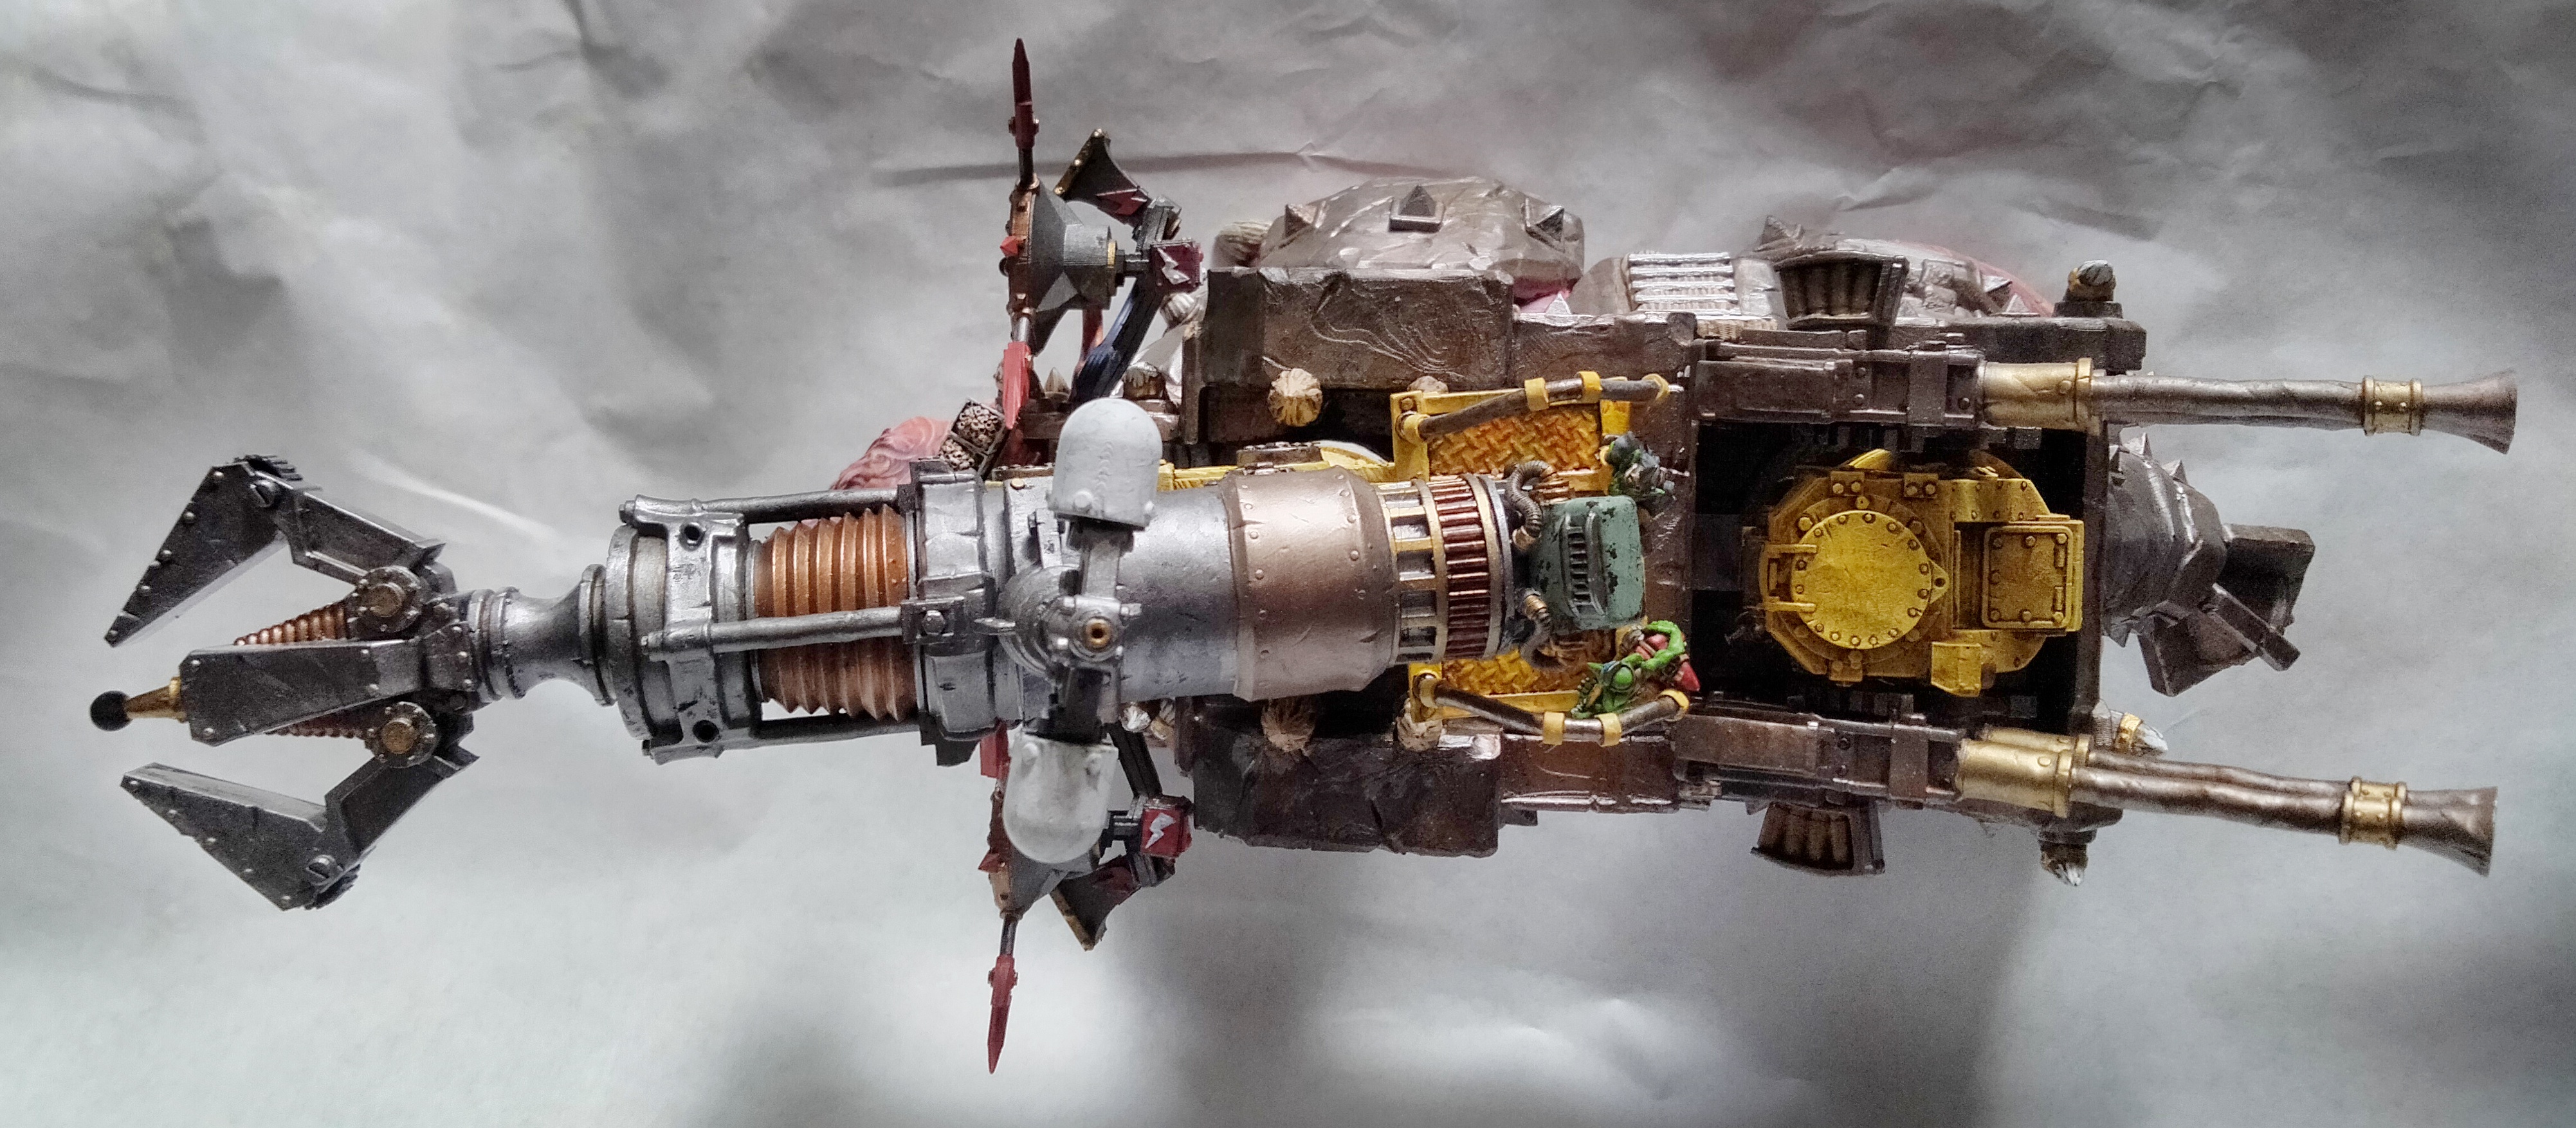
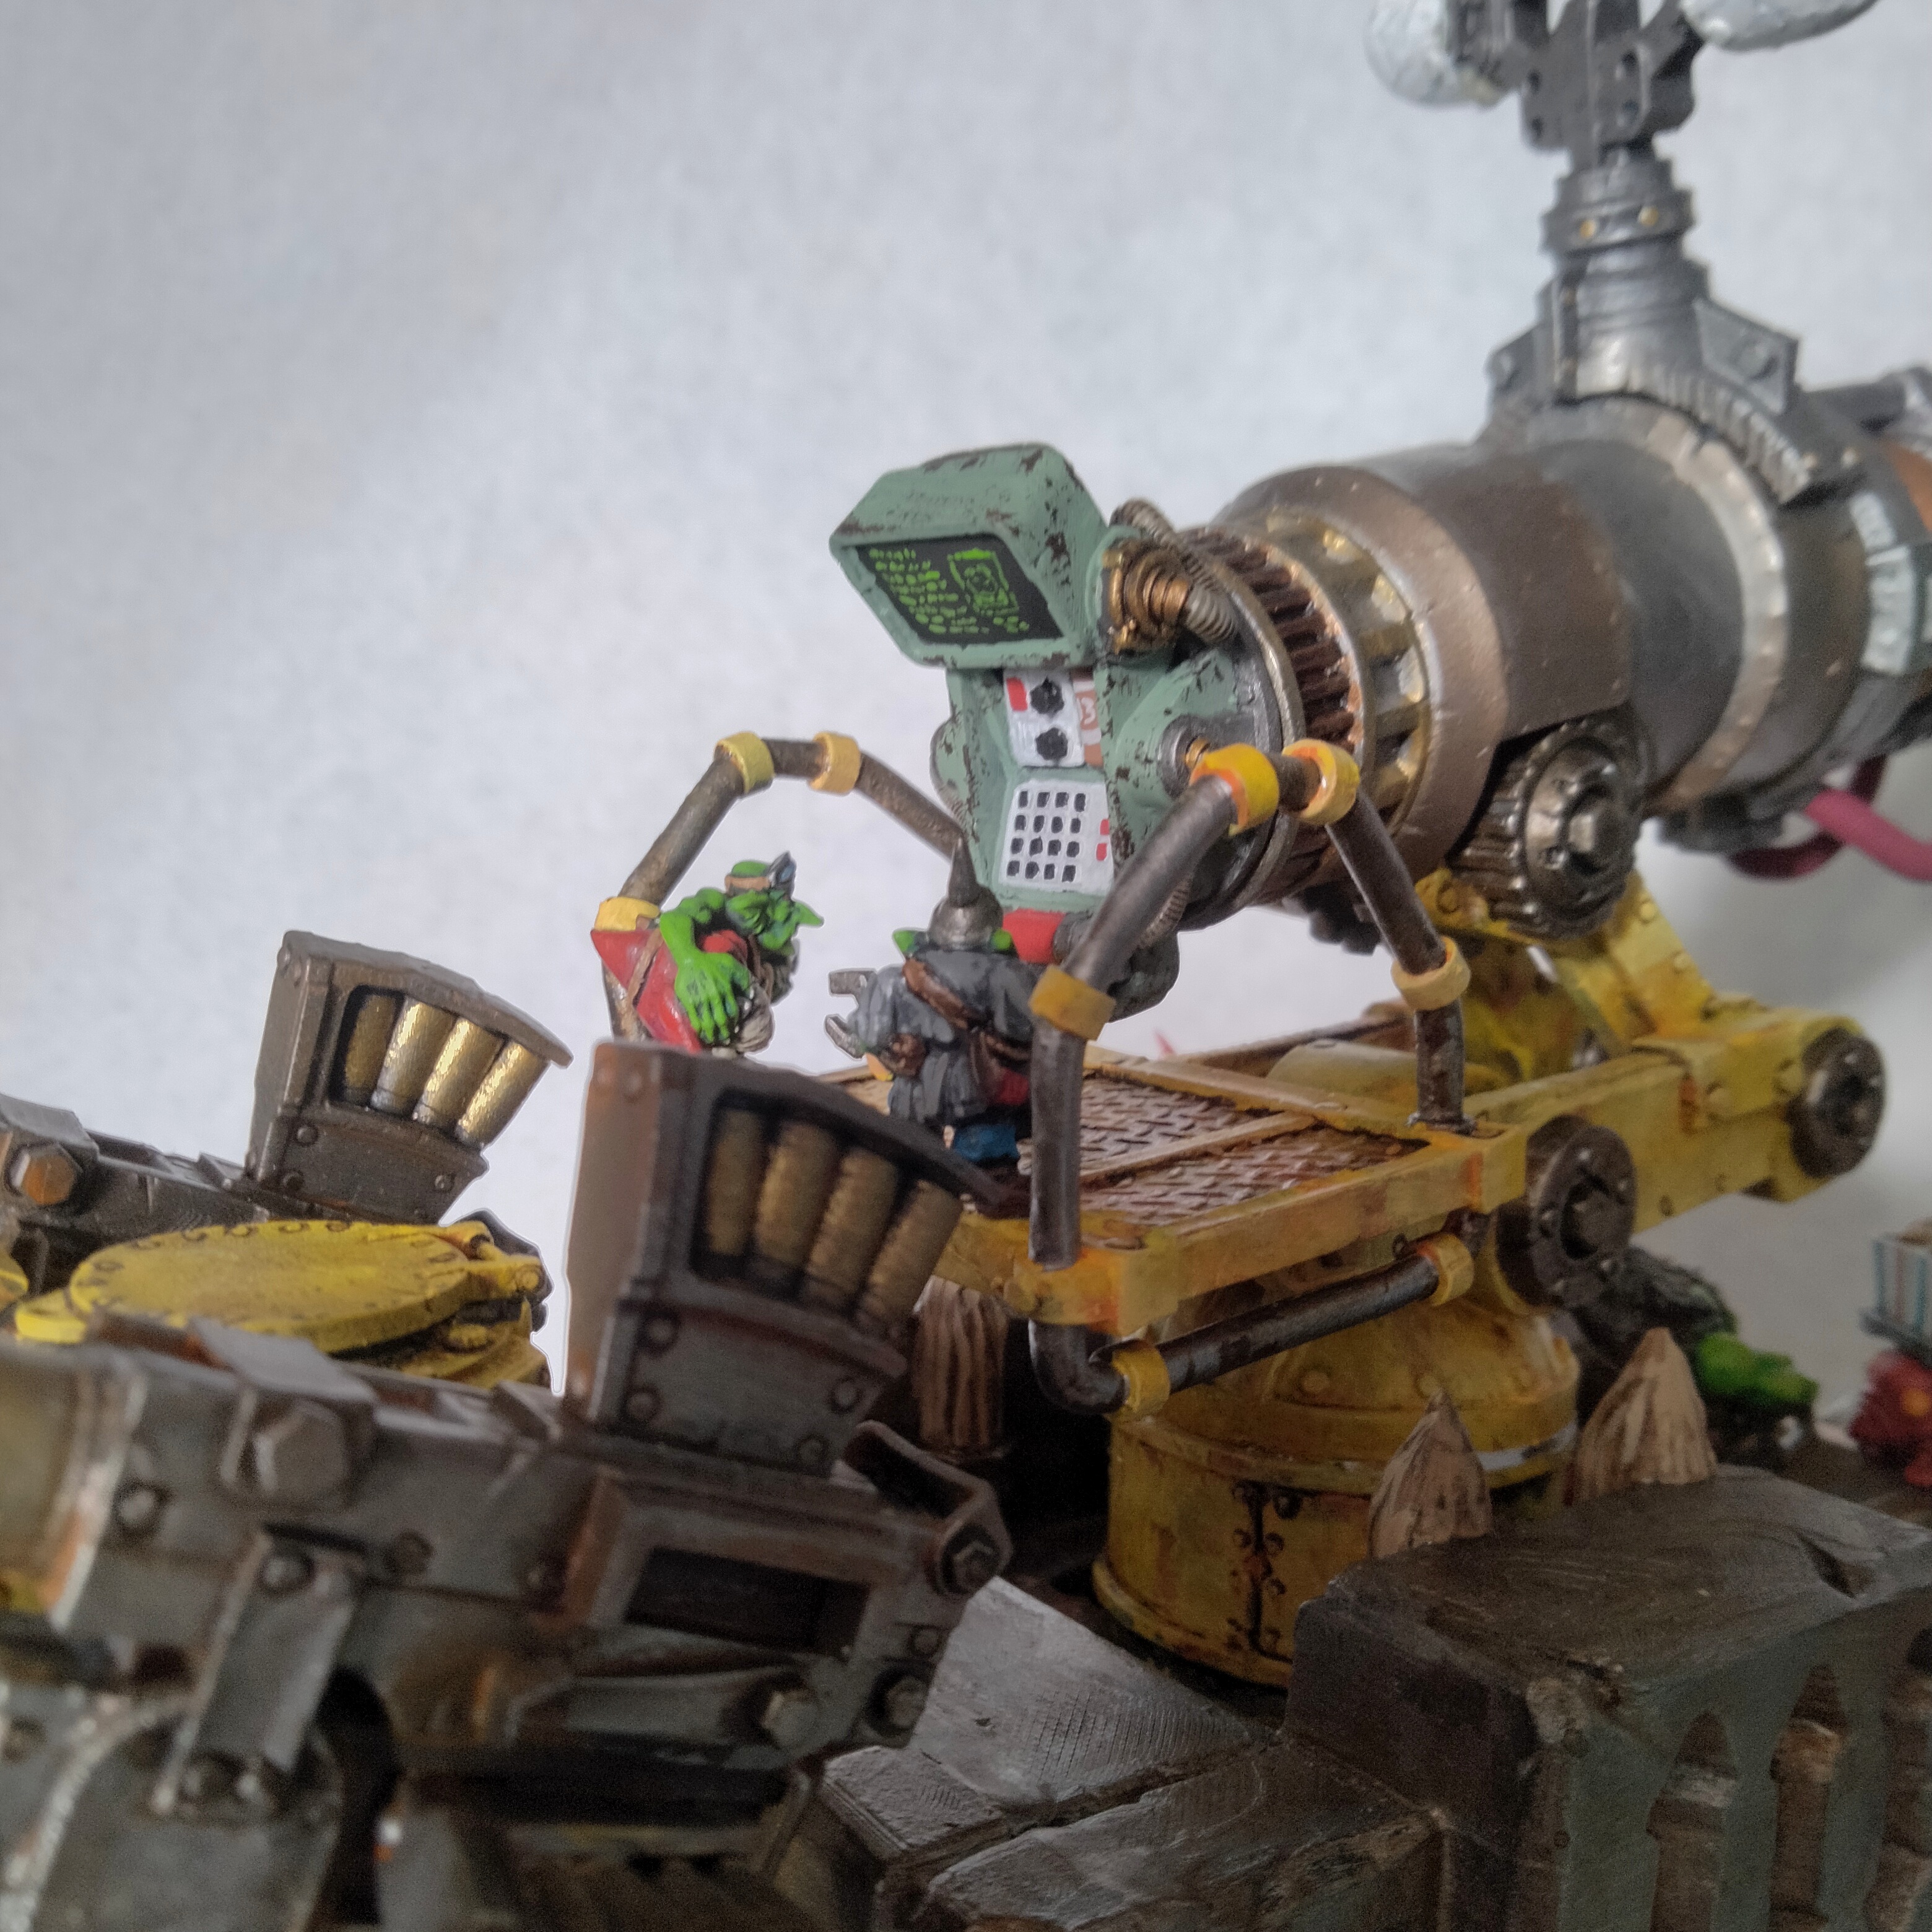
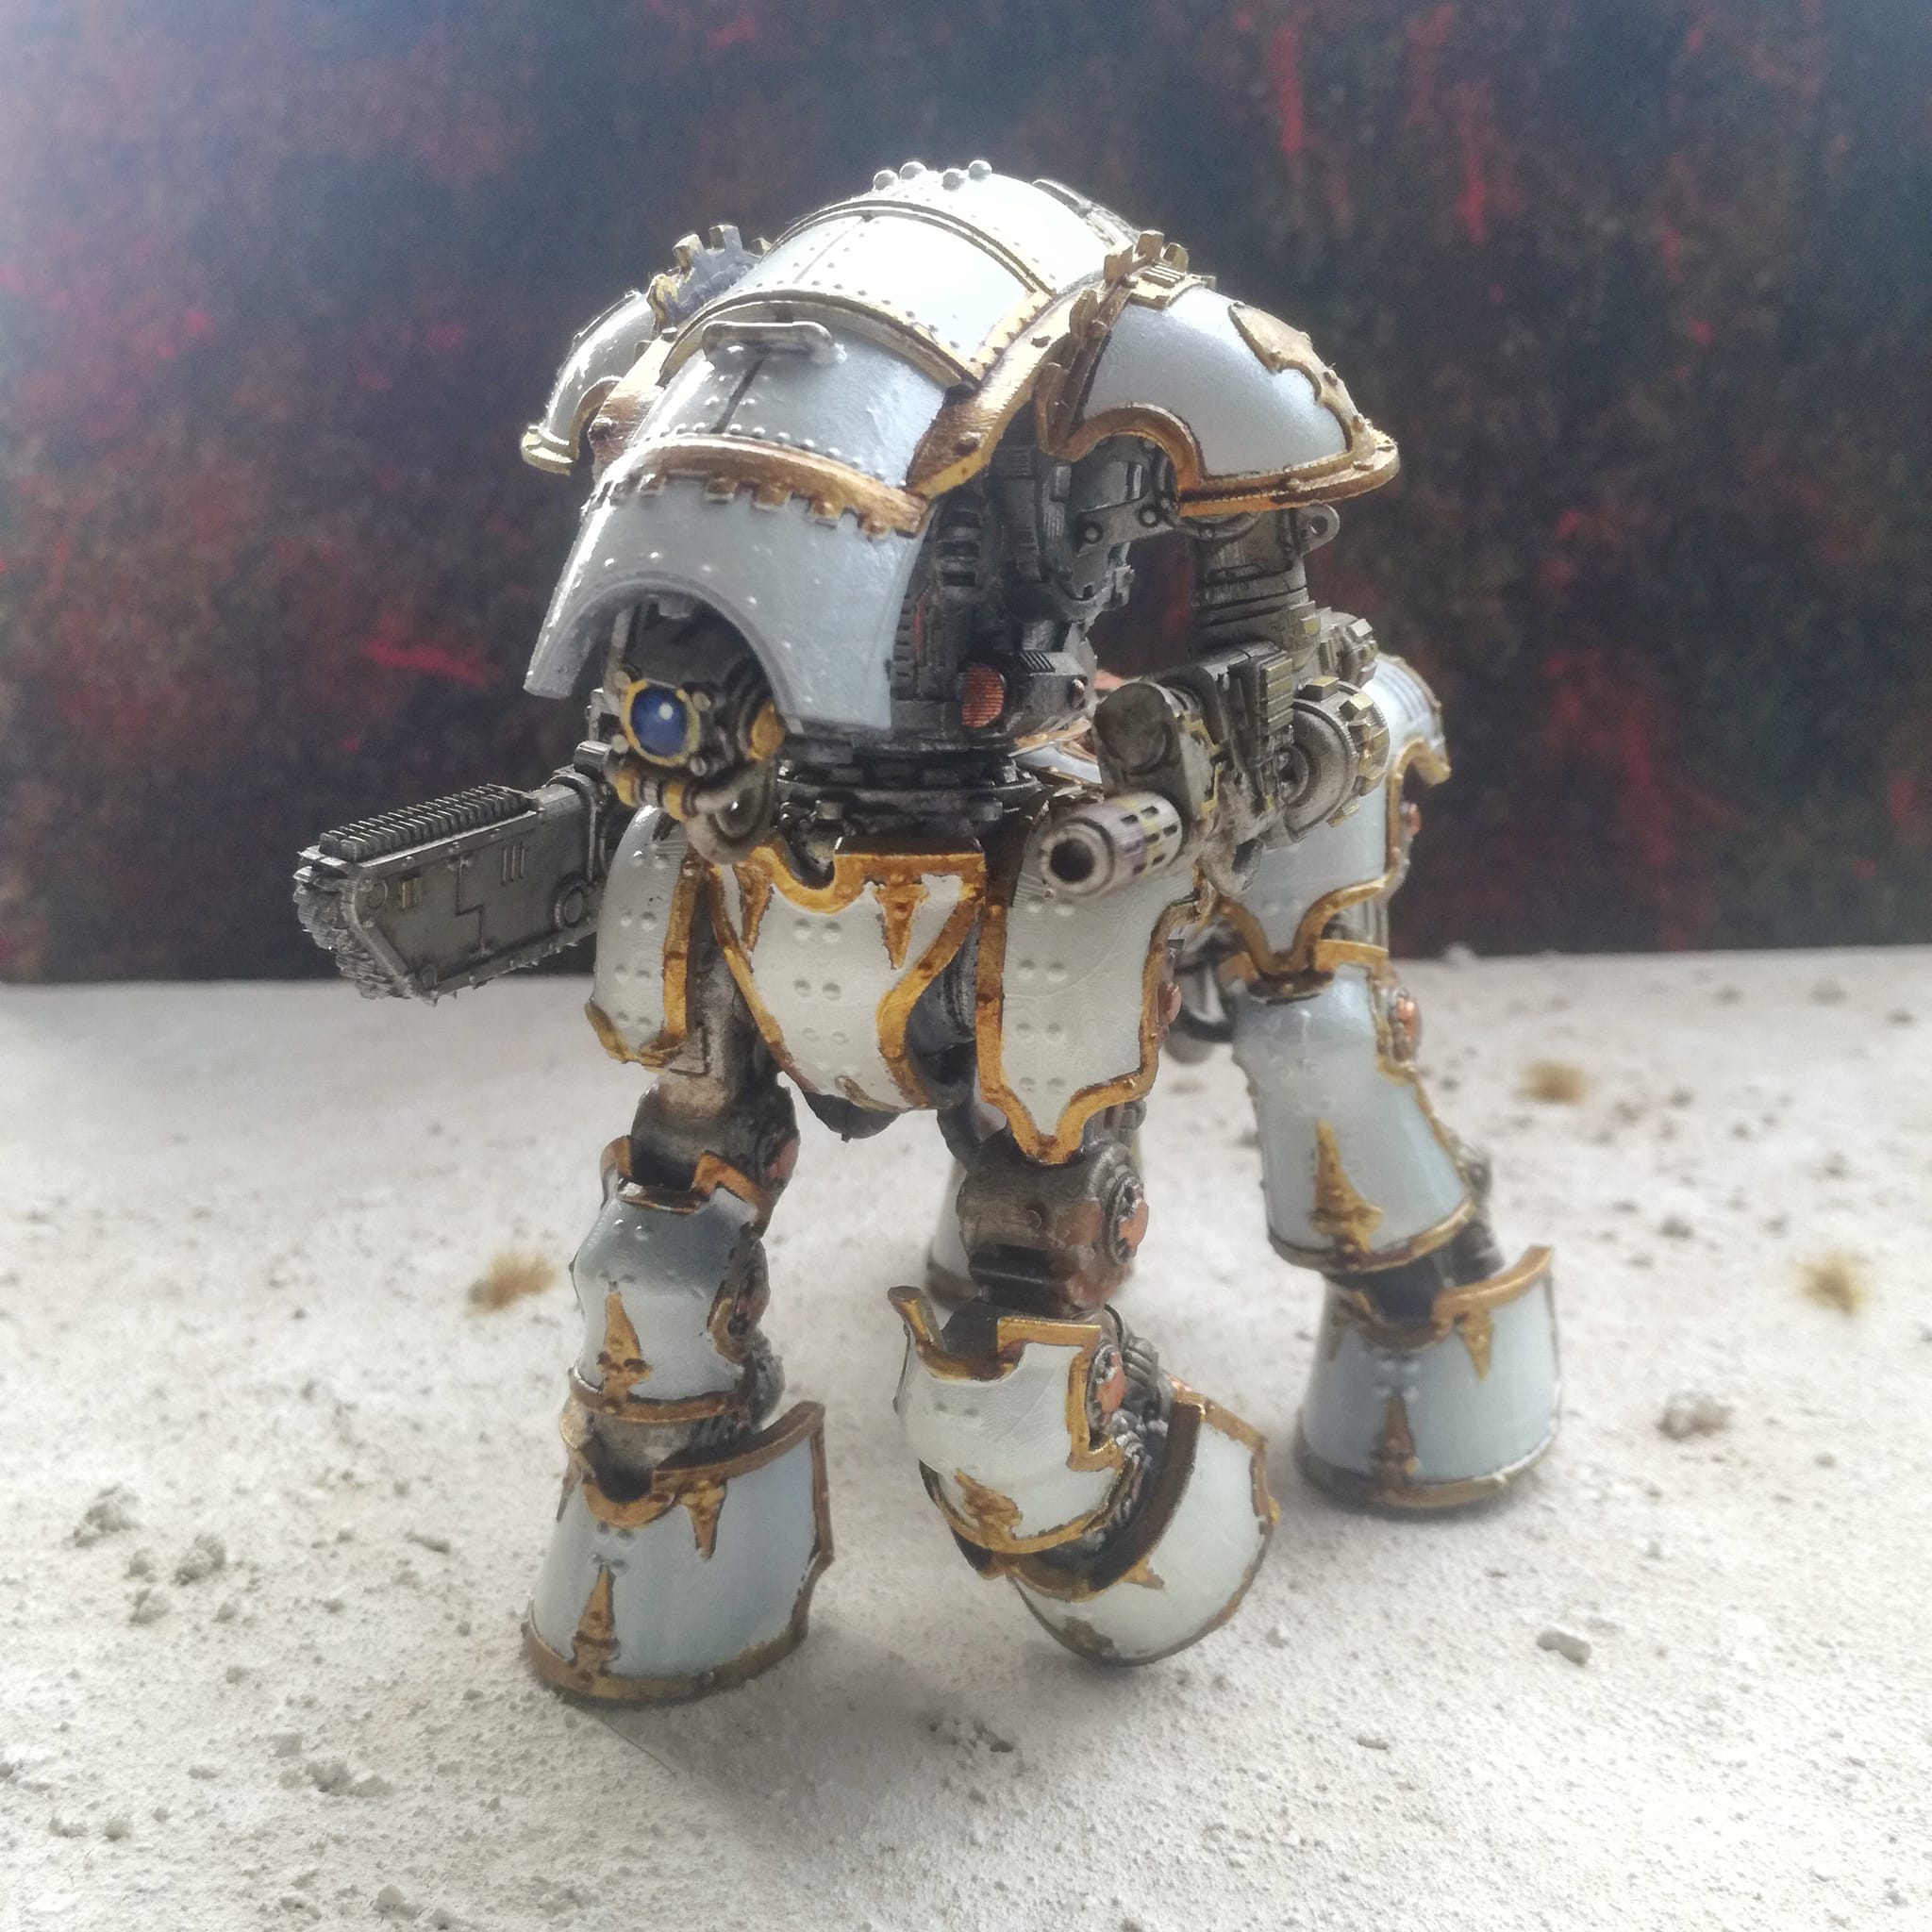
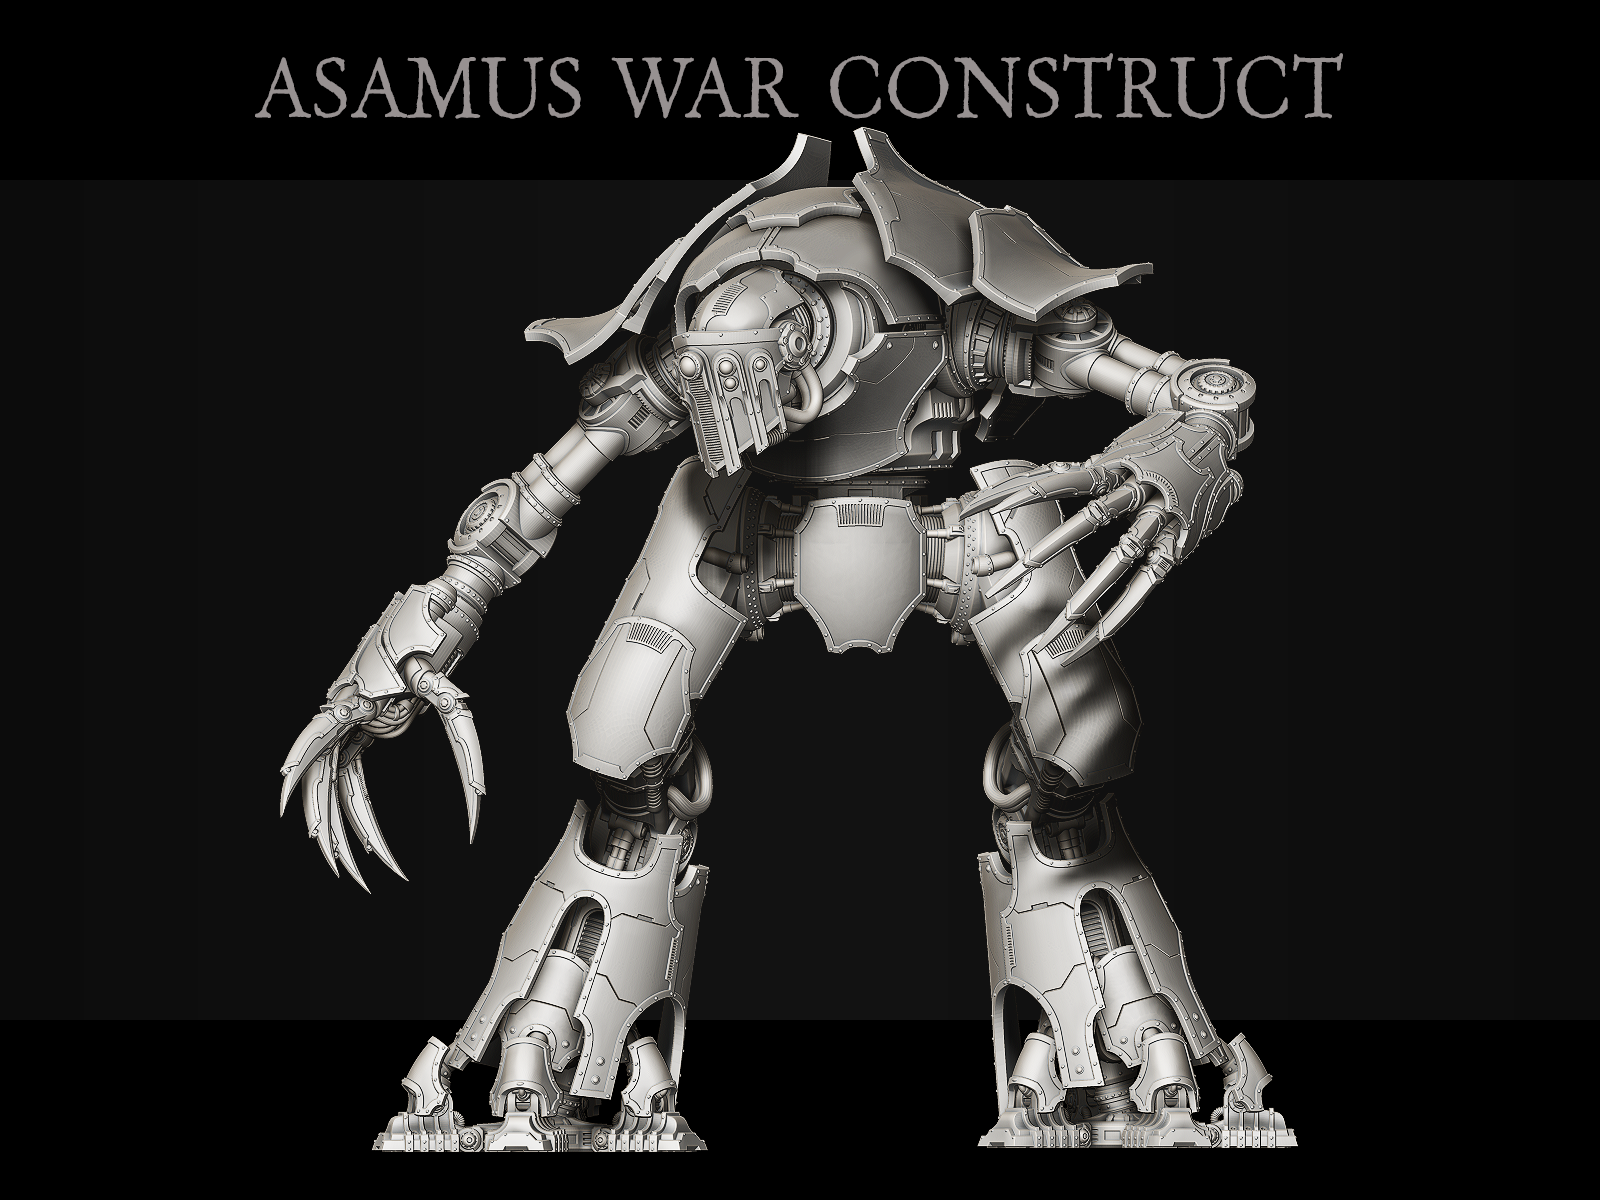
This is some armoured centaur legs, from the Makers Cult, scaled up from AT scale to 40K scale. The top half is an Armiger. This was a test of the livery I am using on my Titan, sat in a box awaiting paint. The lesson wot I did lern is to not apply gloss varnish until all the armour is painted. The gold was very problematic because of this. My next big print project is a Reaver Titan mounted on the Makers Cult 40K scale centaur legs. Warlord might be a bit much.
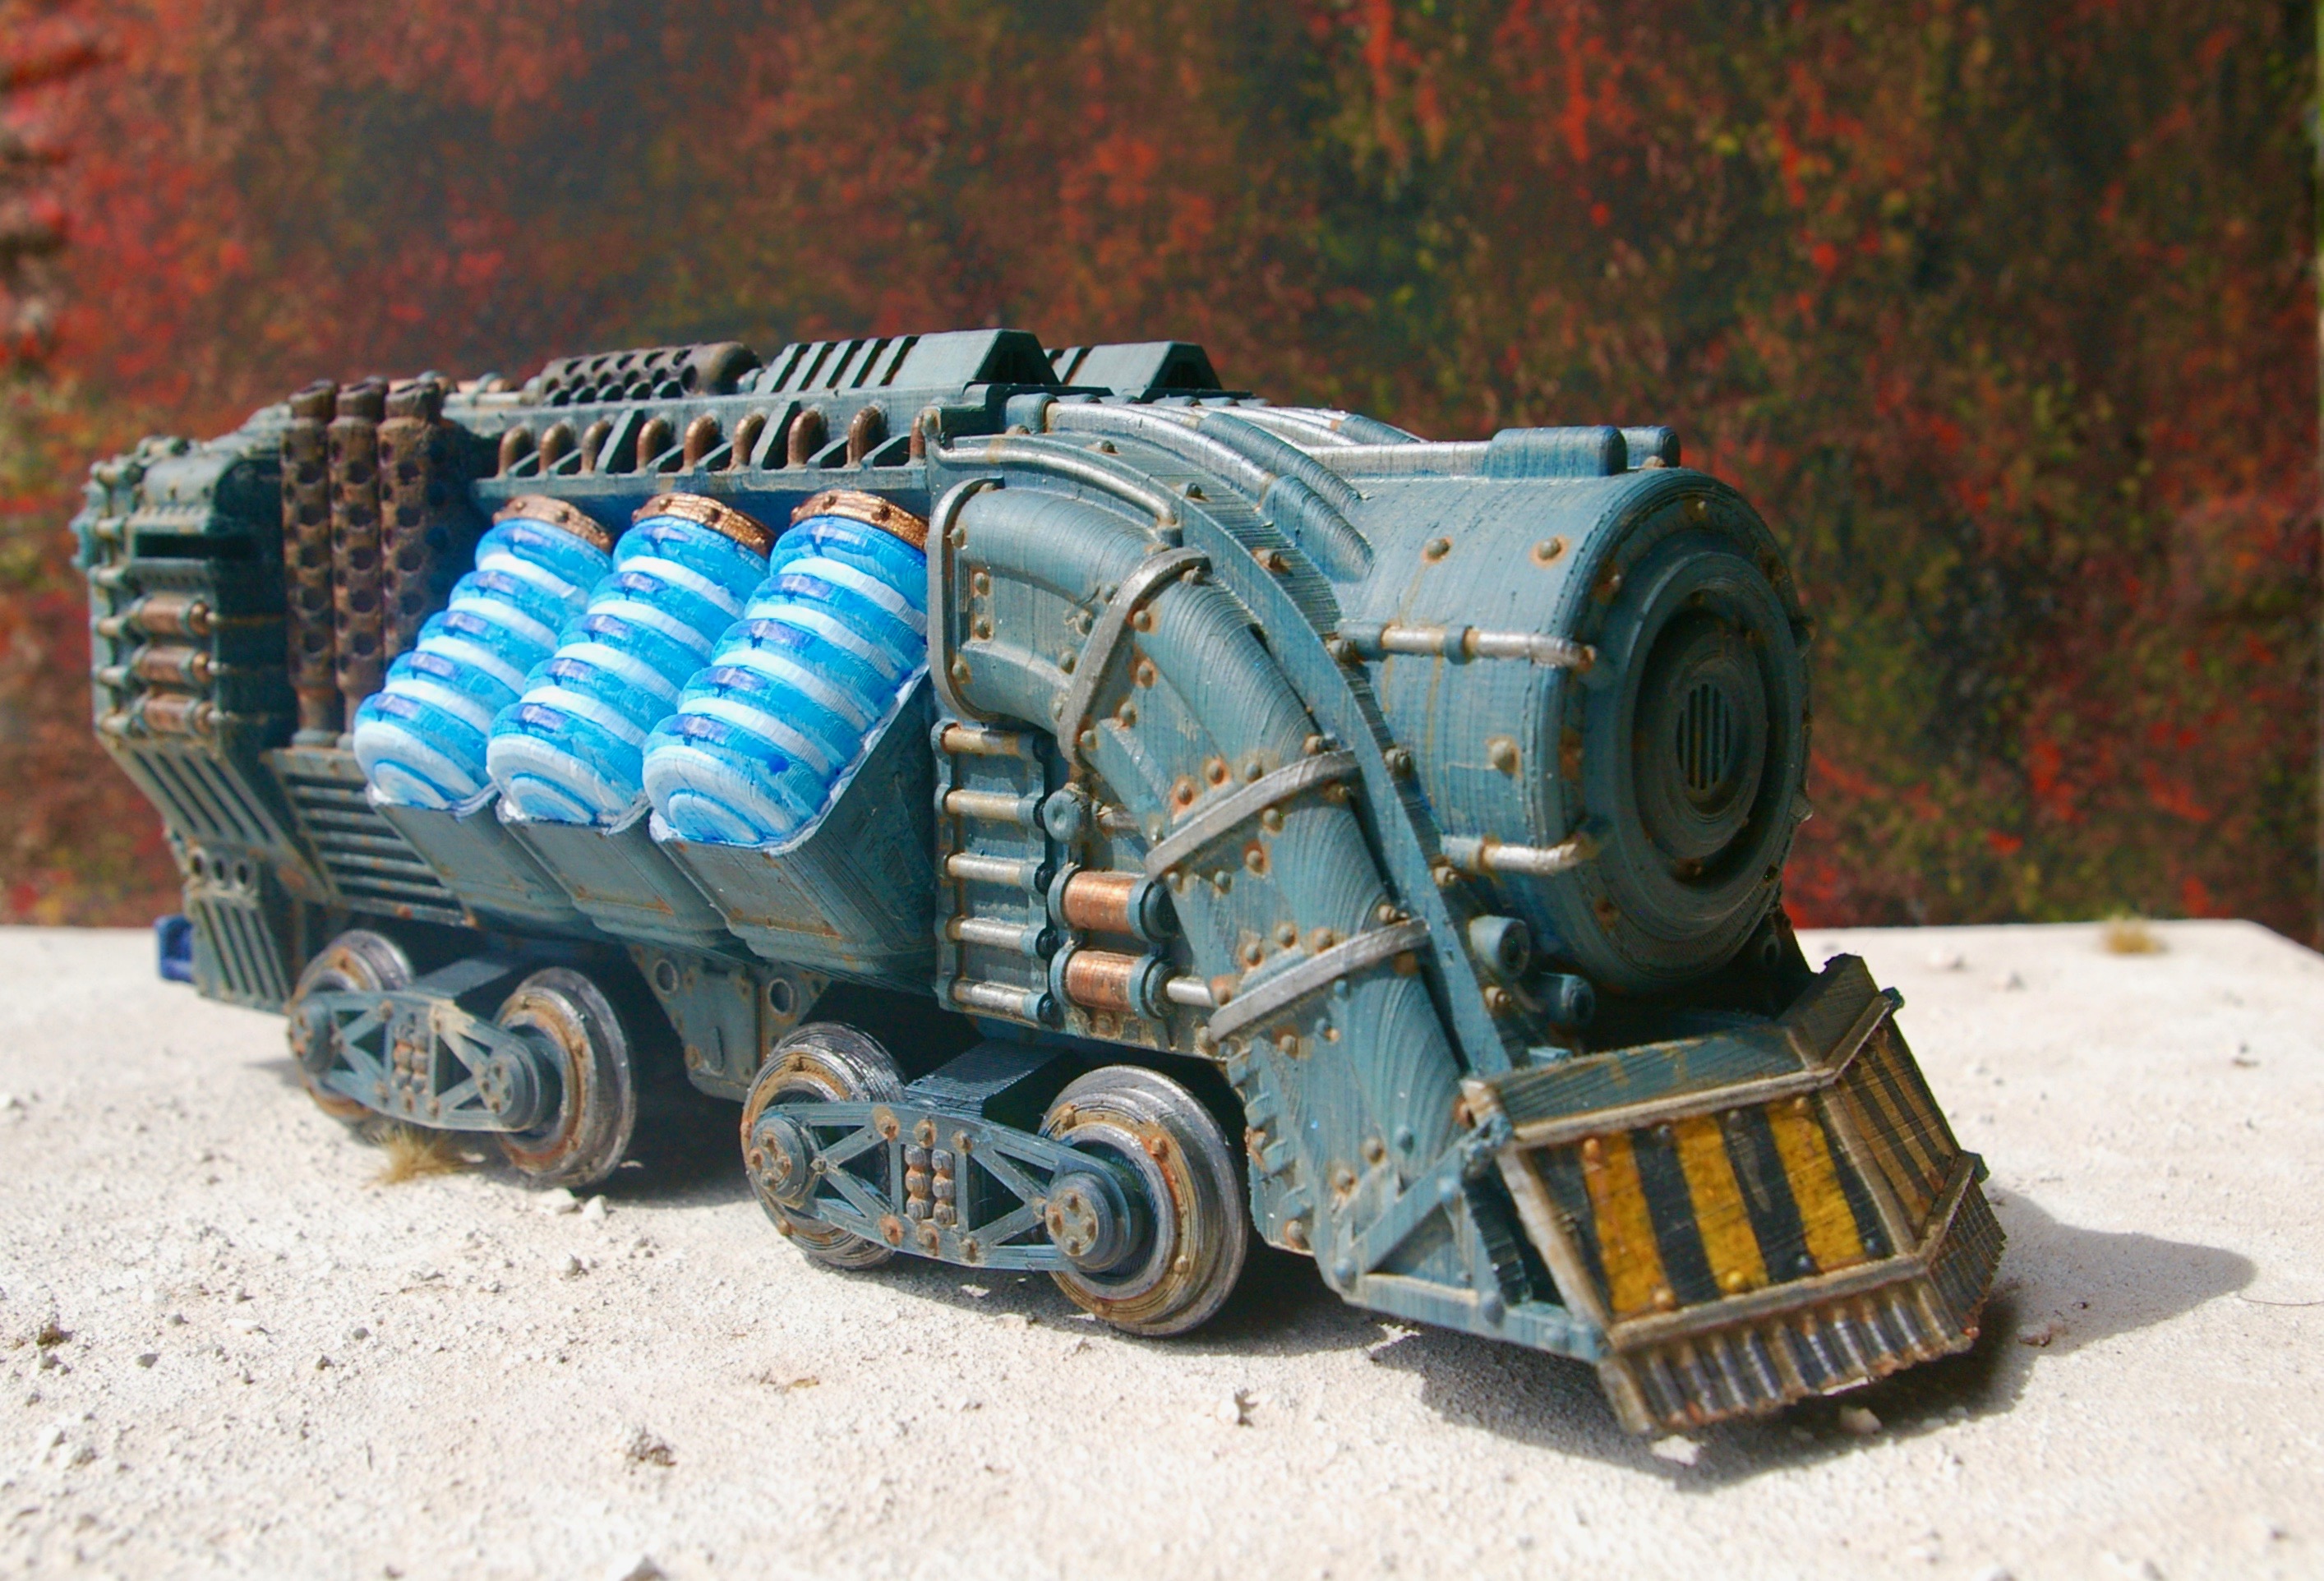
This is from the Tesseract Tomb Patreon. I have wanted a train set for ages and he is going to be producing parts over the next few months.
This is the Marauder Giant which is now starting to fetch eye watering prices on Fleabay. Many thanks to the Delta Squad who made this possible. First rule etc.
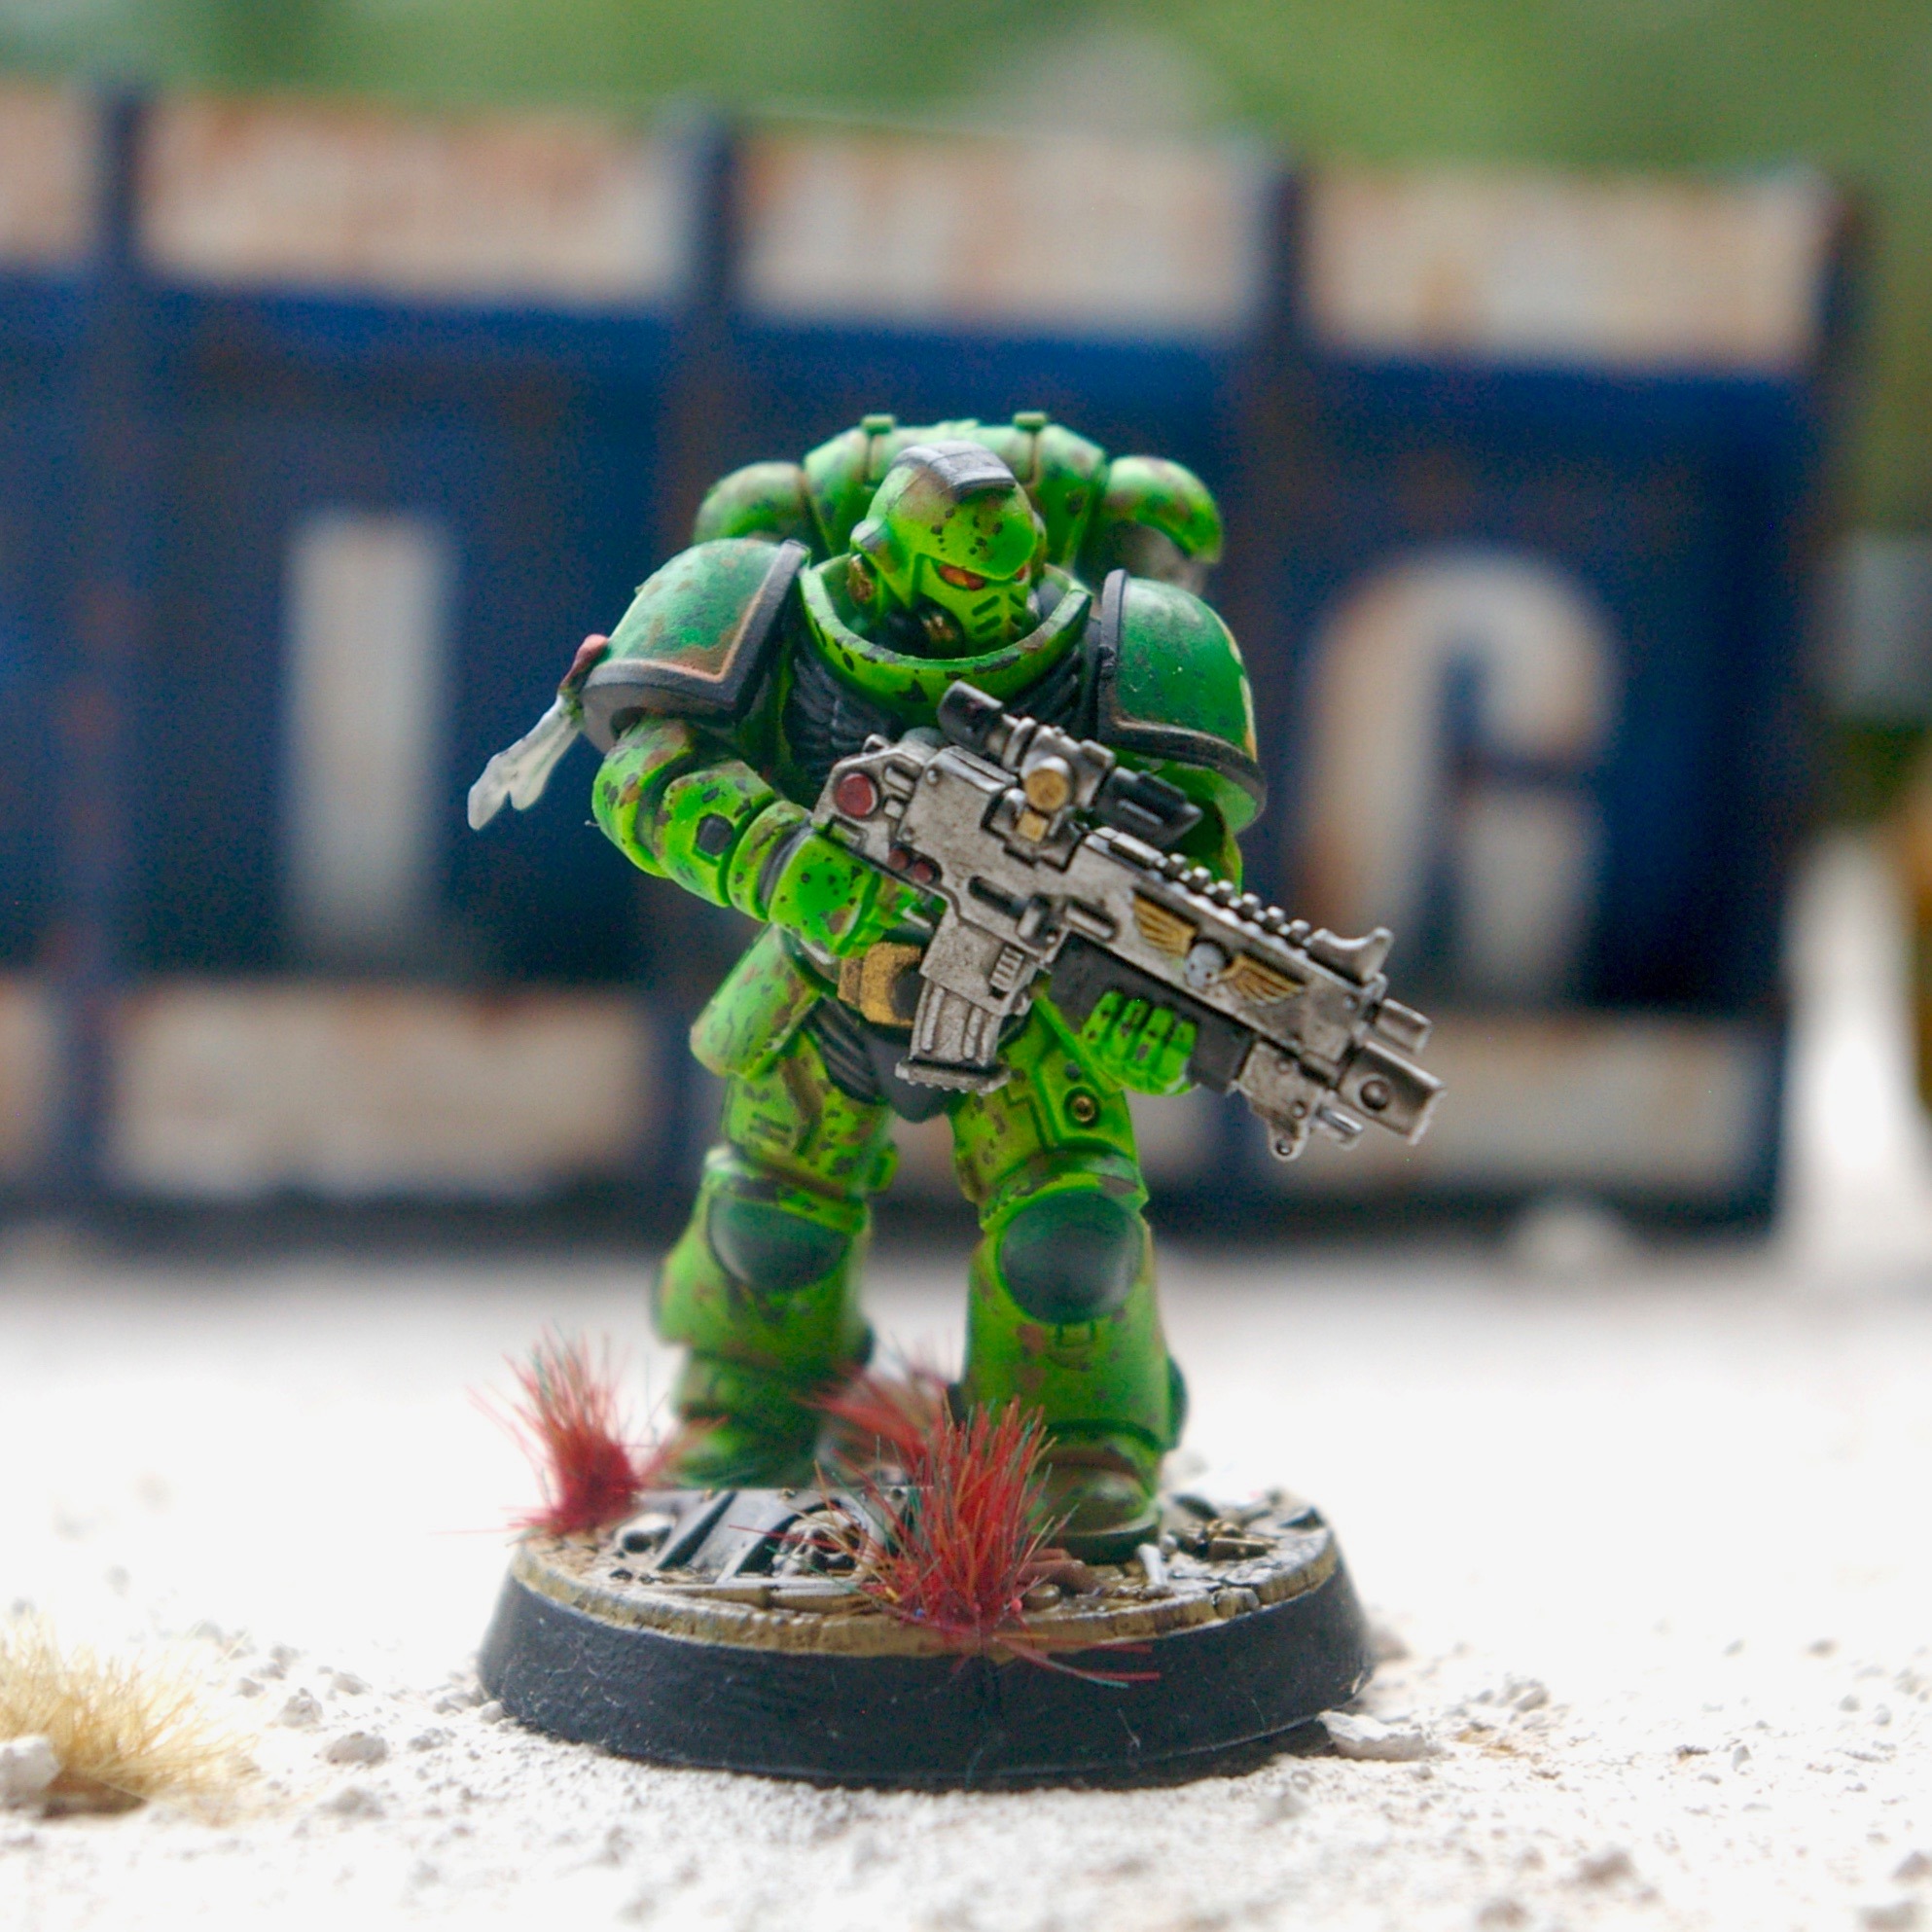
Finally a Spaash Mareen. Number One Son and I have been taking advantage of the 9Euro German rail tickets and have been travelling to Munich for lunch, As you do. I thought I would pop into WARHAMMER! and try out this newfangled Contrast paint that all the cool kids are using these days. The Red Shirt gave me a figure to try it on. While I was slappinig paint on he was inanely chatting to me in English, but in German was really (like really) pushing the hobby onto Number One Son.
One of our lunches. Nothing too extravagant, just a pork knuckle, potato dumpling, dark beer gravy and sauerkraut.
BUT as a result of the trip to WARHAMMER! Number One Son has expressed an interest in gaming. So now the modular table is getting some use, perhaps I need to get on and paint it? We are using our own version of One Hour Skirmish.
A system which utilises playing cards instead of dice which can make the turn system chaotic and fun. Highly recommended.
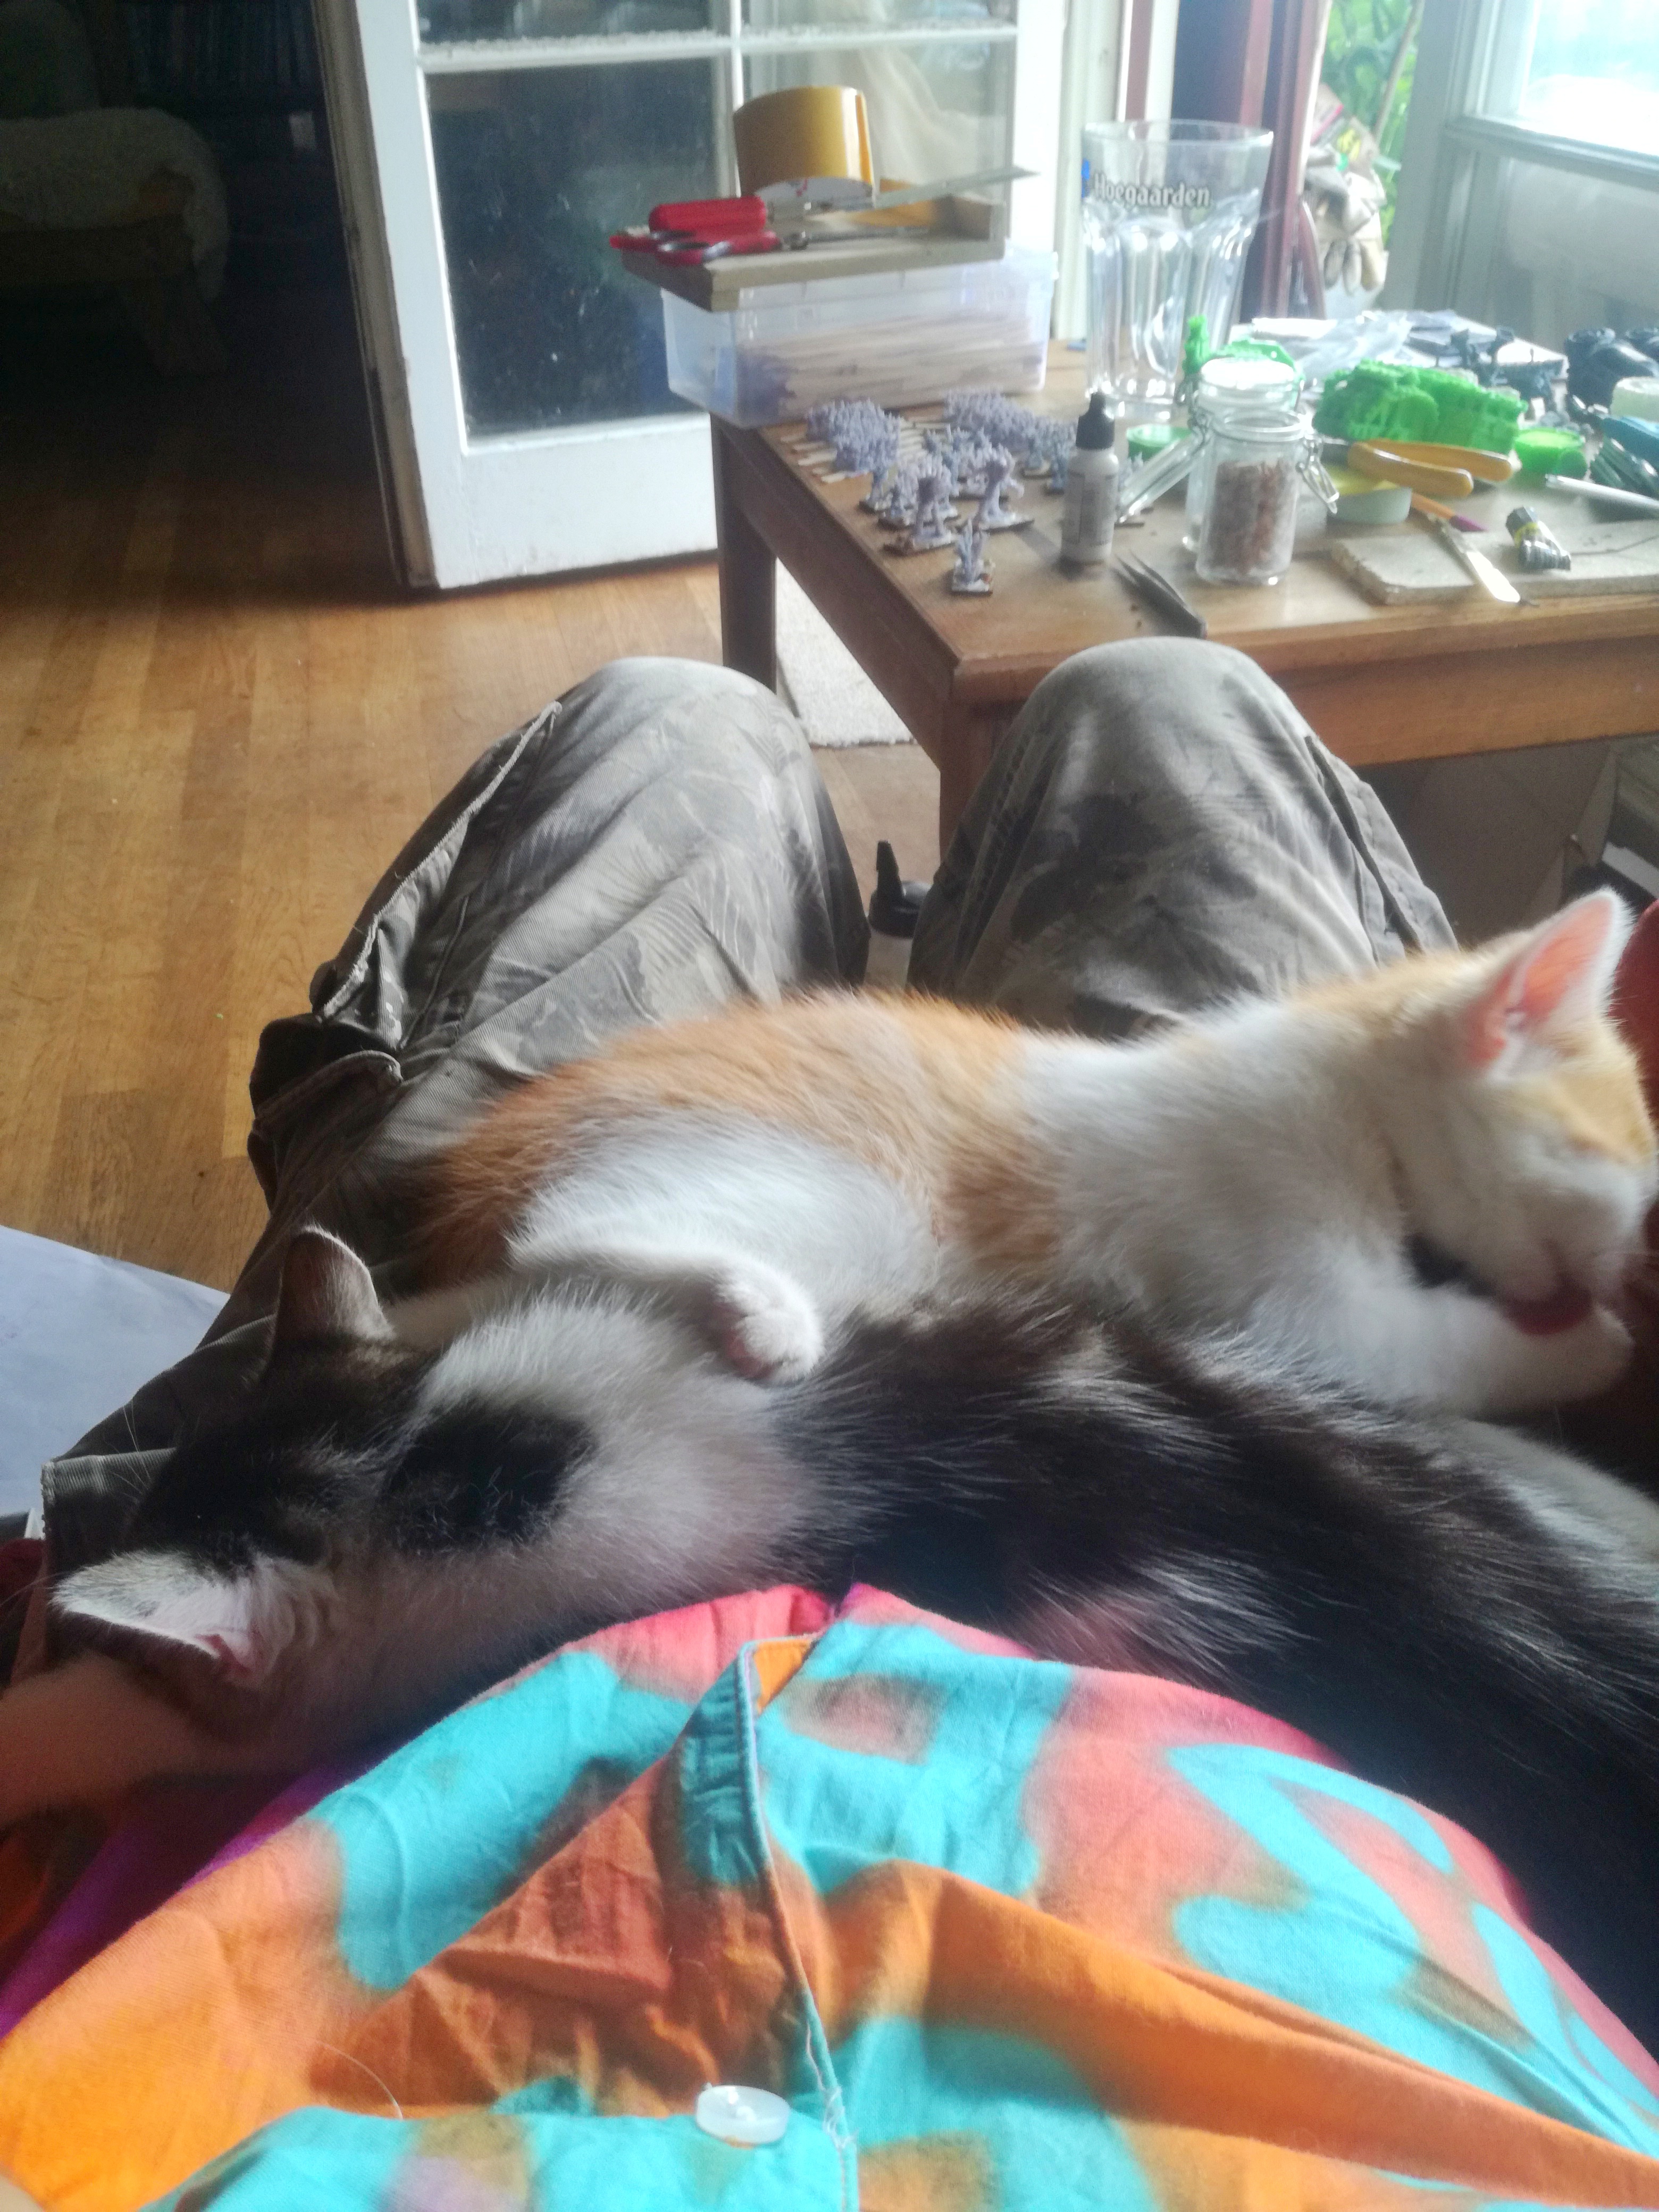
I also have been distracted by kittens, we are helping a neighbour rehouse kittens. Her farm is used as a dumping ground for unwanted kittens and she finds it a bit too much at times.
Here is a picture heavy painting round up. Still struggling with fatigue and concentration. This is why I made this the first job of the day so it would get done.
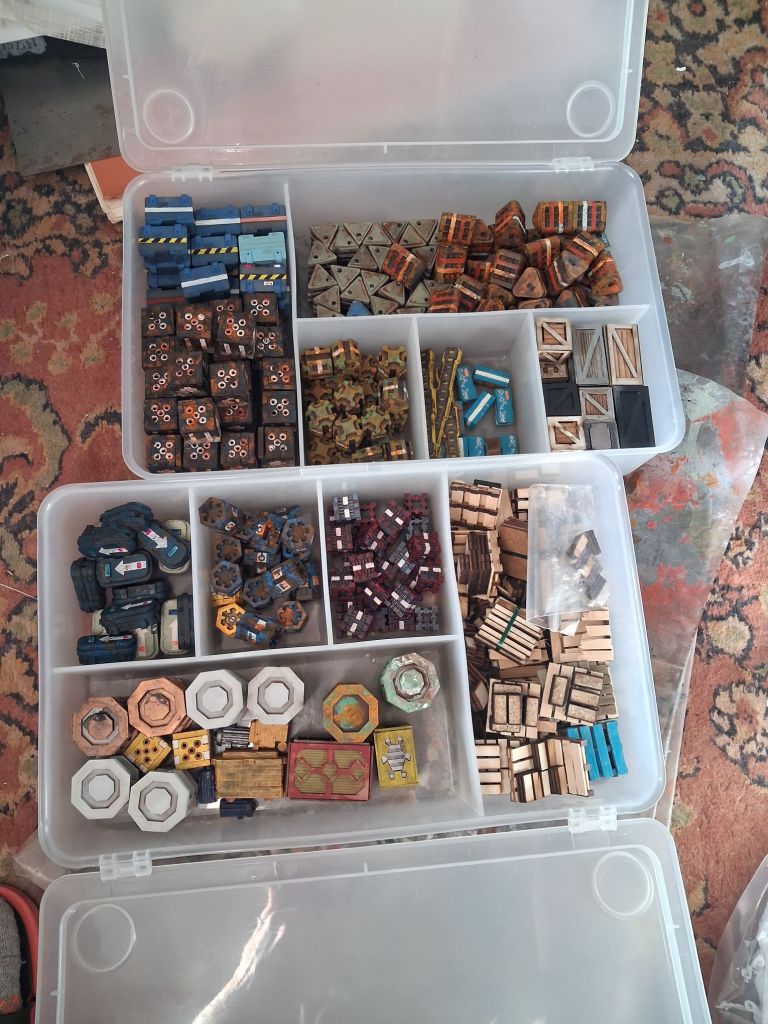
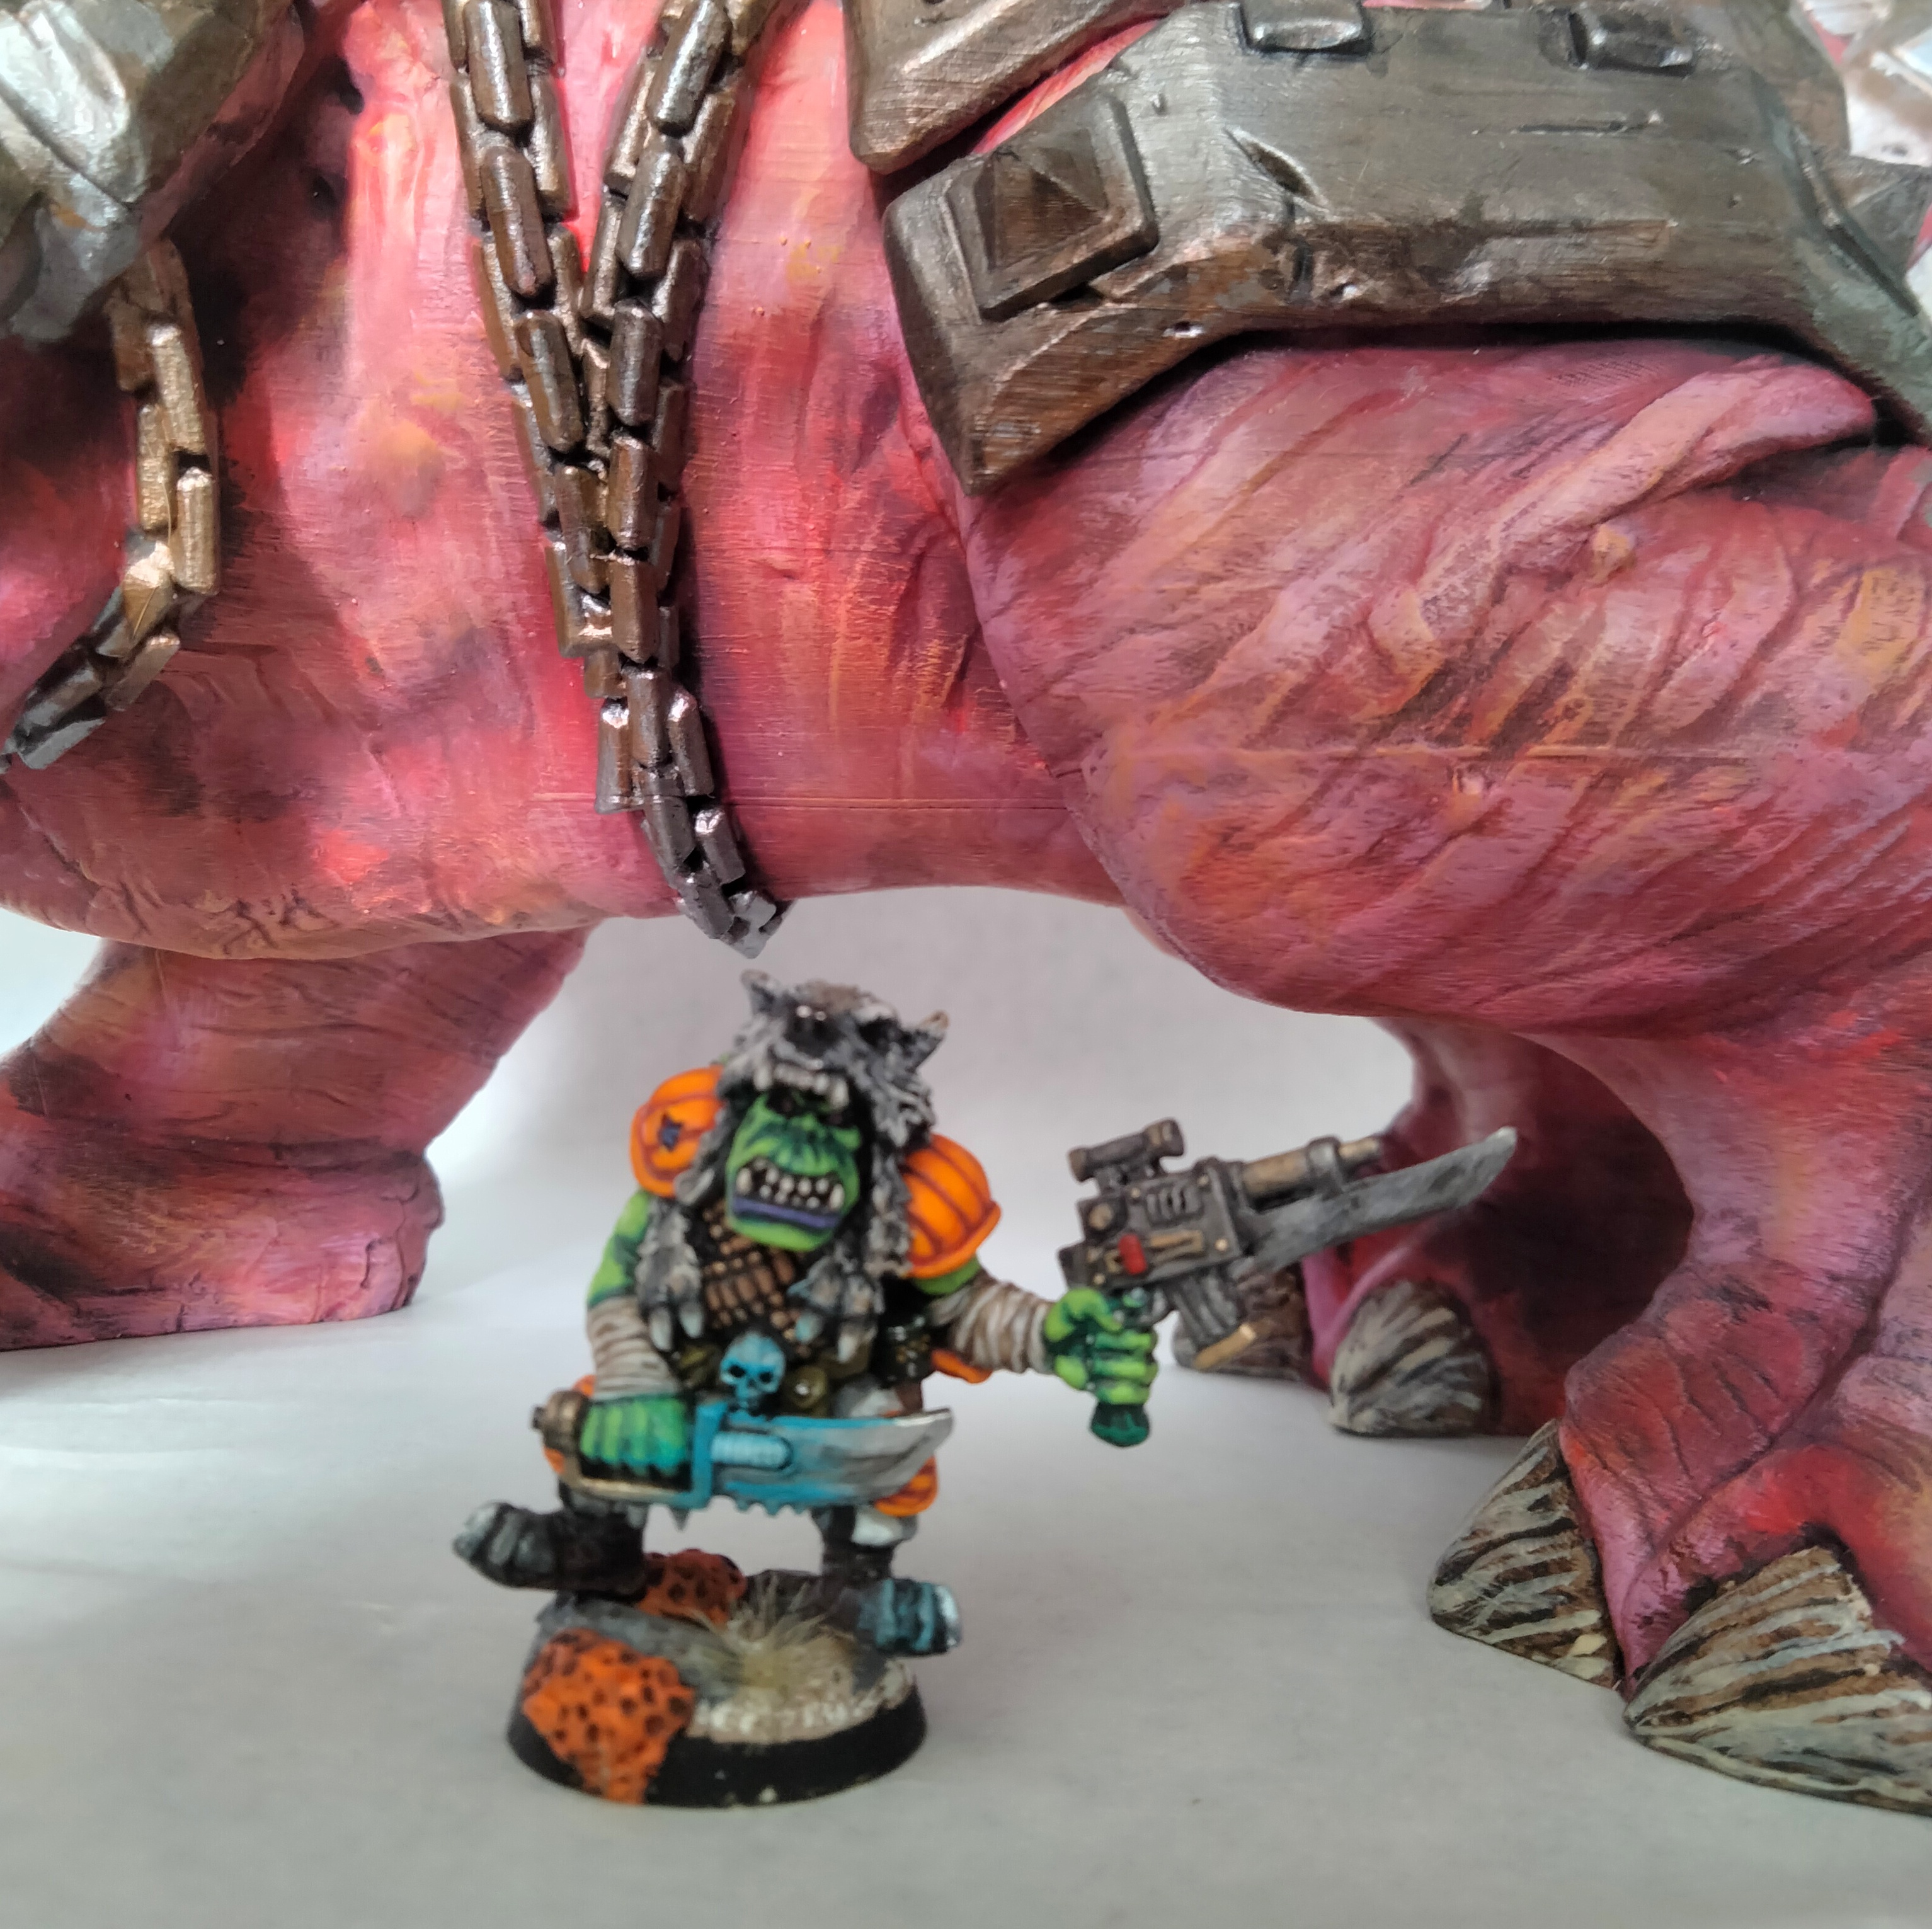
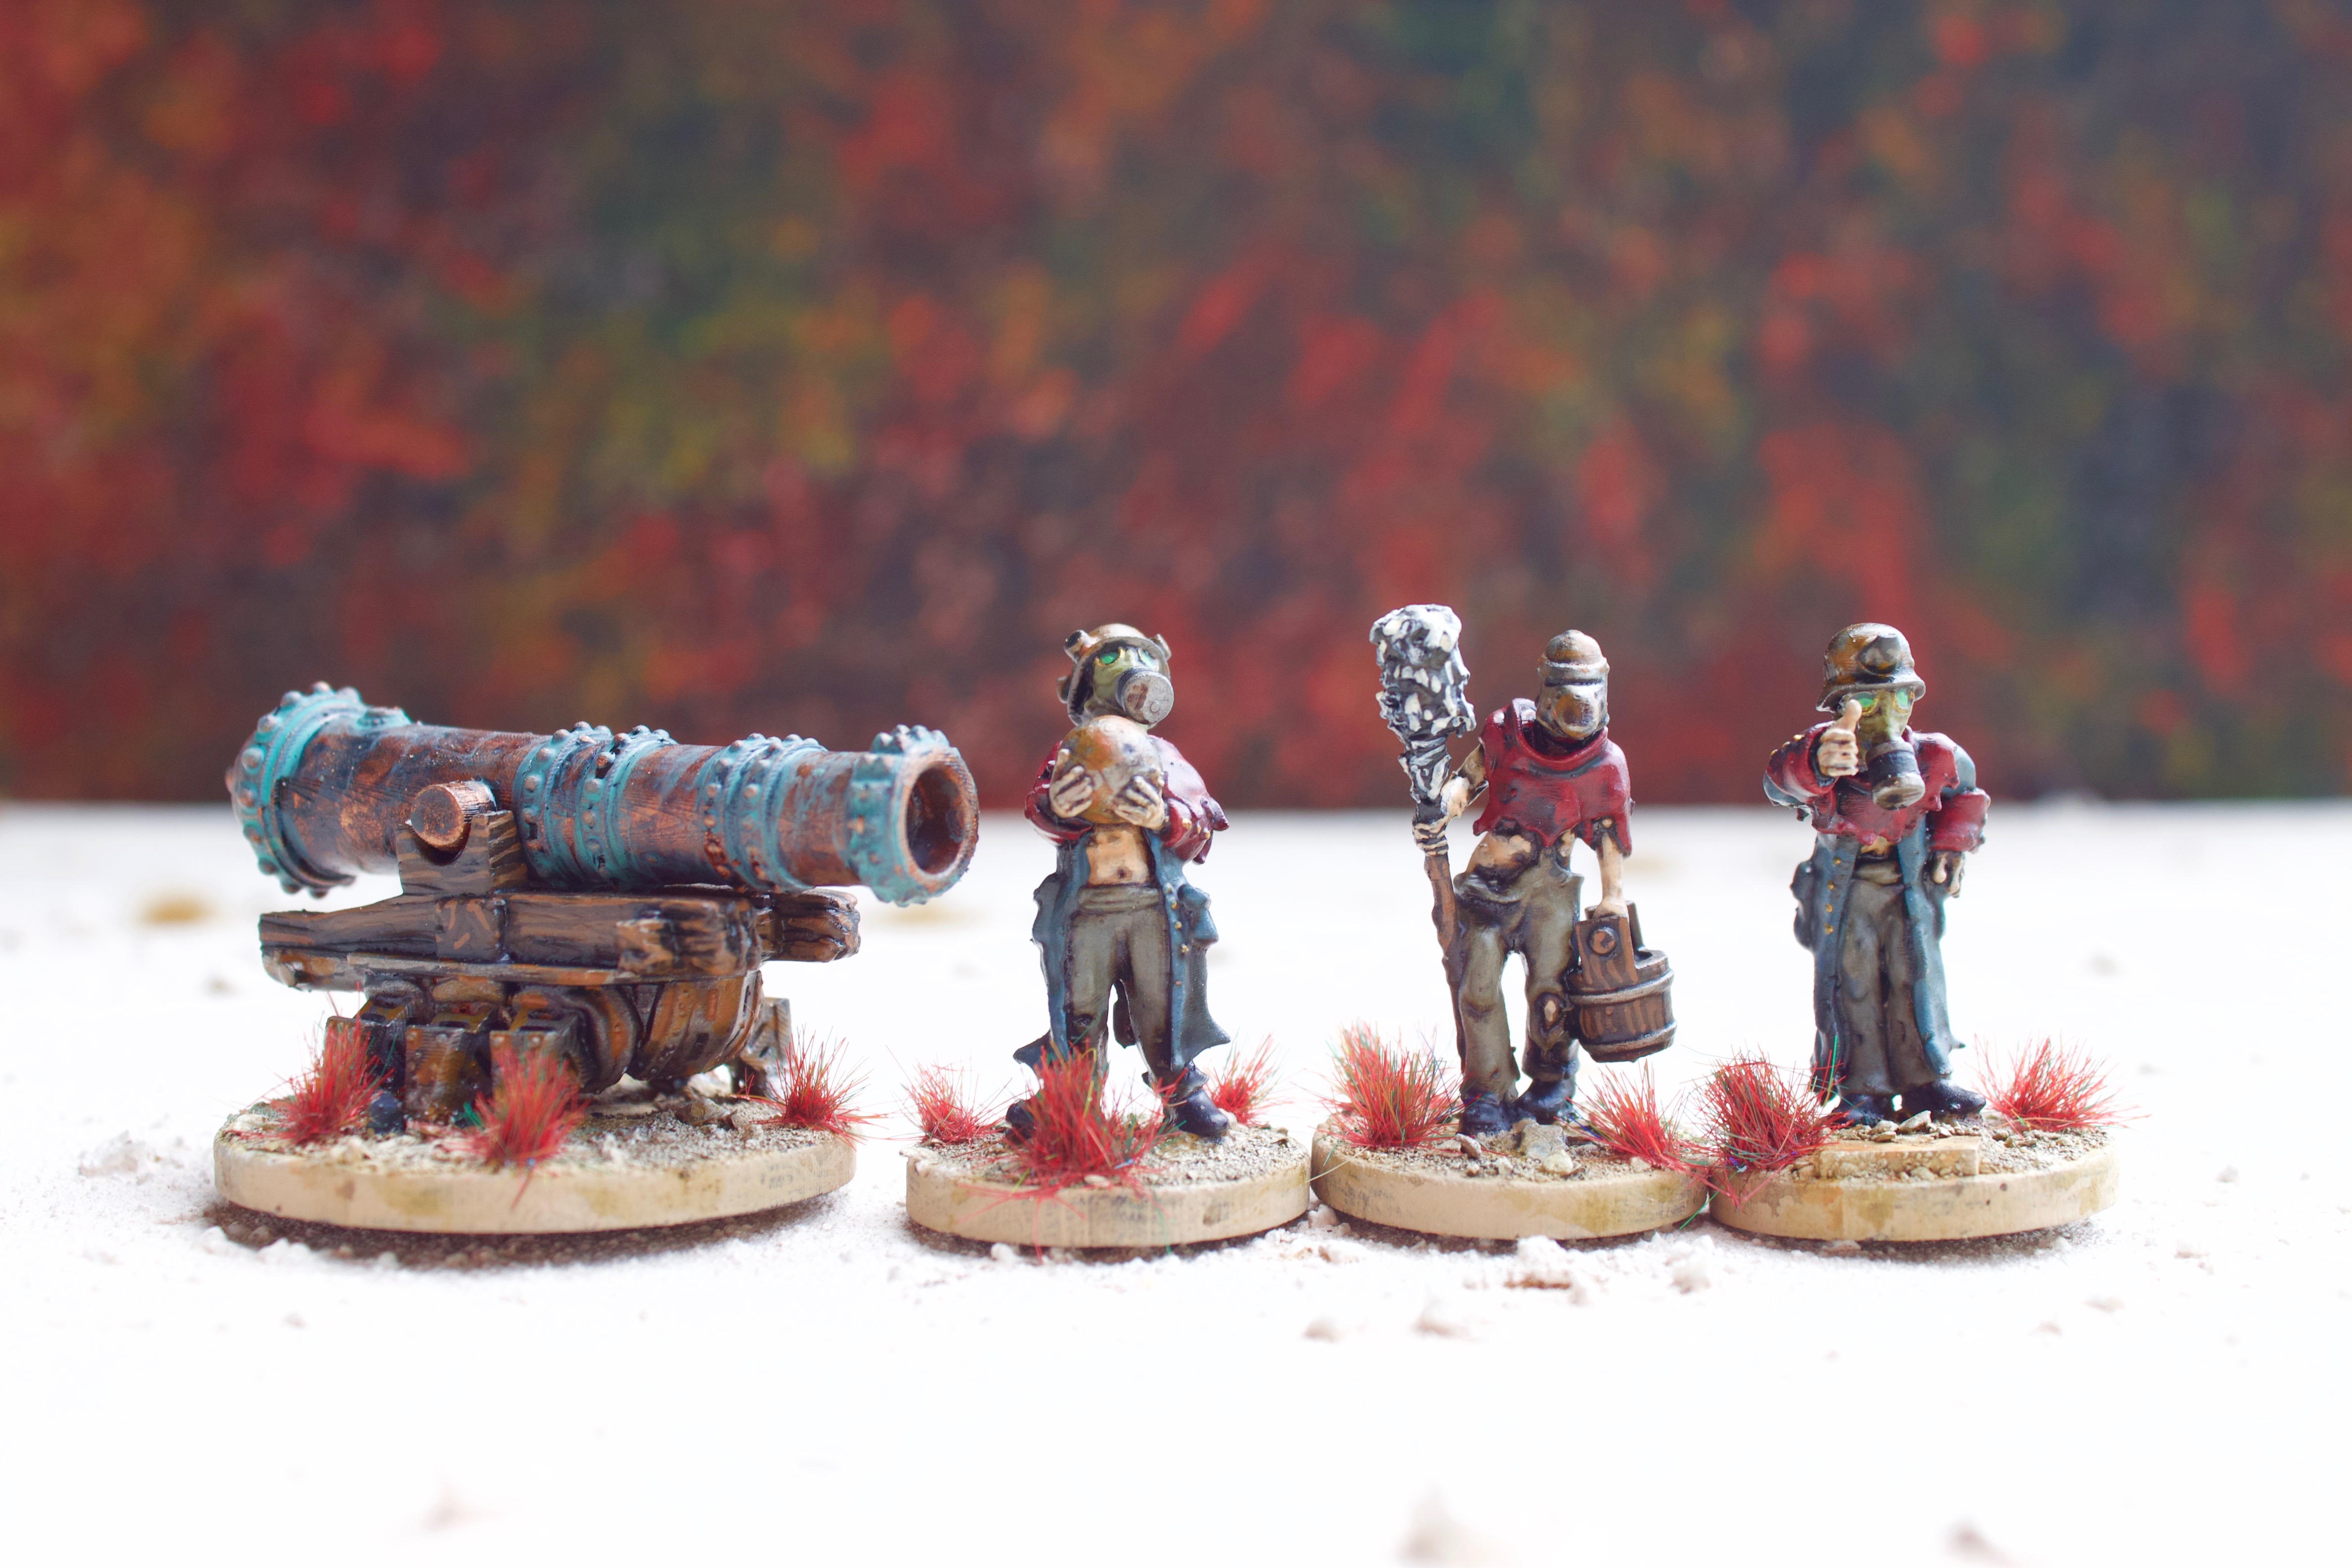
These are walking troop transports for my Traitor Guard. There are 3D printed parts from Knucklebones patreon, resin parts from Ramshackle Games and laser cut parts.
I am not quite sure what these are. 3D printed, laser cut, resin parts and physical modelling.
This is from Redgozfasta Patreon. The guy doing this wants to work his way through the Epic Orks collection, scaling them up to 40k size. This month (May) is the Battlewagon. One of the variations is the Weirdboy Tower which I am very much looking forwards to. Entirely printed on my Ender 3 FDM printer. My genius neighbour took my printer apart and rebuilt it totally square. The results are amazing, not resin quality but pretty damn good.
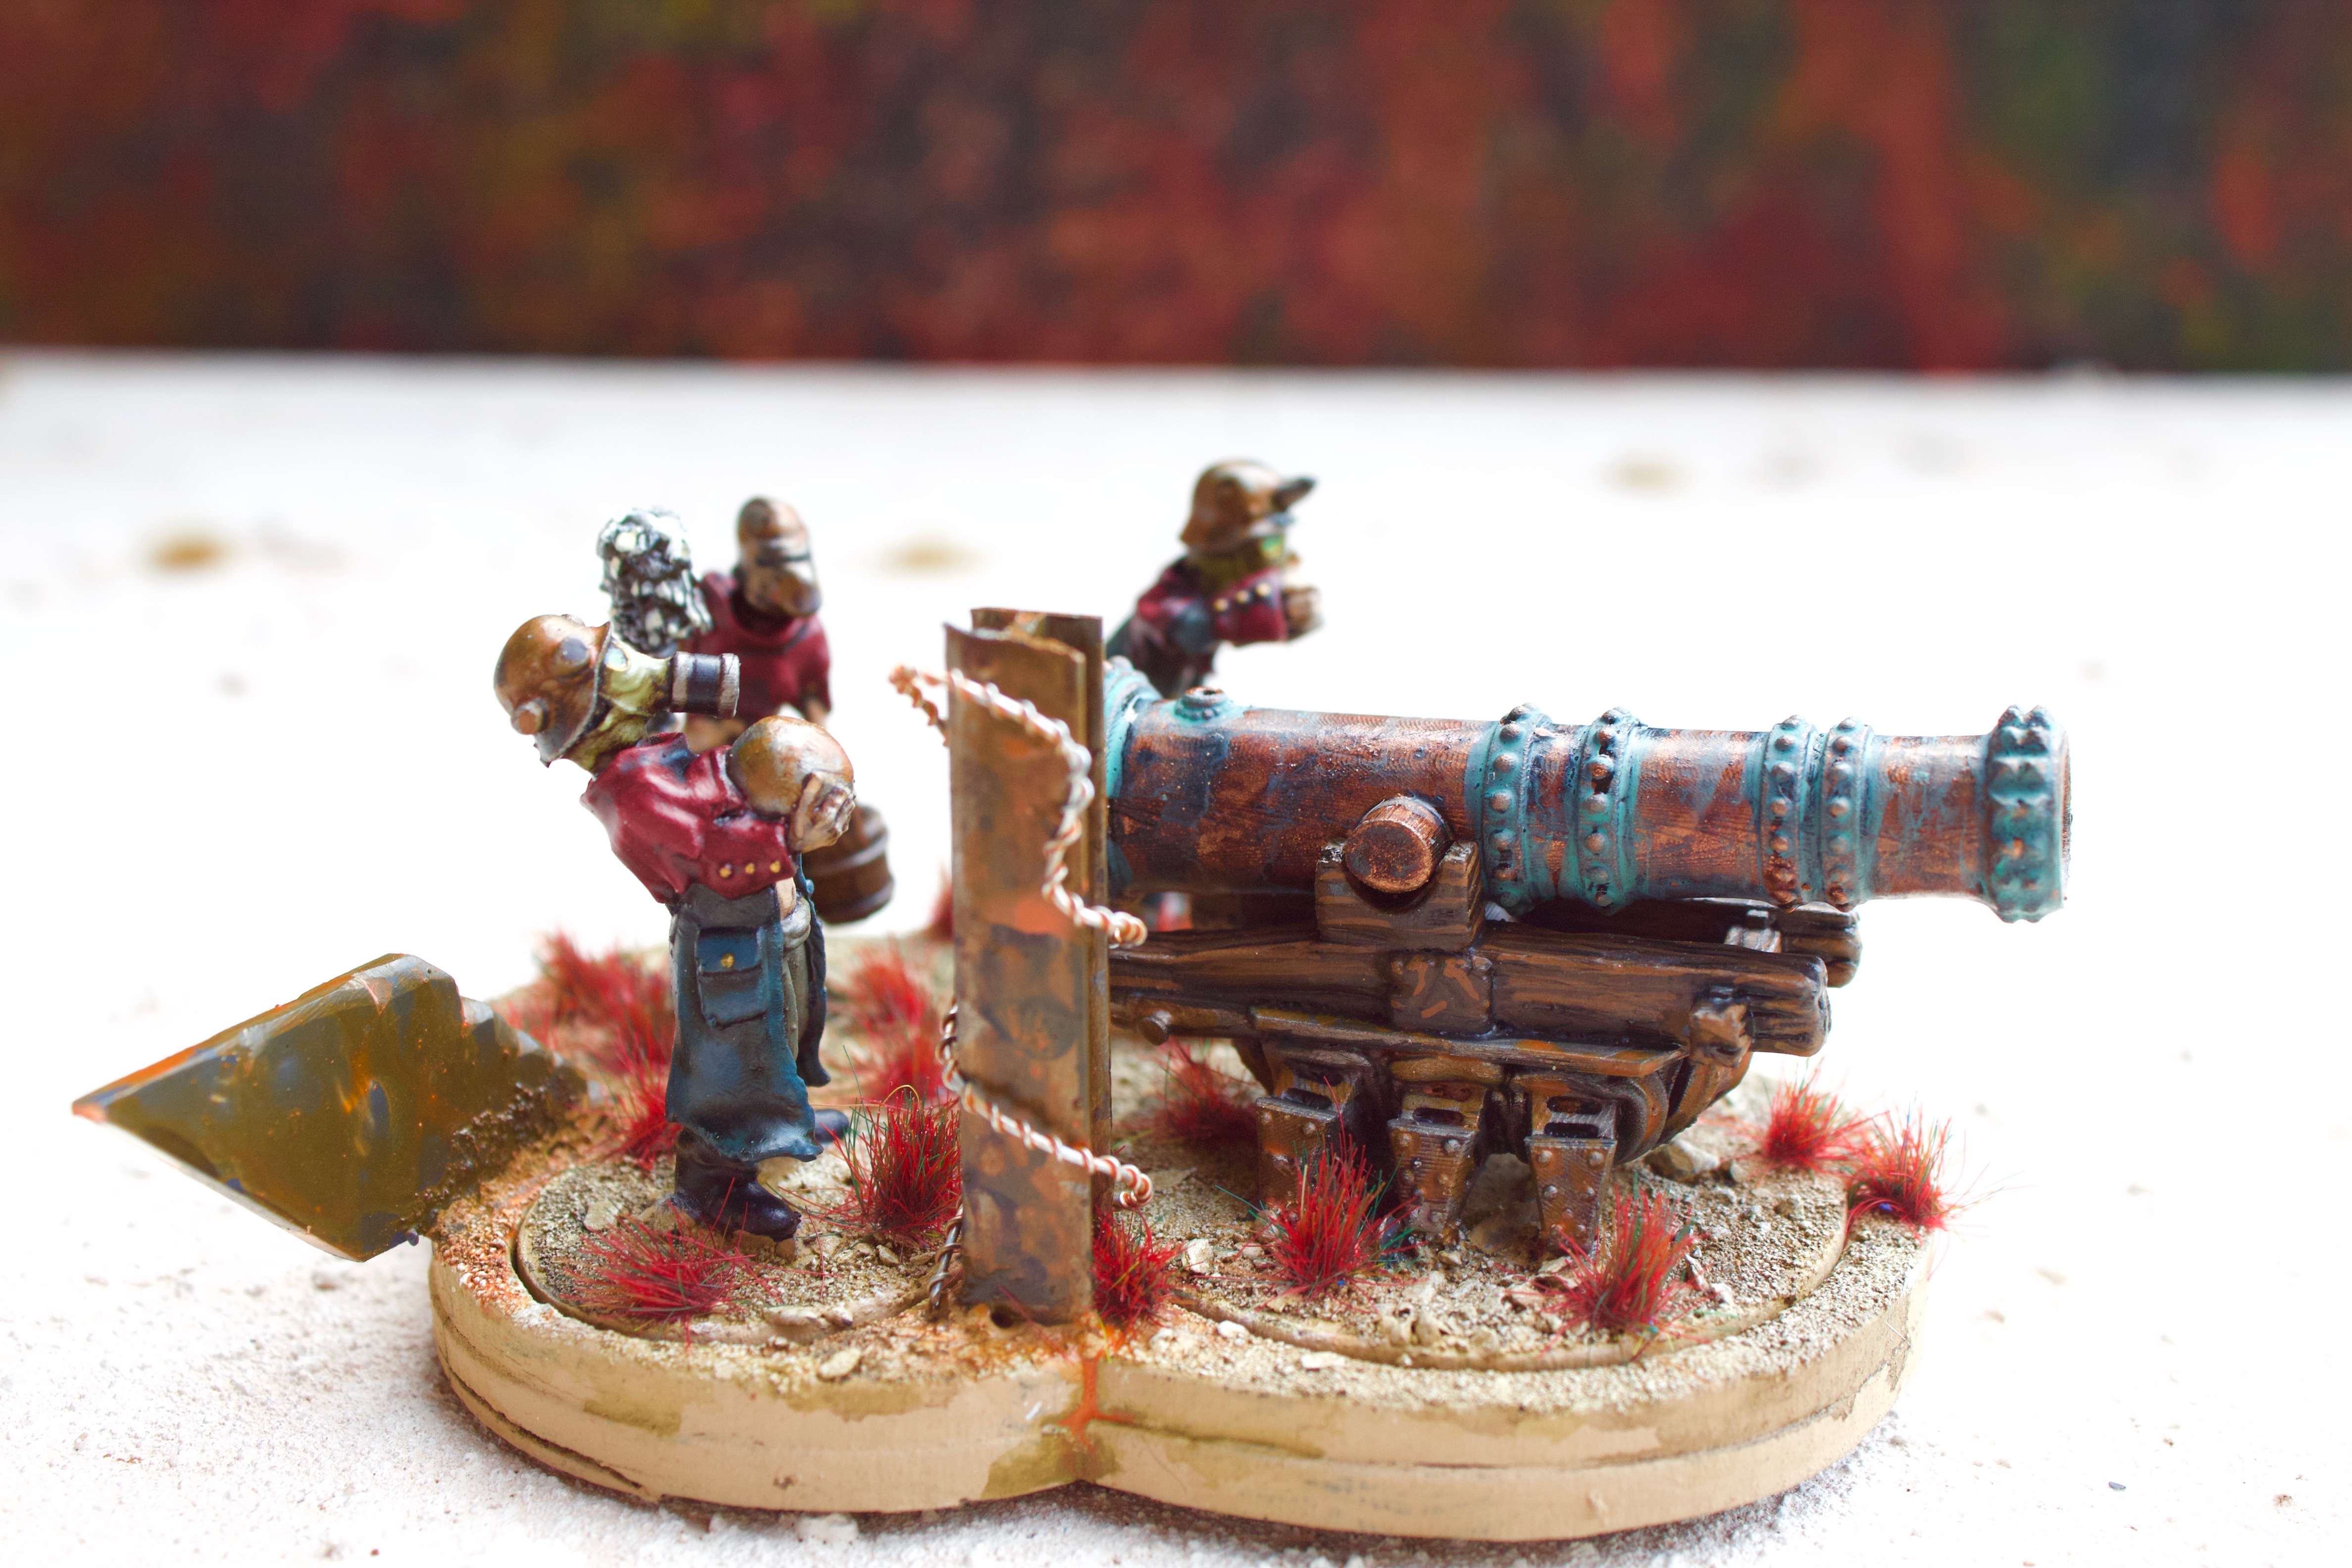
This is a gun crew for my Traitor Guard. This is all from Knucklebones patreon.
These last few weeks have been a bit of a struggle. Covid has left me suffering with fatigue, lack of focus, demotivation and shortness of breath. I have been doing small stabs at hobby, but I haven’t had the enthusiasm to really get stuck in with the painting.
I have been making progress with Blender, 3d modelling software. And I am attempting to rig, basically putting a skeleton inside the figure, my model which will make posing a lot easier.
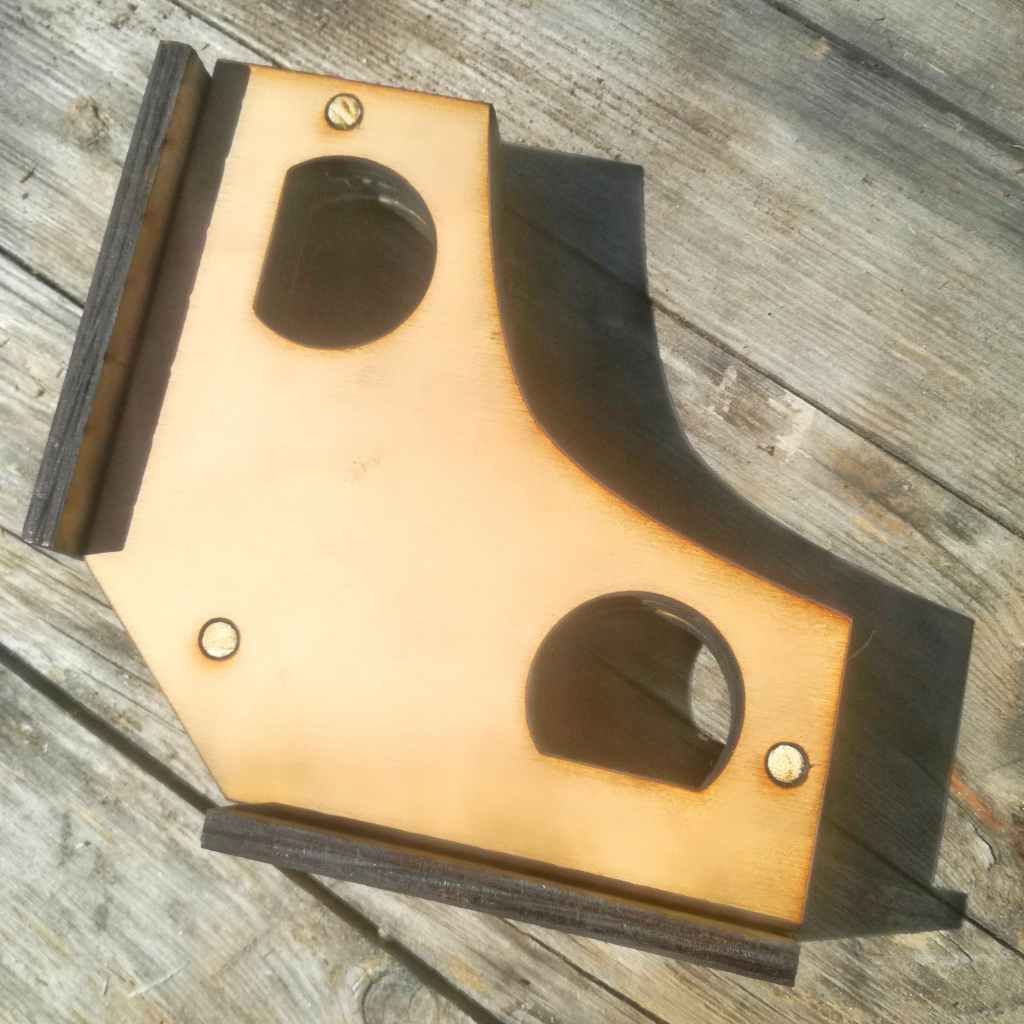
I have been making some tools for my workshop. I always need clamps for glueing and I have been eyeing up some right angle aids on that fabulous far eastern trader. My aim was to avoid plastic and as I had a lot of spare wood scavenged from the Happylab bins I thought I would attempt to make my own.
I am now working on a bigger version of this now.
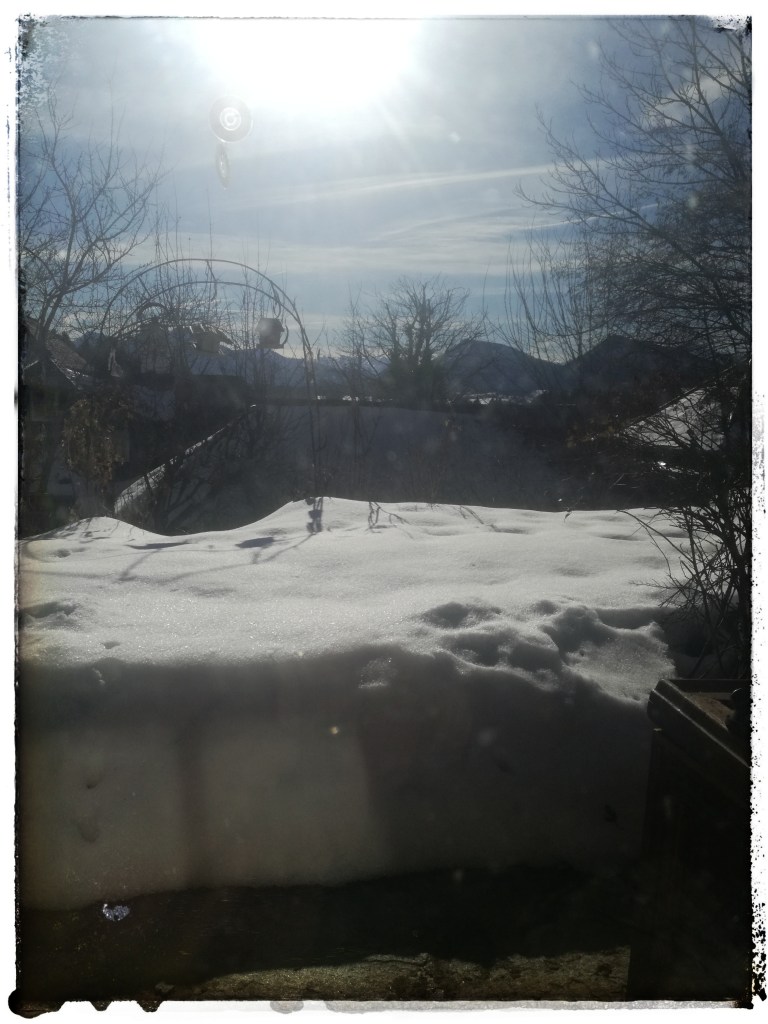
The weather has been going from snow to sunshine and back again in a day.
I have had some nice walks when the weather has been clement. My mood improves after being out.
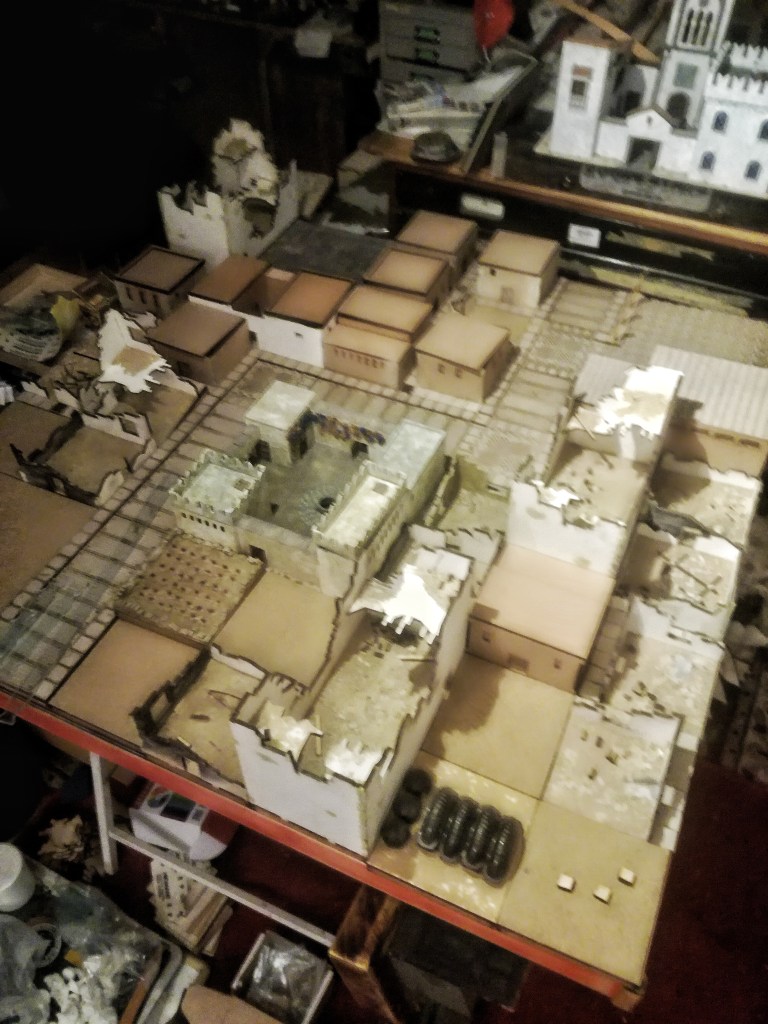
I have finished building the modular tiles for my 4 x 4 modular ruined city table. Now to slap some paint on them.
My neighbour, who is a bit of a perfectionist, took ten hours to deconstruct my Ender3 3D printer and rebuild it totally square. The difference is amazing and I will be posting some pictures soon.
There you have it. A brief catch up on what has been happening.
I have been under the weather for a couple of weeks now but have been testing negative. Earlier this week Number One Son tested positive and I was still negative. Upto this point I had been the only family member to be free from the Rona.
Thursday night I had a bad night with breathing difficulties and a savage sore throat. Not to mention sweats and chills. Friday morning I tested again.
Arse
Got booked that afternoon for a drive thru which has confirmed that I am a positive person. Just waiting on the variant.
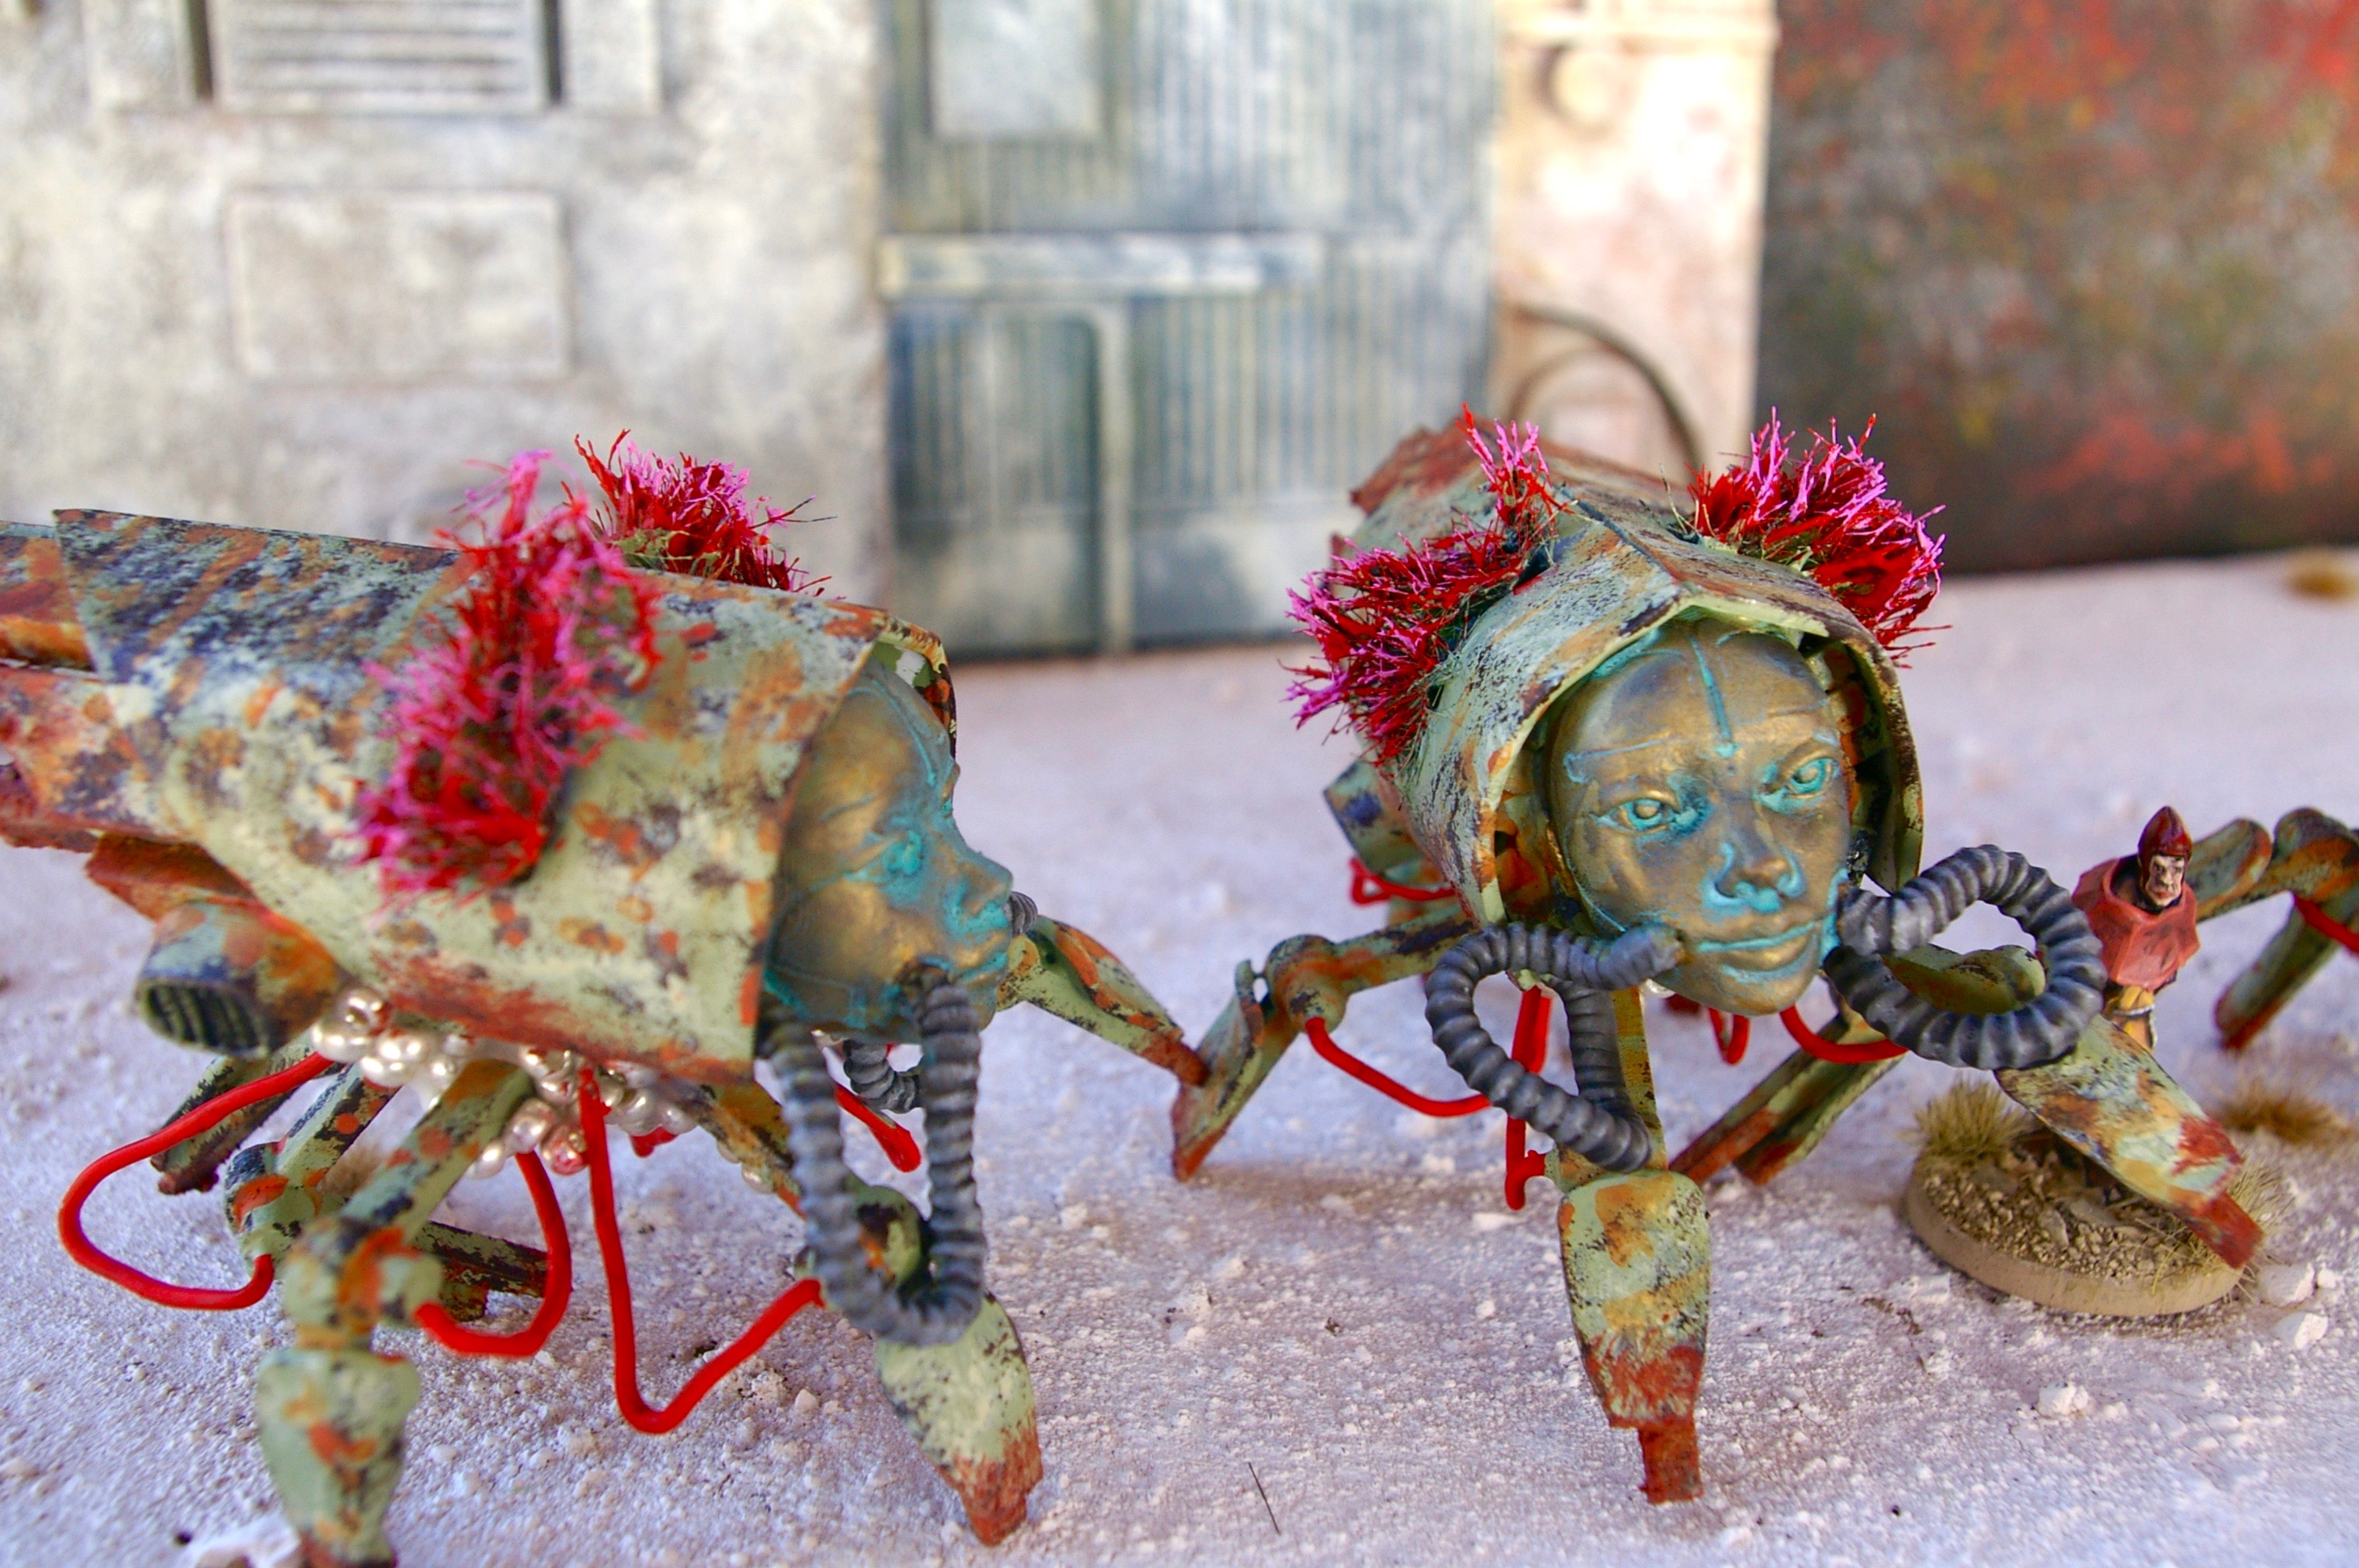
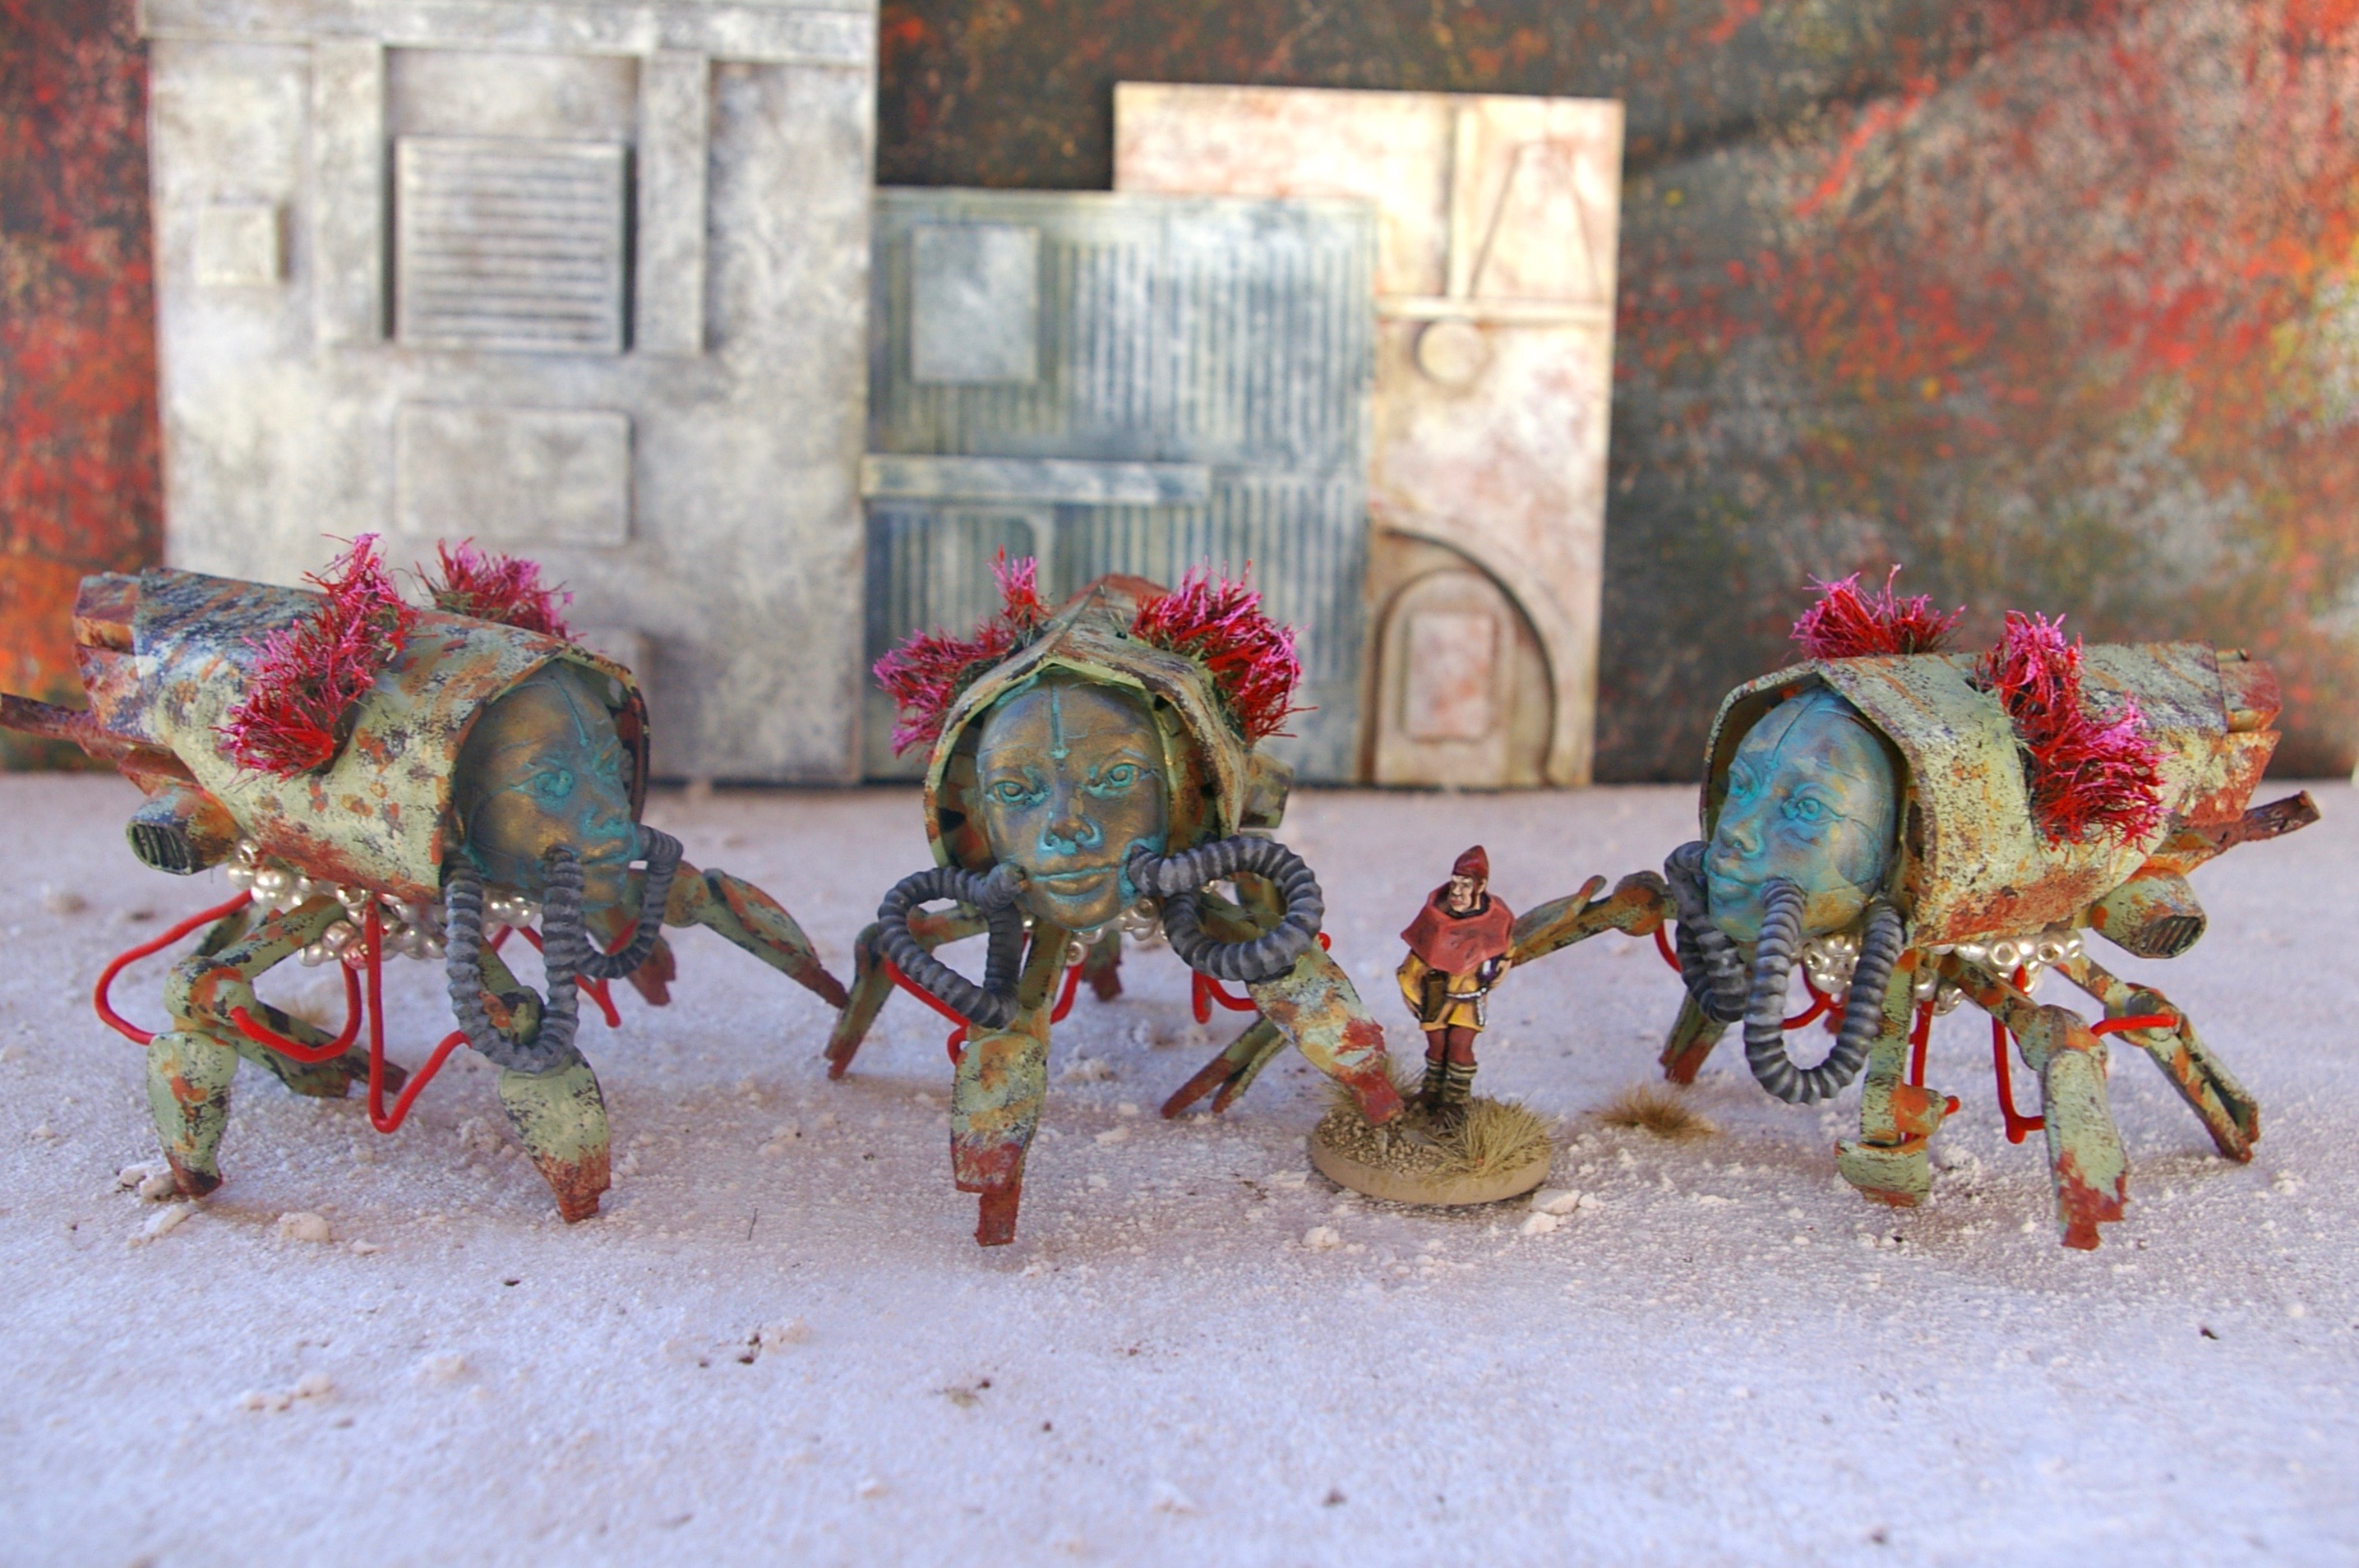
About two weeks ago, before this all kicked off, one of the Patreons I sub to posted this picture.
Image copyright Knucklebones Miniatures.
I saw this and had to have a variant of it. Knucklebones had made some scuttling bug-like legs for a previous model. I chopped them up in Meshmixer and cut’n’pasted the bits to extend them. With this I lasercut some bits to make two open troop carriers. I’ll show them in a later post.
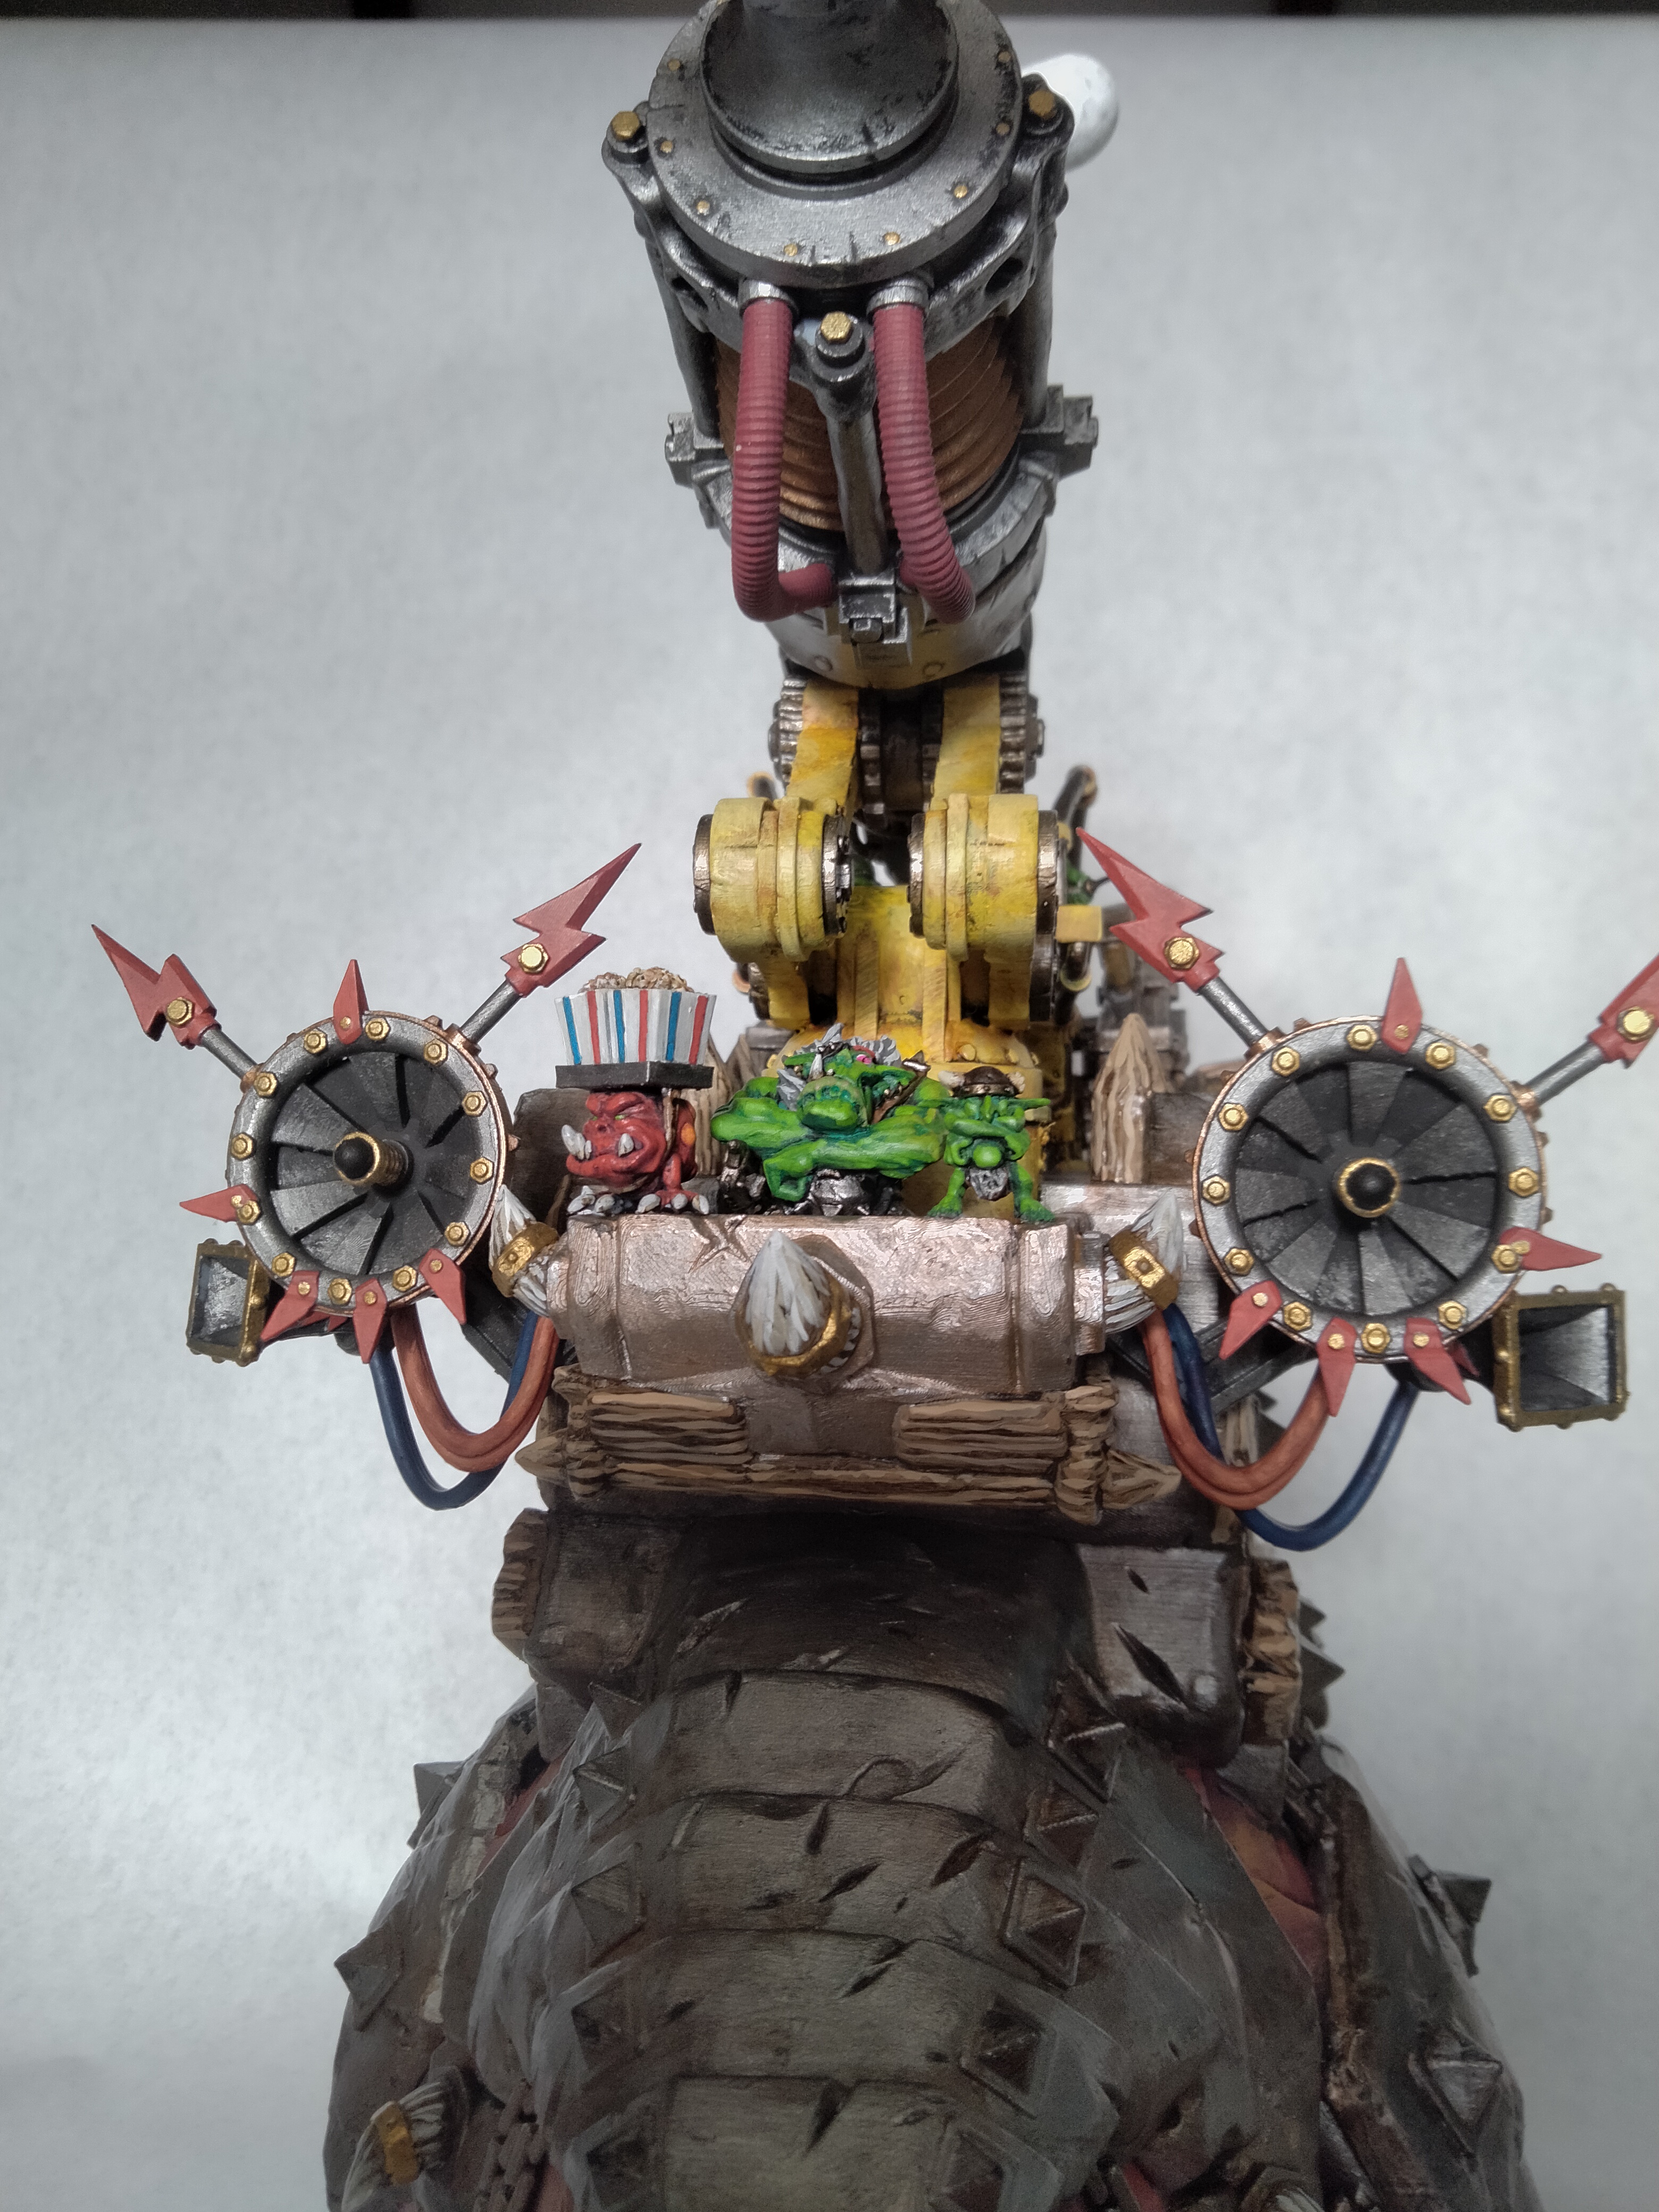
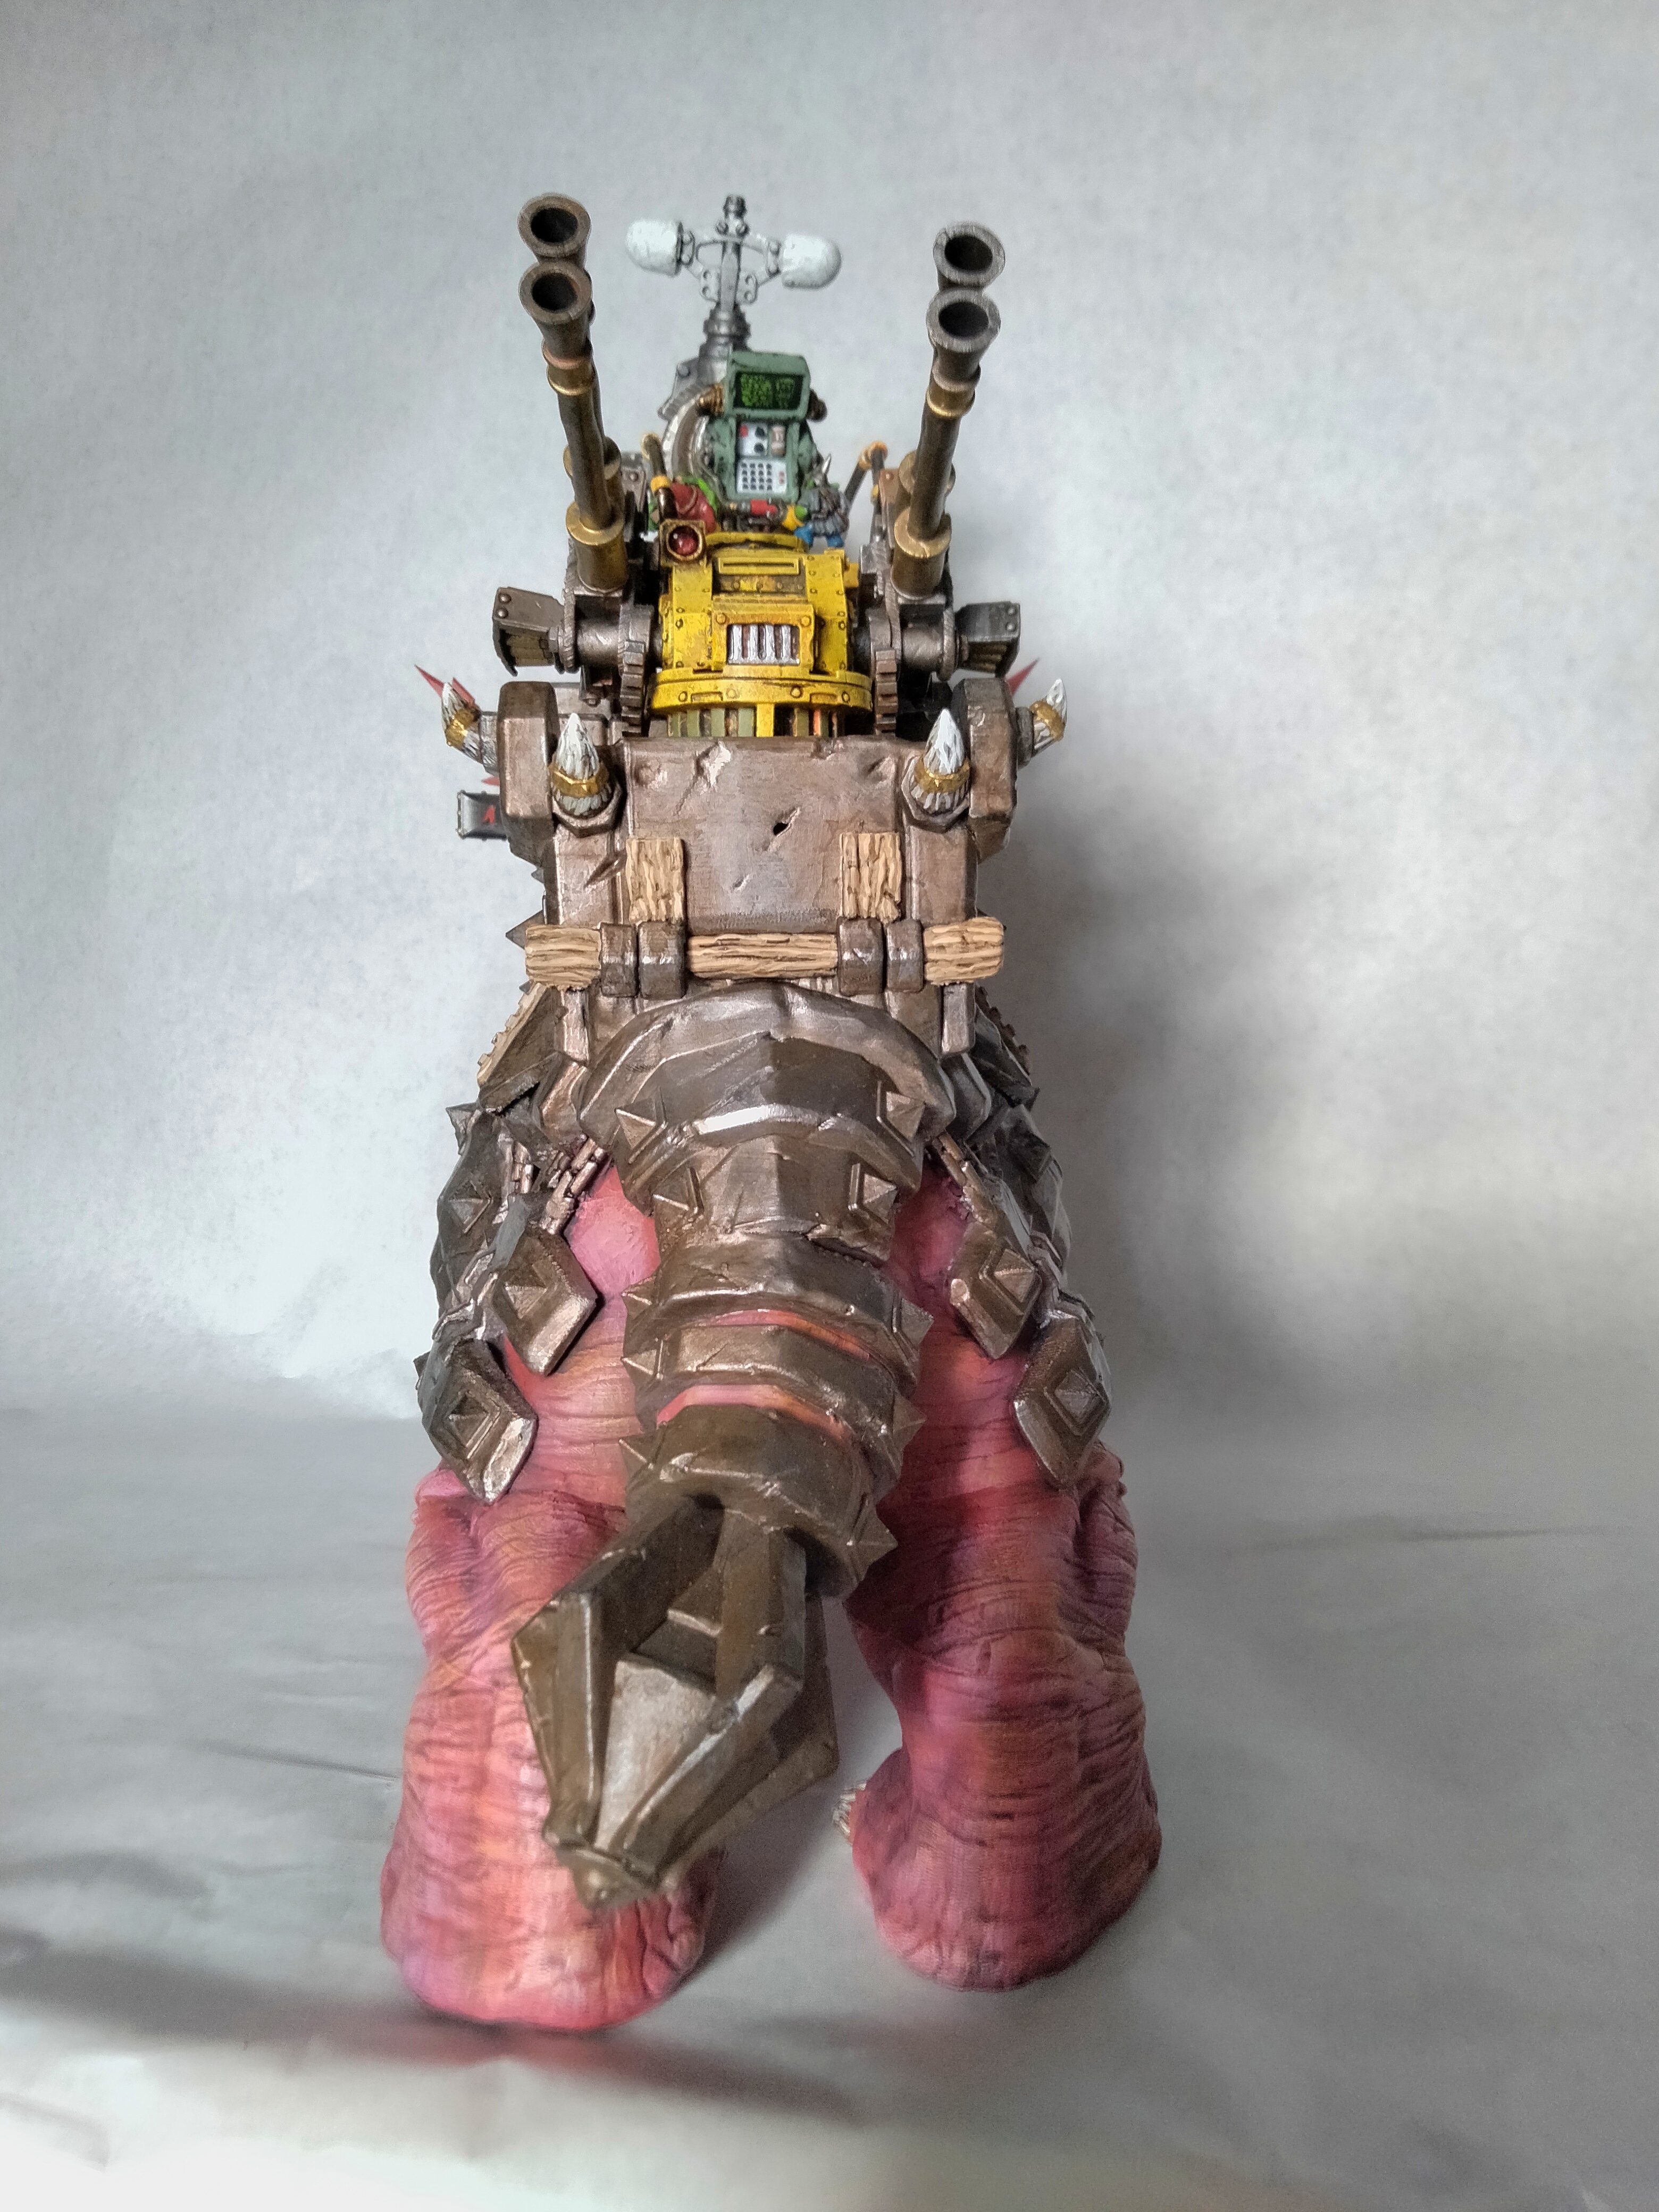
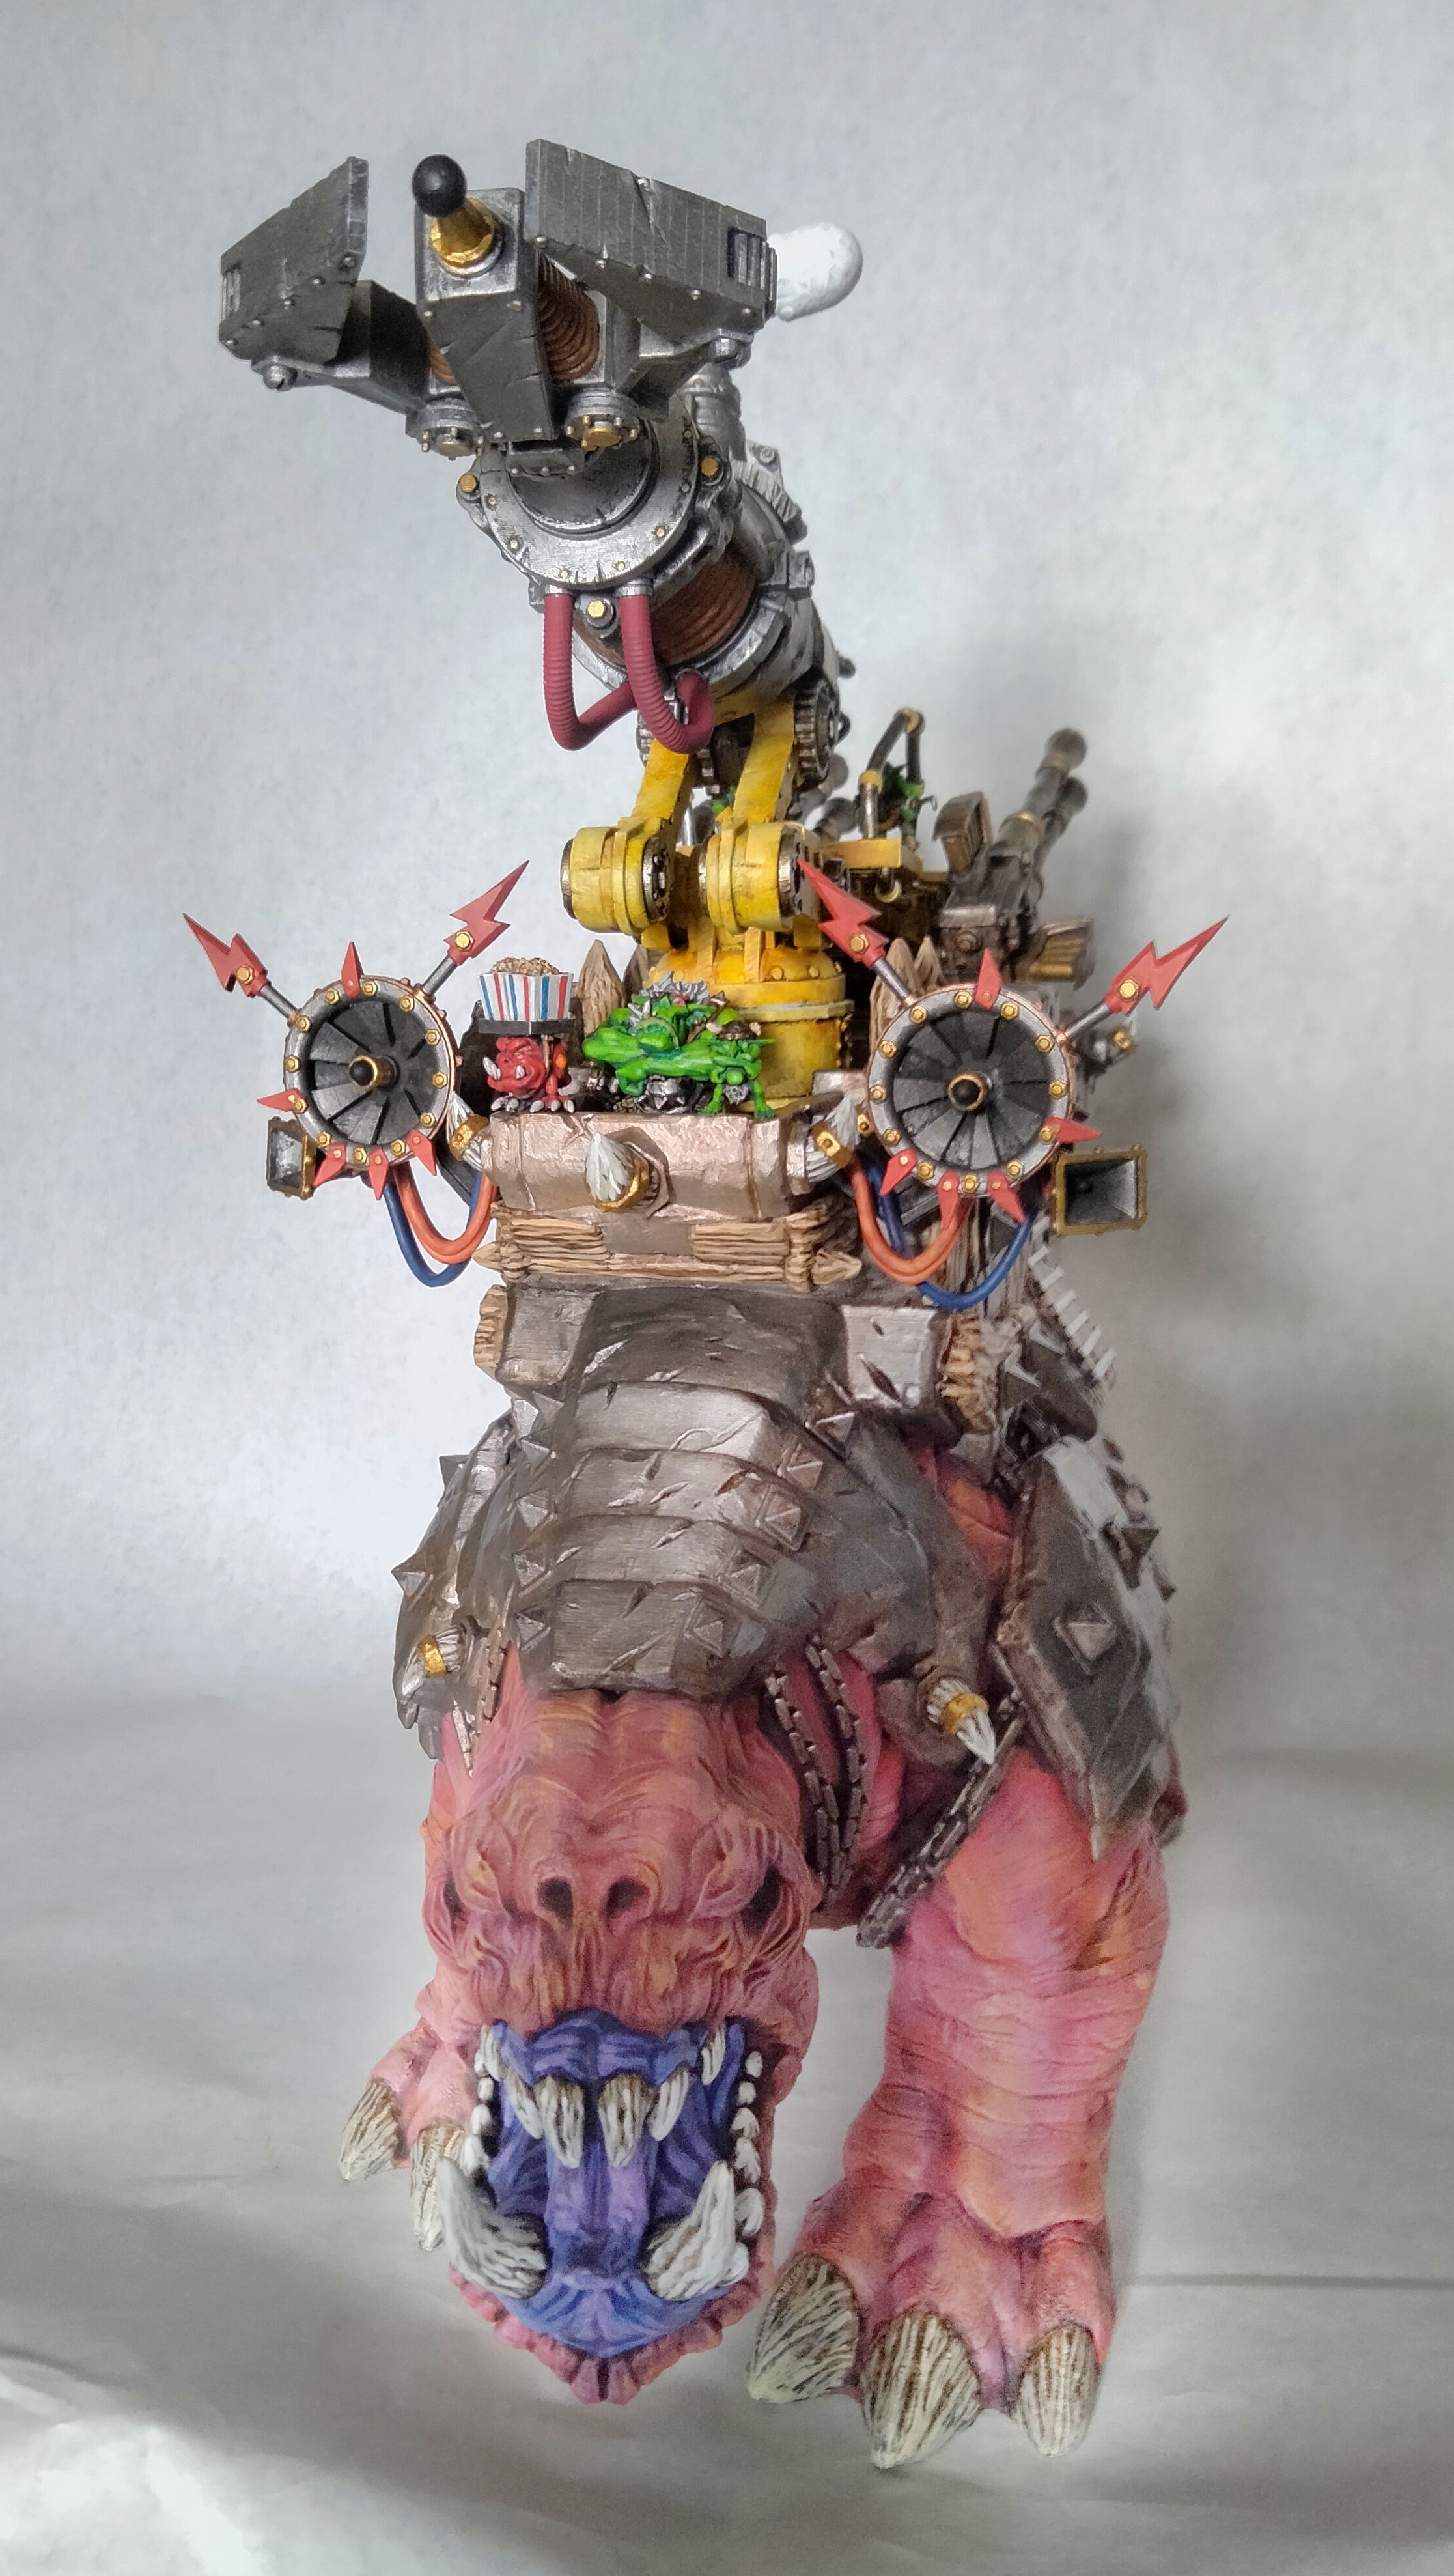
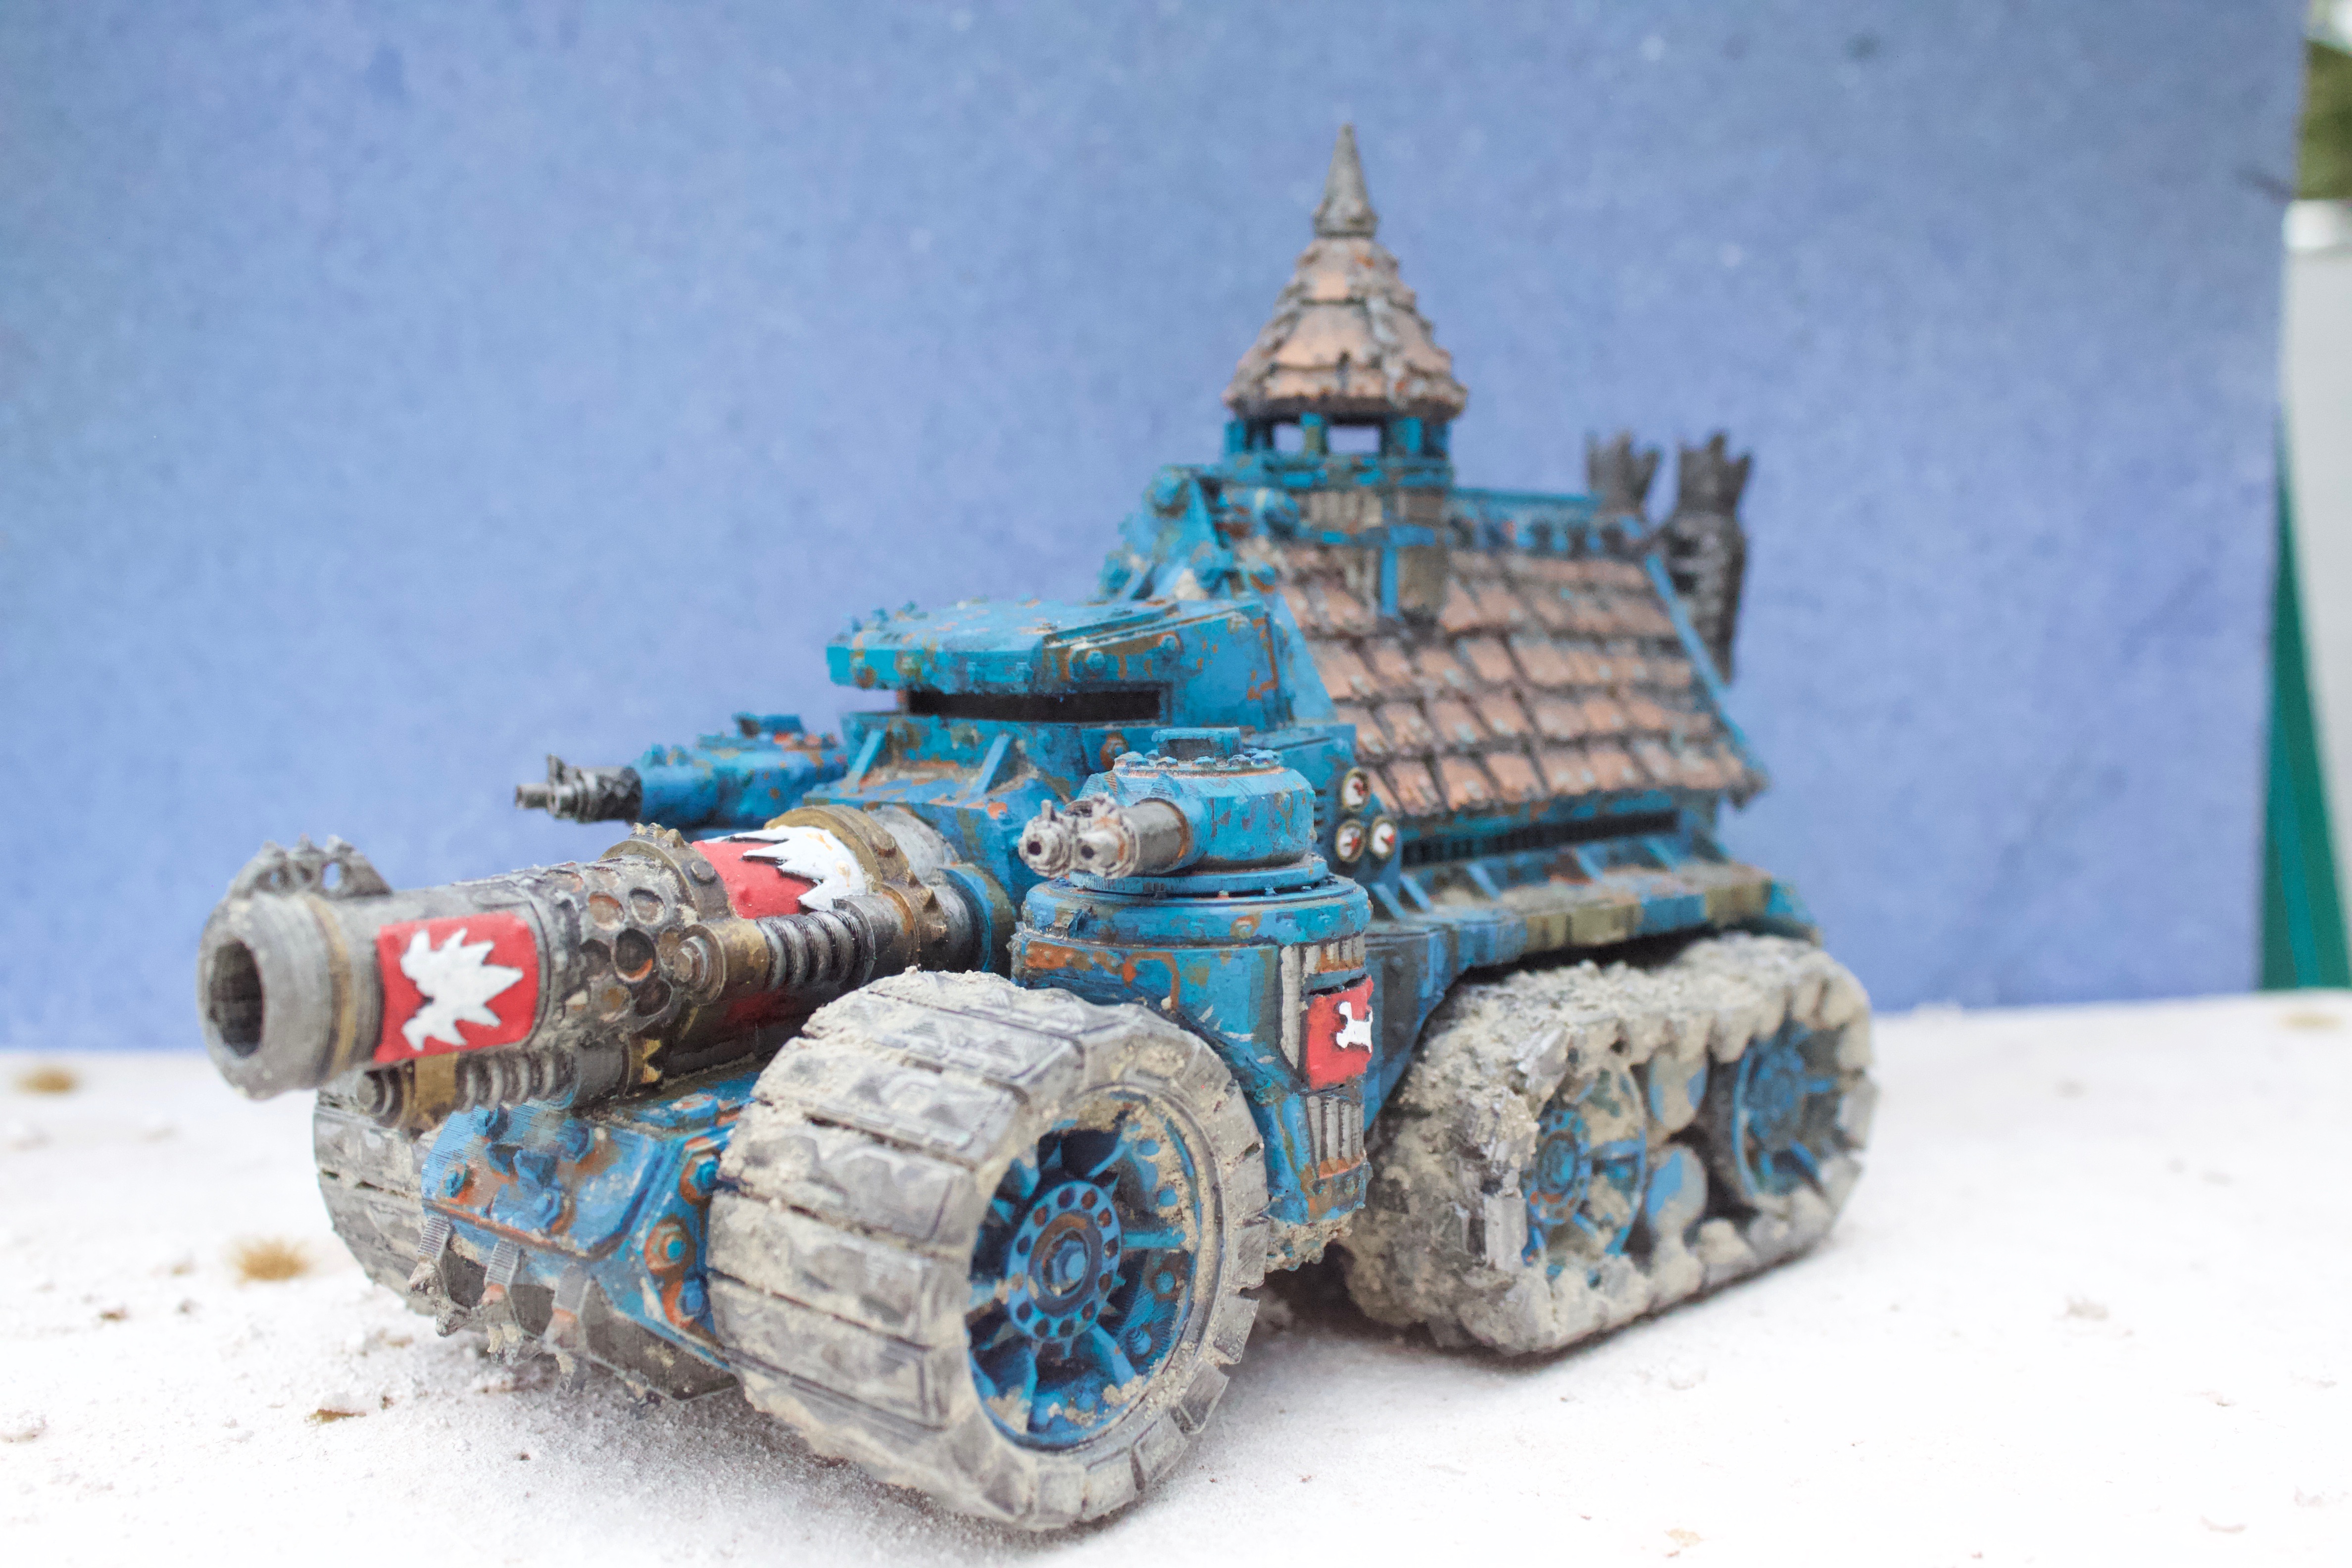
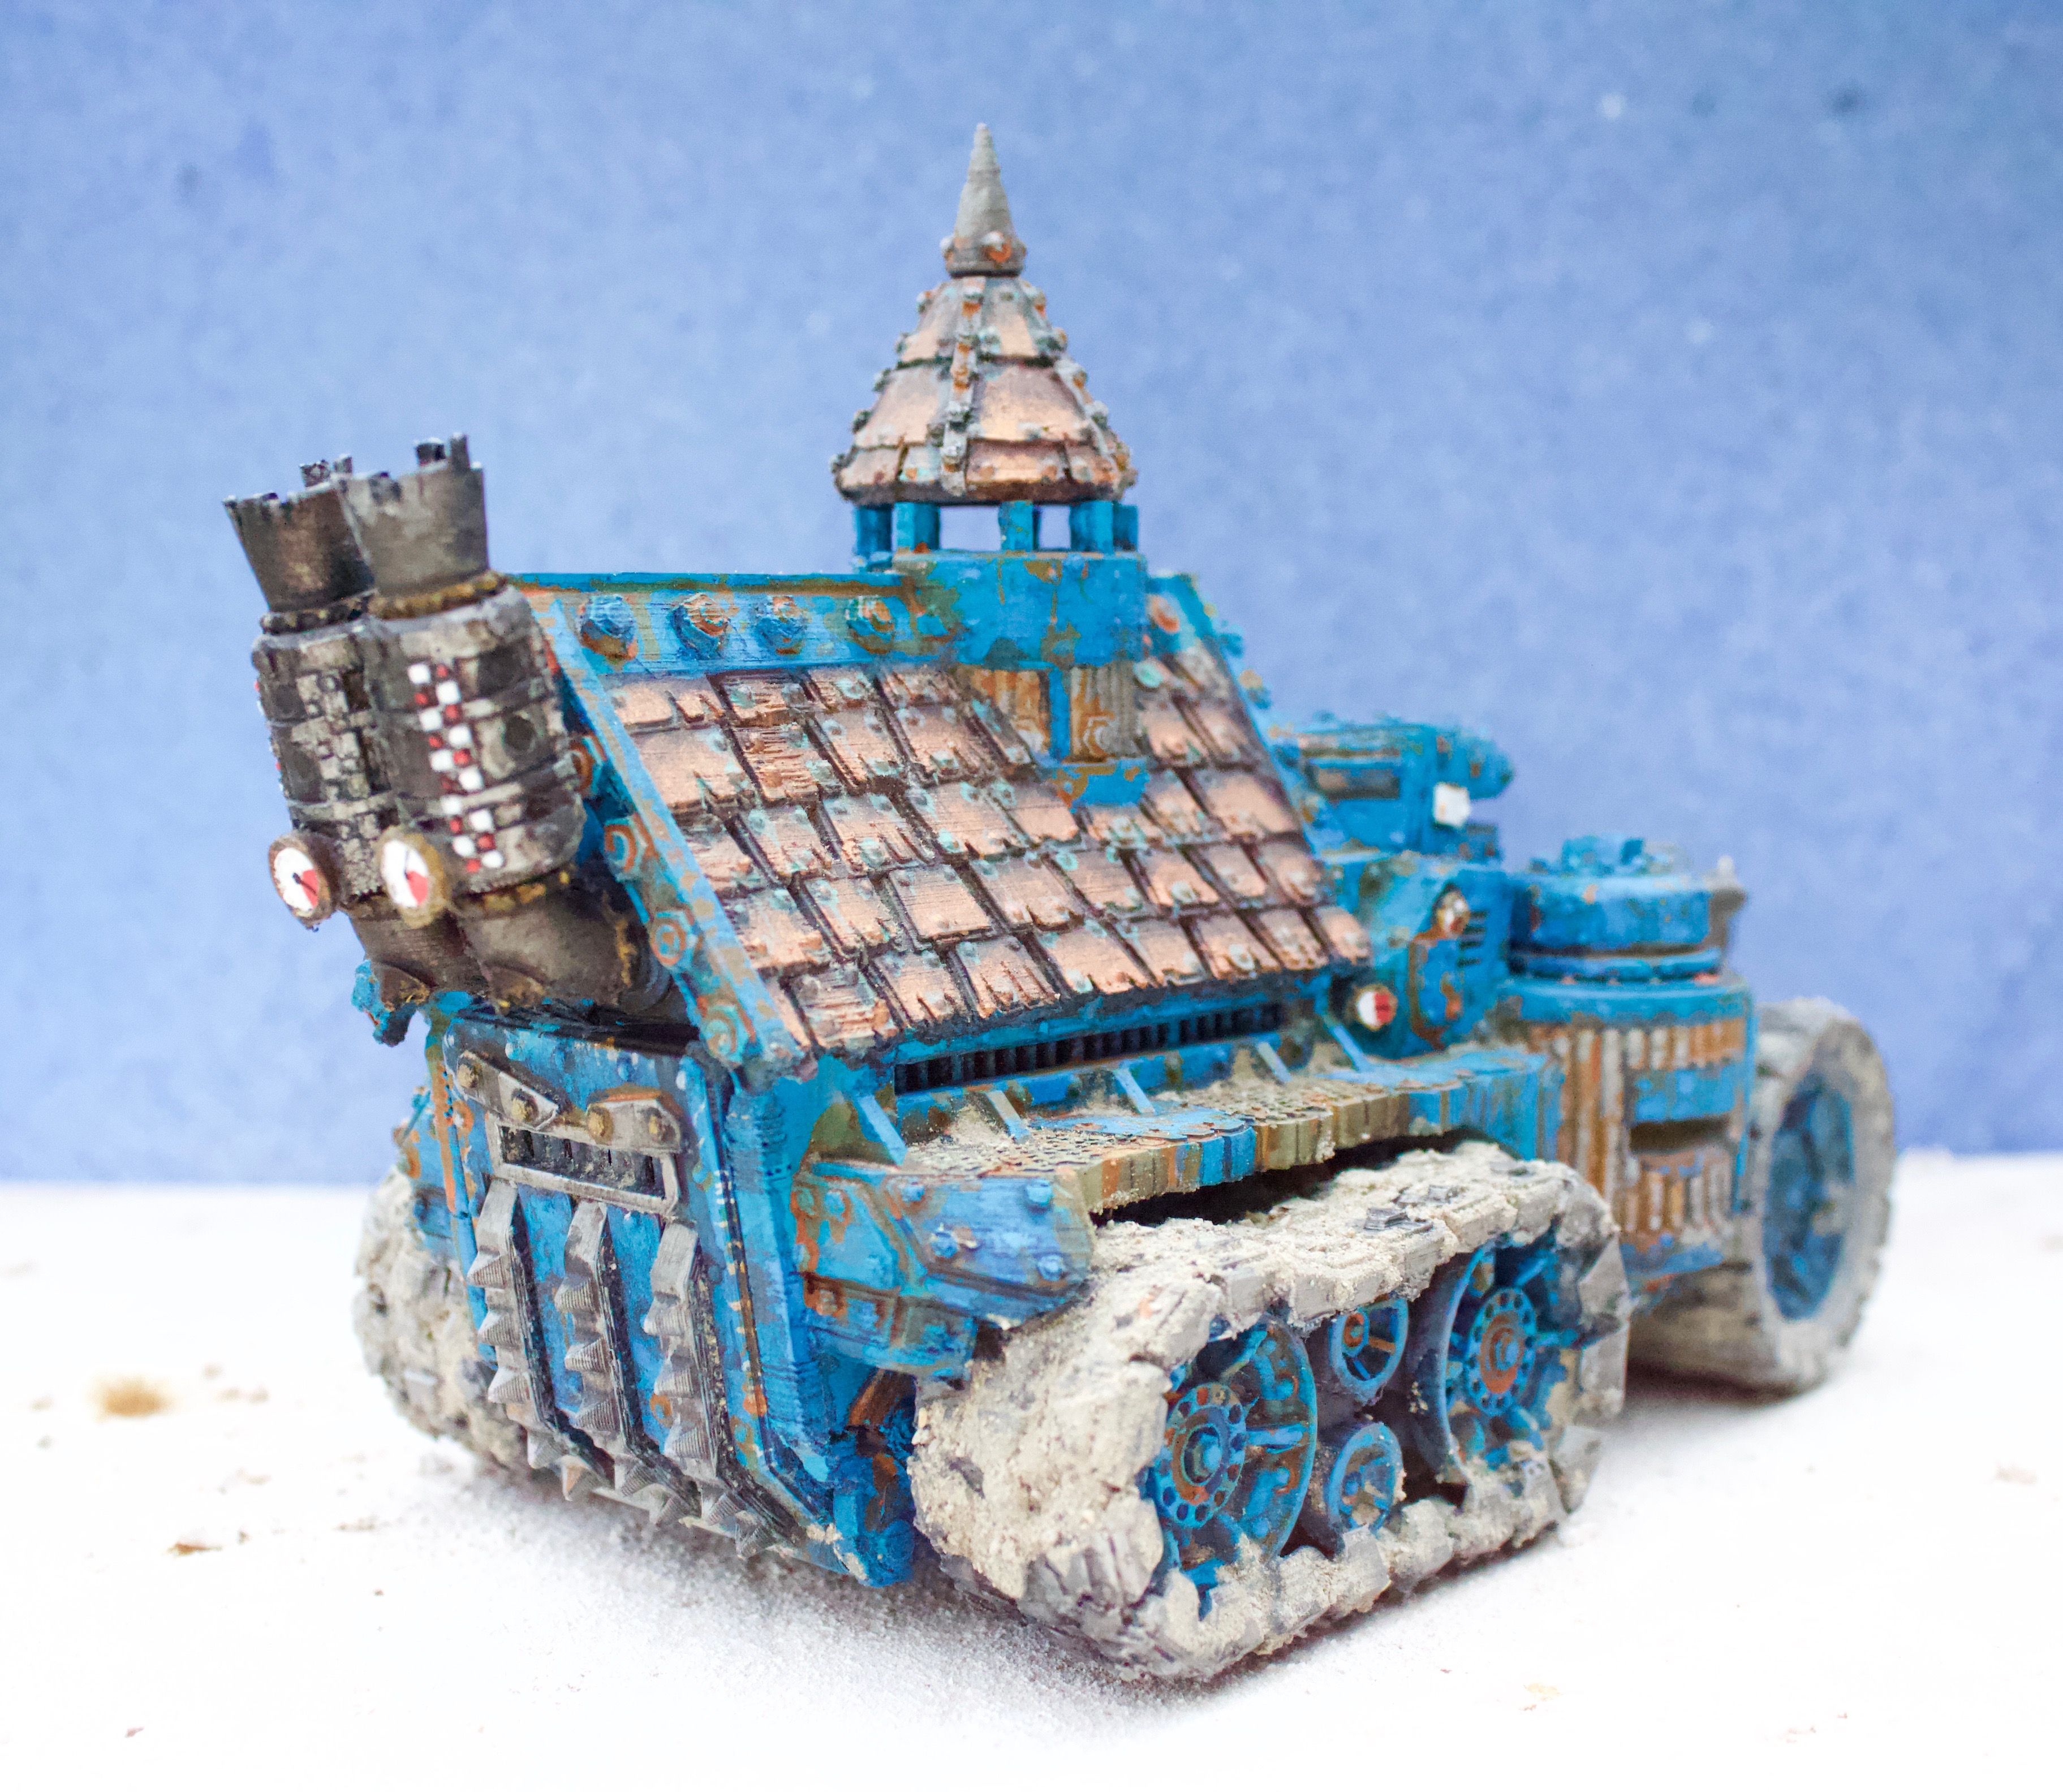
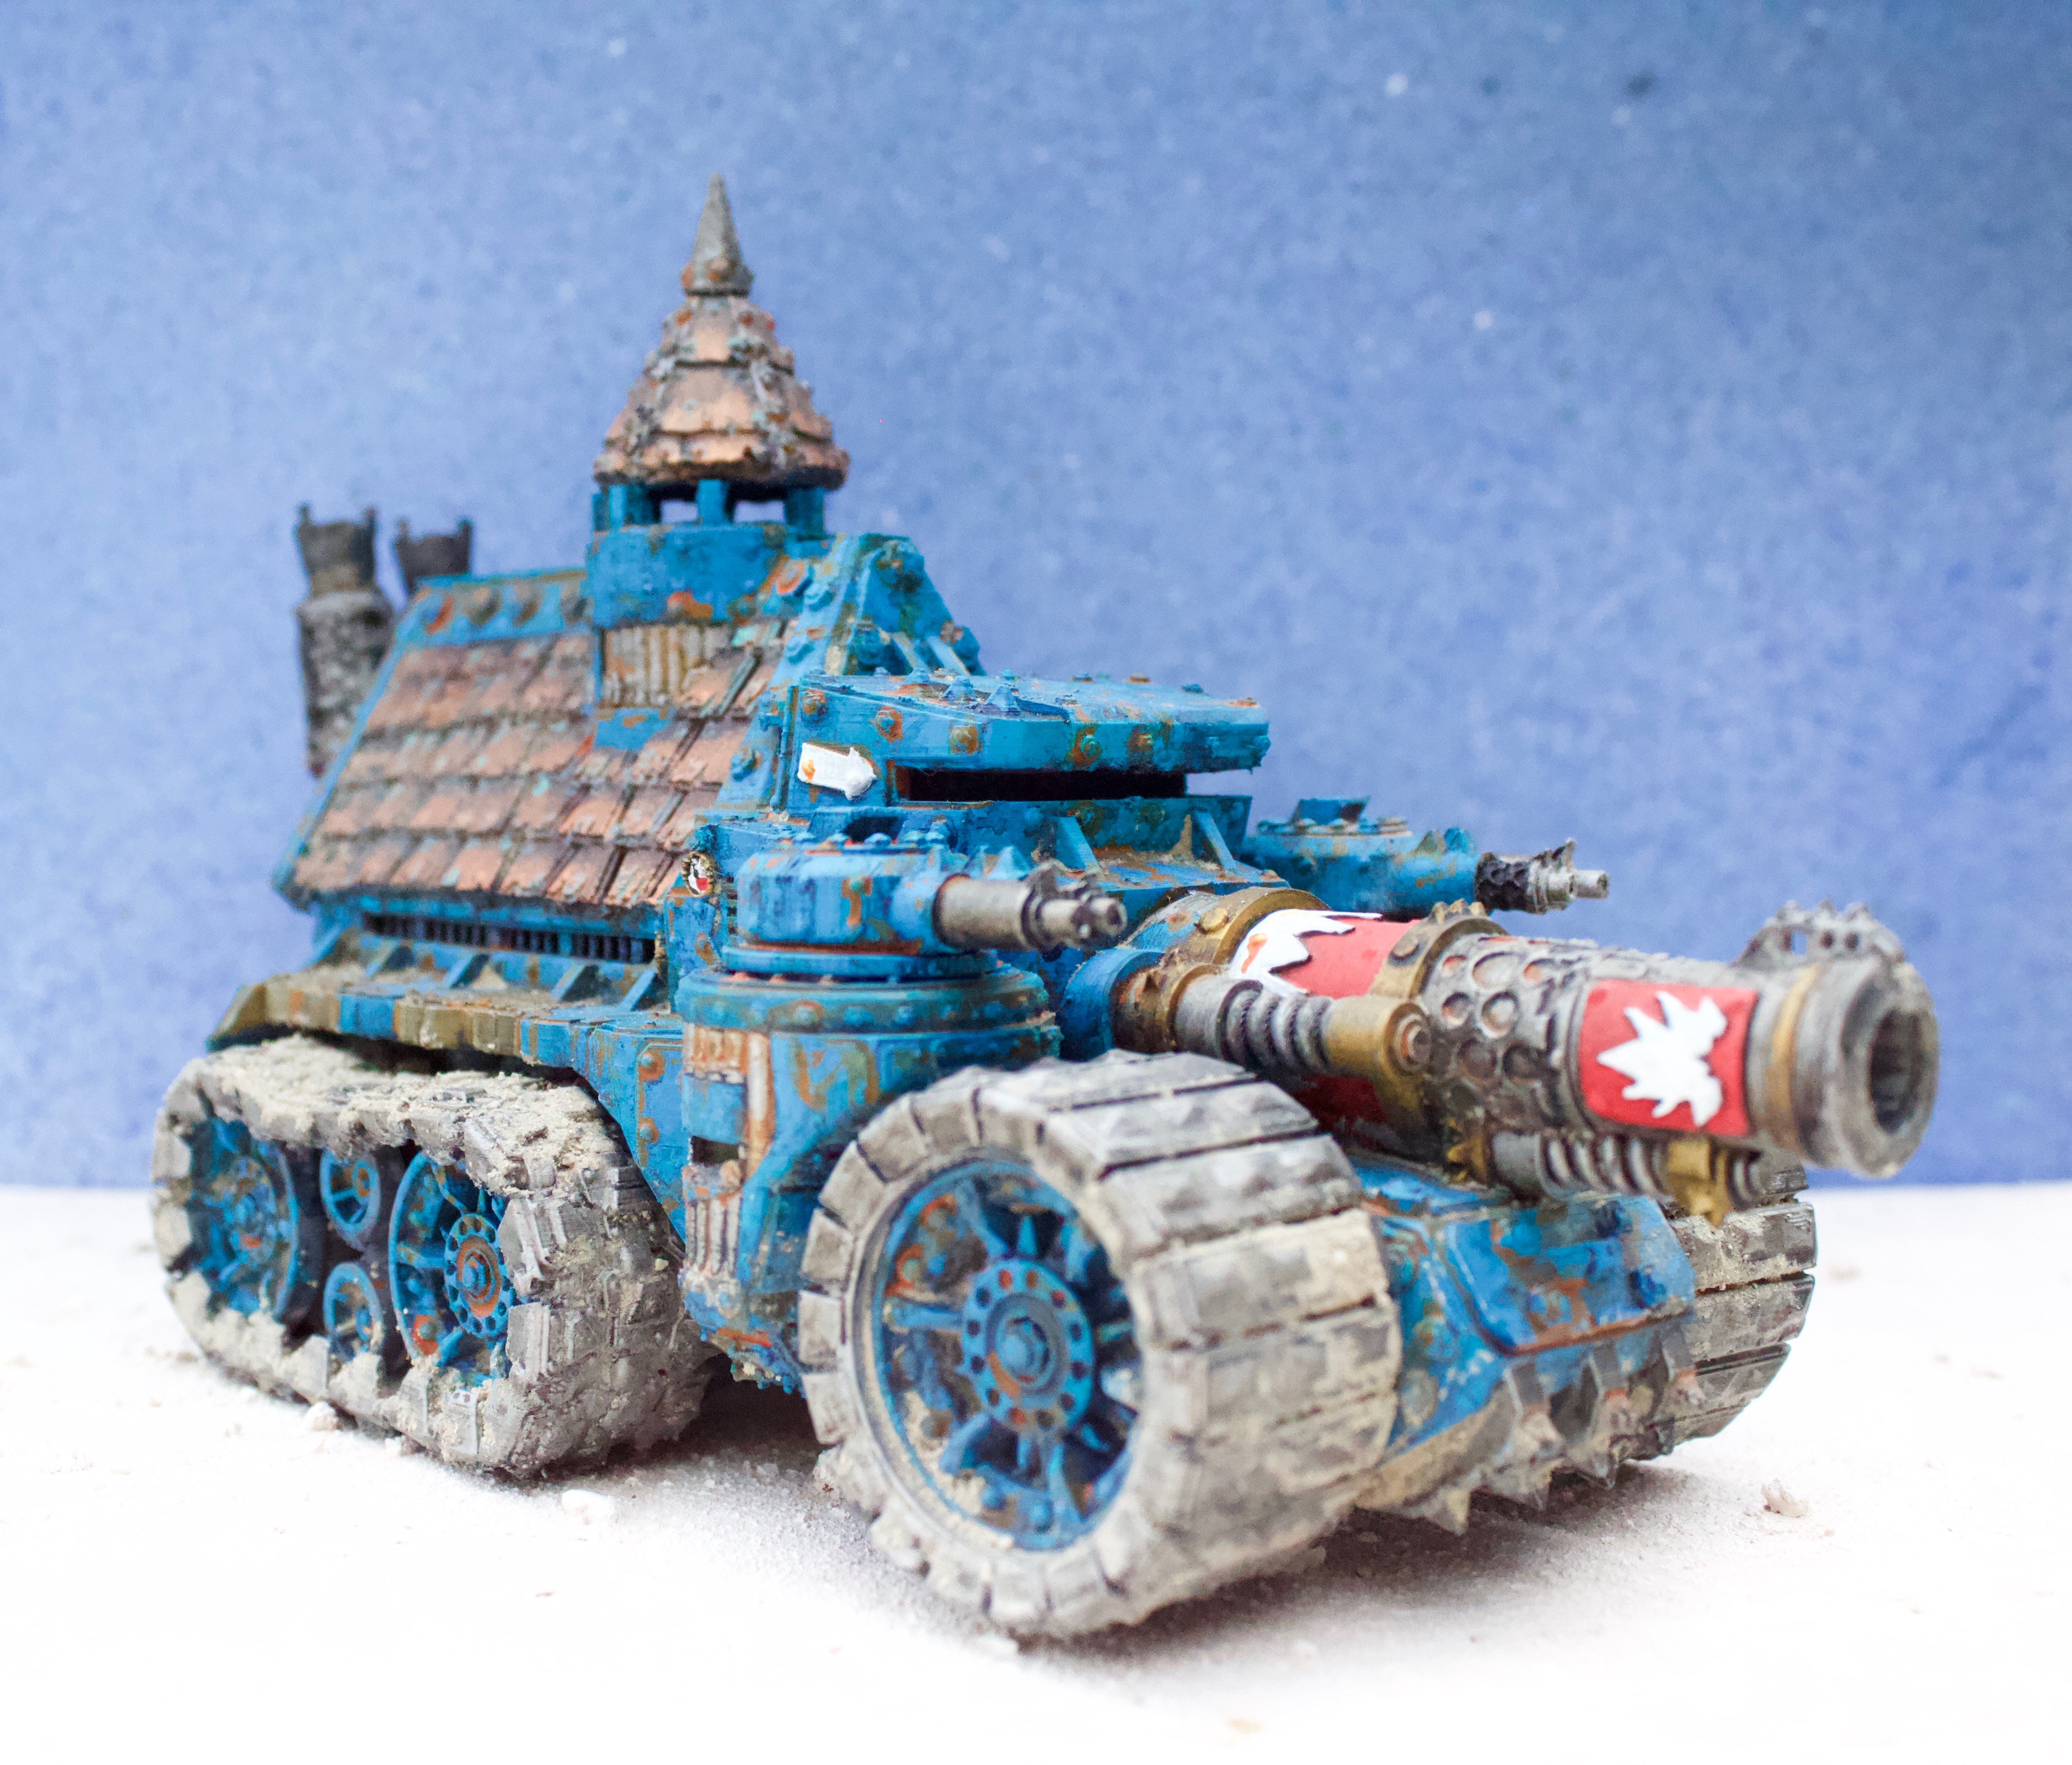
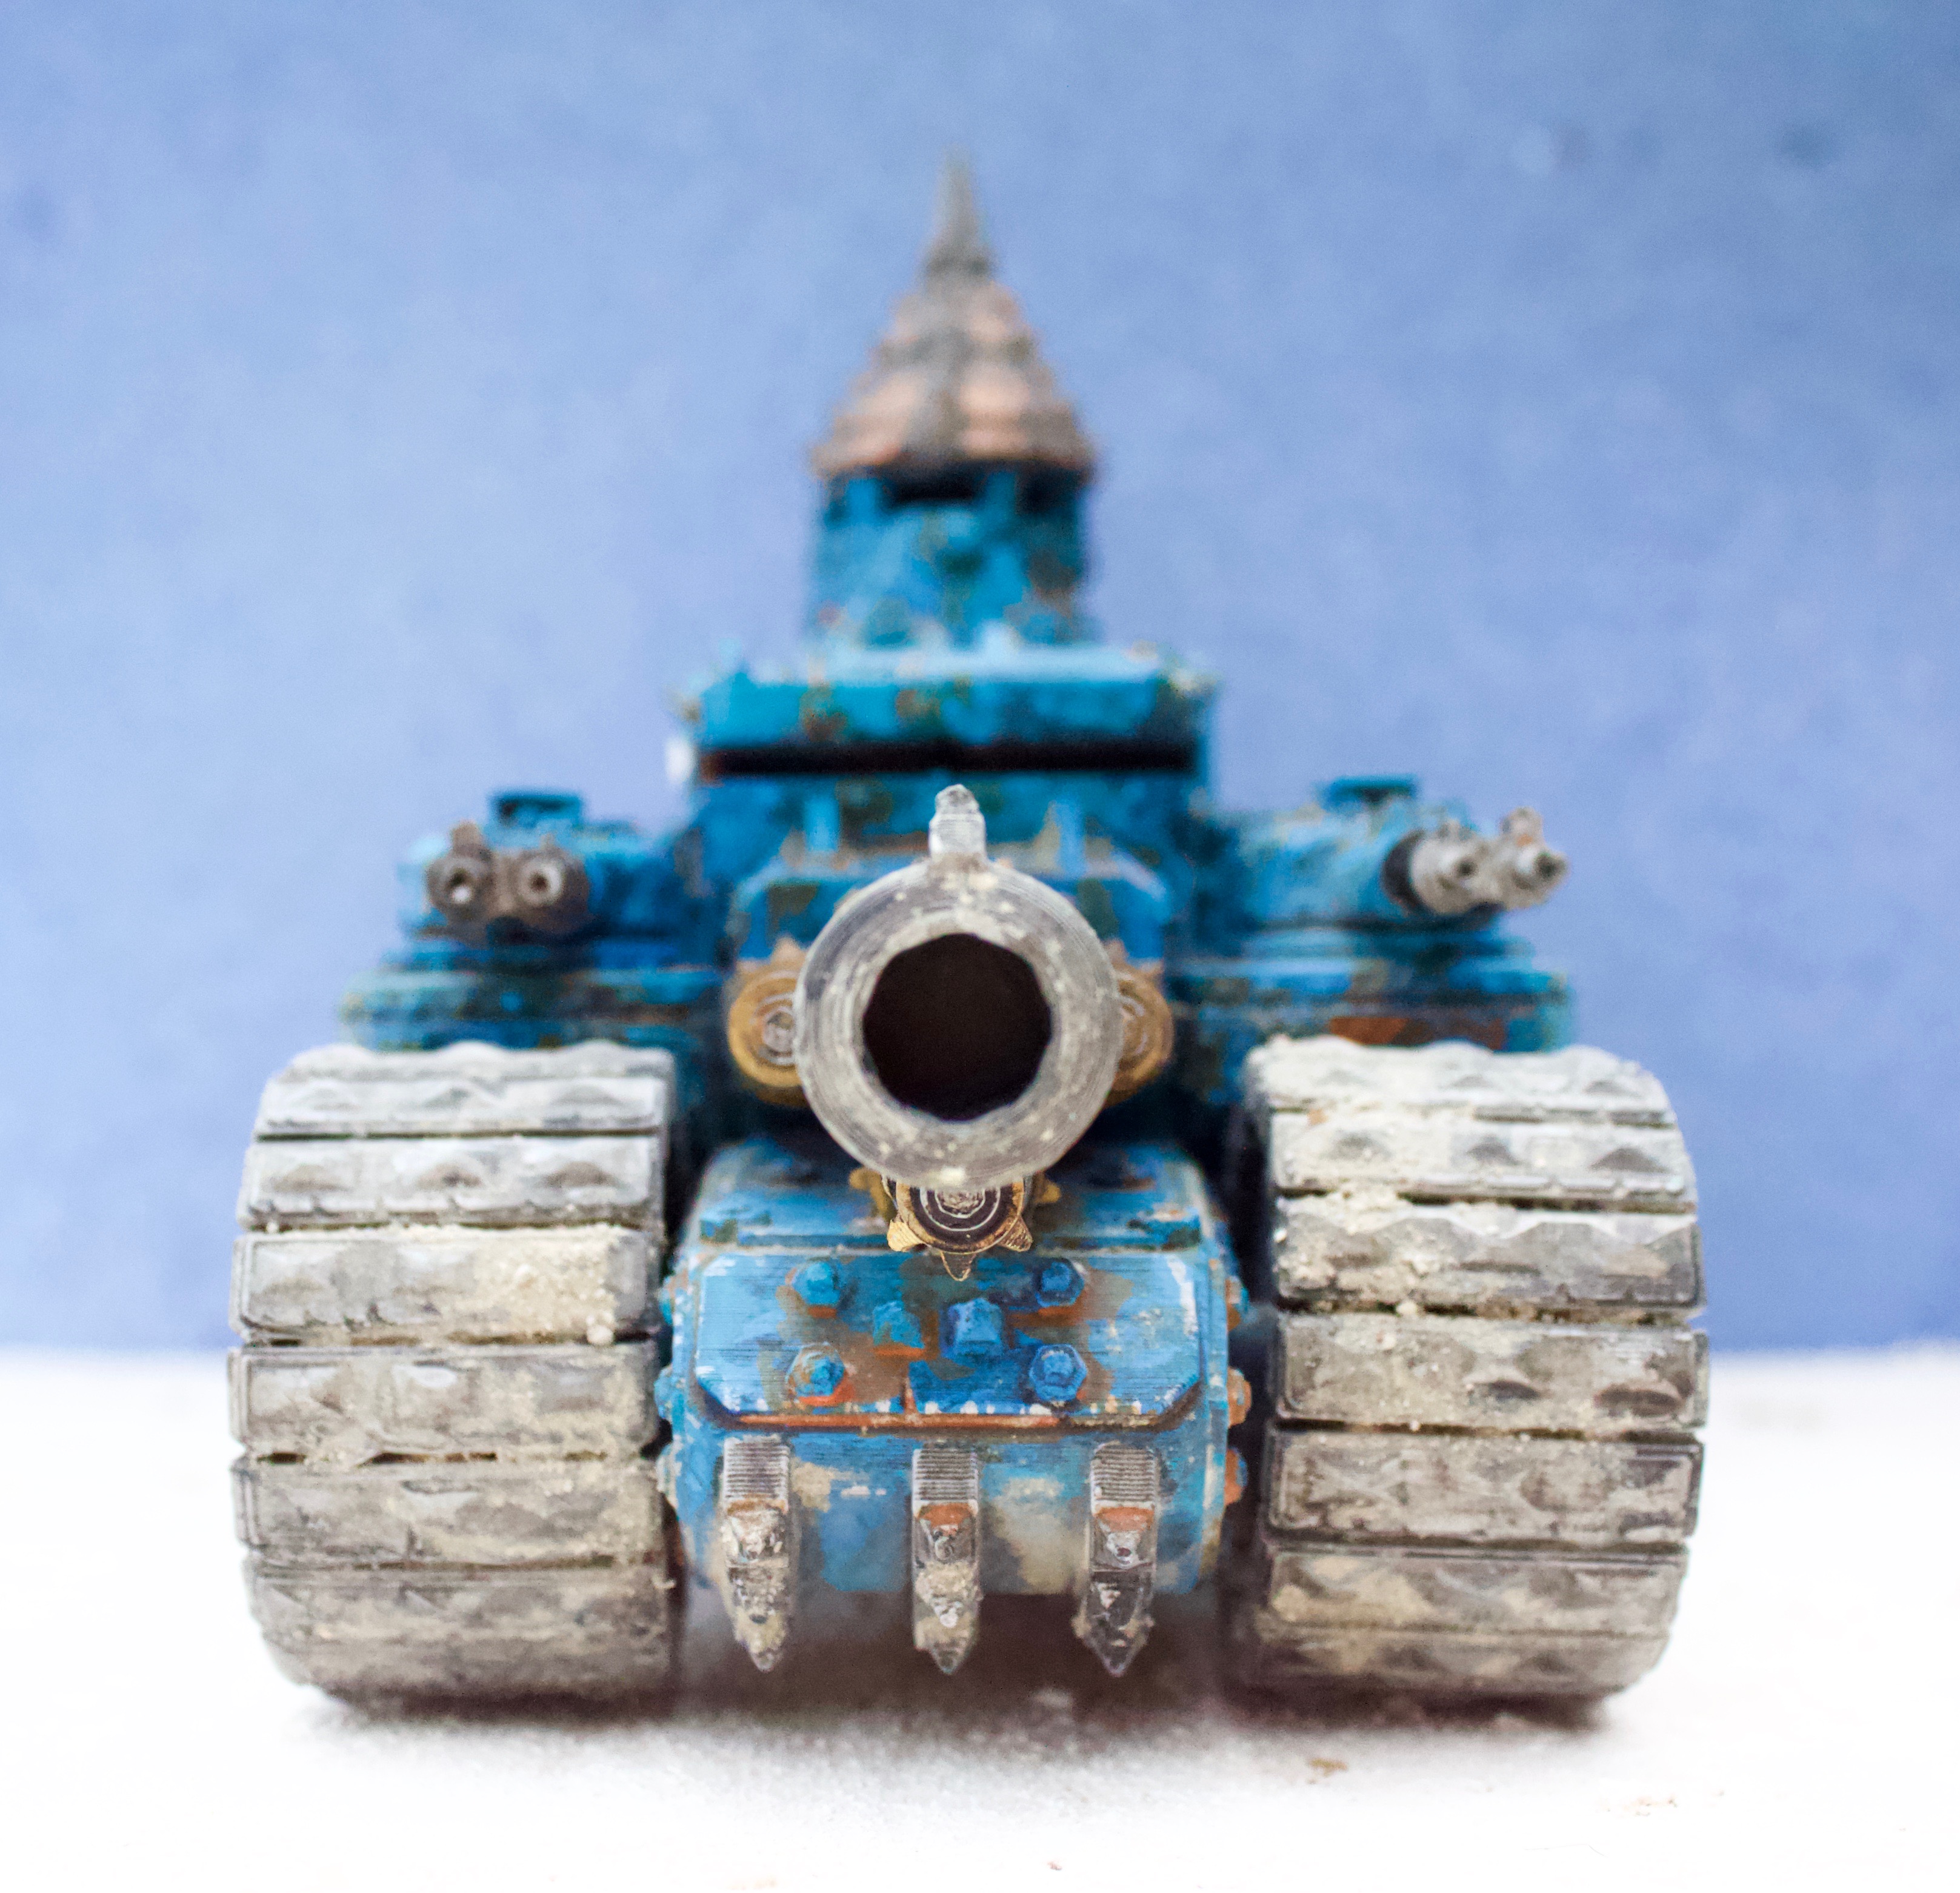
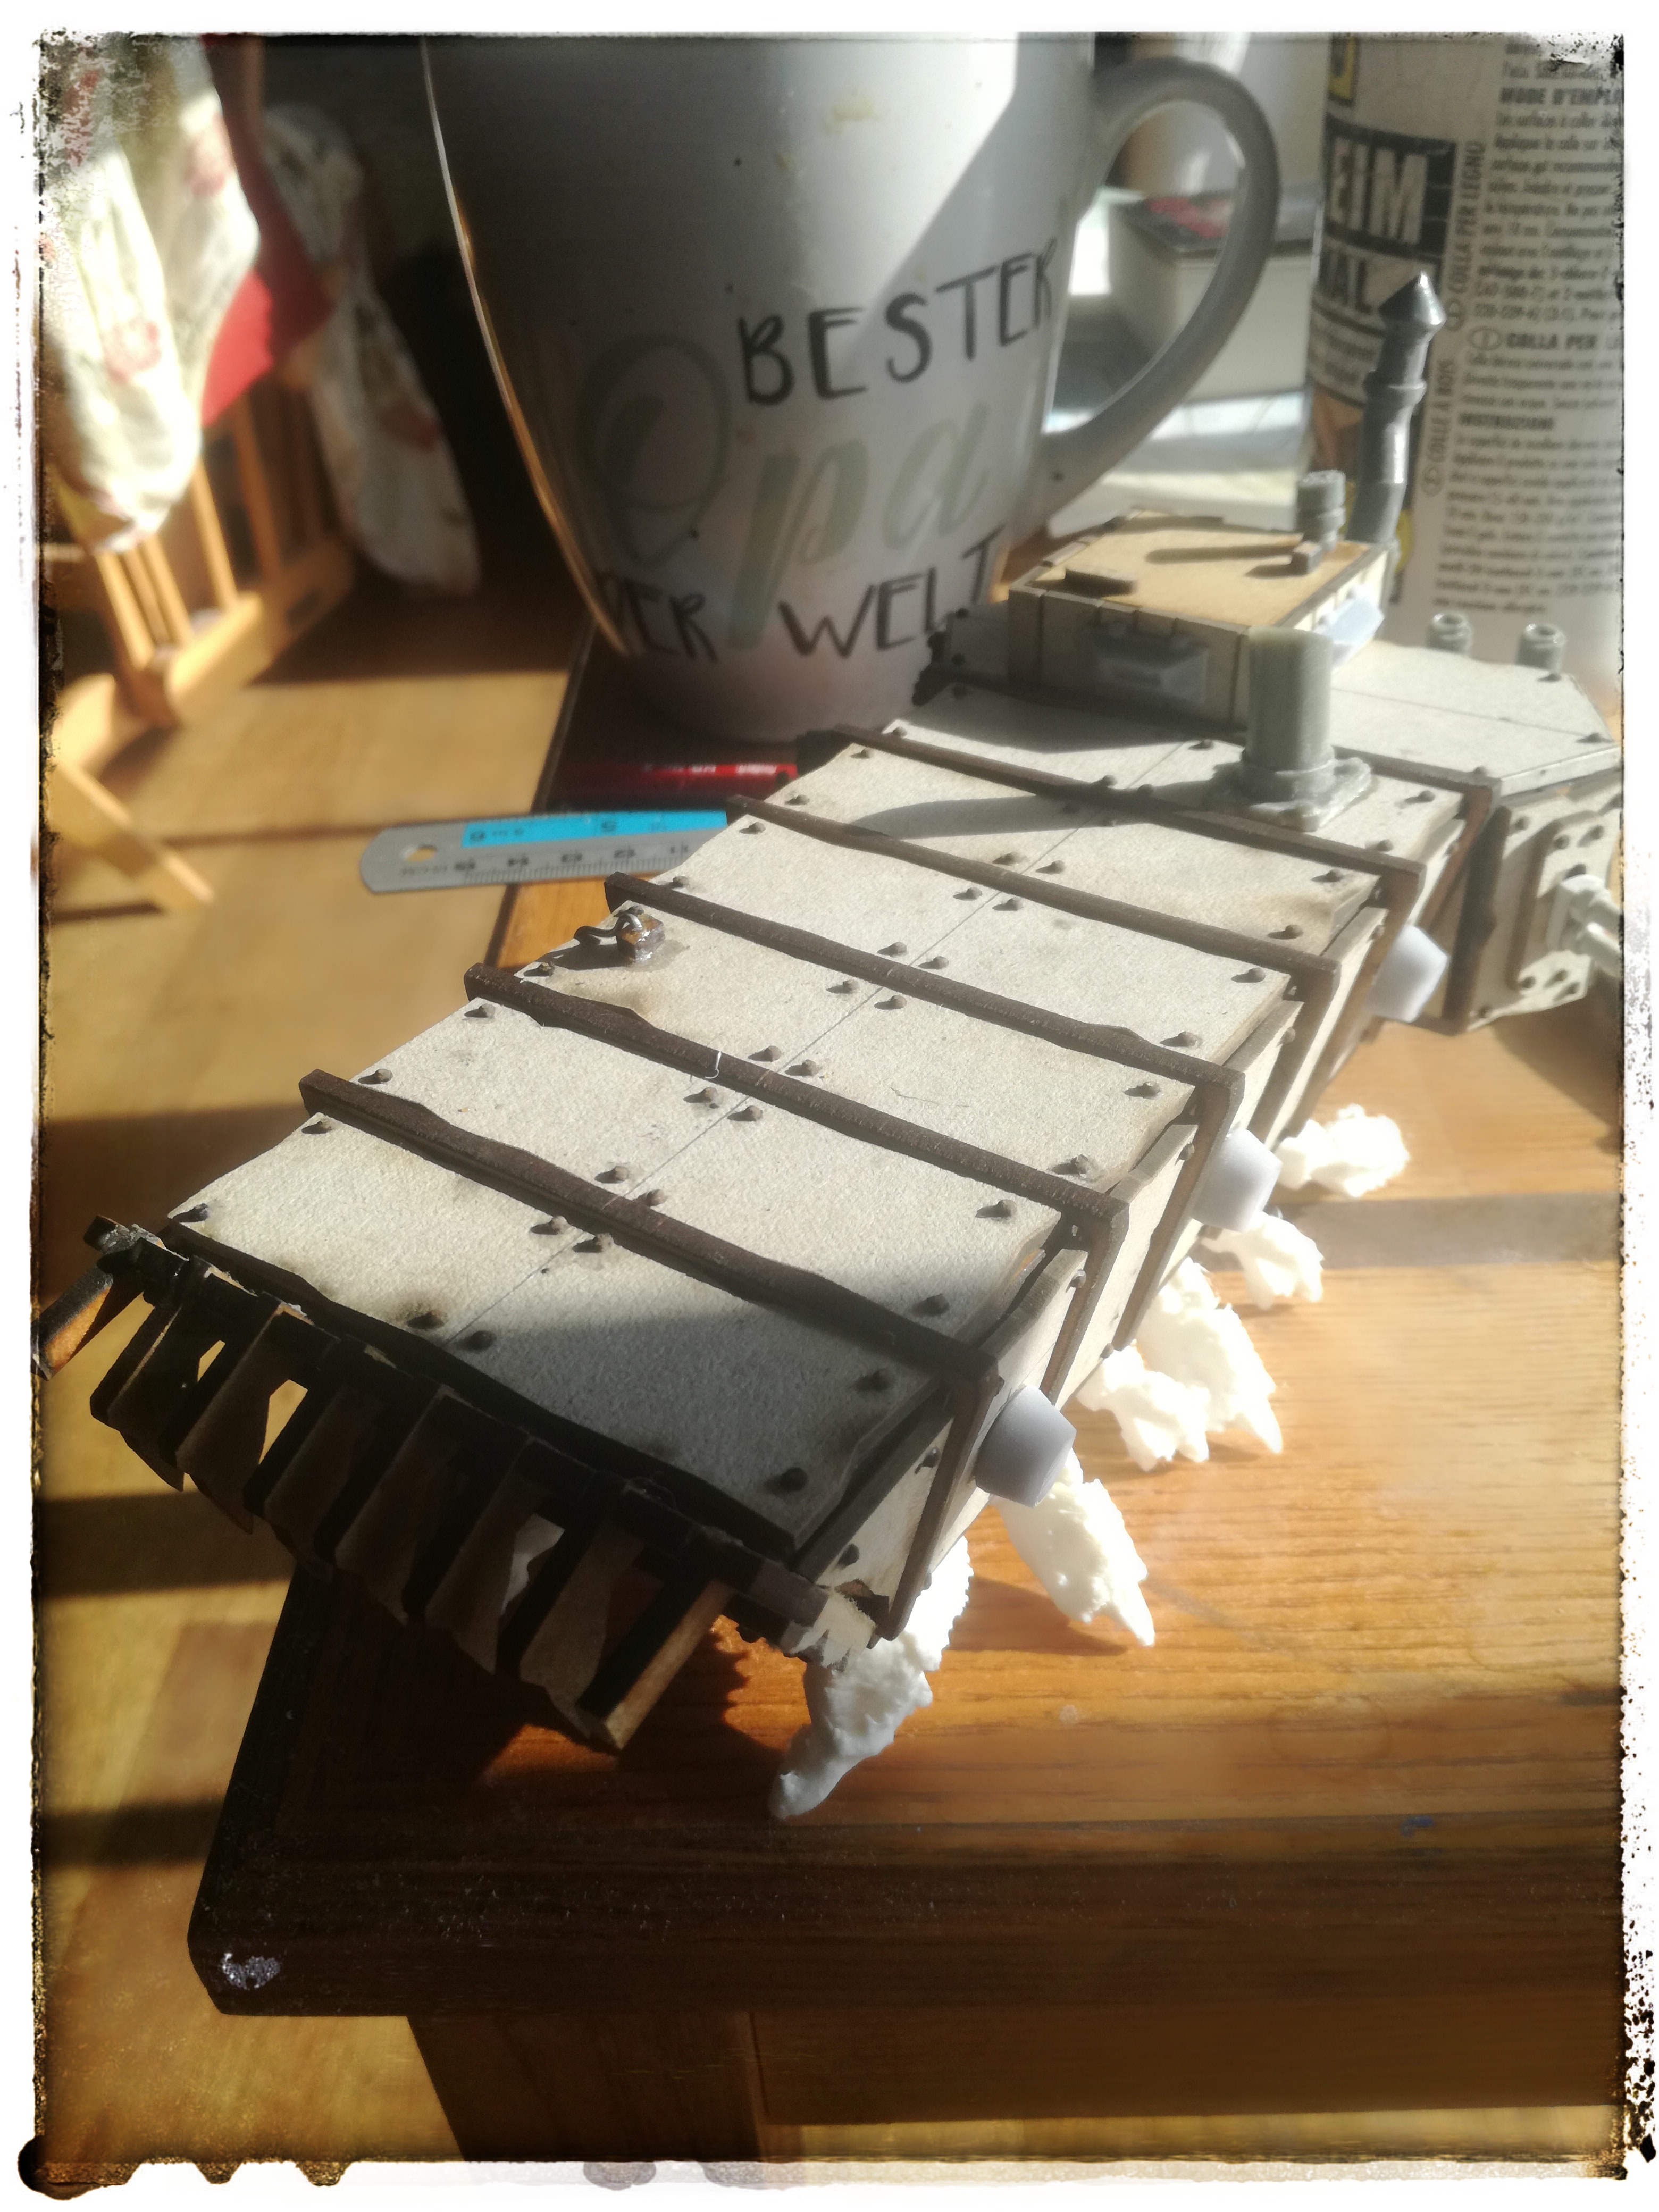
That idea lead on to me thinking about about an armoured variant. More parts were lasercut then Papa Nurgle visited. Not really having the strength or motivation I pottered a bit each day making it.
My little spot in the sunMy view
This is the result
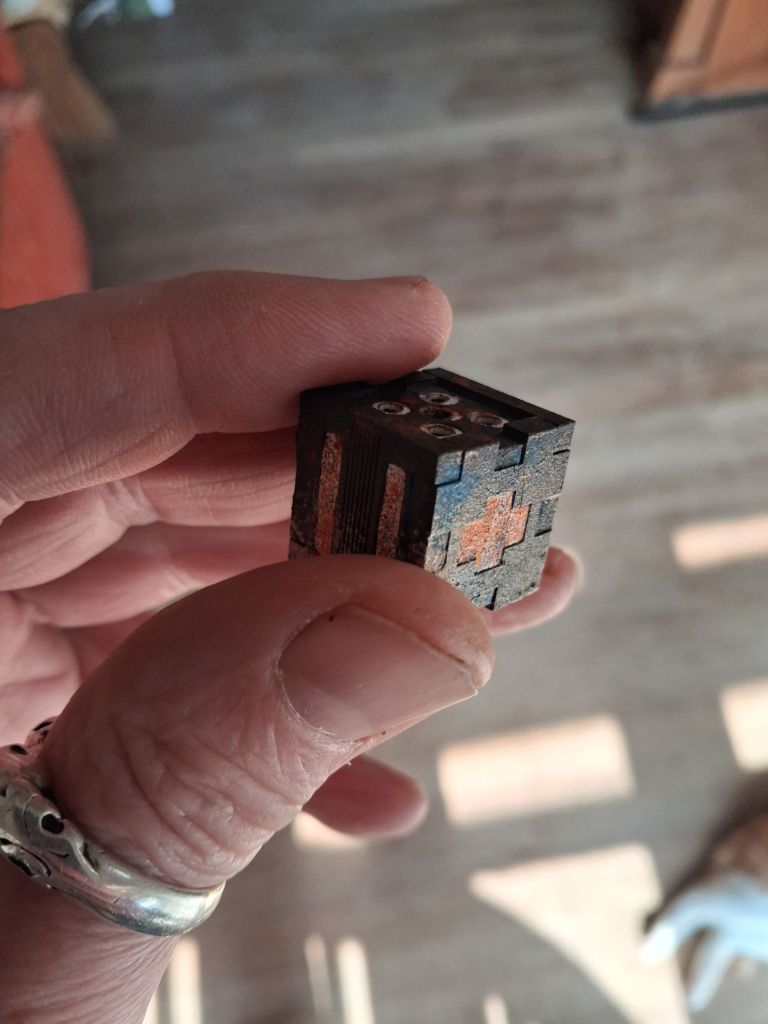
The main body is lasercut mdf and card. Bolts are lasercut card. There are resin greebles from Ramshackle Games and 3d printed ones from Knucklebones. The legs are 3d printed and are derived from Knucklebones.